
Wood shake roofs are prized across the Greater Toronto Area for their rustic texture, natural insulating value, and the way they age gracefully into a soft, weathered grey. But that same organic material that makes cedar shakes so attractive also makes them vulnerable to Toronto’s climate swings — humid summers, freeze-thaw winters, and the heavy rain events that have become more common in recent years. Knowing the indicators your wood shake roof needs repair is the difference between a manageable, affordable fix and a full tear-off that costs thousands more than it should have.
Unlike asphalt shingles, which tend to fail uniformly and predictably, wood shakes fail unevenly. One section of a roof facing south and baking in July sun might be brittle and cracked, while a shaded north slope stays supple for another decade. That inconsistency is exactly why homeowners need to know precisely what to look for, rather than waiting for an obvious leak to appear on the ceiling below.
In this guide, we walk through the three best indicators your wood shake roof needs repair, how to inspect for them safely from the ground and from a ladder, what a professional inspection adds that a visual check cannot, and what repair versus replacement actually costs in the GTA in 2026. We will also cover maintenance habits that extend the life of a shake roof and answer the most common questions homeowners ask us at Universal Roofs.
Why Wood Shake Roofs Need a Different Inspection Approach
Wood shake roofs are typically milled from Western red cedar, and occasionally from other cedar species or treated pine. The material is naturally resistant to insects and has decent rot resistance thanks to its oils, but those protective oils dry out over time. As they do, the wood becomes more porous, absorbs more moisture, and becomes far more susceptible to splitting, cupping, and fungal growth.
In the GTA specifically, three environmental factors accelerate wear on wood shake roofing faster than in drier climates:
- Freeze-thaw cycling. Water that soaks into shake grain during a thaw can freeze overnight, expand, and force micro-splits wider with every cycle from November through March.
- Humid summers. Extended humidity, especially on north-facing or heavily shaded slopes, promotes moss, algae, and fungal growth that traps moisture against the wood.
- Wind-driven rain. Southwest storms common in the GTA push rain up and under shake butts rather than straight down, which is why underlayment condition matters as much as the shakes themselves.
Because of these factors, a wood shake roof in Toronto or Mississauga often shows wear differently than a documented average from a drier region like the interior of British Columbia, where much of the manufacturer lifespan data originates. This is one reason we always recommend a local, in-person inspection rather than relying purely on the “20 to 30 year” lifespan you will see quoted online — actual performance depends heavily on slope, shade, ventilation, and maintenance history.
Indicator One: Curling, Cupping, or Splitting Shakes
The single most visible indicator your wood shake roof needs repair is a change in the shape of the individual shakes themselves. Healthy cedar shakes lie relatively flat against the roof deck with only a slight natural give. As the wood ages and dries unevenly, three distinct deformities appear:
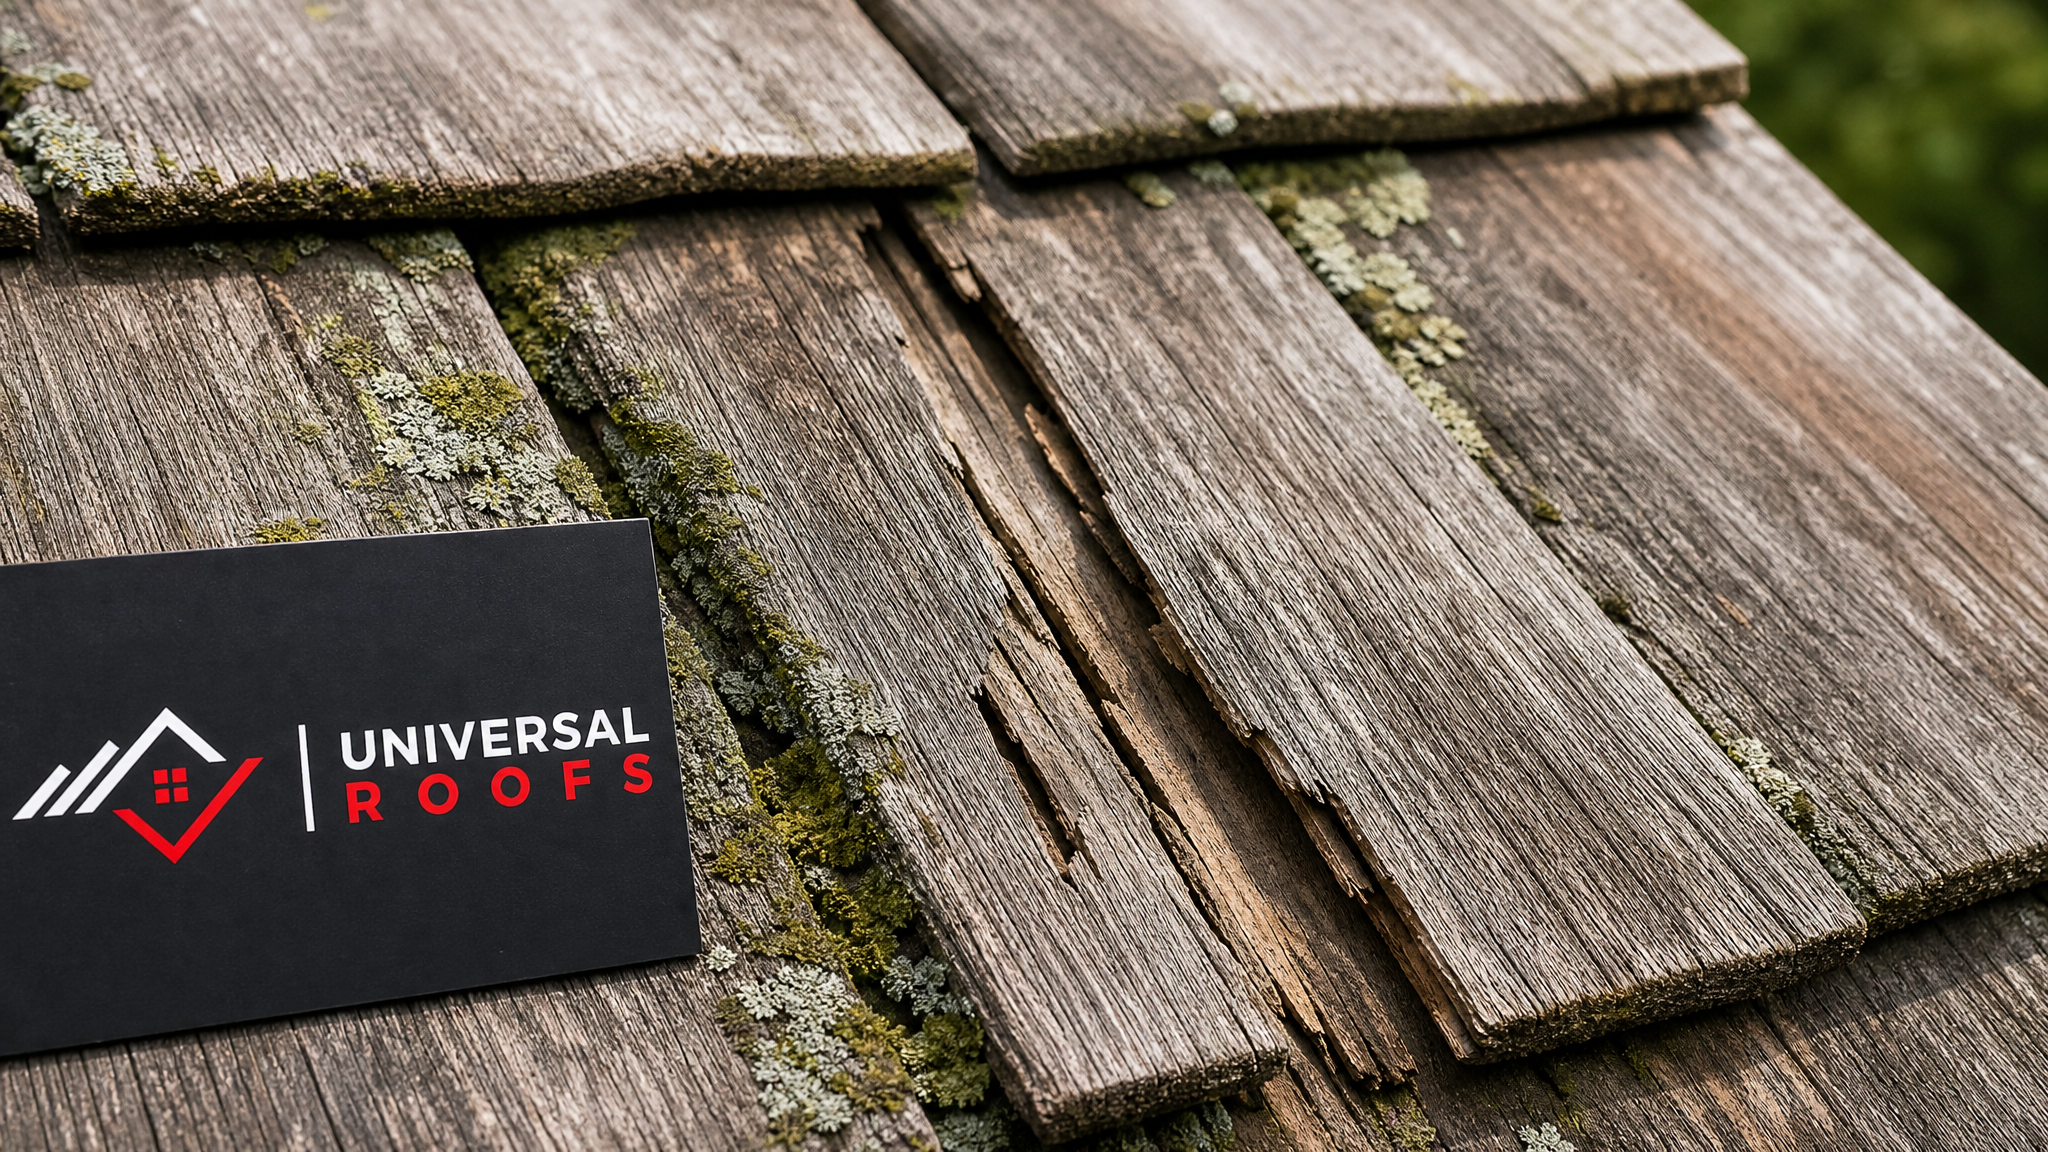
Curling happens when the edges of a shake lift upward while the centre stays anchored, usually because the top surface dries and shrinks faster than the underside, which stays damp against the sheathing. Curled shakes create gaps that let wind-driven rain get underneath the course above.
Cupping is a more severe version, where the entire shake bows like a shallow bowl. Cupped shakes trap standing water after every rainfall, which dramatically accelerates rot in that specific shake and the ones surrounding it.
Splitting occurs along the grain, usually running the full length of the shake. A single hairline split is often cosmetic and not urgent. A split wider than about 6 millimetres, or one that runs through more than half the shake’s exposed length, is a genuine repair priority because it creates a direct channel for water straight to the underlayment.
You can check for these issues safely from the ground using binoculars, focusing on south and west-facing slopes first since they see the most sun exposure and thermal cycling. From a stable extension ladder positioned at the eave (never standing directly on a wood shake roof, which can crack sound shakes underfoot), examine the first two or three courses closely. If you count more than a handful of curled, cupped, or split shakes within a 3 square metre area, that section needs professional attention.
Indicator Two: Moss, Algae, and Soft or Spongy Texture
The second major indicator your wood shake roof needs repair is biological growth combined with a change in the wood’s texture. Moss and algae are not just cosmetic problems on a wood shake roof — they are active moisture reservoirs that keep the shake surface wet for days after a rain event, which is exactly the condition that fungal decay organisms need to take hold.
Here is how to tell normal weathering apart from a genuine problem:
| Observation | Normal Aging | Needs Repair |
|---|---|---|
| Colour | Even silvery-grey patina across the whole slope | Dark, blotchy staining concentrated in valleys or under trees |
| Moss coverage | Light, thin moss on shaded edges only | Thick moss mats covering more than 10% of a slope |
| Wood texture when pressed | Firm, slight give at most | Soft, spongy, or crumbles under light thumb pressure |
| Smell near the surface | Neutral, faint cedar aroma | Musty, earthy, or mildew odour |
| Underside (if visible from attic) | Dry sheathing, no staining | Dark water staining or visible mould on sheathing |
The “thumb press” test is one of the most reliable field checks available to a homeowner. Wood that has begun to rot loses structural integrity long before it visibly crumbles, so a shake that feels noticeably softer or spongier than its neighbours has likely already lost meaningful strength, even if it still looks intact from a distance. Any spot where you can press a thumbnail into the surface and leave an indentation should be treated as an active repair priority, not a “keep an eye on it” situation.
Moss removal on its own, without addressing the underlying moisture retention causing it, is only a temporary fix. If a slope is heavily shaded by mature trees, trimming back overhanging branches to improve airflow and sun exposure is often part of a complete repair plan, alongside replacing the affected shakes.
Indicator Three: Interior Signs and Attic-Level Moisture
The third and most urgent indicator your wood shake roof needs repair is anything showing up inside the home, because by the time water reaches the attic or ceiling, the exterior damage has typically been progressing for months or longer. These interior signs deserve immediate attention rather than waiting for a seasonal inspection:
- Ceiling stains or discoloured patches, particularly ones that grow larger after rain events or appear in new locations each season
- Visible daylight through the roof deck when viewed from inside the attic during daytime, which indicates a gap large enough for water to pass through easily
- Damp or darkened insulation in the attic, especially concentrated near valleys, chimneys, or plumbing vent penetrations
- Musty odours in upper-floor rooms or closets adjacent to exterior walls
- Sagging or soft spots in the roof deck itself, felt when walking the attic on the joists (never on the insulation)
A thorough attic check twice a year — once in late spring after winter thaw and once in early fall before the wet season — catches these issues while they are still isolated. If your attic shows any of these signs, we strongly recommend requesting a professional roof repair assessment rather than attempting a DIY patch, since interior moisture almost always means the underlayment and decking need evaluation in addition to the visible shakes.
DIY Inspection Versus a Professional Roof Assessment
Homeowners can and should perform basic visual inspections regularly, but a professional assessment adds several layers of diagnosis that are difficult to replicate without training and the right equipment. Here is how the two approaches compare:
| Inspection Method | What It Catches | What It Misses | Recommended Frequency |
|---|---|---|---|
| Ground-level visual (binoculars) | Obvious curling, colour changes, moss patches, missing shakes | Underlayment condition, hidden rot, fastener corrosion | Monthly during spring and fall |
| Ladder-assisted eave inspection | Close-up shake condition on lower courses, gutter debris, flashing gaps | Ridge and upper-slope condition, deck integrity | Twice a year |
| Attic-level check | Water staining, daylight gaps, insulation moisture, sagging decking | Exterior-only damage not yet penetrating the deck | Twice a year |
| Professional roof assessment | Full slope-by-slope shake condition, underlayment, flashing, ventilation, moisture meter readings | Nothing significant — comprehensive by design | Every 2-3 years, or after any major storm |
Professional inspectors use moisture meters to test shake and decking readings that are impossible to gauge visually, and they can safely access ridge lines and steep slopes using proper fall protection equipment. They also cross-reference what they see with attic ventilation performance, since inadequate ventilation is one of the most common underlying causes of premature shake failure on GTA homes — trapped heat and humidity in the attic works against the roof from underneath just as much as rain works against it from above. If ventilation is a suspected factor, it is worth having your attic assessed alongside the roof itself.
Repair Costs and Timelines for Wood Shake Roofs in the GTA
Repair scope on a wood shake roof ranges enormously depending on how many shakes are affected and whether the underlayment and decking are still sound. The table below reflects typical 2026 pricing ranges we see across Toronto, Mississauga, Brampton, Vaughan, Markham, and Oakville, though every quote should be based on an actual on-site assessment.
| Repair Type | Typical Scope | Estimated Cost Range (CAD) | Typical Timeline |
|---|---|---|---|
| Spot shake replacement | 1-10 individual shakes | $300 – $900 | Half day |
| Section repair | One slope or valley, moderate damage | $1,200 – $3,500 | 1-2 days |
| Flashing and valley repair | Chimney, skylight, or valley flashing replacement | $600 – $2,000 | 1 day |
| Moss and algae treatment | Full roof cleaning and preventative treatment | $400 – $1,100 | 1 day |
| Major multi-slope repair | Widespread curling, splitting, or rot across several slopes | $4,000 – $9,000 | 3-5 days |
| Full roof replacement | Complete tear-off and re-shake or alternative material | $18,000 – $35,000+ | 1-2 weeks |
As a general rule, if damage is contained to less than 20% of the total roof area and the decking underneath tests dry, repair is almost always the more economical path. Once damage spreads across multiple slopes or the decking shows widespread moisture, the cost of chasing repairs piecemeal often approaches what a full roof replacement would cost, at which point replacement becomes the financially sound choice. A qualified assessment will give you an honest comparison rather than defaulting to the more expensive option.
Preventative Maintenance That Extends Shake Roof Life
Because wood shake roofs are more maintenance-intensive than asphalt or metal alternatives, a consistent care routine meaningfully delays the point at which repair becomes necessary. The habits that make the biggest difference for GTA homeowners include:
- Keep gutters and valleys clear. Debris traps moisture directly against shake butts, which is one of the fastest ways to trigger localized rot.
- Trim overhanging branches to at least 3 metres of clearance, improving airflow and reducing shade-driven moss growth.
- Remove moss promptly using gentle, low-pressure methods — never a pressure washer, which strips protective wood fibres and accelerates wear.
- Confirm attic ventilation is balanced, since both intake and exhaust venting need to function correctly to keep the underside of the deck dry.
- Schedule a professional inspection every 2-3 years, or immediately after any severe wind or hailstorm.
- Address small repairs immediately. A single split shake replaced promptly costs a fraction of what the same spot costs to fix once water has reached the decking.
Homeowners in different parts of the GTA face slightly different maintenance pressures. Properties in the Toronto core often deal with more shade from mature urban tree canopy, while homes across Peel Region, York Region, Halton Region, and Durham Region tend to see more open sun exposure and correspondingly faster surface drying and UV wear. A local assessment accounts for these differences rather than applying a one-size-fits-all maintenance schedule.
When Repair Isn’t Enough: Recognizing the Replacement Threshold
Even the best-maintained wood shake roof eventually reaches a point where repair no longer makes financial or practical sense. The clearest signals that a roof has crossed from “repairable” into “replace” territory include damage spread across more than a third of the total roof area, multiple slopes showing soft or spongy decking rather than isolated spots, repeated leak calls to the same area despite prior repairs, and shakes that have become so brittle they crack simply from foot traffic during inspection.
If your roof is approaching or past the typical 25 to 30 year service window and showing several of the indicators covered above simultaneously, it is worth having a full assessment rather than authorizing another round of patchwork repair. Some homeowners at this stage also explore alternative materials — including durable flat roofing systems for additions or garages, or upgrading skylights during the process if the roof already needs to be opened up. If your home has existing skylights that are original to an aging wood shake roof, it is worth having them checked at the same time; our skylights and skylight replacement teams frequently coordinate directly with roof repair crews so flashing around both is addressed in a single visit.
Insurance, Warranty, and Documentation Considerations
Before any significant repair work begins, it is worth understanding what documentation will matter later, particularly for insurance claims or resale disclosures. Keep dated photographs of any storm damage taken as soon as possible after the event, since insurers frequently require evidence that damage was storm-related rather than the result of gradual wear, which is typically excluded from coverage. Retain all repair invoices and material specifications, since these establish a maintenance record that can support both warranty claims and future home sale disclosures. If your roof is under a manufacturer or installer warranty, confirm what maintenance obligations you must meet to keep that warranty valid — many wood shake warranties require documented periodic maintenance, and skipping it can void coverage even if the shakes themselves fail prematurely.
Reading verified feedback from other homeowners who have gone through a similar repair process can also help set realistic expectations for cost, timeline, and communication. You can browse real customer experiences on our reviews page, and we also maintain a detailed FAQ page covering common roofing questions beyond what is addressed here.
Making the Right Call for Your Roof
Recognizing the indicators your wood shake roof needs repair comes down to three consistent checkpoints: the physical shape and integrity of individual shakes, biological growth combined with wood softness, and any interior signs of moisture intrusion. Catching problems at the first checkpoint is always the least expensive and least disruptive path, which is why a twice-yearly inspection habit pays for itself many times over across the life of a wood shake roof.
Every roof ages differently based on slope orientation, shade, ventilation, and maintenance history, so the ranges and guidelines in this article are a starting point for your own assessment, not a substitute for an in-person evaluation. If you have noticed any of the warning signs described above, or simply want a baseline assessment before the next wet season arrives, our team has been serving wood shake roofs across the GTA since 2005 and can provide a clear, honest recommendation on repair versus replacement. Learn more about our approach and history on our about page.
What are the most reliable indicators your wood shake roof needs repair?
How often should a wood shake roof be inspected in the GTA?
Can I repair a wood shake roof myself instead of hiring a professional?
How much does wood shake roof repair typically cost in Toronto?
What is the difference between normal weathering and damage that needs repair on a wood shake roof?
How do I know if my wood shake roof needs full replacement instead of repair?
Need Help With 3 Best Indicators Your?
Whether you have spotted a handful of curling shakes or you are noticing staining on an upstairs ceiling, catching the problem early is always the more affordable path. The team at Universal Roofs has inspected and repaired wood shake roofs across the GTA’s varied microclimates for nearly two decades, and we can tell you honestly whether your roof needs a targeted repair or a broader plan.
Call us today at (416) 732-2421 or request a free inspection to get started.
Universal Roofs proudly serves Toronto, Mississauga, Brampton, Vaughan, Markham, Oakville and the GTA since 2005.