
A severe windstorm can strip shingles, lift flashing, and tear at your roofline in minutes, and the days right after the wind dies down are often the most stressful part of the whole ordeal. You need to stop water from getting into your attic tonight, but a full roof replacement crew may not be able to get to your neighbourhood for a week or two, especially after a storm sweeps across the Greater Toronto Area and dozens of homes are calling roofers at once.
That gap between “the wind just tore something loose” and “the roof is properly repaired” is exactly where temporary fixes earn their keep. Done correctly, a short-term patch buys you time, protects your attic insulation and ceiling drywall from water damage, and gives an insurance adjuster something other than a gaping hole to look at. Done poorly, a rushed patch can trap moisture, void a warranty, or simply blow off again in the next gust.
This guide walks through ten quick fixes for temporary roof wind damage that homeowners across Toronto, Mississauga, Brampton, Vaughan, Markham, Oakville and the rest of the GTA can use safely, plus the situations where you should skip the ladder entirely and call in a professional. We will also cover materials, realistic timelines, and the mistakes that turn a $40 tarp job into a $4,000 interior repair bill.
How to Assess Wind Damage Before You Touch a Single Shingle
Before attempting any quick fixes for temporary roof wind damage, you need an honest picture of what actually happened. Wind rarely damages a roof in one obvious spot; it tends to lift edges, loosen fasteners, and crease shingles in several places at once, and some of that damage will not be visible from the ground.
Start with a walk around the exterior of the house. Look for shingles in the gutters, on the lawn, or caught in shrubs. Check the eavestroughs for granules that have washed off damaged shingles, which shows up as a dark, sandy residue. Scan the roofline with binoculars for shingles that are lifted, curled, or missing outright, and pay close attention to ridge caps and the edges nearest the corners of the house, since wind uplift is strongest there.
Inside the house, check the attic with a flashlight for daylight coming through the roof deck, damp insulation, or water stains on the underside of the sheathing. Check ceilings on the top floor for new stains, especially around chimneys, skylights, and plumbing vents, since flashing failures around these penetrations are one of the most common forms of wind damage. If you have a skylight on the property, inspect the seal around its frame closely, as wind-driven rain can force its way past a compromised gasket even when the glass itself looks intact.
Only get on the roof yourself if the pitch is low, the surface is completely dry, and you are comfortable on a ladder. A steep roof, wet shingles, or high winds still gusting through the area are all reasons to stay on the ground and call a professional for a proper roof repair assessment instead.
| Warning Sign | Where to Look | What It Usually Means | Urgency |
|---|---|---|---|
| Granules in the gutter or on the ground | Downspouts, splash blocks, lawn below eaves | Shingle surface is being stripped by wind and hail | Moderate — schedule inspection soon |
| Lifted or missing shingles | Roof edges, ridges, corners | Wind uplift has broken the seal strip or fasteners | High — cover exposed area today |
| Daylight visible in attic | Roof deck, especially near vents | Sheathing gap or missing shingle section | Urgent — tarp immediately |
| Ceiling stains or drips | Top-floor ceilings, around chimneys | Active water intrusion through flashing or deck | Urgent — contain water and call a roofer |
| Bent or lifted flashing | Chimney base, sidewalls, valleys | Wind has pried flashing away from its seal | High — re-secure or tarp same day |
Quick Fix 1: Tarp the Exposed Area Properly
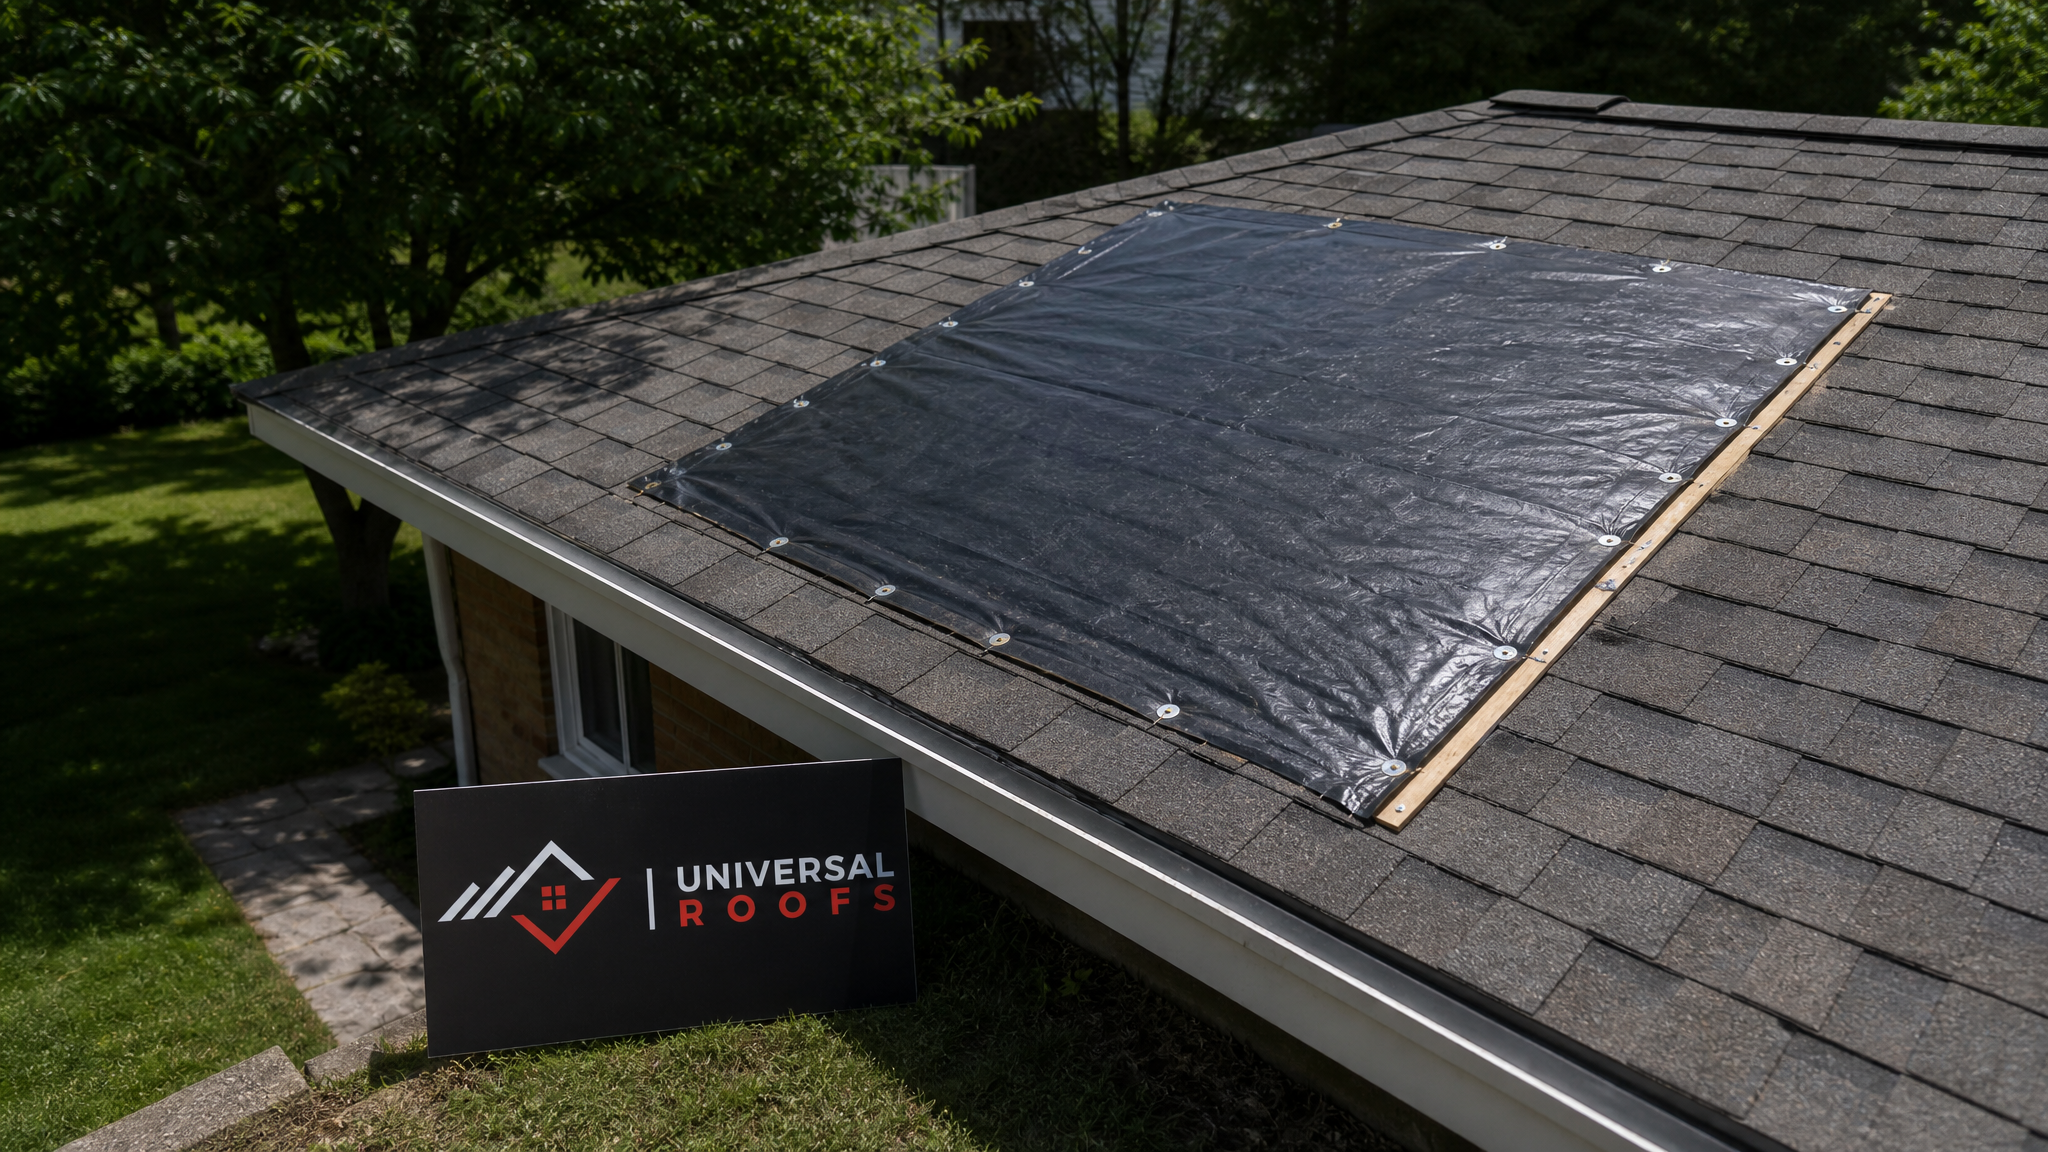
A tarp is the single most effective temporary fix for wind damage that has exposed the roof deck, and it is also the one most homeowners get wrong. The goal is not just to throw a blue poly tarp over the hole; it is to create a shingle-style water shed that directs rain off the roof rather than pooling against the edges of the tarp.
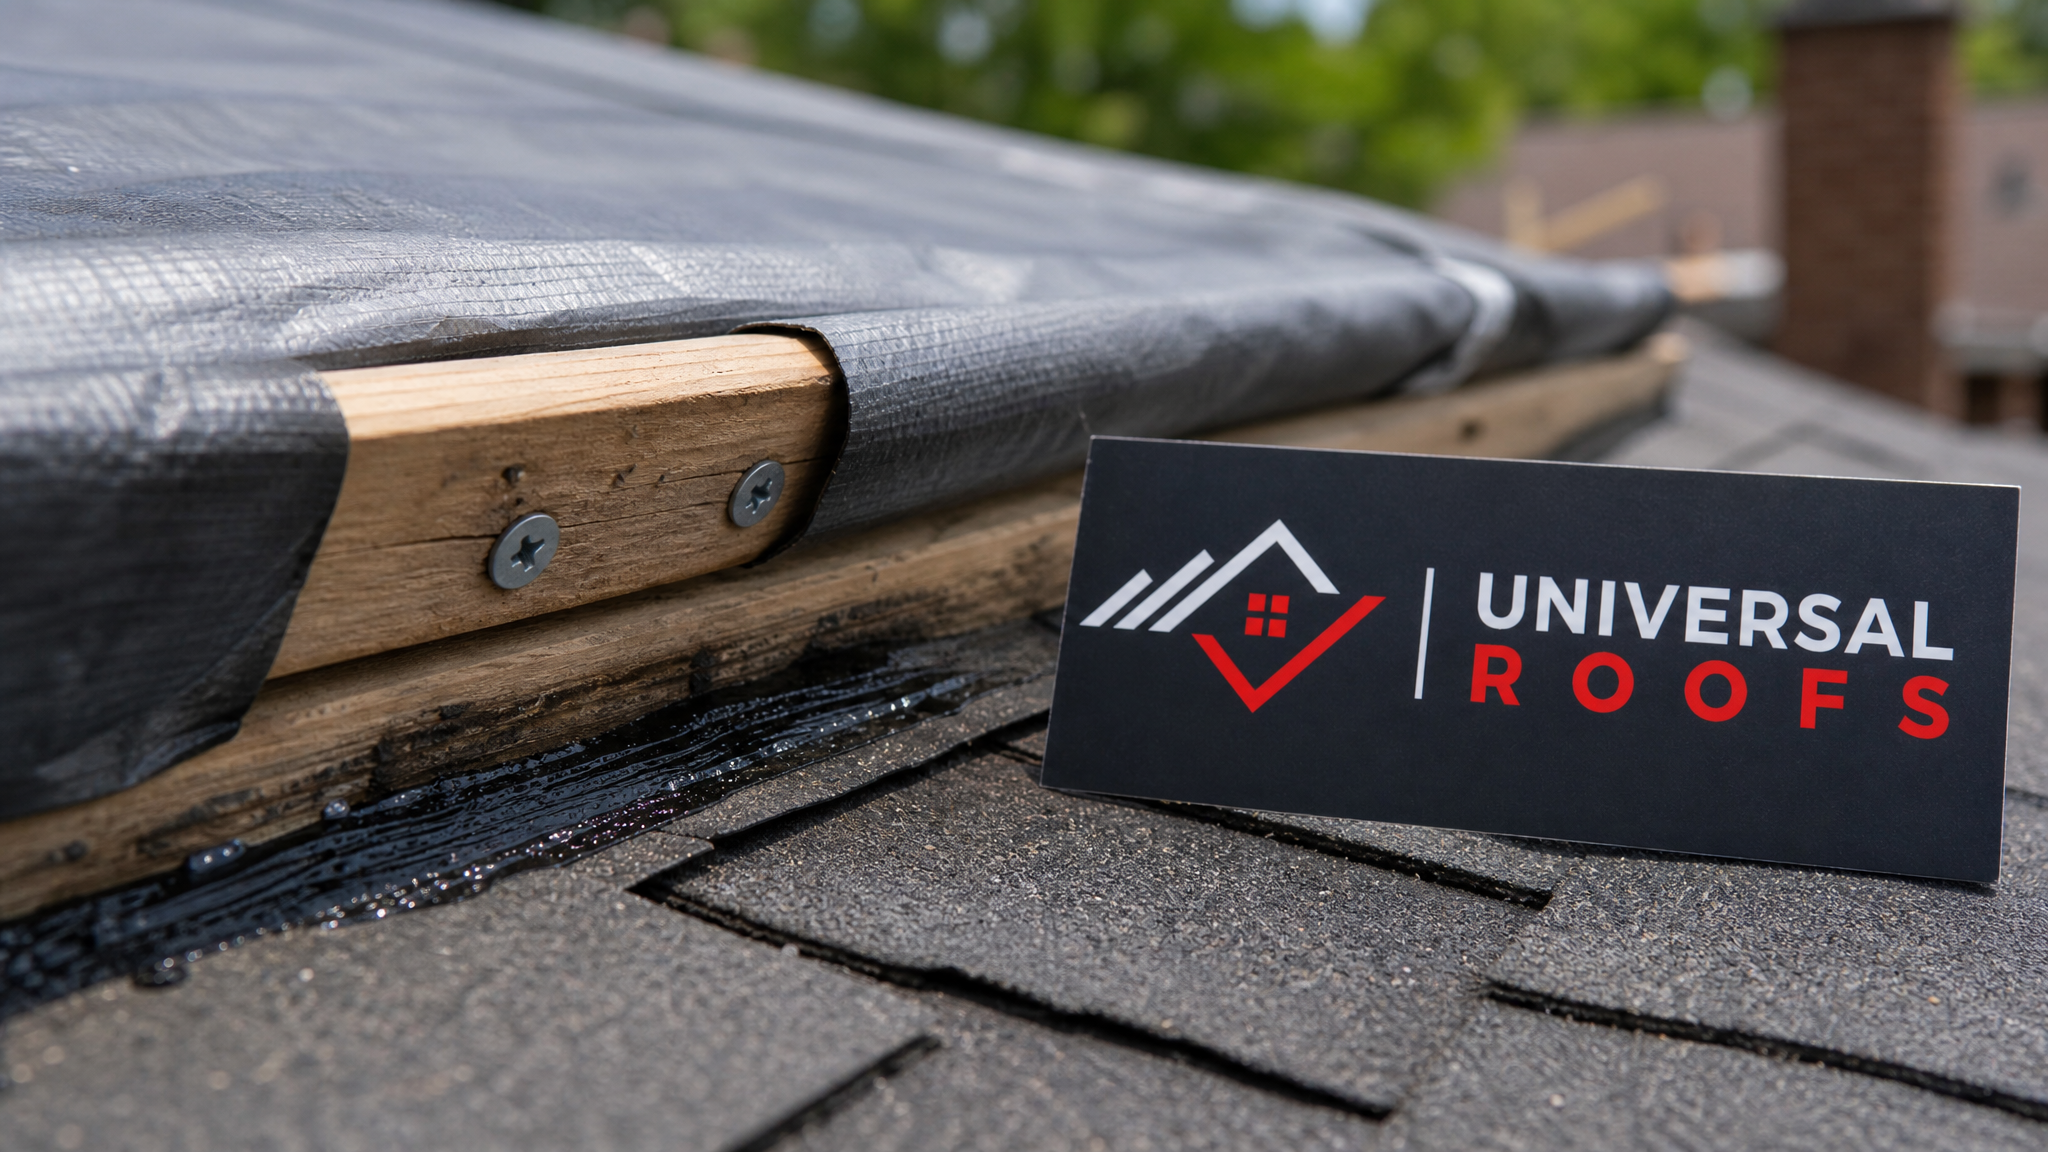
Use a heavy-duty tarp rated for roofing, ideally 6-mil poly or a woven reinforced tarp, and size it so it extends at least 1.2 metres beyond the damaged area on every side, including well past the ridge line if the damage is near the peak. Roll the top edge of the tarp around a 2×4 furring strip and screw the strip down through the tarp into solid roof deck or rafters, never just into shingles, so the fasteners actually hold under wind load. Let the tarp drape downhill over the damaged section like a shingle course, and secure the bottom and sides with additional furring strips or sandbags rather than staples alone, since staples pull through tarp material quickly in high wind. Avoid driving screws through the middle of the tarp field wherever possible; every penetration is a potential new leak point once the tarp is removed.
Quick Fix 2: Secure Lifted or Loose Shingles With Roofing Cement
Shingles that have lifted at the tab but are not torn or missing can often be pressed back down and sealed temporarily with a small amount of asphalt roofing cement, sometimes called plastic roof cement. This works best on warm, dry afternoons when the shingle is pliable; asphalt shingles become brittle and prone to cracking in cold weather, so this fix is far more reliable in summer than in a January thaw.
Lift the loose tab gently, apply a few dabs of cement about the size of a quarter under the shingle near each corner, then press firmly and hold for thirty seconds to let the cement grab. Avoid smearing cement across the visible surface of the shingle, since it attracts dirt and looks unsightly, and never use more than a light bead; overapplication can actually trap water rather than shed it. This fix typically holds for a few weeks to a couple of months depending on sun exposure and further wind events, which is usually enough time to schedule a proper roof repair.
Quick Fix 3: Replace Missing Shingles With Spares if You Have Them
If your roof is only a few years old, there is a good chance the original roofing contractor left a bundle of matching shingles in the garage or basement. If missing shingles have left bare patches of underlayment or deck exposed, and you have matching spares on hand, this is one of the few “temporary” fixes that can actually look and perform like a permanent one.
Slide the replacement shingle into place under the course above it, nail it in the standard four-nail pattern just above the adhesive strip, and dab a small amount of roofing cement over each nail head to seal it. If you do not have spares, resist the urge to buy mismatched shingles from a hardware store for a “permanent-looking” fix; it is smarter to tarp the area properly and let a professional source an exact or close colour match during the real repair, particularly if the roof is more than five or six years old and the current shingle line has faded.
Quick Fix 4: Re-Secure Loose Ridge Caps
Ridge caps take the brunt of wind uplift because they sit at the highest point of the roof where wind speed is greatest. A ridge cap that has come loose but not blown off entirely can usually be re-nailed and resealed as a short-term measure.
Check that the cap is not cracked or split before attempting this fix; a cracked cap should be treated as damaged and covered rather than re-secured, since it will continue to let water in even when nailed down. For an intact but loosened cap, drive roofing nails through the existing nail line (never create new holes elsewhere in the cap) and cover each nail head with roofing cement. If several ridge caps in a row have lifted, that is usually a sign of a broader nailing pattern failure along the ridge and points to a job for a full roof repair crew rather than a piecemeal fix.
Quick Fix 5: Patch and Reseal Flashing Around Penetrations
Flashing around chimneys, plumbing stacks, and skylights is joined to the roofing material with sealant rather than being a continuous surface, which makes it especially vulnerable to wind that works sealant loose over time or in a single violent gust. A temporary flashing fix usually means cleaning out old, cracked caulking and applying a fresh bead of high-quality roofing sealant or butyl tape around the flashing edge.
For flashing around a skylight, be especially careful, since skylight flashing kits are engineered to shed water in a specific layered order, and a bead of caulk in the wrong spot can trap water against the frame instead of directing it away. If the flashing itself is bent or pulled away from the roof deck rather than simply having failed sealant, this is a sign the fix needs to go beyond caulk; a bent flashing return often needs to be reformed and re-fastened by a professional, and in some cases the skylight unit itself may need a full skylight replacement if the wind has cracked the frame or glazing.
Quick Fix 6: Weight Down or Remove Damaged Ridge Vents and Turbines
Ridge vents and turbine vents are lightweight by design, which unfortunately also makes them one of the first components to fail in high wind. A turbine vent that is spinning erratically, rattling, or visibly leaning is at risk of tearing loose entirely and taking a section of roofing with it.
If a vent is damaged but still attached, a temporary fix is to secure it with additional fasteners through its base flange into solid decking, and to tarp over it if the housing itself is cracked. If a vent has already torn free, the resulting hole needs to be covered immediately, ideally with a rigid patch of plywood sized to the opening and sealed at the edges, then tarped over the top. This protects your attic from wind-driven rain until the vent can be properly replaced and reflashed.
Quick Fix 7: Clear and Redirect Water Away From the Damaged Section
Not every fix happens on the roof itself. Wind damage often coincides with heavy rain, and a roof section that would otherwise shed water fine can suddenly overflow if gutters are clogged with the granules, leaves, and shingle debris that a storm knocks loose.
Clear gutters and downspouts near the damaged area as soon as it is safe to do so, and check that splash blocks or downspout extensions are still directing water away from the foundation, since a secondary wind-related failure is often gutters pulled loose from their fascia brackets. If water is pooling on a low-slope or flat roofing section because a drain has been blocked by debris, clearing that drain is often the single most effective “repair” you can make in the first hour after a storm, well before any patching begins.
Quick Fix 8: Board Up Broken Skylights and Roof Windows
Flying debris during a windstorm can crack or shatter skylight glazing, and a broken skylight is one of the fastest routes to serious interior water damage because it sits directly over living space rather than an attic buffer. If the outer pane is cracked but intact, a temporary fix is to cover the exterior with a fitted tarp secured to the surrounding roof deck, never taped directly to the glass, since tape residue and flex can worsen a crack.
If the glazing has actually broken through, the opening needs to be boarded from the interior with plywood cut to fit the shaft, in addition to the exterior tarp, to prevent wind from driving rain sideways into the gap. Do not attempt to remove broken glazing yourself; loose glass under tension can shift unpredictably. This is a case where calling a professional for an emergency skylight replacement assessment right away is the safest and most cost-effective path, since a temporary board-up is only meant to last a few days at most.
Quick Fix 9: Stabilize Loose Soffit and Fascia
Wind uplift does not stop at the shingles; soffit panels and fascia boards can be pried loose or partially torn away, creating an entry point for wind-driven rain into the attic space even when the main roofing surface is intact. A section of soffit hanging loose is also a safety hazard, since it can detach fully in a subsequent gust.
As a temporary measure, loose soffit panels can be pushed back into their track and secured with a few galvanized screws driven through the panel into the fascia board, and any gap where the soffit meets the fascia can be sealed with exterior-grade caulk to slow water intrusion. Fascia that has pulled away from the roof edge should be treated more cautiously; if it is structurally loose rather than just cosmetically damaged, it is often tied to gutter hardware and better left to a professional to reattach correctly, since an improperly refastened fascia board can fail again under load and take the gutter with it.
Quick Fix 10: Document Everything Before and After Each Fix
This last “fix” is not a physical repair at all, but it is arguably the one that saves homeowners the most money and stress. Insurance claims for wind damage live or die on documentation, and every temporary repair you make changes what an adjuster will see when they eventually visit.
Photograph the damage from the ground and, if safely possible, from the roof before doing any work: wide shots showing the affected area in context, plus close-ups of individual missing shingles, bent flashing, or cracked vents. Photograph each temporary fix once complete, and keep receipts for any tarps, fasteners, or sealant purchased, since many insurance policies reimburse reasonable costs incurred to prevent further damage. Note the date and approximate time of the windstorm if known, since this can matter for claims involving multiple weather events in the same season. If you are unsure whether damage is severe enough to file a claim, it is worth getting a written assessment from a local roofer; a same-day free inspection often gives you the documentation an adjuster will actually want to see.
How Long Do Temporary Fixes Actually Last?
One of the most common questions homeowners ask after a storm is how much time a given quick fix realistically buys them. The honest answer depends heavily on the method, the material, and how much additional wind and rain the roof sees before permanent repairs happen. The table below reflects realistic expectations for the GTA climate, where freeze-thaw cycles in the shoulder seasons and heavy summer thunderstorms both put extra stress on temporary patches.
| Temporary Fix | Typical Lifespan | Best Season to Apply | Follow-Up Needed |
|---|---|---|---|
| Reinforced tarp over deck opening | 2-6 weeks | Any season, but check ties after freezing rain | Full deck and shingle repair |
| Roofing cement on lifted shingle tabs | 3-8 weeks | Warm, dry weather (spring through early fall) | Shingle replacement if cracked |
| Re-nailed ridge cap | 1-3 months | Any season if cap is intact | Inspect full ridge line for pattern failure |
| Flashing sealant/butyl tape | 2-10 weeks | Dry, above-freezing conditions for proper cure | Full reflashing by a professional |
| Plywood board-up over broken skylight | 2-5 days | Any season, treat as emergency-only | Skylight glazing or unit replacement |
When to Stop DIY-ing and Call a Professional Roofer
Quick fixes for temporary roof wind damage exist to buy time, not to replace proper repair work, and there are clear signals that a situation has moved past what a homeowner should handle alone. Recognizing these signals early prevents a manageable repair from turning into a much larger project.
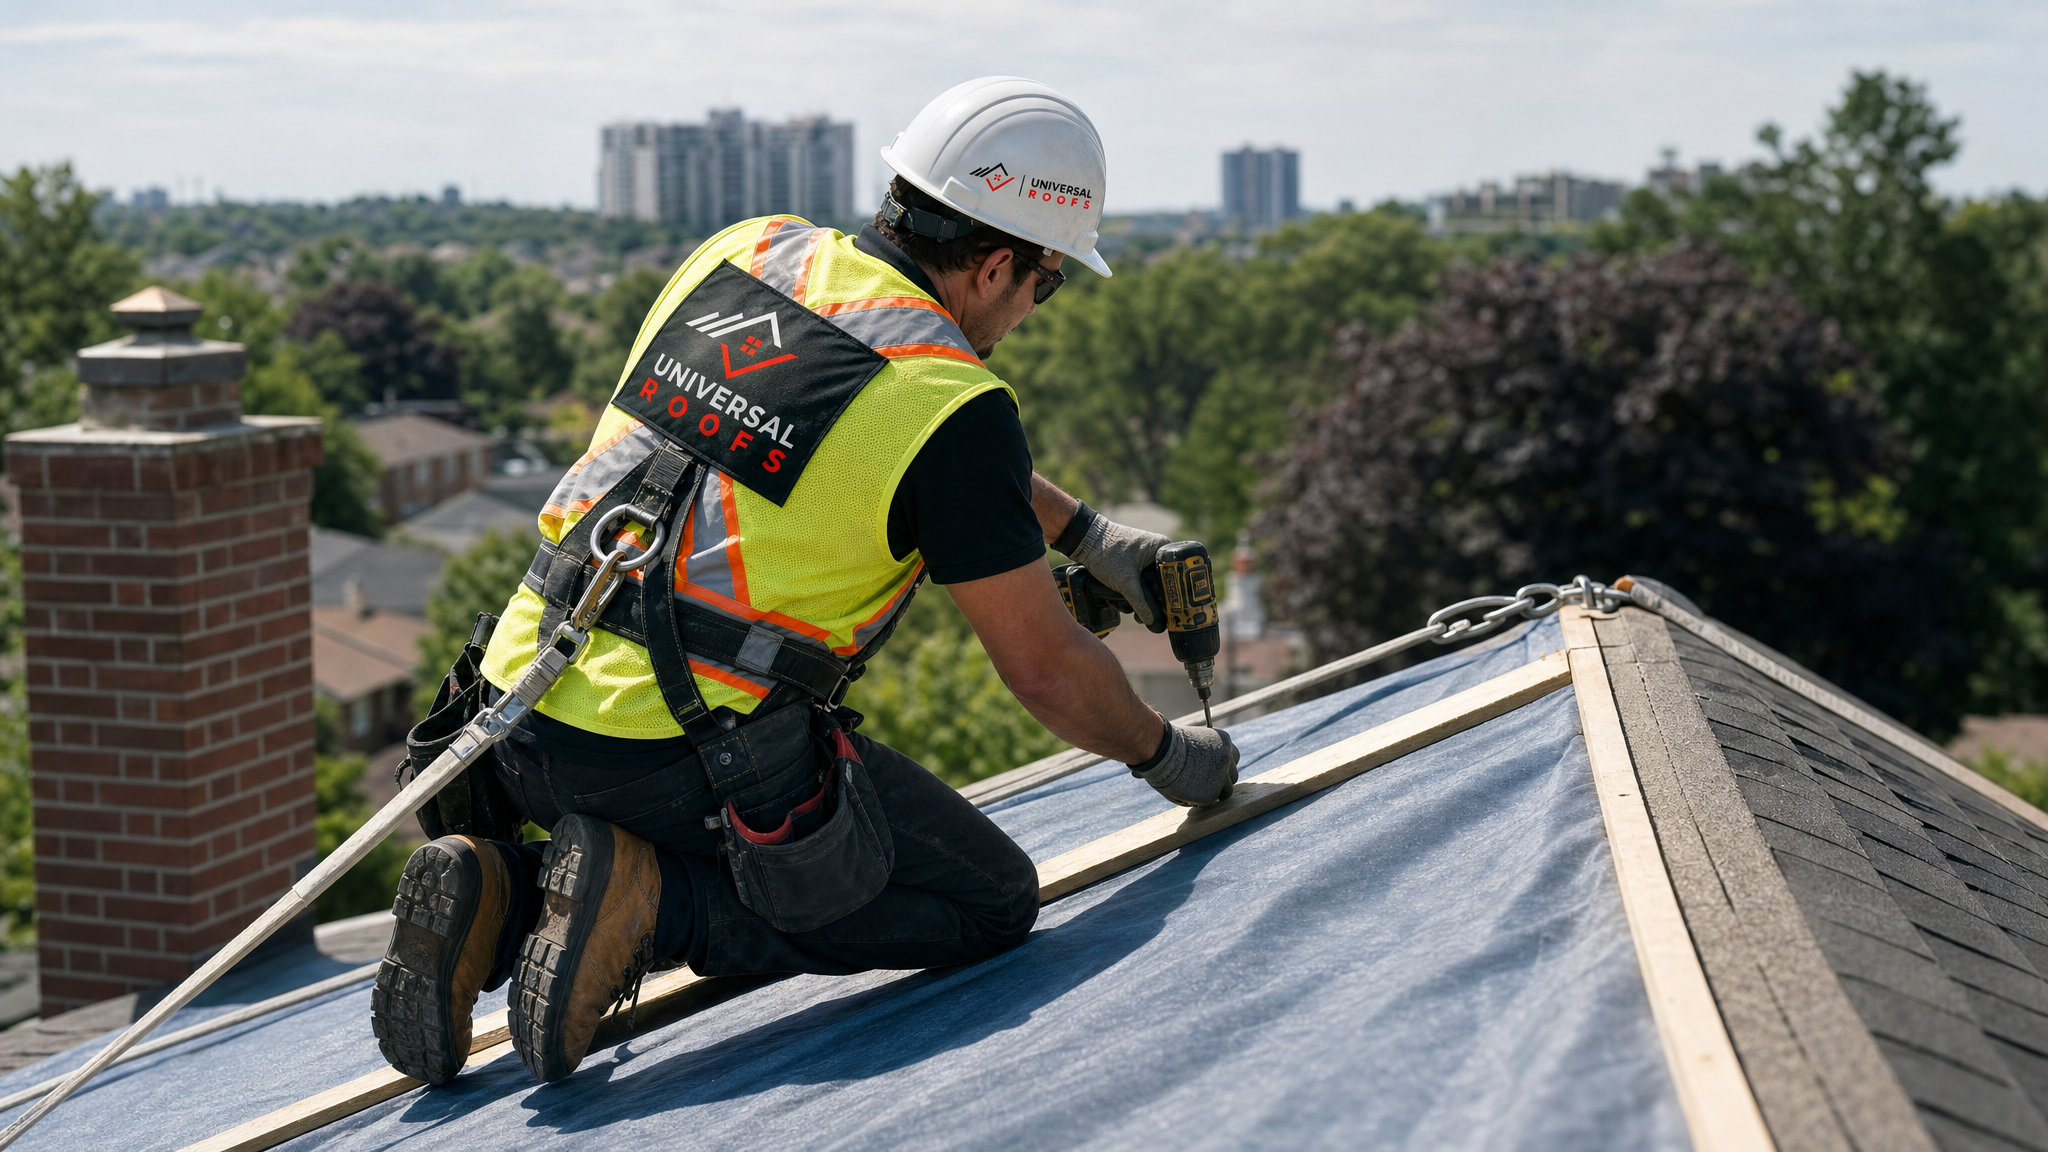
Call a professional immediately if you see structural sagging anywhere on the roofline, if multiple ridge caps or entire courses of shingles are missing rather than isolated tabs, if water is actively entering the living space rather than the attic, if any exposed decking is soft or spongy to the touch, or if the damage involves a flat or low-slope section where standing water can accumulate quickly. Similarly, if the storm has knocked loose anything near electrical service masts or has left debris still lodged on the roof, do not attempt removal yourself; this is squarely a job for a trained crew with the right harness and ladder safety equipment.
Homeowners in Toronto, the Peel Region, York Region, Halton Region, and Durham Region all face slightly different exposure depending on how close a property sits to open water or elevated terrain, but the underlying rule is the same everywhere: a temporary fix that is holding but was applied more than a few weeks ago should be followed up with a proper inspection before the next major weather event.
| Situation | Safe for Homeowner? | Recommended Action | Typical Cost Range (Temporary vs. Permanent) |
|---|---|---|---|
| Single lifted shingle tab, low-slope roof | Yes, if roof is dry and low pitch | Reseal with roofing cement | $0-$20 (DIY) vs. $150-$300 (professional shingle repair) |
| Missing shingle section exposing deck | Ground work only; tarp from ladder | Tarp immediately, schedule repair within days | $40-$120 tarp kit vs. $300-$900 section repair |
| Cracked or shattered skylight glazing | No — board interior only | Call for emergency assessment same day | $60-$150 board-up vs. $900-$2,500 skylight replacement |
| Loose fascia with gutter still attached | Limited — screws only if fully reachable safely | Professional refastening recommended | $0-$30 DIY screws vs. $250-$700 professional fix |
| Multiple ridge caps missing along the peak | No — ladder work at the roof’s highest point | Full professional inspection and re-ridging | Not a safe DIY fix vs. $400-$1,200 depending on length |
Preparing Your Roof for the Next Windstorm
Once the immediate damage is under control, it is worth spending an afternoon thinking about how the roof performed and where it is vulnerable to the next windstorm, since GTA weather patterns mean it is rarely a matter of if another one arrives, only when. A roof that is nearing the end of its expected service life, generally 20 to 25 years for standard asphalt shingles in this climate, is far more prone to widespread wind damage than a newer roof, simply because sealant strips have dried out and nails have started to back out of the deck over time.
If your most recent windstorm caused damage in more than one or two isolated spots, that pattern is a reasonable signal to have a full roof assessed rather than repeatedly patching individual failures as they appear. A professional can check nail patterns, sealant strip adhesion, and flashing condition across the entire roof, and can advise honestly on whether a targeted roof repair will hold for the next several years or whether a roof replacement makes more long-term financial sense. Homeowners are often surprised to learn that a full replacement, done with proper wind-rated fastening and starter strip installation, actually reduces the odds of repeat storm damage far more than an endless cycle of patch repairs.
It is also worth having your attic ventilation checked at the same time. Poor attic ventilation can accelerate shingle aging from the underside, making a roof more brittle and more susceptible to wind uplift years before it would otherwise need replacing, so a quick look at your attic insulation and venting can pay for itself many times over.
Materials Worth Keeping on Hand
Homeowners who have been through even one bad windstorm often keep a small kit of supplies on hand for the next one, since trying to find roofing cement and tarps at a hardware store in the middle of a storm response is far harder than buying them ahead of time. A basic kit covers most of the quick fixes above without requiring specialized tools.
| Item | Approximate Cost | Used For | Storage Tip |
|---|---|---|---|
| Heavy-duty reinforced poly tarp (6-mil or better) | $25-$60 | Covering exposed deck or broken skylight exteriors | Keep folded flat; avoid sun exposure in storage which weakens poly over years |
| Asphalt roofing cement (tube or can) | $8-$18 | Resealing lifted shingle tabs and small flashing gaps | Store above freezing; cement stiffens badly in cold garages |
| Galvanized roofing nails | $6-$12 per box | Re-securing ridge caps and loose shingles | Keep dry to prevent rust before use |
| 2×4 furring strips (cut to roughly 1.2 m lengths) | $3-$6 each | Anchoring tarp edges into solid roof deck | Keep a few pre-cut lengths in the garage rafters |
| Butyl flashing tape | $15-$25 per roll | Quick reseal around chimneys, stacks, and skylight frames | Store rolled tightly; loses tack if left partially unrolled |
A Note on Insurance and Emergency Repairs
Most Canadian home insurance policies specifically expect homeowners to take reasonable steps to prevent further damage after an insured event like a windstorm, and reasonable temporary repairs are typically reimbursable even before an adjuster visits, provided you keep receipts and photographs. Where homeowners sometimes run into trouble is treating a temporary fix as a substitute for filing a claim promptly, since most policies have windows for reporting damage, and delays can complicate coverage.
If you are uncertain whether wind damage on your property is covered, it rarely hurts to call your broker the same day and describe what you see, then follow up with the documentation habits described above. A written estimate from a roofer familiar with insurance-related repairs, including clear photos and a description of the wind event, tends to make the claims process considerably smoother, and reviewing reviews from other homeowners who have gone through storm repairs locally can help you gauge which contractors handle this process well.
Frequently Asked Questions
What are the best quick fixes for temporary roof wind damage after a storm?
How long can a tarp safely stay on a wind-damaged roof?
Is it safe to do quick fixes for temporary roof wind damage myself?
Will a temporary roof repair affect my insurance claim?
How do I know if wind damage needs more than a temporary fix?
What roofing materials hold up best against wind in the Toronto area?
Need Help With 10 Quick Fixes for?
Temporary patches only go so far, and if your roof has taken repeated wind damage or you are not confident handling repairs safely yourself, the team at Universal Roofs can assess the damage properly and put a lasting fix in place.
Call us today at (416) 732-2421 or request a free inspection to get started.
Universal Roofs proudly serves Toronto, Mississauga, Brampton, Vaughan, Markham, Oakville and the GTA since 2005.