
If you have ever compared notes with a neighbour whose flat-roofed garage was recoated in an afternoon while your own sloped roof took a full crew three days to waterproof properly, you have already brushed up against the central question homeowners ask us every summer: why are sloped roofs waterproofed differently than flat ones, and why does it matter so much in the Toronto area? The short answer is that a sloped roof relies on gravity, layered shingles, and a completely different set of flashing and underlayment details to shed water, while a flat or low-slope roof has to rely almost entirely on a continuous waterproof membrane because water simply cannot run off quickly enough on its own.
That distinction sounds simple, but it drives nearly every decision a roofing contractor makes on a sloped roof project, from which underlayment goes down first to how many layers of flashing wrap a chimney. Get the waterproofing strategy wrong on a sloped roof and you will not see the failure right away. Water finds the one seam that was not lapped correctly, works its way under a shingle during a spring thaw, and shows up as a stain on a bedroom ceiling eight months later, long after the crew has moved on to the next neighbourhood.
In this guide we will walk through exactly why sloped roofs are waterproofed differently from low-slope and flat roofs, the specific materials and techniques used at each slope, the vulnerable details (valleys, chimneys, skylights, eaves) that separate a roof that lasts from one that leaks, and what GTA homeowners should expect in terms of cost and timeline. Whether you are planning a full roof replacement or just trying to understand why your contractor is recommending a particular underlayment, this article will give you the practical, Toronto-specific answers you need.
Sloped vs. Flat: The Physics That Changes Everything
Waterproofing strategy starts with one number: slope, expressed as a ratio of vertical rise to horizontal run (for example, 6:12 means the roof rises 6 inches for every 12 inches of horizontal distance). Roofs are generally grouped into three categories, and each one calls for a different waterproofing approach.
| Roof Category | Typical Slope | Primary Waterproofing Strategy | Common GTA Examples |
|---|---|---|---|
| Steep slope | 6:12 to 12:12+ | Layered shingles + underlayment shed water via gravity | Two-storey detached homes, gable roofs |
| Low slope | 2:12 to 4:12 | Enhanced underlayment, tighter fastening, ice-and-water shield across the whole deck | Bungalow additions, dormer roofs |
| Flat / near-flat | 0:12 to 2:12 | Continuous waterproof membrane (TPO, EPDM, modified bitumen) | Garages, rear additions, commercial roofs |
| Mixed-slope home | Combination | Different systems on each section, tied together at transitions | Homes with a sloped main roof and a flat rear addition |
On a steep-slope roof, water is moving. A heavy summer downpour on a 9:12 roof reaches the eavestrough in seconds. Because the water is not sitting still, the roofing system does not need to be perfectly sealed at every square centimetre — it needs to be layered correctly so that each course of shingles overlaps the one below it, directing water downward and outward the way roof tiles have worked for centuries. This is called a “shingled” or “lapped” waterproofing system, and it is fundamentally different from the membrane systems used on our flat roofing projects, where standing water can remain in contact with the surface for hours after a storm.
That single fact — moving water versus standing water — explains almost every material and labour difference between the two roof types. It is also why a contractor who tells you “we’ll just use the same membrane on your sloped roof as we did on your garage” should raise a red flag. The physics simply do not transfer.
Why Shingles Alone Are Not Enough: The Underlayment Layer
A common misconception is that asphalt shingles themselves are the waterproofing layer on a sloped roof. In reality, shingles are the first line of defence against sun, wind, and general weather, but the underlayment beneath them is what actually keeps a home dry when shingles are lifted by wind, cracked by hail, or simply reach the end of their service life before a replacement is scheduled.
In the GTA, where freeze-thaw cycles are common from November through March, ice damming is the single biggest threat to a sloped roof’s waterproofing. Warm air escaping from the attic melts snow on the upper roof, the meltwater runs down to the colder eaves, refreezes, and forms a dam that backs water up under the shingles. Without the right underlayment at the eaves, that backed-up water finds every nail hole and seam. This is why local building code and most manufacturer warranties require ice-and-water shield membrane (a self-adhering, rubberized asphalt membrane) to extend at least 900mm (roughly 3 feet) up from the eave edge, measured from the interior wall line, on any roof with a slope under 4:12, and it is smart practice on steeper roofs too.
| Underlayment Type | Where It’s Used | Water Resistance | Typical Lifespan |
|---|---|---|---|
| Synthetic underlayment (woven polymer) | Full roof deck, general field areas | Water-resistant, not fully waterproof | 25-30 years (matches shingle life) |
| Ice-and-water shield (rubberized asphalt) | Eaves, valleys, around penetrations, low-slope sections | Fully waterproof, self-sealing around nails | 30+ years |
| Felt paper (traditional #15 or #30) | Older installations, budget re-roofs | Water-resistant only, degrades faster | 15-20 years |
| Peel-and-stick membrane (full deck coverage) | Premium installs, low-slope sections, cottage roofs | Fully waterproof across entire deck | 30-40 years |
Our crews typically favour a hybrid approach on GTA homes: ice-and-water shield at every vulnerable detail (eaves, valleys, chimneys, skylights, sidewalls) paired with a high-quality synthetic underlayment across the rest of the field. That combination gives you full waterproofing exactly where water tends to concentrate, without the added cost of membrane across the entire deck where gravity is already doing most of the work.
The Detail Work: Valleys, Flashing, and Penetrations
If you ask any experienced roofer where sloped roofs actually fail, the answer is almost never “in the middle of a plain shingle field.” It is at the transitions — the places where two roof planes meet, where a chimney or skylight pokes through the deck, or where the roof meets a sidewall. These details require a completely different waterproofing approach than the open field of shingles, which is another reason sloped roofs demand more specialized labour than a flat membrane roof.
Valleys
A valley is where two roof slopes meet at an angle, and it concentrates enormous volumes of water from both roof planes into a single channel. There are two accepted approaches: an open valley, where metal flashing is left exposed down the centre and shingles are cut back on each side, and a closed (woven or cut) valley, where shingles run through the valley and overlap each other. Open metal valleys generally handle heavy water volume and ice better, which is why we favour them on north-facing valleys and homes with steeper roof pitches where meltwater volume is highest.
Flashing at Chimneys, Skylights, and Sidewalls
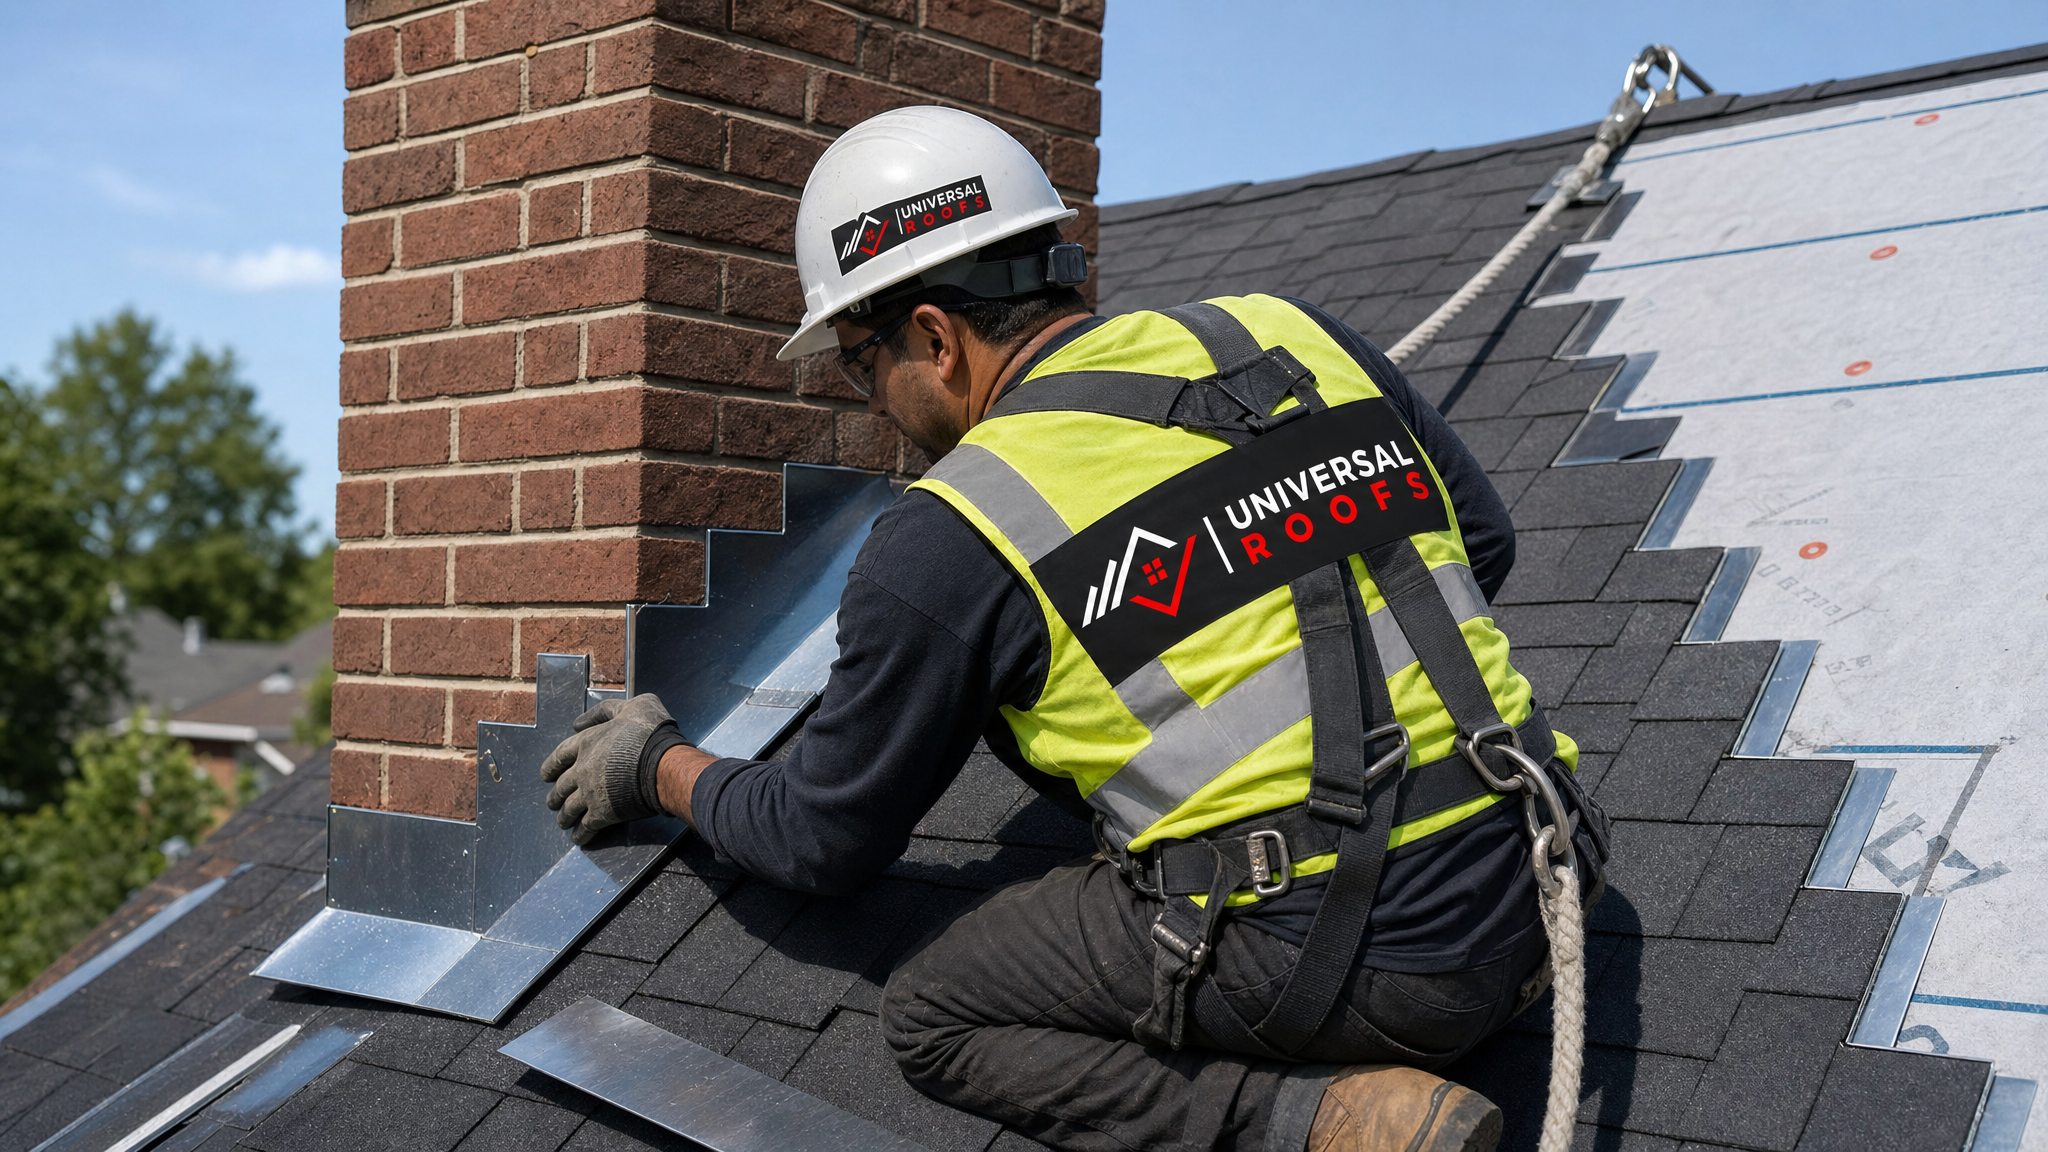
Flashing is thin sheet metal (usually aluminum, galvanized steel, or copper) formed to direct water away from any place the roof plane is interrupted. Proper flashing at a chimney requires three separate pieces working together: base flashing against the roof deck, step flashing woven between each course of shingles up the sides, and counter-flashing embedded into the chimney’s mortar joints to cap everything and prevent water from getting behind the assembly. Skip the counter-flashing, or caulk over a gap instead of properly integrating new flashing, and you have created exactly the kind of hidden leak point that shows up as a stain two rooms away from the actual entry point. The same layered logic applies around every skylight curb and any point where a bathroom or kitchen vent penetrates the deck.
Eaves and Fascia
At the lowest edge of a sloped roof, drip edge flashing (a formed metal strip) is installed under the underlayment at the eaves and over the underlayment at the rakes, directing water cleanly into the eavestrough rather than allowing it to wick back under the fascia board. This small detail prevents a huge percentage of the wood rot we see on older Toronto homes where drip edge was skipped during a cheaper re-roof.
How This Differs From Flat Roof Waterproofing
It is worth spelling out the comparison directly, because so many GTA homes — bungalows with rear additions, homes with attached garages, older properties with flat-roofed sunrooms — actually have both roof types on the same building, tied together at a single transition point.
| Factor | Sloped Roof | Flat / Low-Slope Roof |
|---|---|---|
| Primary waterproofing method | Layered shingles + strategic underlayment | Continuous single-ply or built-up membrane |
| Tolerance for standing water | Low — water is expected to run off within minutes | Must be engineered for water sitting for hours |
| Seam vulnerability | Concentrated at valleys, flashing, penetrations | Every seam across the entire membrane is a risk point |
| Typical material lifespan | 20-30 years (architectural shingles) | 15-25 years (TPO/EPDM), 10-20 years (modified bitumen) |
| Inspection frequency recommended | Annually, plus after major storms | Twice yearly, plus after major storms |
When a sloped roof ties into a flat section — a very common configuration across Mississauga, Brampton, and older Toronto neighbourhoods — the transition itself becomes the highest-risk detail on the entire building. Our crews flash these junctions with the same layered, overlapping logic used on chimneys: base flashing tied into the membrane below, counter-flashing or step flashing woven into the shingle courses above, so water is directed onto the membrane rather than trapped at the seam.
Seasonal Timing: Why Summer Is the Right Time to Address This
July and August are, somewhat counterintuitively, the best months to have sloped roof waterproofing evaluated or repaired in the GTA. Shingles are pliable in warm weather, which allows them to seal properly and reduces the risk of cracking during handling. Underlayment and flashing sealants cure faster and more completely above roughly 10°C, and there is no snow load or ice to work around. Homeowners who wait until October, when the first cold snap hits, often find that ice-and-water shield is harder to install correctly and that any existing damage from the previous winter has already caused hidden moisture intrusion into the attic insulation and roof deck.
If your home experienced ice damming last winter, summer is also the ideal window to have us assess your attic ventilation and insulation alongside the roof waterproofing itself, since poor attic airflow is the root cause of most ice dam damage on sloped roofs in this region.
Warning Signs Your Sloped Roof’s Waterproofing Has Failed
Because sloped roof leaks often travel along rafters or sheathing before showing up indoors, the visible symptom rarely appears directly above the actual failure point. Homeowners should watch for the following signs and act quickly, since delayed roof repair almost always costs more than early intervention.
| Warning Sign | Likely Cause | Recommended Action | Urgency |
|---|---|---|---|
| Brown ceiling stain after rain | Failed flashing at valley, chimney, or skylight | Schedule an inspection within days | High |
| Granules collecting in eavestroughs | Shingle wear nearing end of service life | Plan for replacement within 1-2 seasons | Medium |
| Daylight visible through attic roof boards | Gap in decking or missing flashing | Immediate repair required | High |
| Ice dams forming most winters | Poor attic ventilation/insulation combined with underlayment gaps | Combined attic + roof assessment | Medium-High |
| Curling or cupping shingles | Age, heat exposure, ventilation issues | Inspection to determine remaining lifespan | Medium |
What a Proper Sloped Roof Waterproofing Job Includes
When our crews quote a re-roof or major repair, the waterproofing scope typically includes several layers working together rather than a single product doing all the work. Understanding this helps homeowners evaluate quotes and avoid contractors who cut corners on the underlayment or flashing to win a lower bid.
- Deck inspection and repair — any soft, rotted, or delaminated sheathing is replaced before anything else goes down, since no underlayment can waterproof a compromised deck.
- Ice-and-water shield at all vulnerable zones — eaves, valleys, chimneys, skylights, and sidewalls, extending to code-minimum distances or beyond.
- Synthetic underlayment across the full field — providing secondary water resistance and a safe walking surface during installation.
- Drip edge at eaves and rakes — directing water into the eavestrough system rather than behind the fascia.
- New step and counter-flashing at every chimney, skylight curb, and sidewall — reused flashing is a common corner-cutting shortcut we do not recommend.
- Properly lapped shingle courses with correct nail placement (never over-driven or under-driven, which both compromise the seal).
- Ridge venting integration so the waterproofing system works with the attic ventilation rather than trapping moisture underneath.
Cost and Timeline Expectations for GTA Homeowners
Waterproofing quality is one of the biggest cost variables between a budget re-roof quote and a properly detailed one, because the materials described above (ice-and-water shield, new flashing at every penetration, premium underlayment) add real cost that some contractors skip to win a lower bid. Below are general ranges we see across Toronto and the surrounding regions; every home is different, so a proper quote requires an on-site assessment.
| Project Scope | Typical Timeline | Waterproofing Emphasis |
|---|---|---|
| Flashing repair only (chimney/valley) | Half day to 1 day | Targeted — replace failed flashing, re-seal affected shingles |
| Partial re-roof (single slope/section) | 1-2 days | New underlayment and flashing on affected section only |
| Full sloped roof replacement | 2-4 days depending on size and complexity | Complete tear-off, deck inspection, full underlayment and flashing system |
| Combined sloped + flat section replacement | 3-6 days | Two waterproofing systems plus a carefully detailed transition |
We serve homeowners across Toronto, Peel Region, York Region, Halton Region, and Durham Region, and timelines can shift slightly depending on roof access, weather windows, and the amount of deck repair discovered once the old shingles come off. You can read what past clients have experienced with our crews on our reviews page.
Choosing the Right Contractor for Sloped Roof Waterproofing
Because so much of a sloped roof’s waterproofing performance depends on details that are invisible once the job is finished — the flashing under a shingle course, the width of ice-and-water shield at a valley, whether nails were driven at the correct depth — homeowners are largely trusting their contractor’s process rather than inspecting the finished product themselves. A few questions can help separate a thorough contractor from one who is racing through the job:
- Ask specifically what underlayment and ice-and-water shield brands and coverage widths will be used, and at which locations.
- Ask whether flashing will be replaced or reused at chimneys and skylights.
- Ask how valleys will be treated — open metal or woven — and why that choice fits your specific roof.
- Ask whether attic ventilation will be assessed as part of the project, since ventilation and waterproofing are closely linked on sloped roofs.
- Check for manufacturer certifications, since many premium shingle and underlayment warranties require installation by certified contractors to remain valid.
You can find answers to many of these common questions on our FAQ page, and learn more about our approach and history on our about page.
Maintaining Your Sloped Roof’s Waterproofing Over Time
Waterproofing is not a one-time installation that lasts forever without attention. Even a correctly installed sloped roof benefits from periodic checks, particularly after major wind events or ice storms, both of which are common in the GTA’s climate. A simple annual visual inspection — ideally from the ground with binoculars, or by a professional if you are not comfortable on a ladder — can catch a lifted shingle or damaged flashing corner before it becomes a ceiling stain. Keeping gutters clear so water does not back up under the eaves, trimming overhanging branches that can abrade shingles during wind, and addressing attic moisture or ventilation issues promptly all extend the effective life of the waterproofing system well beyond the shingles’ basic warranty period.
For homeowners who noticed water intrusion after this past winter’s freeze-thaw cycles, or who are simply due for a routine check before the next winter arrives, summer remains the ideal time to book an assessment while conditions are dry and materials perform at their best.
Why are sloped roofs waterproofed differently than flat roofs?
What underlayment is used to waterproof a sloped roof?
How does flashing help waterproof a sloped roof?
Why do ice dams cause leaks on sloped roofs waterproofed with standard shingles?
Can a sloped roof and a flat roof be waterproofed as one connected system?
How often should sloped roof waterproofing be inspected?
Need Help With Why Are Sloped Roofs?
Understanding why your roof’s slope changes its waterproofing needs is the first step toward protecting your home for decades to come, and the team at Universal Roofs has been solving exactly these problems for GTA homeowners since 2005.
Call us today at (416) 732-2421 or request a free inspection to get started.
Universal Roofs proudly serves Toronto, Mississauga, Brampton, Vaughan, Markham, Oakville and the GTA since 2005.