
Tile roofing is prized across Toronto and the wider GTA for its longevity, its distinctive profile, and its resistance to hail, wind, and UV damage. But the tiles themselves are only the visible layer of the system. Underneath every tile roof sits a wood or engineered deck, a layer of underlayment, and often battens or furring strips that hold everything together. When moisture finds its way past the tiles, it is this hidden structure that suffers first — and by the time a stain appears on a ceiling or a tile feels spongy underfoot, rot or decay may already be well established.
Homeowners often assume that a leak means the tiles have failed. In reality, tiles can look flawless for decades while the plywood or oriented strand board beneath them slowly softens from years of condensation, ice damming, or a single unnoticed flashing failure. Finding and correctly repairing rot or decay underneath tile roofs requires more than patching the surface — it requires understanding exactly how deep the damage goes and choosing the repair method that matches that severity.
In this guide we walk through the four best methods for repairing rot or decay underneath tile roofs, how to tell which one your home needs, realistic GTA pricing, and the maintenance habits that keep the problem from coming back. Whether you manage a century home in the Beaches or a newer build in Vaughan, the fundamentals of tile roof deck repair are the same, and getting them right protects both your roof and your home’s structure for decades to come.
How Rot and Decay Develop Underneath Tile Roofs
Before comparing repair methods, it helps to understand why decay forms in the first place. Tile roofs are exceptionally durable on the surface, but they are not waterproof on their own — the underlayment beneath the tiles is the true water barrier, and the tiles primarily shed bulk water and protect that underlayment from UV and physical damage. When underlayment ages, tears, or was installed with poor overlaps, water can travel underneath the tile field and sit against the wood deck.
In the GTA’s climate, several conditions accelerate this process. Freeze-thaw cycles through a typical Ontario winter cause any trapped moisture to expand and contract repeatedly, opening tiny cracks in flashing and sealant that widen year after year. Ice damming along eaves — common after heavy snow followed by a thaw — forces meltwater backward under the tile courses instead of off the roof edge. Poor attic ventilation adds a second source of moisture entirely: warm, humid indoor air rising into an under-ventilated attic condenses on the underside of the cold deck, soaking the plywood from below even when the tiles and underlayment are perfectly intact.
Because decay usually starts hidden, the visible warning signs tend to lag well behind the actual damage. Homeowners typically notice a soft or bouncy feel when walking a roof (during an inspection), sagging between rafters visible from the attic, dark staining or mould on interior ceilings, a musty smell in upper-floor rooms, or tiles that have shifted, cracked, or slipped out of alignment because the deck beneath them no longer holds fasteners securely. If you are already investigating a leak, our roof repair team can trace the water path back to its source rather than simply patching the symptom.
Method 1: Localized Deck Sistering and Spot Patching
The least invasive of the four best methods for repairing rot or decay underneath tile roofs is localized sistering — reinforcing or replacing only the specific rafters, sheathing, or battens affected, while leaving the surrounding tile field completely undisturbed.
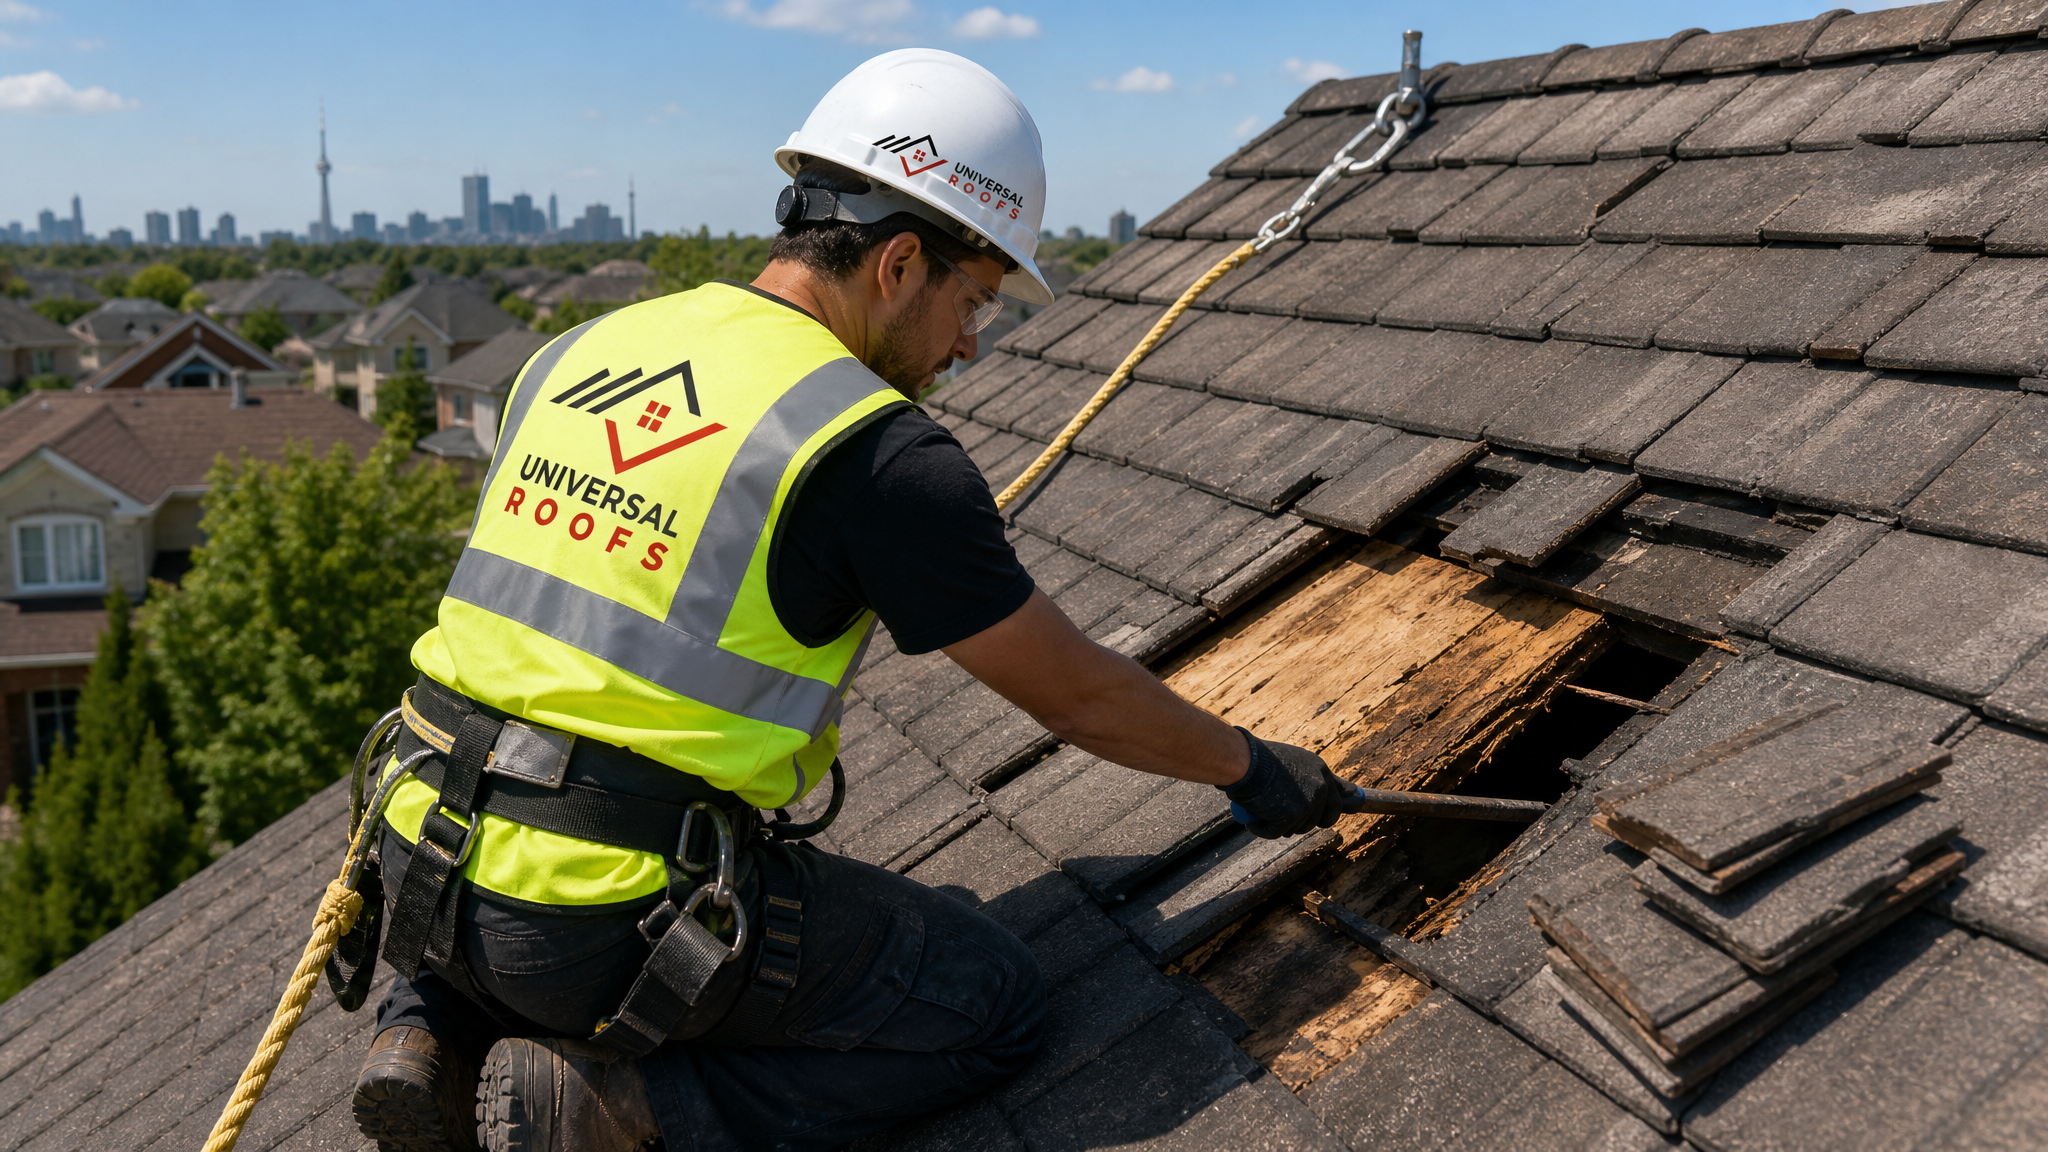
This method works when decay is confined to a small, well-defined area — typically around a single flashing detail, a plumbing vent, a valley, or a chimney where water has been getting in from one identifiable point. The affected tiles are carefully lifted and numbered so they can be replaced in the same position, the damaged section of decking is cut out along the nearest rafter lines, and new plywood or OSB of matching thickness is fastened in. If a rafter itself has softened, a new “sister” rafter is bolted alongside the old one to restore structural strength without removing the original framing member.
Spot patching is fast, cost-effective, and minimizes disruption to tiles that are otherwise in good condition. Its limitation is that it only addresses what is visible and accessible — if the underlayment itself has degraded broadly, a spot patch may stop today’s leak while a new one develops nearby within a season or two. This is why any spot repair should include a careful inspection of the surrounding underlayment condition, not just the wood.
Method 2: Underlayment Replacement With Deck Overlay
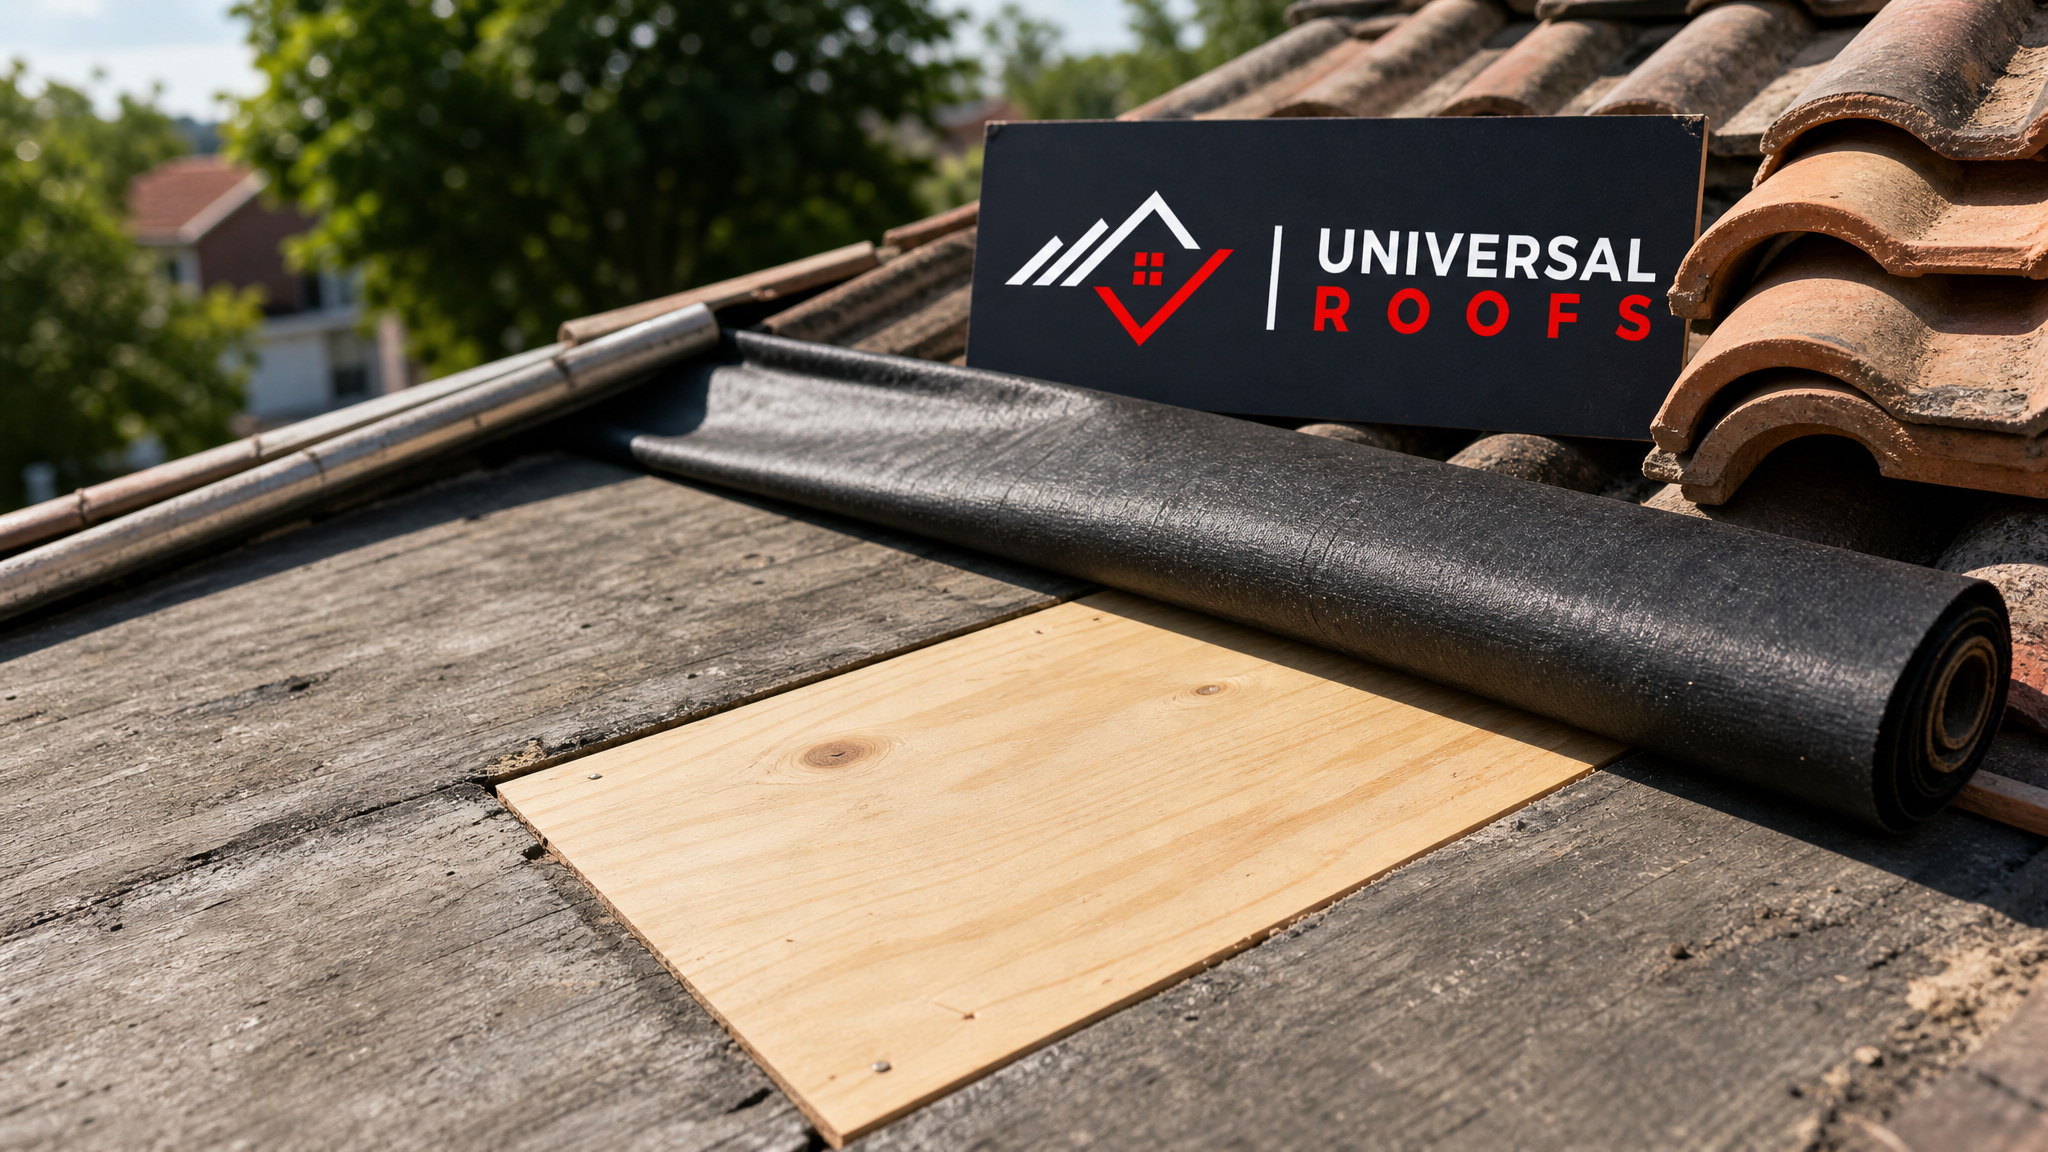
When the wood deck is still structurally sound but the underlayment has failed across a wider section — a common finding on tile roofs installed 20 or more years ago with older felt-based products — the better approach is to remove the tiles in that section, strip the old underlayment entirely, and install a new self-adhered or synthetic membrane before resetting the tiles.
This method addresses the actual waterproofing layer rather than just the wood, which matters because even a perfectly repaired deck will decay again if it sits under a compromised membrane. Modern self-adhered ice-and-water membranes perform significantly better in freeze-thaw conditions than the asphalt-saturated felt commonly used in older installations, and they seal tightly around every fastener penetration, which is often exactly where the original leak began.
During this process, battens or furring strips are also inspected and replaced if they show any softness, since these thin strips of wood are usually the first thing to rot and the last thing anyone checks. Where a deck overlay is used instead of full tear-off, a thin layer of new sheathing is fastened directly over the sound existing deck to create a smooth, solid nailing surface before the new underlayment and tiles go down.
Method 3: Full Deck Replacement in Widespread Decay Zones
Some tile roofs, particularly those where ventilation problems have gone unaddressed for years or where a slow leak has been active for a long time before discovery, show decay across an entire roof plane rather than in isolated spots. In these cases, the only reliable fix is full deck replacement: removing all tiles in the affected plane, tearing off the old decking down to the rafters, and installing new sheathing across the entire section.
Full deck replacement is more disruptive and costs more than the first two methods, but it is the only approach that guarantees there is no hidden decay left behind to resurface later. It also gives the opportunity to correct ventilation issues at the source — adding or upgrading soffit and ridge venting, for example — before the new deck and underlayment go back on. Anyone facing this scope of repair should also have their attic ventilation assessed at the same time, since decking replaced without fixing the underlying moisture source is at real risk of decaying again.
For homes where decay has spread across multiple planes or where the tiles themselves are also reaching the end of their service life, full deck replacement is often bundled with a broader roof replacement rather than treated as a standalone repair, since the labour of removing and resetting tiles is a large share of the cost either way.
Method 4: Structural Rafter and Truss Repair for Advanced Decay
The fourth and most involved method addresses cases where decay has progressed beyond the sheathing and into the structural framing — rafters, trusses, or ridge beams that have softened, split, or lost their load-bearing capacity. This is the least common scenario but the most serious, and it typically surfaces after long-term hidden leaks, roof valleys, or chimney flashings that failed years earlier without visible symptoms indoors.
Structural repair may involve sistering new lumber alongside compromised rafters, replacing sections of a truss under engineered supervision, or in severe cases reframing an entire roof plane. Because this work affects the load path of the roof, it typically requires coordination with a structural engineer or, at minimum, careful assessment by an experienced contractor before any cutting begins, and it may trigger a permit requirement depending on the scope, which is worth confirming with your local municipality.
This method is rarely undertaken in isolation. It is almost always paired with full deck replacement, since exposing structural framing requires removing all the decking above it. Homeowners facing this level of damage should treat it as an opportunity to evaluate the entire roof system rather than a single repair, including checking whether a skylight or older skylight replacement nearby may have contributed to the original leak path, since skylight curbs are a frequent source of long-term hidden moisture intrusion on tile roofs.
Comparing the Four Repair Methods
Choosing the right method comes down to how far the decay has spread and whether the structural framing is affected. The table below summarizes how the four approaches compare.
| Method | Scope of Damage | Typical Duration | Relative Cost |
|---|---|---|---|
| 1. Localized deck sistering / spot patching | Single small area, isolated cause | 1 day | Lowest |
| 2. Underlayment replacement with deck overlay | One roof section, membrane has failed | 2-3 days | Moderate |
| 3. Full deck replacement | Entire roof plane, widespread moisture | 4-7 days | High |
| 4. Structural rafter/truss repair | Framing compromised, load-bearing concern | 5-10+ days | Highest |
Estimated GTA Repair Costs by Method
Exact pricing always depends on roof pitch, tile type, access, and how much of the roof needs to come up, but the ranges below reflect typical costs homeowners across the GTA can expect to budget for in 2026.
| Repair Method | Typical GTA Cost Range | Includes | Best For |
|---|---|---|---|
| Spot patching / sistering | $450 – $1,500 | Tile removal/reset, small sheathing patch | Single leak point, chimney or vent area |
| Underlayment + deck overlay | $2,000 – $6,000 | Section tear-off, new membrane, tile reset | Aging felt underlayment, one roof plane |
| Full deck replacement | $6,000 – $15,000+ | Full tear-off, new sheathing, membrane, ventilation review | Widespread rot, long-term leak history |
| Structural rafter/truss repair | $8,000 – $25,000+ | Framing repair or replacement, engineering review, full deck | Sagging roofline, compromised framing |
Signs You Need Professional Repair Now
Because decay is progressive, waiting rarely improves the outcome and almost always increases the eventual cost. The signs below indicate that a professional assessment should not be delayed.
| Warning Sign | Likely Cause | Recommended Action | Urgency |
|---|---|---|---|
| Ceiling stain that grows after rain | Active leak reaching interior finishes | Book an inspection within days | High |
| Soft or bouncy feel on the roof | Decking has lost rigidity | Avoid walking further; call a contractor | High |
| Musty odour in upper-floor rooms | Trapped moisture and possible mould growth | Schedule attic and roof inspection | Medium-High |
| Sagging visible from the attic | Rafter or truss weakening | Structural assessment before repairs | Urgent |
| Shifted or slipping tiles | Fasteners no longer holding in soft wood | Full deck inspection recommended | Medium |
Preventing Future Rot and Decay Beneath Tile Roofs
Repair is only half the equation — the goal is to prevent decay from returning once the fix is complete. A few habits make a measurable difference over the life of a tile roof in our climate.
Schedule a professional inspection every one to two years, ideally in spring after the freeze-thaw season and again before winter. Keep gutters and downspouts clear so meltwater and rain drain properly instead of backing up under the eaves. Confirm your attic has balanced intake and exhaust ventilation, since this single factor prevents the majority of condensation-driven decay that has nothing to do with the tiles themselves. Have flashing around chimneys, skylights, and valleys checked annually, as these transition points fail well before the tile field does. And whenever any tiles are removed for any reason — even for satellite dish work or solar panel installation — insist that the underlayment beneath them is inspected before the tiles go back on.
Homeowners in Toronto, Mississauga, Brampton, Vaughan, Markham, Oakville, and across the Toronto, Peel Region, York Region, Halton Region, and Durham Region areas each face slightly different exposure depending on tree cover, roof orientation, and how exposed the home is to prevailing winter winds, which is why a local, in-person inspection is always more reliable than a generic maintenance schedule.
How Contractors Diagnose the Extent of Hidden Decay
Before recommending any of the four methods above, a competent contractor will investigate the extent of the problem rather than guessing from surface symptoms alone. This typically involves a physical walk of the roof to feel for soft spots underfoot, a visual attic inspection from below looking for staining, mould, or daylight through gaps, moisture meter readings taken directly on exposed decking where accessible, and selective removal of a small number of tiles around the suspected problem area to visually confirm deck condition before committing to a repair scope.
This diagnostic step matters because underestimating the damage leads to repeat callbacks, while overestimating it leads homeowners to pay for a full deck replacement when a targeted patch would have solved the problem. A transparent contractor will show you the exposed decking before closing anything back up, and will explain in plain terms why a given method is being recommended. You can read how past clients describe this process on our reviews page, and browse commonly asked questions on our FAQ page.
When a Repair Isn’t Enough: Recognizing the Line Between Repair and Replacement
Not every tile roof with decay underneath needs to be replaced outright, but there is a point where repeated spot repairs stop making financial sense. As a general rule, if decay is found in more than two or three separate locations across the same roof, if the tiles themselves are also cracking, fading, or reaching 40+ years of service, or if the underlayment across the whole roof is the original felt from installation, it is usually more cost-effective in the long run to plan a full roof replacement rather than continuing to chase individual leaks one at a time.
On the other hand, a well-maintained tile roof with one isolated area of decay — say, around a single chimney flashing — is an excellent candidate for a targeted repair that can extend the roof’s life by many more years without the expense of a full replacement. An honest assessment from an experienced roofer, backed by an actual look at the exposed decking rather than a guess from the ground, is the only reliable way to know which side of that line your roof falls on. To learn more about our company’s approach and experience with tile roofing across the region, visit our about page.
What are the best methods for repairing rot or decay underneath tile roofs?
How do I know if my tile roof has rot or decay underneath it?
Can rot underneath tile roofing be repaired without removing all the tiles?
What causes decay to form underneath a tile roof in the first place?
How much does it cost to repair rot or decay under a tile roof in the GTA?
Should I repair or fully replace a tile roof with widespread deck rot?
Need Help With 4 Best Methods for?
Whether you’re dealing with a single soft spot near a chimney or suspect widespread decay across an entire roof plane, getting an accurate diagnosis is the first step toward the right fix. Universal Roofs has been assessing and repairing hidden deck damage under tile roofs across the GTA since 2005, and we always show homeowners exactly what we find before recommending a repair scope.
Call us today at (416) 732-2421 or request a free inspection to get started.
Universal Roofs proudly serves Toronto, Mississauga, Brampton, Vaughan, Markham, Oakville and the GTA since 2005.