
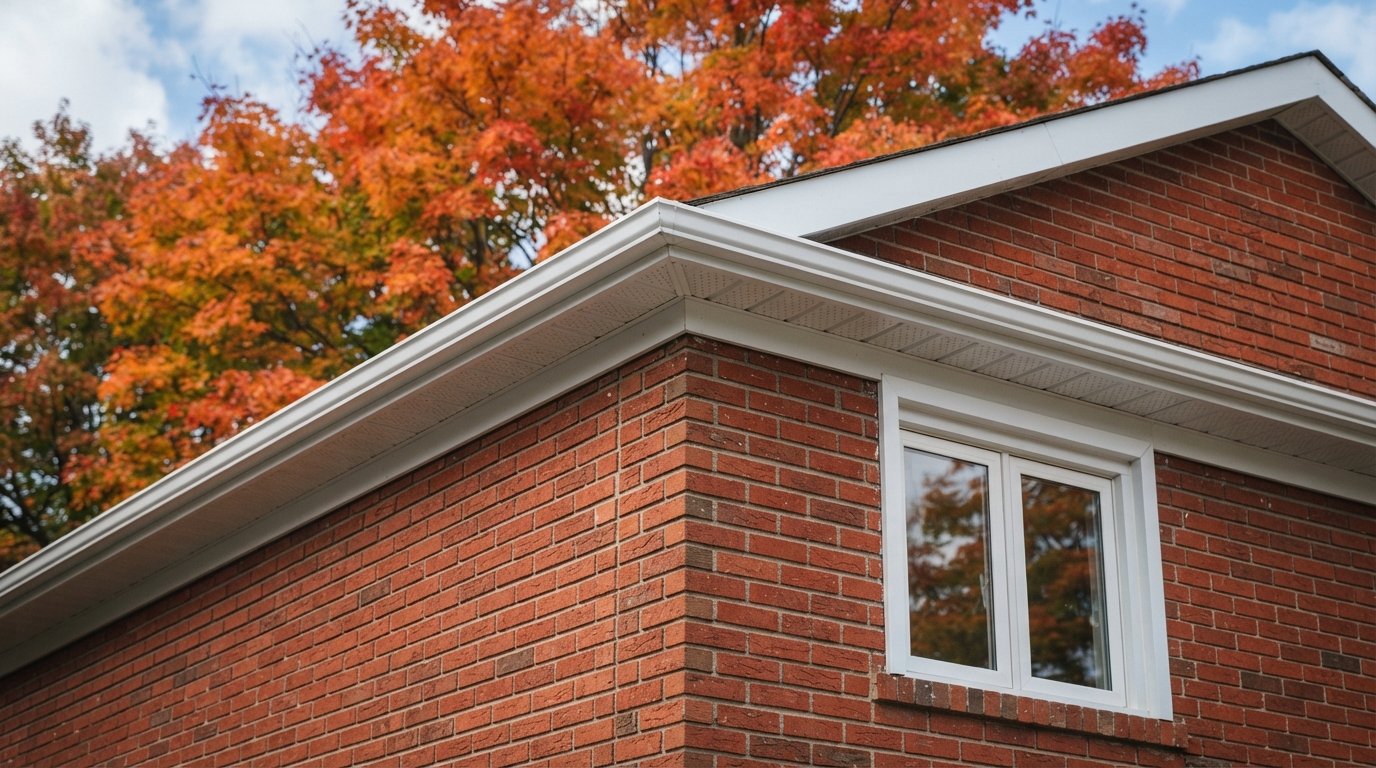
Aluminum capping is the bent metal trim that covers wood fascia boards, window frames, door frames and other exterior wood on a great many GTA homes. Done well, it ends the cycle of scraping and repainting and gives the exterior crisp, clean lines. Done badly, it can hide rotting wood that keeps getting worse behind a shiny cover until the eavestroughs start pulling away from the house.
The quality of a capping job is decided before the first bend: by what the installer does about soft wood, how the top edge meets the drip edge and which joints get caulk. Autumn is a common time to have it done, often alongside new eavestroughs, because the fascia is exposed anyway.
What Aluminum Capping Is And Where It Goes
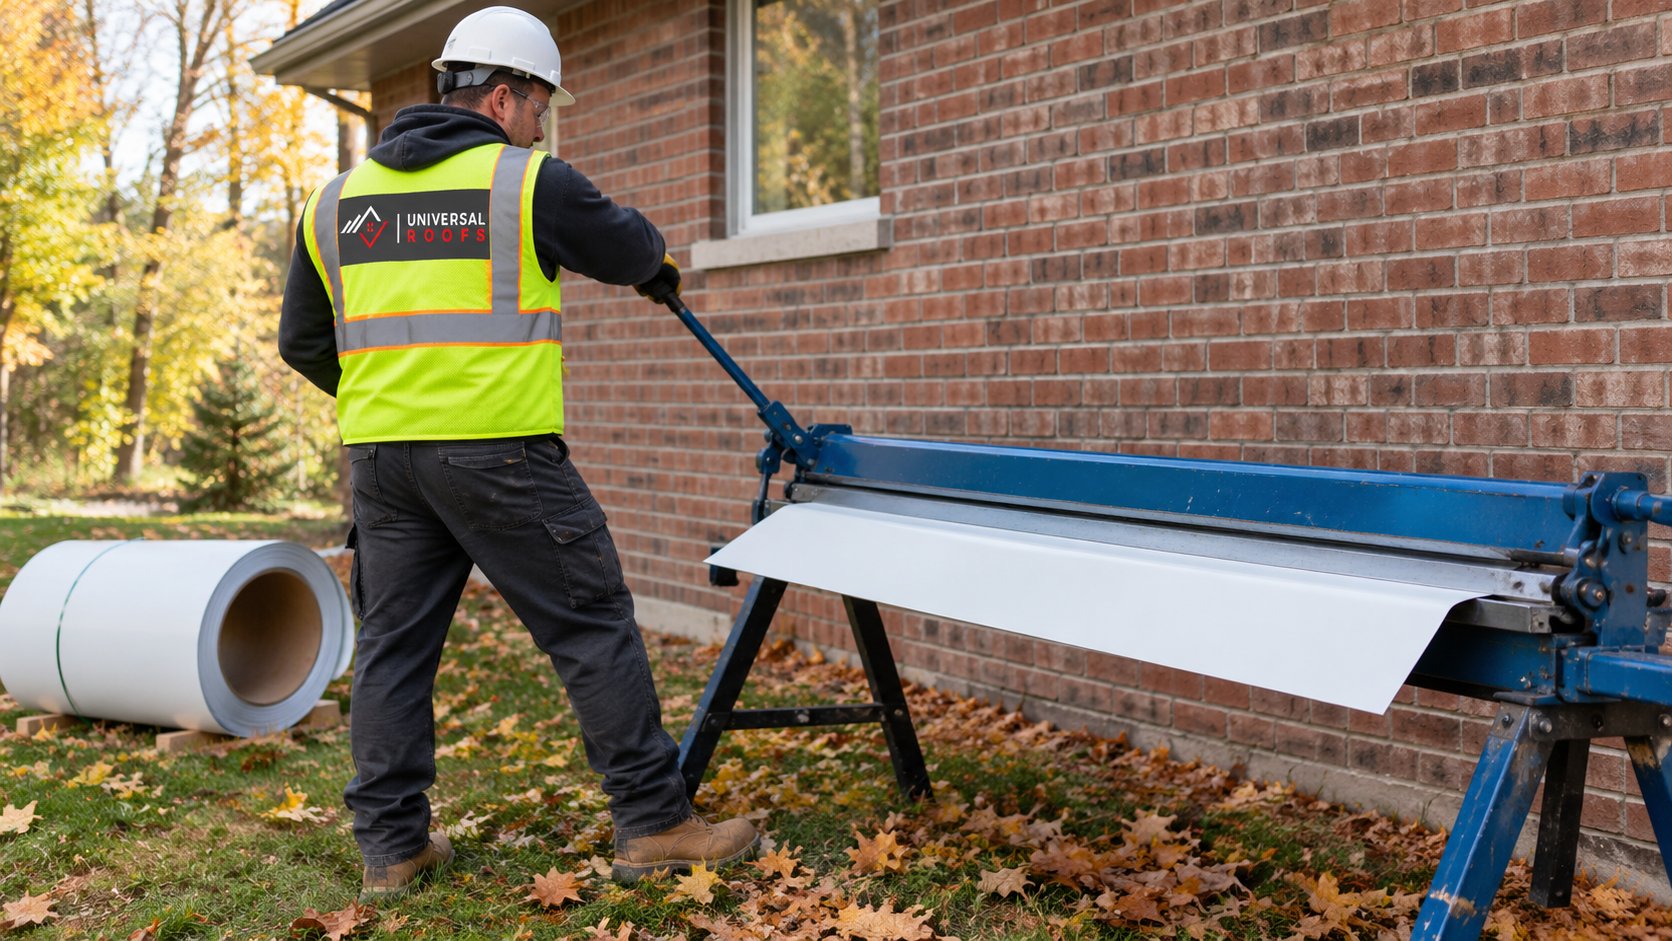
Capping, also called cladding or trim wrap, is made from prepainted aluminum coil stock, a thin sheet supplied in rolls with a baked finish on one or both sides. Installers cut it to width and bend it on a sheet metal brake to fit the exact shape of the wood underneath. The finished pieces are fastened over the wood, overlapping at joints, so the wood is shielded from sun and rain.
Common places for aluminum capping on a house include:
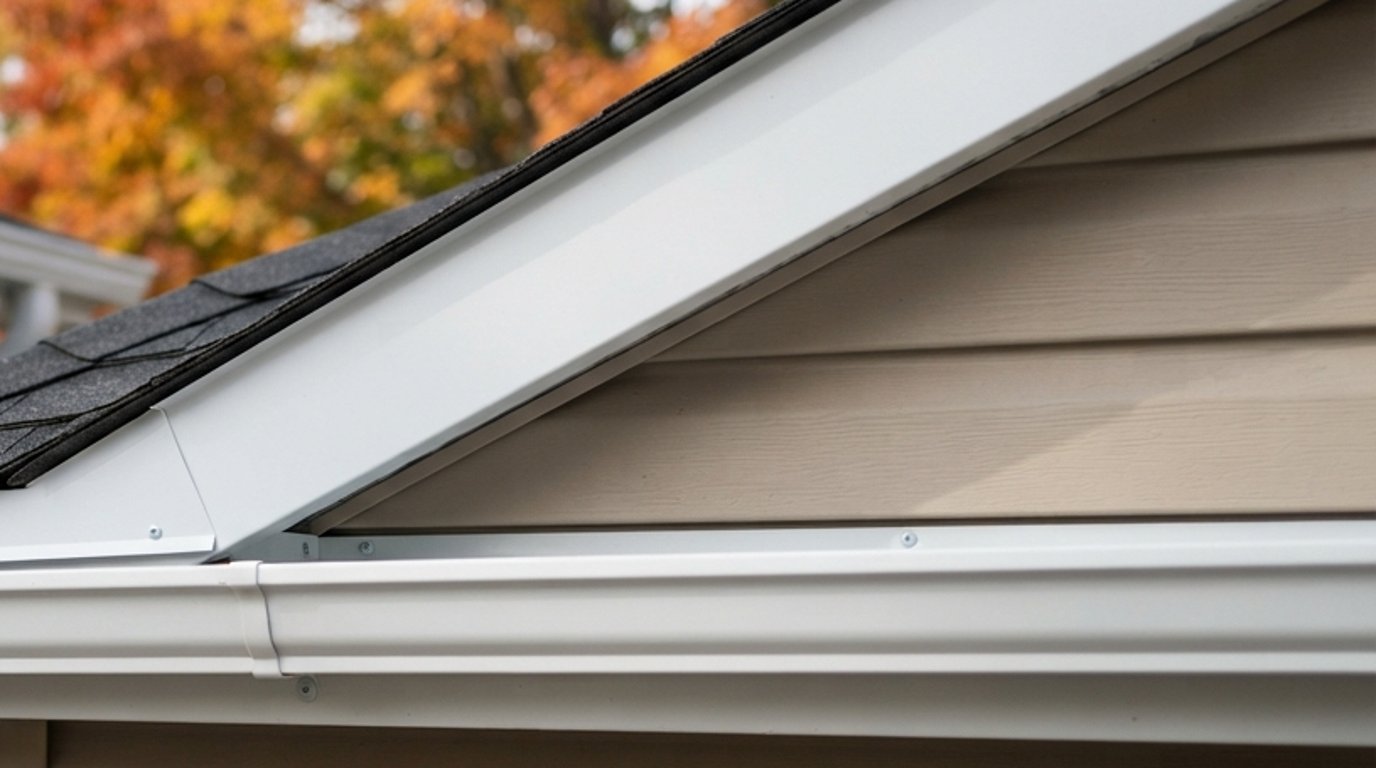
- Fascia boards along the eaves and rakes, where the term fascia wrap is often used.
- Window frames and brickmould, including sills and the exterior trim around each opening.
- Door frames, including front entries, side doors and patio doors.
- Garage door jambs and headers, which take a beating from weather and vehicles.
- Porch posts, beams and rake boards on older homes.
Because capping sits at the roofline next to soffits and eavestroughs, it is often planned as part of a wider exterior job. Our siding, soffit and fascia work covers fascia repair, aluminum soffit and capping together so the pieces fit and drain correctly.
Brake-Formed Versus Pre-Formed Aluminum Capping
There are two main ways to cover fascia and trim with aluminum. Both are common in the GTA, and many jobs use a mix.
Brake-formed capping
The installer sets up a portable brake on site, cuts coil stock into strips and bends custom profiles for each surface: a fascia board with a lip that tucks under the drip edge, a window head with a slight slope, a sill with a drip edge on the front. The advantage is fit. Older houses rarely have consistent trim sizes, and custom bending accommodates odd widths, steps and angles. The result depends heavily on the installer’s skill: crisp, straight bends and hemmed edges look tailored; sloppy bends, crooked laps and visible nail lines look cheap.
Pre-formed fascia
Manufacturers also make pre-formed aluminum fascia in standard widths and lengths, designed to work with their soffit systems. It installs quickly and has consistent factory bends, which can look very clean on newer homes with standard fascia boards. It is less adaptable on irregular trim, and it still relies on proper fastening and lapping.
| Factor | Brake-formed capping | Pre-formed fascia |
|---|---|---|
| Fit on older, irregular trim | Excellent, bent to suit each surface | Limited to standard sizes |
| Appearance | Depends on installer skill; can be very crisp | Consistent factory bends |
| Window and door trim | The standard approach | Not generally used |
| Speed on long, straight fascia runs | Slower, every piece is bent on site | Faster |
| Colour range | Wide, through coil stock lines | Usually matched to the maker’s soffit and fascia colours |
| Resistance to waviness | Improved with hems and stiffening bends | Factory profile adds some stiffness |
Why Covering Rot With A Fascia Wrap Fails
The most common shortcut in this trade is wrapping rotten wood. It looks fine on the day the job is finished, and that is the problem. Aluminum capping is a cover, not a cure.
What happens behind the metal
Rot needs moisture, and capping does not remove moisture already in the wood. Worse, it slows drying. Water that reaches the wood through overflowing eavestroughs, ice damming at the eaves, a missing drip edge or gaps at laps now has a harder time escaping. The rot continues hidden, and the fascia gradually loses strength.
Why it matters at the roofline
Eavestroughs are usually fastened through the fascia. When the board behind the metal softens, hangers and screws lose their grip, and troughs begin to sag, pull away or tilt so water spills behind them. Heavy autumn rain loaded with leaves, followed by winter ice, puts real weight on those fasteners. A failed fascia under a fresh fascia wrap often only shows up when a section of eavestrough drops.
What should happen instead
- Remove old capping or eavestroughs where needed to see the wood.
- Probe the fascia and the rafter tails behind it. Soft wood is cut out and replaced with sound lumber.
- Check the roof edge: drip edge, eave protection and the first course of shingles.
- Correct the water source, whether that is an overflowing trough, a missing drip edge or a poorly sloped section.
- Then install the aluminum capping and rehang the eavestroughs.
Rafter tails and roof sheathing rot along with fascia more often than owners expect. When the damage runs into the roof edge, it may need a roof repair before the trim goes back on.
Colours, Gauge And Finish
Choosing a colour
Coil stock comes in a wide range of colours, usually matched to the colour lines of the same company’s soffit and eavestrough products. Most homeowners match capping to either the windows or the eavestroughs. White is the most common, with black, greys, browns and almond also popular. Two tips:
- Look at the actual material outdoors. Brochure colours rarely look the same in daylight next to brick and shingles.
- Consider your windows. If you plan to replace windows within a few years in a different colour, capping chosen to match today’s windows may look wrong later.
Like any painted metal, coil finishes fade and chalk slowly over many years, darker colours more noticeably. Coil stock with a higher-performance paint system may hold colour better; ask what finish is being supplied.
Gauge and stiffness
Coil stock thickness is described in thousandths of an inch. Standard trim coil is thin, and heavier grades are available at a higher cost. Thin material is easier to bend and works well on narrow trim, but on wide, flat fascia it can show waviness, known as oil-canning, and dents more easily from ladders and hail. Heavier coil, or adding small stiffening bends and hemmed edges, reduces that effect. Ask the installer which thickness they are quoting and why.
Fasteners
Capping is usually fastened with small colour-matched trim nails made of aluminum or stainless steel. Plain steel nails can rust and streak, and mixing metals can cause corrosion over time. Fasteners should be placed where laps and hems hide them, and spaced to let the metal move with temperature changes without buckling.
Where Caulking Matters And Where It Does Not
Caulking is where many capping jobs go wrong in both directions: too little at the joints that need it, and too much in places that should be left to drain. The principle is simple. Capping should shed water like shingles do, with each upper piece lapped over the lower piece, and caulk should seal the places where the metal meets a different material.
| Location | Caulk? | Why |
|---|---|---|
| Where window capping meets the window frame | Yes | Stops water running between the trim and the window unit |
| Where capping meets brick, stone or stucco | Yes | Closes the gap between dissimilar materials |
| Laps between capping pieces on fascia | Generally no | Proper laps shed water; caulk can trap moisture and fail |
| Bottom edge of window sill capping | No | Water must be able to drip off and escape |
| Top of fascia capping under the drip edge | No | The drip edge overlaps the capping to shed water |
| Penetrations through capping, such as wires or hose bibs | Yes | Seals the hole around the item |
Choosing and applying sealant
Use an exterior sealant rated for aluminum and for the adjacent material, applied to clean, dry surfaces within the temperature range on the label. Many sealants need warmer conditions to cure properly, which matters on cool autumn days. Colour-matched sealant looks neater, and the bead should be tooled to a smooth concave profile. Even good sealant ages, so check the joints around windows every few years.
Window And Door Capping Details
Windows and doors are where water most often gets behind trim, so details matter more here than on long fascia runs.
- Heads. The capping at the top of a window should slope slightly outward or carry a drip so water does not sit on top or run back toward the frame.
- Sills. Sill capping must slope away from the window with a front drip edge. Water that pools on a flat sill eventually finds a way in.
- Corners. Neat folded or lapped corners, rather than butt joints filled with caulk, last longer and look better.
- Underlying wood. As with fascia, soft brickmould or sills should be repaired or replaced before capping goes on.
- Window condition. Capping can refresh sound windows, but it will not fix failed seals, rotting sashes or leaking units.
Getting The Order Right At The Roofline
On fascia, the sequence of work decides whether the aluminum capping sheds water or funnels it behind the metal. A careful job at the eaves usually runs like this:
- Take down the eavestroughs on the section being capped, so the full face of the fascia is visible and the hanger holes can be checked.
- Repair the wood. Soft fascia, rafter tails or sub-fascia are replaced, and loose boards are refastened into solid framing.
- Check the drip edge. The metal edge at the bottom of the roof should overhang the fascia so water drips clear. If it is missing or bent, it is corrected before capping, because the top of the capping needs to sit behind it.
- Install soffit channels and soffit where they are being replaced, so the bottom of the fascia capping can lap over the soffit edge.
- Bend and fit the capping, starting at the end away from the main viewpoint so laps face away from the street, with the top edge tucked under the drip edge.
- Rehang the eavestroughs with hangers screwed through the capping into solid wood, checking slope toward the downspouts.
Skipping step three is a common cause of staining and rot behind new aluminum capping. Water running off the shingles finds the top edge of the metal and runs down the face of the wood instead of dripping into the trough.
Inspecting Existing Aluminum Capping
If your house already has capping, a careful look from the ground, ideally with binoculars or a phone camera zoomed in, can reveal whether the wood behind it is in trouble:
- Soft spots. On window and door trim you can reach, capping that gives way when pressed lightly often has rotten wood behind it.
- Sagging or tilted eavestroughs. These frequently mean hanger screws have lost grip in softened fascia.
- Lifting laps and popped nails. Gaps at joints let water in and suggest movement in the wood.
- Dark streaks or peeling paint below trim. Water is escaping from behind the metal.
- Cracked or missing sealant at windows. The joint between capping and the window frame needs periodic attention.
Late autumn, once the leaves are down and the troughs are cleaned, is a good time for this check, because overflow marks and staining from autumn rain are fresh and easy to see.
Cost Considerations
Capping is usually priced by the linear foot for fascia and by the opening for windows and doors. Wood repairs underneath are typically extra. The figures below are rough estimates only.
| Item | Estimated range in CAD | What moves the number |
|---|---|---|
| Fascia capping | Often $8 to $18 per linear foot | Height, access, coil grade, number of corners |
| Window frame capping | Often $150 to $400 per opening | Window size, sill condition, brick or siding surround |
| Entry or patio door frame capping | Often $200 to $500 per opening | Door width, threshold detail, sidelights |
| Garage door jambs and header | Often $200 to $500 per door | Door width, damage to wood jambs |
| Replacing rotted fascia boards before capping | Often $10 to $25 per linear foot added | Extent of rot, rafter tail repairs, eavestrough removal |
Every house is different, so an on-site assessment is the only way to get a reliable price for aluminum capping and any wood repairs it needs.
Hidden fascia rot is easiest to catch when the capping and the eavestroughs are looked at together, which is how our York Region roofing, eavestroughs and attic work team approaches a roofline inspection.
Questions About Bent Aluminum Trim
How long does aluminum capping last?
Can you put aluminum over rotten fascia?
Is brake-formed or pre-formed fascia better?
Should all capping joints be caulked?
Why does my aluminum fascia look wavy?
Can aluminum capping be painted?
Get A Quote For Aluminum Capping
If your fascia and window trim need constant painting, or you suspect soft wood behind old metal, we can inspect the roofline and openings and recommend the right mix of repairs and capping. Universal Roofs handles fascia, soffit, eavestroughs and capping together so everything fits and drains properly.
Call us today at (416) 732-2421 or request a free estimate.
Fascia, trim and roofline work for York Region homes and across the GTA.