
Noticing a crack running through your skylight glass is unsettling, and understandably so. A skylight sits directly over your living space, and a compromised pane means water intrusion, energy loss, and in some cases a real safety hazard from falling glass fragments. The good news is that cracked skylight glass is a well-understood problem with predictable causes, and in most cases a clear path to a proper repair.
This guide walks through exactly why skylight glass cracks in the first place, how to tell the difference between a cosmetic surface crack and a structural failure, what your realistic repair and replacement options are, and how to prevent it from happening again. We will also cover the safety considerations that make this one of the few home repairs where calling a professional is almost always the right call, not just the cautious one.
Whether your skylight is a decade-old fixed unit or a newer vented model, the fundamentals are the same across the Greater Toronto Area: our climate puts unusual stress on rooftop glazing, and understanding that stress is the first step toward a lasting fix.
Why Skylight Glass Cracks: The Most Common Causes
Skylight glass rarely cracks for just one reason. Most cracks are the result of a combination of age, temperature stress, and installation quality catching up with the unit all at once. Understanding the actual mechanism helps you judge how urgent the repair is and whether the crack is likely to spread.
Thermal Stress and Freeze-Thaw Cycling
Toronto’s climate is particularly hard on rooftop glazing because of how dramatically temperatures swing, sometimes within the same day. A skylight pane that is sitting at -15°C overnight can be hit with direct winter sun and warm indoor air rising against the interior surface simultaneously. Glass expands and contracts at a fixed rate, and when one part of the pane heats or cools faster than another, the resulting stress can exceed the glass’s tensile strength. This is called thermal stress cracking, and it typically produces a crack that starts at the edge of the pane, where the glass is held rigidly by the frame, and travels inward.
Impact Damage
Hail, falling tree branches, ice dislodged from a chimney, or debris kicked up by high winds are the most obvious cause of cracked skylight glass. Impact cracks tend to have a visible point of origin, often with a small chip or starburst pattern, and radiating fracture lines extending outward from that point. Even a relatively minor impact can crack tempered glass because tempered panes are designed to shatter into small, blunt pieces rather than crack in a single line, which is a safety feature, not a flaw.
Structural Movement and Poor Installation
If the skylight curb, the frame it’s mounted on, was built out of square, or if the roof structure has settled or flexed over time, the glazing can be placed under constant mechanical stress it was never designed to handle. This is more common with older installations or skylights that were retrofitted into a roof rather than installed as part of new construction. A frame that is even a few millimetres out of true can concentrate load on one corner of the glass, and a crack will eventually appear there.
Age and Seal Failure
Most residential skylights use insulated glass units, two or three panes of glass separated by a spacer and sealed with an inert gas in between, similar to a modern window. Over 15 to 25 years, the edge seal on these units degrades. Once moisture gets between the panes, condensation, fogging, and eventually stress cracking become far more likely because the seal was also providing some structural support to the assembly.
Manufacturing Defects
Less common, but worth ruling out, particularly if a skylight cracks with no obvious impact and within the first few years of installation, a manufacturing flaw such as nickel sulphide inclusion in tempered glass can cause spontaneous cracking with no external trigger at all. This is rare, but reputable installers will recognize the pattern immediately.
| Cause | Typical Crack Pattern | Urgency | Usually DIY-Fixable? |
|---|---|---|---|
| Thermal stress | Straight line from edge inward | Moderate to high | No |
| Impact damage | Starburst from a point of contact | High | No |
| Structural movement | Crack near a corner or fastener point | High | No |
| Seal failure (older unit) | Fogging first, cracking later | Moderate | No |
| Manufacturing defect | Sudden, no visible cause | High | No |
Is a Cracked Skylight an Emergency?
Not every crack requires you to drop everything, but some genuinely do. Here is how to triage what you are looking at.
A hairline crack confined to the outer pane of a double or triple-glazed unit, with no visible gap and no active leaking, is a repair you should schedule promptly but is unlikely to fail catastrophically overnight. A crack that extends through the full thickness of a single pane, that you can feel air moving through, that has a visible gap you could slide a piece of paper into, or that is on the interior-facing pane directly above living space, is a same-week priority. If glass has already begun to sag, if you can see daylight through a fracture that wasn’t there before, or if fragments have fallen, that is an emergency: tarp it from the exterior if you can safely do so, keep the room below clear of foot traffic, and call for an inspection immediately.
The reason urgency matters so much with skylights specifically, compared to a cracked window at ground level, is gravity and exposure. A failing skylight pane is directly over furniture, flooring, and people, and it is also the single most exposed piece of glazing on your entire house to wind-driven rain and snow load. A small crack today becomes a saturated ceiling cavity and drywall repair within a few storms if it’s ignored.
DIY vs. Professional Repair: What You Can and Cannot Safely Do
There is a meaningful difference between temporary stabilization, which a comfortable homeowner can sometimes manage, and an actual repair, which almost always requires a professional.
What is reasonable to do yourself: from the inside, you can apply clear packing tape or plastic sheeting over a small hairline crack as a short-term measure to slow air infiltration until a technician arrives. You can also monitor the crack daily with a photo taken from the same angle to see whether it is spreading. What is not reasonable, and frankly not safe, is climbing onto a sloped or high roof to inspect or tape a skylight from the exterior, attempting to remove or replace a glazing panel yourself, or using clear silicone caulk as a “permanent fix” over an actual crack, because silicone does not restore structural integrity and often traps moisture against the crack, accelerating failure.
Tempered and laminated glass units used in most skylights also require specific handling. Tempered glass under stress can shatter completely and suddenly if disturbed incorrectly, and laminated glass, while safer because it holds together when cracked, still needs to be cut free from its interlayer and frame sealant with the right tools. Professional roofers who work with skylights regularly carry the fall protection, the correct glazing sealants, and, critically, replacement units or the ability to source an exact match, which is not something most hardware stores stock.
Step-by-Step: How Professionals Repair or Replace Cracked Skylight Glass
Understanding the process helps you know what to expect when you book a repair, and it is also a useful way to evaluate whether a contractor is doing the job properly.
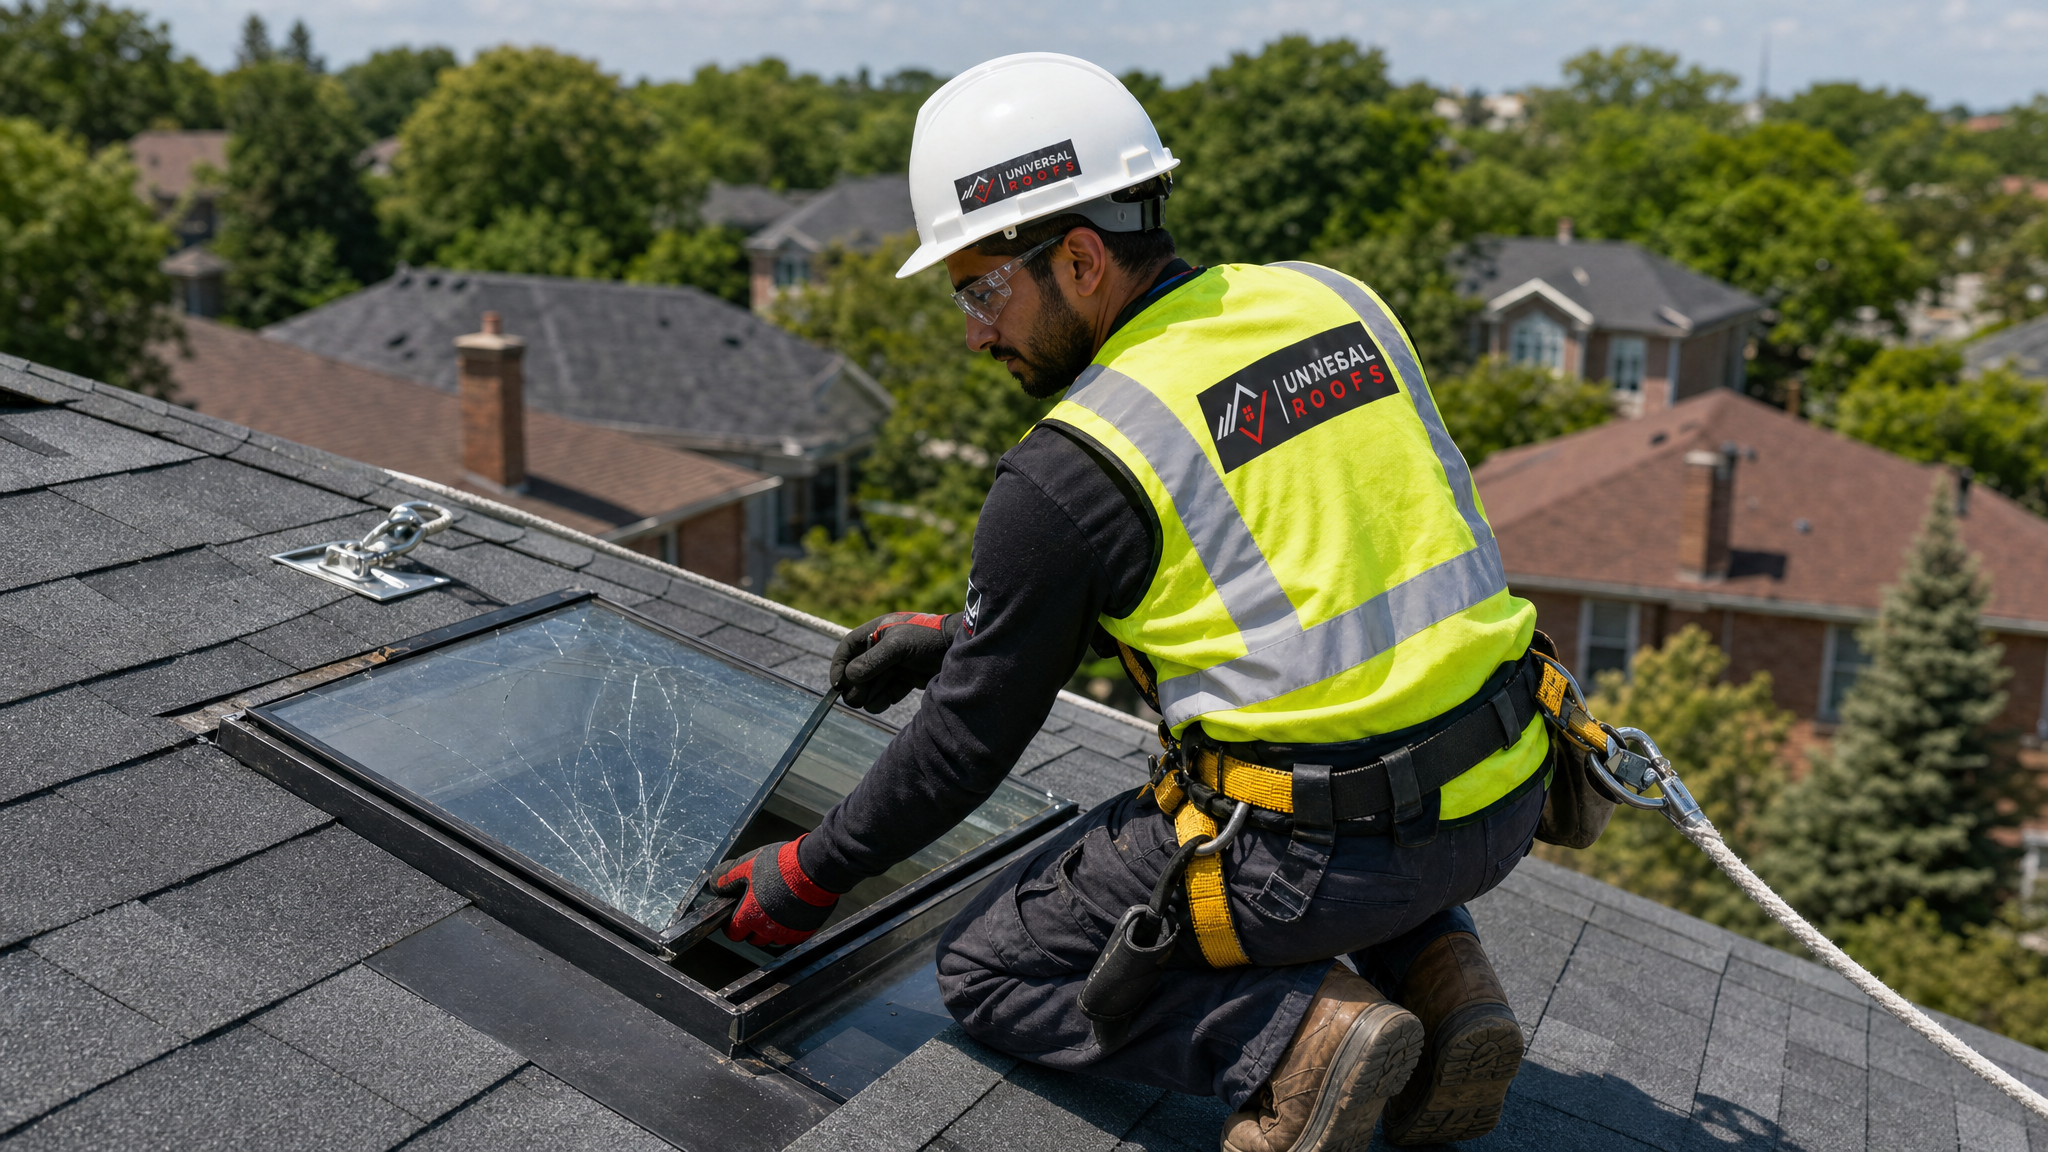
- Assessment and measurement. The technician inspects the crack pattern, confirms whether it is isolated to one pane or has compromised the full unit, and takes precise measurements of the skylight opening, curb, and glazing type.
- Weatherproofing the opening. If the crack is actively leaking or there is any delay before the replacement pane arrives, the opening is temporarily sealed with a weather-resistant membrane or board to protect the interior.
- Sourcing the correct replacement unit. Skylight glass is not universal. The replacement needs to match the exact dimensions, glazing type (tempered, laminated, or insulated), Low-E coating, and gas fill of the original, or performance and warranty coverage can be compromised.
- Removing the damaged glazing. Old sealant, glazing clips, and retaining caps are removed, and the cracked unit is carefully lifted out without disturbing the surrounding flashing.
- Inspecting the frame and flashing. This step gets skipped by less careful contractors, but it matters. The curb and flashing are checked for water damage, rot, or corrosion, since a compromised frame is often what caused the crack in the first place.
- Installing the new glazing unit. The replacement pane is set into fresh glazing tape or sealant, secured with retaining clips or caps to the manufacturer’s torque specification, and capped.
- Final weatherseal and test. A bead of exterior-grade sealant finishes the perimeter, and the installer typically performs a water test to confirm the seal before considering the job complete.
| Repair Method | Best For | Typical Turnaround | Longevity |
|---|---|---|---|
| Temporary tarp / patch | Emergency stabilization before repair | Same day | Days to weeks |
| Single-pane glazing replacement | Crack limited to outer or inner pane only | 1-3 days | 10-20+ years |
| Full insulated glass unit (IGU) replacement | Crack through full unit or seal failure | 2-5 days (custom order) | 15-25 years |
| Full skylight replacement | Cracked glass plus damaged frame, curb, or flashing | 1-2 days once scheduled | 20-30 years |
What Does It Cost to Repair Cracked Skylight Glass?
Costs vary with skylight size, glazing type, and roof accessibility, but homeowners in the GTA should generally expect the following ranges. These figures assume a standard residential skylight and a straightforward, accessible roof; steep pitches, high roofs, or custom or oversized units will run higher.
| Job Type | Typical Cost Range (CAD) | Notes |
|---|---|---|
| Single-pane tempered glass replacement | $350 – $700 | Most common for outer-pane impact cracks |
| Full insulated glass unit replacement | $600 – $1,400 | Depends on Low-E coating, gas fill, and size |
| Glazing plus flashing repair | $800 – $1,800 | Needed when water has reached the frame |
| Full skylight unit replacement | $1,200 – $3,500+ | Recommended when frame or curb is also compromised |
If your skylight is still under a manufacturer’s warranty, some or all of the glazing cost may be covered, particularly for a defect-related crack. It is also worth checking your homeowner’s insurance policy, since impact damage from hail or falling debris is often covered as a peril, sometimes with the deductible being the only out-of-pocket cost.
Repair vs. Full Skylight Replacement: How to Decide
Not every cracked pane means the whole unit needs to go, but there are clear signals that point toward full replacement rather than a glazing-only repair.
Consider a full skylight replacement rather than a glass-only repair when the unit is more than 15 to 20 years old, since the frame seals and hardware are likely nearing end of life even if the crack is repaired. It also makes sense when the crack coincides with visible fogging or condensation between panes, which indicates the whole insulated unit has failed, not just the surface glass. If the curb or flashing shows rot, rust, or repeated past leak staining, replacing just the glass leaves the underlying problem in place. And if you are already noticing the skylight is drafty, hard to open (for vented models), or visibly discoloured from UV exposure, a crack is often the final straw on a unit that was already due for an upgrade.
On the other hand, a straightforward glazing repair is the right call when the frame, curb, and flashing are all in good condition, the crack is recent and isolated to impact damage, and the skylight itself is under roughly 12 to 15 years old. In those cases, replacing the glass alone restores the unit to full performance at a fraction of the cost of a new install.
Preventing Future Cracks: Maintenance That Actually Helps
While you cannot fully eliminate the risk of a stray branch or a hard hailstorm, most non-impact cracks are preventable with basic seasonal attention.
- Trim overhanging branches that could drop debris directly onto the skylight during wind or ice events.
- Clear debris and standing snow from the skylight surface and surrounding roof valleys, since trapped snow load and ice damming put uneven pressure on the frame and glass.
- Inspect the flashing and sealant annually, ideally in spring after freeze-thaw season, and again in fall before winter. Cracked or shrinking sealant lets water reach the frame, which weakens the structure supporting the glass.
- Avoid pressure-washing directly onto the glazing, as high-pressure water and rapid temperature change from cold water on warm glass can contribute to thermal stress.
- Have your roof and attic ventilation checked. Poor attic ventilation can cause excess heat buildup that stresses skylight seals from below, accelerating the seal failures described earlier.
- Book a professional inspection as part of a broader roof repair or maintenance visit every few years, since a technician on the roof can spot early frame movement or sealant failure long before it shows up as a crack.
| Maintenance Task | Frequency | Why It Matters | Who Should Do It |
|---|---|---|---|
| Visual inspection from inside | Monthly | Catches early fogging, condensation, or hairline cracks | Homeowner |
| Clear debris and branches | Seasonally | Reduces impact and load risk | Homeowner |
| Snow and ice clearing | As needed in winter | Prevents uneven load and ice damming stress | Homeowner or professional |
| Flashing and sealant check | Annually (spring/fall) | Prevents water intrusion that weakens the frame | Professional |
| Full skylight and roof inspection | Every 2-3 years | Identifies frame movement and aging seals early | Professional |
When to Call a Professional Right Away
A few specific situations should move a cracked skylight from “schedule it this month” to “call today.” Any crack you can feel a draft through, any crack accompanied by an active drip or water stain forming on the ceiling below, any crack near an electrical fixture or recessed lighting, and any crack on a skylight over a stairwell, hallway, or other high-traffic area all warrant an immediate call. Glass fragments, even from laminated or tempered panes that have held together, should never be left directly overhead in a space people walk through regularly.
It’s also worth having a professional look even at cracks that seem minor if your skylight is original to a home built before 2010, since older units are more likely to be single-pane or to use glazing standards that have since been improved, and a full replacement with modern, better-insulated glass may be more cost-effective long term than repairing outdated glazing. If you are ever unsure whether what you’re looking at is urgent, it is always worth a quick call rather than guessing. You can review common questions on our FAQ page or see what other GTA homeowners have experienced on our reviews page before booking an assessment.
Why is my skylight glass cracked with no obvious impact?
Is it safe to leave cracked skylight glass and how to repair it later?
Can I repair cracked skylight glass myself?
How much does it cost to fix cracked skylight glass in the GTA?
Should I repair the glass or replace the entire skylight?
Does homeowner’s insurance cover cracked skylight glass?
Need Help With Your Skylight?
A cracked skylight is not a problem to sit on, but it is also not one you need to solve alone. The team at Universal Roofs has been diagnosing and repairing skylight glazing across the GTA since 2005, and we carry the experience to tell you quickly whether you need a simple glass swap or a full unit replacement.
Call us today at (416) 732-2421 or request a free inspection to get started.
Universal Roofs proudly serves Toronto, Mississauga, Brampton, Vaughan, Markham, Oakville and the GTA since 2005.