
If your roof is more than 15 or 20 years old, the shingles are only half the story. Underneath every layer of asphalt or metal sits the roof deck, the layer of plywood or oriented strand board (OSB) that gives your roof its structural shape and holds every nail in place. When that decking starts to rot, sag, or delaminate, no amount of new shingles will fix the underlying problem. Reviving aging roofs with decking repair is one of the most important, and most misunderstood, parts of roof restoration for homeowners across the Greater Toronto Area.
Toronto’s climate is particularly hard on roof decking. Hot, humid summers followed by freeze-thaw winters create the perfect conditions for moisture to sneak in, condense, and slowly break down wood fibres from the inside out. By the time a homeowner notices a soft spot underfoot or a sagging ridge line, the damage has often been developing for years. This guide walks through exactly how professional roofers diagnose decking problems, what a proper repair looks like step by step, and how to tell the difference between a patch job and a roof that has been genuinely revived.
At Universal Roofs, we have been repairing and replacing roof decking on GTA homes since 2005, and decking problems are one of the most common issues we uncover once a roof is opened up. This article covers the full process, from identifying warning signs to final inspection, so you know what to expect whether you are hiring a contractor or simply trying to understand a quote you already received.
What Roof Decking Is and Why It Fails Over Time
Roof decking, also called sheathing, is the layer of structural panels — usually 7/16″ to 5/8″ OSB or plywood — fastened to your roof trusses or rafters. It is the foundation everything else sits on: underlayment, ice-and-water shield, shingles, and flashing. Decking has two jobs: hold fasteners securely and keep the roof assembly rigid and flat.
Decking fails for a handful of predictable reasons, and almost all of them come back to water:
- Prolonged moisture exposure. A slow leak from cracked flashing, worn shingles, or ice damming lets water seep into the wood fibres. Over months and years, this leads to soft spots, delamination, and eventually rot.
- Poor attic ventilation. Warm, moist air from inside the house rises into a poorly ventilated attic and condenses on the underside of the deck. This is one of the most common causes of decking failure that has nothing to do with the shingles at all — it is worth reviewing your attic ventilation system whenever decking damage is discovered.
- Ice damming. Toronto’s freeze-thaw cycles push meltwater back under shingles at the eaves, where it can sit against the deck for weeks each winter.
- Age and material quality. Older homes sometimes used thinner or lower-grade sheathing that was never rated for the loads and moisture cycles it now has to withstand.
- Physical damage. Fallen branches, animal intrusion, or foot traffic from previous repairs can crack or puncture panels even without a leak being present.
Understanding the root cause matters because replacing rotten decking without fixing the underlying moisture source, whether that is a ventilation gap, a flashing failure, or an aging roof replacement that is overdue, just resets the clock on the same failure.
Warning Signs Your Roof Deck Needs Attention
Most homeowners never see their decking directly, so the signs tend to show up elsewhere first. Here is what to watch for, both outside and inside the home:
- Sagging or wavy roof planes visible from the street or a neighbour’s driveway, especially between rafters
- Soft, spongy areas underfoot that a roofer notices while walking the roof for an inspection or roof repair visit
- Staining or dark streaks on interior ceilings, particularly after heavy rain or spring melt
- Visible daylight through the attic roof boards when viewed from inside on a sunny day
- A musty odour in the attic, which often indicates trapped moisture and early-stage mould growth on the underside of the deck
- Nail pops or shingles that won’t lie flat, since fasteners lose their grip once the wood around them softens
- Visible rot or discoloration around skylight curbs, chimneys, or vent stacks, common trouble spots we also flag during skylight inspections
Any one of these signs on its own does not necessarily mean the entire deck needs replacing. But two or more together, especially sagging combined with interior staining, usually means it is time for a proper inspection before the damage spreads further.
The Diagnostic Process: How Roofers Assess Decking Damage
Before any repair begins, a thorough assessment separates a five-figure surprise from a straightforward, budgeted repair. Here is the process we follow on nearly every job that involves suspected decking issues:
- Exterior visual inspection. We walk the full roof plane looking for sagging, soft spots, and shingle irregularities that hint at what is happening underneath.
- Interior attic inspection. Using a flashlight and moisture metre, we check the underside of the deck for staining, mould, soft wood, and daylight penetration at seams or fastener holes.
- Moisture metre readings. A pin or pinless moisture metre gives an objective reading of wood moisture content. Readings above roughly 20 percent moisture content signal active decay risk, not just historical dampness.
- Probing suspect areas. A screwdriver or awl pressed gently into a suspected soft spot tells us quickly whether the wood is structurally sound or has begun to crumble.
- Removing a test section of shingles. In some cases, particularly around known trouble spots like valleys or chimney flashing, we peel back a small shingle section to inspect the deck directly before quoting a full repair.
- Mapping the damage. Every soft or stained panel is marked and measured so the replacement scope is accurate rather than an estimate.
This diagnostic stage is the single biggest factor separating a lasting repair from a callback six months later. Skipping it, or relying only on a driveway-level visual check, is how homeowners end up paying twice.
Step-by-Step: The Decking Repair Process
Once damage is mapped, the actual repair follows a consistent sequence. Below is the step-by-step process for reviving a roof deck properly, whether the damage is isolated to a few panels or spans a larger section of the roof.
Step 1: Remove Shingles and Underlayment
Shingles, starter strips, and old underlayment are stripped back from the affected area, along with any flashing that needs to be reset. This exposes the deck fully so nothing is hidden during the repair.
Step 2: Remove Damaged Decking Panels
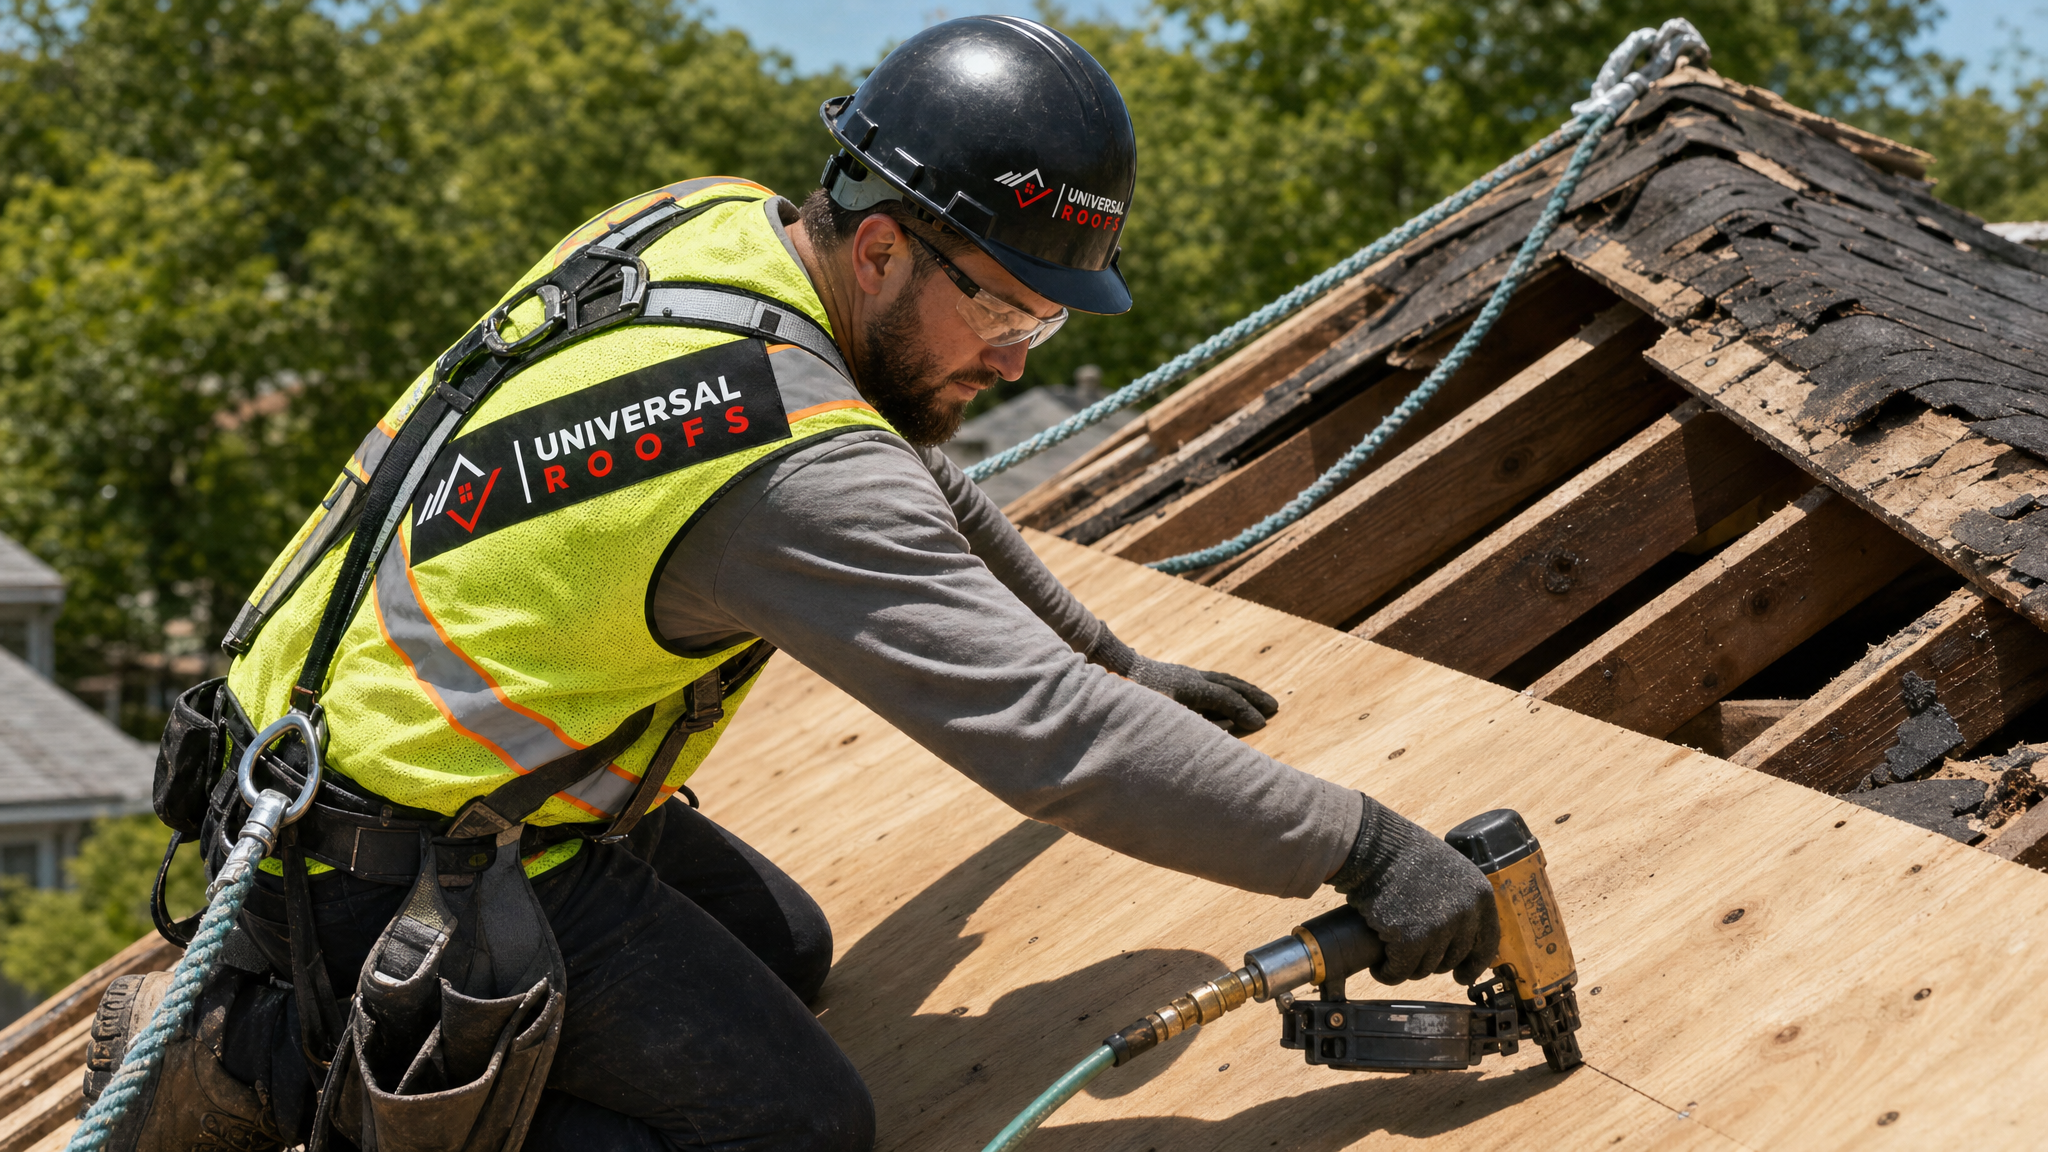
Rotten or delaminated panels are cut out along the centre of the nearest rafter or truss, never mid-span, so the new panel has full support along both edges. Nails and staples are pulled or cut flush.
Step 3: Inspect and Treat the Framing
With the deck removed, the rafters and trusses underneath are inspected. Any soft or rotted framing members are sistered with new lumber or fully replaced before new decking goes down. Skipping this step is one of the most common shortcuts taken by less careful crews.
Step 4: Install New Sheathing
New OSB or plywood panels, matched in thickness to the existing deck, are cut to fit and fastened with ring-shank nails on proper stagger patterns, following current building code spacing (typically 6 inches on edges, 12 inches in the field).
Step 5: Address the Root Cause
If ventilation, flashing, or ice damming caused the original failure, that issue is corrected now. This might mean adding intake or exhaust vents, replacing step flashing, or improving ice-and-water shield coverage at eaves and valleys.
Step 6: Reinstall Underlayment, Flashing, and Shingles
Fresh underlayment, ice-and-water membrane where required, flashing, and shingles are installed to match the surrounding roof, restoring both the appearance and the weatherproofing of the section.
Step 7: Final Inspection
The repaired area is checked for flush transitions, proper nailing, and sealed flashing before the job is signed off. On larger repairs, photos of the exposed decking and framing are provided so homeowners can see exactly what was replaced.
Decking Repair Methods Compared
Not every case of decking damage calls for the same approach. The table below compares the main repair strategies homeowners are typically offered.
| Repair Method | Best For | Typical Lifespan Added | Relative Cost |
|---|---|---|---|
| Spot patch (single panel) | Isolated leak damage, small soft spots | 10-15 years if root cause fixed | Low |
| Section replacement | Valley, eave, or chimney area rot | 15-20 years | Moderate |
| Full deck replacement | Widespread sagging, multiple soft zones | 25-30+ years | High |
| Overlay (new deck over old) | Rarely recommended; hides problems | Unreliable, masks rot | Low upfront, high risk |
| Deck repair + ventilation upgrade | Condensation-related failure | 25+ years, prevents recurrence | Moderate to high |
Overlaying new sheathing directly on top of damaged panels is sometimes offered as a cheaper shortcut, but it is not a method we recommend. It traps the original problem under a new surface and almost always results in the same failure reappearing within a few years.
Materials and Fasteners: What a Quality Repair Uses
The materials used in a decking repair matter just as much as the labour. Here is how the common options compare for GTA roofing applications.
| Material | Thickness | Moisture Resistance | Typical Use |
|---|---|---|---|
| OSB (oriented strand board) | 7/16″ – 5/8″ | Good with proper sealing | Most residential sloped roofs |
| CDX plywood | 1/2″ – 5/8″ | Very good | Higher-end residential, coastal-style exposure |
| Tongue-and-groove plywood | 5/8″ – 3/4″ | Very good | Flat roof and low-slope applications |
| Ring-shank nails | N/A (fastener) | High pull-out resistance | All new decking installation |
| Construction adhesive + fasteners | N/A (fastener) | Reduces squeaks and movement | Premium installations |
For flat and low-slope sections, decking requirements differ enough that they are worth treating as a separate conversation. If your home has a mixed roof profile, our flat roofing team can assess those sections specifically, since tongue-and-groove panels and different fastening patterns are typically required there.
Cost Factors and What Influences Your Quote
Decking repair costs vary widely depending on scope, access, and what is found once the roof is opened. The table below breaks down the variables that typically move a quote up or down.
| Cost Factor | Impact | Notes |
|---|---|---|
| Number of panels replaced | Direct, largest factor | Priced per sheet plus labour |
| Roof pitch and access | Moderate | Steep roofs require more safety setup and time |
| Framing damage found | Can be significant | Sistering or replacing rafters adds labour and material |
| Ventilation upgrades | Moderate | Often bundled to prevent recurrence |
| Matching shingle availability | Low to moderate | Discontinued shingle colours may need a wider reshingle area |
| Time of year | Low | Summer scheduling is typically faster than storm-season demand |
Because the true scope of decking damage is often invisible until shingles are removed, we always recommend homeowners budget some flexibility into a repair quote, and ask for a written explanation of what was found once the roof is opened. A reputable contractor will document damaged panels with photos rather than asking you to take their word for it.
DIY Versus Professional Decking Repair
Some homeowners are tempted to patch a small soft spot themselves, especially if it is visible and accessible. While a very small, isolated repair on a single-storey garage roof might be within reach for an experienced DIYer, full decking repair carries real risks that make professional work worth the investment:
- Fall risk. Roof work, especially once decking is removed and footing becomes unstable, is one of the leading causes of serious home-related injuries.
- Structural judgment. Knowing whether a rafter needs sistering versus replacing requires experience most homeowners do not have.
- Code compliance. Fastener spacing, panel thickness, and ventilation requirements are governed by building code and can affect insurance and resale.
- Warranty coverage. Manufacturer shingle warranties are frequently voided if the decking underneath was not installed by a certified contractor.
- Hidden damage. What looks like a single soft panel from the attic is often the edge of a larger problem that only becomes clear once shingles are pulled back.
For anything beyond a very minor, low-risk patch, hiring a licenced roofing contractor is the safer and ultimately more cost-effective choice.
Preventing Future Decking Damage
Once a deck has been repaired or replaced, a few maintenance habits go a long way toward protecting that investment for decades:
- Schedule a roof inspection every one to two years, ideally in spring after winter’s freeze-thaw cycles
- Keep gutters clean to reduce ice damming risk along the eaves
- Confirm attic insulation and ventilation are balanced correctly to prevent condensation on the deck’s underside
- Address small leaks immediately rather than waiting for visible interior staining
- Trim overhanging branches that can drop debris or hold moisture against the roof surface
- Review flashing around skylights, chimneys, and vent stacks annually, since these are common leak entry points
Homeowners who have recently had a skylight replacement or other roof penetration work done should pay particular attention to the surrounding decking in the following year, since flashing settles slightly as new materials cure.
Decking Damage Location Troubleshooting Guide
Different areas of the roof tend to fail for different reasons. The table below can help homeowners understand what a specific trouble spot usually means.
| Location | Common Cause | Typical Fix | Urgency |
|---|---|---|---|
| Eaves and gutter line | Ice damming, poor ice-and-water coverage | Section replacement + membrane upgrade | High |
| Valleys | Water concentration, worn flashing | Deck repair + new valley flashing | High |
| Around chimneys/skylights | Flashing failure | Localized panel repair + flashing reseal | Moderate to high |
| Ridge line | Poor ventilation, condensation | Deck repair + ventilation upgrade | Moderate |
| General field of roof | Age, widespread wear | Full deck replacement during reroofing | Plan proactively |
When Decking Repair Signals It Is Time to Reroof
Sometimes what starts as a decking inquiry ends with a bigger conversation. If more than 25 to 30 percent of the deck area shows damage, or if the shingles above are also nearing the end of their service life, patch repairs stop making financial sense. In those cases, a full roof replacement that includes complete deck replacement is usually the more economical path, since you avoid paying labour twice for tear-off and reinstallation.
A good contractor will tell you honestly when a repair is the right call and when it is time to plan for a full replacement, rather than defaulting to whichever option is more profitable. We walk every GTA homeowner through both options with real numbers before any work begins, whether the property is in Toronto, Peel Region, York Region, Halton Region, or Durham Region.
Why Summer Is an Ideal Time for Decking Repair
Warm, dry summer weather is genuinely the best window for decking repair work in the GTA. Wood moisture content is at its lowest, shingles seal properly in warmer temperatures, and there is far less risk of a sudden rain event soaking exposed framing mid-repair. Scheduling decking work now, rather than waiting until autumn storms or winter ice arrive, also gives any moisture that has already accumulated in the surrounding structure time to dry out fully before the next freeze-thaw cycle begins.
What does reviving aging roofs with decking repair actually involve, step by step?
How do I know if my roof needs decking repair or just new shingles?
How much does roof decking repair typically cost in the Toronto area?
Can rotten roof decking be repaired without replacing the whole roof?
What causes roof decking to rot in the first place?
Is it safe to attempt decking repair myself?
Need Help With Reviving Aging Roofs with?
Decking damage rarely announces itself clearly until it has already spread, which is why a proper inspection matters more than a quick shingle patch. The team at Universal Roofs has been diagnosing and repairing roof decking issues across the GTA since 2005, and we always show homeowners exactly what we find before any work begins.
Call us today at (416) 732-2421 or request a free inspection to get started.
Universal Roofs proudly serves Toronto, Mississauga, Brampton, Vaughan, Markham, Oakville and the GTA since 2005.