
A sagging roof is one of the few roofing problems you should never simply monitor and hope improves on its own. Whether you have noticed a dip along the ridge line, a wave forming across a section of shingles, or a soft spot when you walk through the attic, a sagging roof is a visible symptom of a structural problem underneath — and in the Toronto area, decades of freeze-thaw cycles, heavy snow loads, and humid summers make these issues progress faster than homeowners expect.
The good news is that fixing a sagging roof is a well-understood process. It is not guesswork. Licensed contractors follow a specific sequence: diagnose the cause, stabilize the structure, reinforce or replace the failing members, and then restore the roofing envelope on top. This guide walks through every one of those steps to fix a sagging roof, explains what causes the sag in the first place, and gives you realistic cost and timeline expectations so you can plan the repair with confidence.
At Universal Roofs, we have been diagnosing and repairing structural roof problems across the Greater Toronto Area since 2005, and a sagging roof is one of the calls we take most seriously — because unlike a missing shingle or a small leak, a sag almost always means something underneath the roof deck has already failed or is close to failing.
What Causes a Roof to Sag in the First Place
Before any contractor can tell you the correct steps to fix a sagging roof, they need to identify why it is sagging. The repair method changes completely depending on the root cause, and guessing wrong means paying for cosmetic patchwork over a structural problem that keeps getting worse.
The most common causes we see on GTA homes include:
- Undersized or damaged roof trusses/rafters — older homes, particularly those built before modern truss engineering standards, sometimes used framing that was never adequate for current snow load requirements in Ontario’s building code.
- Water damage and wood rot — a slow leak around flashing, a valley, or a skylight can quietly rot out rafters, sheathing, and structural supports for years before a visible dip appears.
- Excessive weight from multiple roofing layers — homes with two or three layers of old shingles stacked on top of each other are carrying far more dead load than the structure was designed for.
- Snow and ice accumulation — Toronto winters routinely deliver heavy, wet snow followed by freeze-thaw cycles; ice damming adds concentrated weight exactly where the structure is often weakest, near the eaves.
- Inadequate ventilation and attic moisture — poor airflow through the attic allows condensation to build up, which slowly weakens wood framing from the inside out.
- Removed or altered support walls — renovations that remove interior load-bearing walls without properly transferring the roof load elsewhere are a surprisingly common cause of sagging in older Toronto homes.
- Age and natural wood fatigue — wood framing does lose strength over multiple decades, especially if it has been exposed to repeated moisture cycles.
Identifying which of these applies to your home is the actual first step in the repair process, and it is not something that should be skipped or assumed. A sag caused by rot needs different work than a sag caused by undersized trusses, even though both can look identical from the street.
Step 1: Inspect and Diagnose the Structural Cause
Every legitimate repair begins with a thorough inspection, both from inside the attic and from the roof surface itself. A qualified roofer or structural assessor will typically:
- Measure the depth and location of the sag using a straightedge or laser level along the ridge and rafter lines
- Inspect every rafter, truss, and collar tie visible in the attic for cracking, splitting, or rot
- Check the roof sheathing from underneath for soft spots, water staining, or delamination
- Look for evidence of past or active leaks near valleys, chimneys, vents, and skylights
- Count the number of existing shingle layers and estimate total dead load
- Assess whether any interior walls were altered or removed during past renovations
- Check ventilation — soffit intake, ridge or roof vents, and signs of trapped moisture
For sags that appear serious — more than about 2.5 centimetres of deflection over a short span, or any sag paired with visible cracking — a structural engineer’s assessment is usually recommended before repair work begins. This protects you and ensures the contractor’s repair plan is engineered correctly rather than eyeballed. Our roof repair technicians coordinate directly with structural engineers on any project where the cause isn’t a straightforward, isolated issue.
Step 2: Stabilize the Roof Before Any Repair Begins
If the inspection reveals active structural weakness, the very next step — before any demolition or rebuilding — is temporary stabilization. This is a safety step, not a cosmetic one. It typically includes:
- Installing temporary support posts or shoring beams beneath the sagging section from inside the attic or the floor below
- Removing excess weight where safely possible, such as accumulated snow, ice, or debris
- Tarping any active leak points to prevent further water intrusion during the repair window
- Restricting access to the affected area of the attic or upper floor until the structure is confirmed safe
Skipping this stabilization step is one of the most dangerous shortcuts a homeowner or inexperienced contractor can take. A sagging roof that is actively failing can progress from a cosmetic dip to a structural collapse in a matter of weeks if a heavy snow load or a sustained rainstorm adds enough additional weight.
Step 3: Remove Damaged Roofing and Expose the Framing
Once the structure is stabilized, the roofing surface above the affected area is carefully removed — shingles, underlayment, and in many cases the sheathing itself — to give the crew a clear, direct view of the framing underneath. This step accomplishes two things:
- It confirms the diagnosis made during the inspection, since rot and cracking are sometimes more extensive than what’s visible from the attic alone
- It gives the crew clean access to sister, replace, or reinforce the damaged rafters and trusses without working around intact roofing material
On roofs where the sag is limited to a small section — say, around one damaged rafter near a valley or a skylight curb — this removal can be localized. On roofs where multiple trusses are affected, a larger section, or in some cases the full slope, needs to come off. This is also the point in the project where any related issues — deteriorated flashing, an aging skylight that has been leaking, or damaged decking around a chimney — typically get addressed at the same time, since the roof is already open.
Step 4: Repair or Replace the Damaged Structural Framing
This is the core structural step, and the method depends entirely on what the inspection found:
Sistering damaged rafters or trusses
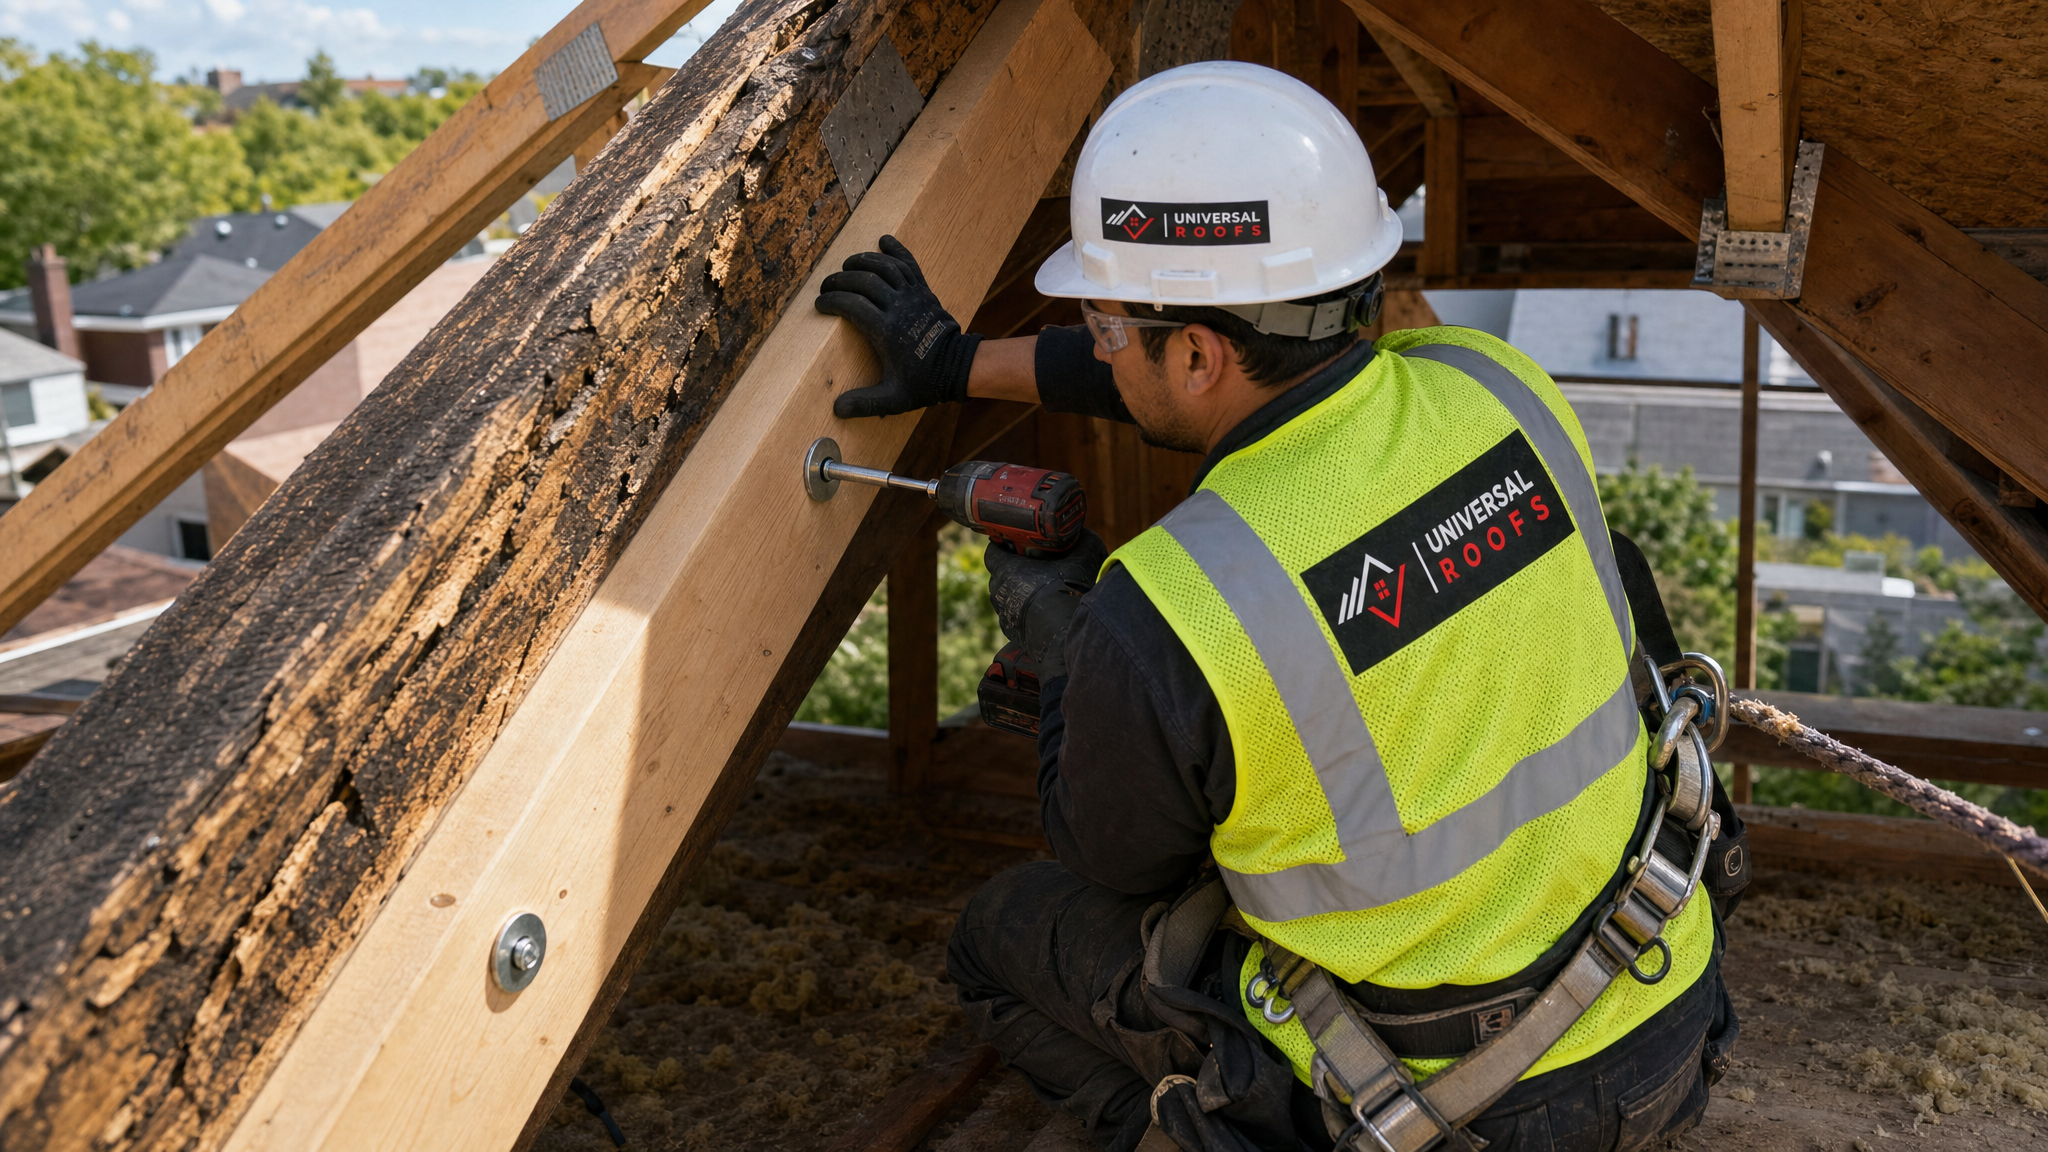
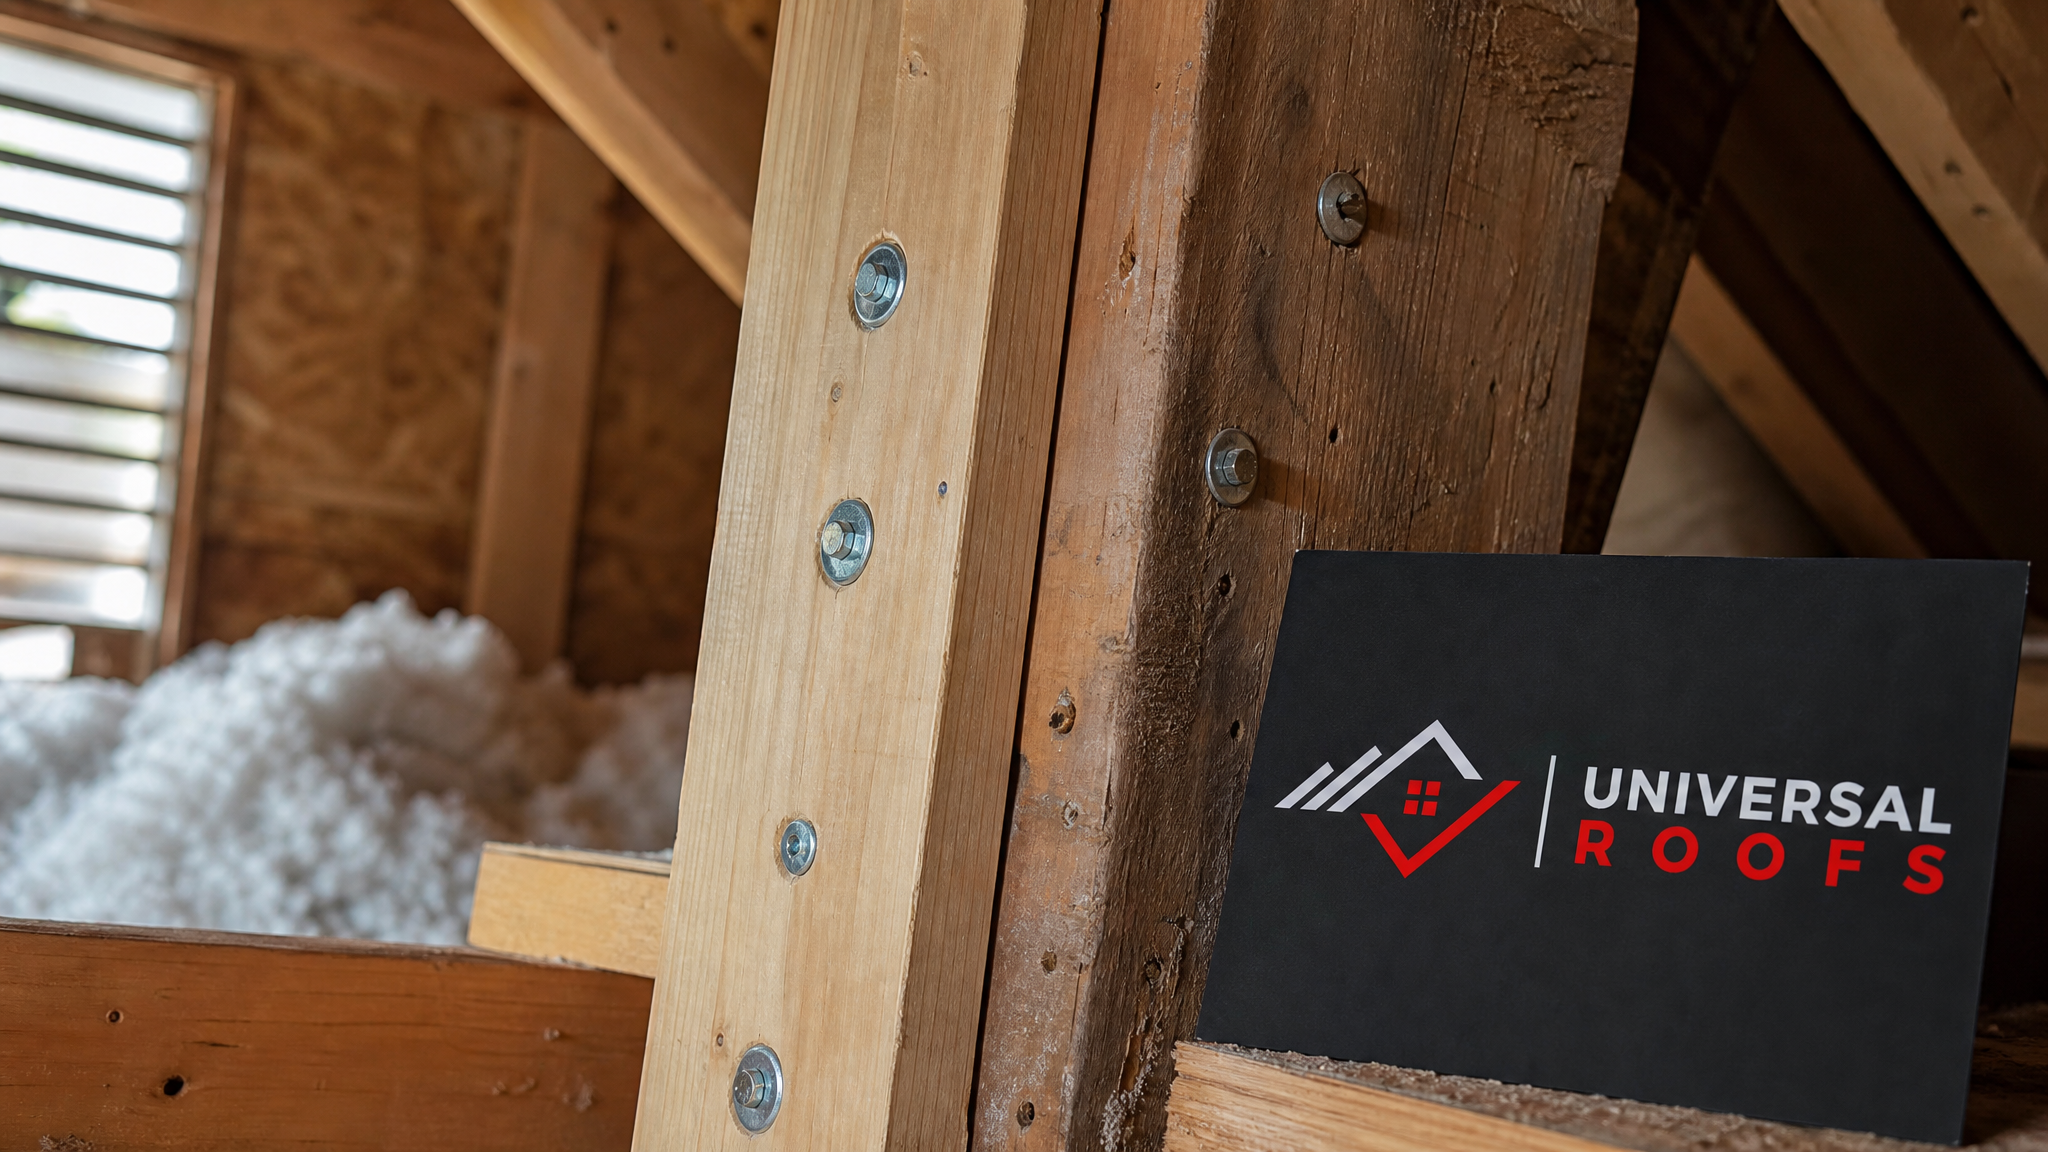
When a rafter or truss chord is cracked, split, or partially rotted but still structurally connected, contractors often “sister” it — bolting or screwing a new piece of dimensional lumber directly alongside the damaged member along its full length. This restores strength without removing the original piece, which is often faster and less invasive.
Full replacement of rotted members
When wood rot has compromised a rafter or truss beyond what sistering can fix, the damaged section is cut out and replaced entirely with new, code-rated lumber, properly tied into the adjoining structure.
Adding collar ties or additional support
Some sags result from a lack of lateral bracing rather than damaged wood. In these cases, installing collar ties, additional bracing, or a properly sized support beam resolves the sag without replacing any framing members at all.
Installing a load-bearing beam or post
Where a previous renovation removed a load-bearing wall without transferring the roof load properly, the fix usually involves installing an engineered beam (often steel or engineered lumber, sized by a structural engineer) supported by new posts down to the foundation.
Every one of these methods needs to be sized and installed according to the current Ontario Building Code snow and live-load requirements — not just “matched” to what was there before, since what was there before is often exactly what failed.
Step 5: Replace Sheathing and Restore the Roof Deck
With the framing repaired, attention shifts to the roof deck itself. Any sheathing panels that were removed, water-damaged, or delaminated during the inspection and demolition steps are replaced with new plywood or OSB, properly nailed to the repaired framing according to code spacing requirements. This step also includes:
- Confirming the new deck surface is flat and properly fastened — a common quality-control point, since an uneven deck will telegraph through the finished shingles
- Installing or replacing ice-and-water shield membrane along eaves, valleys, and any penetration points, which is especially important given how often Toronto experiences freeze-thaw ice damming each winter
- Correcting or upgrading attic ventilation if the original inspection identified inadequate airflow as a contributing cause — this often means adding soffit vents, a ridge vent, or additional roof vents
Improving ventilation at this stage isn’t optional if moisture was part of the original problem. Re-roofing over the same inadequate ventilation setup just resets the clock on the same failure.
Step 6: Reinstall Roofing Materials and Finish the Repair
Once the structure and deck are sound, the roofing system goes back on: underlayment, starter strips, shingles (or an alternate material, if you’re upgrading), flashing at all valleys, walls, and penetrations, and ridge capping. If the affected area is on a low-slope or flat section of the home, this step instead involves a properly detailed flat roofing membrane system rather than shingles.
A quality crew will also:
- Verify the repaired section ties in seamlessly with the surrounding roofing, both structurally and visually
- Recheck the ridge and rafter lines with a level to confirm the sag has been fully corrected, not just concealed under new shingles
- Clean up all debris, including old shingles, sheathing, and any wood removed during the structural work
- Provide documentation of the repair, including photos of the structural work completed before it was covered by new roofing — this matters for insurance, resale, and future reference
Repair Methods Compared: Choosing the Right Approach
The table below compares the most common structural repair methods used to fix a sagging roof, so you understand what your contractor is proposing and why.
| Repair Method | Best For | Typical Duration | Relative Cost |
|---|---|---|---|
| Sistering damaged rafters/trusses | Partial cracking or rot, structure still connected | 1-3 days | Low to moderate |
| Full rafter/truss replacement | Severe rot or breakage in individual members | 2-4 days | Moderate |
| Adding collar ties or bracing | Lack of lateral support, no wood damage | 1-2 days | Low |
| Engineered beam and post installation | Load path changed by past renovation | 3-7 days | Moderate to high |
| Full truss system replacement | Widespread structural failure across multiple trusses | 5-10+ days | High |
Most residential sagging roof repairs in the GTA fall into the first two categories — localized sistering or replacement of a small number of rafters — especially when the issue is caught before it spreads across the whole roof plane. This is exactly why early diagnosis matters: a problem addressed in year one might cost a fraction of the same problem addressed in year five.
What Determines the Cost of a Sagging Roof Repair
Every sagging roof repair is different, but the price is driven by a consistent set of factors: the extent of structural damage, the number of trusses or rafters affected, whether the roofing material above needs full replacement, ventilation upgrades, and whether an engineer’s stamped drawing is required. The table below breaks down the typical cost drivers homeowners in Toronto and the surrounding regions should budget for.
| Cost Factor | Low End | High End | Notes |
|---|---|---|---|
| Localized rafter sistering (1-2 members) | $800 | $2,500 | Includes access, lumber, and fasteners |
| Section truss/rafter replacement | $2,500 | $6,000 | Depends on span and roof pitch |
| Sheathing replacement | $3 | $7 per sq ft | Varies with panel condition and access |
| Engineered beam installation | $4,000 | $12,000 | Includes engineering fees and posts/footings |
| Structural engineer assessment | $500 | $1,500 | Often required for permits on major repairs |
| Full roofing restoration over repair area | $5 | $12 per sq ft | Shingle or flat roofing, depending on section |
These figures are general ranges based on projects across the GTA and should be treated as a starting point, not a quote. The only way to get an accurate number for your home is a proper inspection, which is why we always recommend starting with an on-site assessment rather than guessing from a phone description. You can review examples of completed structural and roofing work on our reviews page from homeowners who went through this exact process.
Warning Signs You Should Never Ignore
Not every uneven-looking roofline is an emergency, but certain signs mean you should call a professional immediately rather than waiting for a routine inspection:
| Warning Sign | What It Usually Means | Urgency Level |
|---|---|---|
| Visible dip along the ridge line from the street | Truss or rafter deflection, possibly widespread | High — inspect within days |
| Sagging visible from inside the attic | Localized weakness, often from a leak or rot | High — inspect within days |
| Cracking sounds during wind or snow load | Active structural stress, possible imminent failure | Emergency — same-day inspection |
| Doors or windows suddenly sticking on the top floor | Structural shift affecting the frame | High — inspect within days |
| Visible daylight through the roof deck | Sheathing failure, active water entry likely | Emergency — same-day inspection |
| Bowing or bulging ceiling on the top floor | Significant deflection, water saturation possible | Emergency — same-day inspection |
If you notice any of the emergency-level signs above, especially after a heavy summer storm or during spring snowmelt, treat it the same way you would a gas leak — get people out of the affected area and call a professional immediately rather than waiting to see if it gets worse.
Preventing a Sagging Roof From Happening Again
Once your roof has been properly repaired, a handful of ongoing habits significantly reduce the chance of a repeat problem:
- Keep attic ventilation clear — don’t block soffit vents with insulation, and confirm ridge or roof vents remain unobstructed year-round.
- Remove heavy snow load after major storms — a roof rake used from the ground after significant accumulation reduces stress on the structure through winter.
- Schedule a professional inspection every one to two years — catching a small issue during a routine check is dramatically cheaper than discovering it after a visible sag appears.
- Address leaks immediately, not eventually — a small stain on a ceiling is far cheaper to fix than the rot it can eventually cause if ignored for a full season.
- Avoid stacking additional shingle layers — if your roof already has two layers, a full roof replacement down to the deck is safer than adding a third layer of weight.
- Use summer’s dry weather window for maintenance — July and August in the GTA typically offer the most stable, driest conditions for structural repairs, before wet autumn weather and winter snow load return.
Summer is genuinely the best season to address any structural concern you’ve been putting off. Materials cure and seal properly in stable heat, crews have full daylight hours to complete multi-day structural work, and you avoid the added risk of tackling a sag during or right before the snow-load season.
DIY vs. Professional Repair: Why This Isn’t a Weekend Project
It’s worth addressing directly: a sagging roof is not a DIY repair, and this isn’t contractor self-interest talking — it’s a matter of structural safety and liability. Here’s why:
- Correctly diagnosing the cause requires experience distinguishing rot from truss undersizing from ventilation-driven weakening, often from limited attic access
- Temporary shoring has to be installed correctly or it can shift under load, creating a serious safety hazard for anyone in the house
- Structural framing repairs typically require a building permit and, in many cases, a stamped engineering drawing — work done without one can create problems at resale or with insurance claims
- Working at height on a compromised roof structure without proper fall protection is genuinely dangerous, which is why licensed crews always work in a harness and safety rope when accessing a weakened roof plane
- Getting the repair wrong doesn’t just waste money — it can mask a problem that continues to worsen invisibly under new shingles
If you’re located in Toronto, Peel Region, York Region, Halton Region, or Durham Region, our team can typically get an inspector on-site within a few days of your call, and sooner for anything flagged as urgent.
What to Expect From a Professional Sagging Roof Assessment
When you call a roofing company about a sag, a properly run assessment should include a written or photographed report, not just a verbal opinion. Expect the technician to:
- Walk the roof surface and measure the sag’s depth and boundaries
- Enter the attic to inspect framing, sheathing, and insulation/ventilation conditions
- Photograph any rot, cracking, or water staining found
- Explain the likely root cause in plain language, not just “it needs work”
- Provide a written estimate broken down by phase — stabilization, structural repair, and roofing restoration
- Tell you honestly whether a structural engineer’s involvement is required for permitting
If a company tries to quote a full repair price over the phone without ever seeing the roof or attic in person, that’s a red flag. Sagging roof repairs vary too much in scope for an accurate quote without eyes on the actual structure. You can find answers to more common roofing questions on our FAQ page, or learn more about how our team approaches every project on our about page.
What are the steps to fix a sagging roof?
How much does it cost to fix a sagging roof in Toronto?
Can a sagging roof be repaired without replacing the whole roof?
Is a sagging roof always an emergency?
What causes a roof to sag over time?
How long does it take to fix a sagging roof?
Need Help With What Are the Steps?
A sagging roof is not a problem that improves with time, and the earlier it is properly diagnosed, the less invasive and less expensive the fix tends to be. Universal Roofs has been guiding GTA homeowners through exactly this process since 2005, from the first inspection through the final shingle.
Call us today at (416) 732-2421 or request a free inspection to get started.
Universal Roofs proudly serves Toronto, Mississauga, Brampton, Vaughan, Markham, Oakville and the GTA since 2005.