
A sagging roofline on a century home in Cabbagetown or a heritage farmhouse in Halton Hills is rarely just a cosmetic quirk. It is usually a visible symptom of structural fatigue that has been building for decades, accelerated by Toronto’s freeze-thaw winters, humid summers, and, in many cases, generations of poorly matched repairs. Restoring a historic roof and correcting a sagging structure is a different discipline from a standard reroof: it demands an understanding of century-old framing methods, period-correct materials, and the structural engineering needed to bring a tired roof back to true without erasing the character that makes the building worth preserving in the first place.
At Universal Roofs, we have spent nearly two decades working on roofs across the Greater Toronto Area, from postwar bungalows to pre-Confederation homes with hand-hewn rafters. Sagging structures show up again and again in our inspections, and the good news is that in the overwhelming majority of cases, the roof can be restored and the sag corrected without a full teardown. This guide walks through how to identify the cause of a sagging historic roof, what restoration methods actually work, what it costs, and how to avoid the mistakes that turn a repairable problem into a rebuild.
Whether you own a designated heritage property in old Toronto, a century farmhouse in York Region, or simply an older home with a roofline that has started to dip, the principles below apply. We will cover diagnosis, structural correction techniques, material matching, permitting considerations, and long-term maintenance so your roof stays sound for the next hundred years.
Why Historic Roofs Sag: Common Causes in GTA Homes
Before any repair begins, we need to understand why the roof sagged in the first place. Restoring historic roofs and repairing sagging structures without addressing the root cause is a guaranteed way to see the same problem return within a few years. In our experience inspecting older homes across Toronto, Mississauga, and the surrounding regions, sagging almost always traces back to one or more of the following.
Undersized or deteriorated rafters and purlins. Many homes built before the 1950s used rafters sized for the loads and code standards of their era, which are often lighter than what modern snow load calculations require. Decades of Toronto winters, with heavy wet snow followed by rapid thaw cycles, place repeated stress on framing that was never engineered with today’s loads in mind.
Water infiltration and rot at the eaves and ridge. Historic roofs frequently show the worst sagging directly above chimneys, valleys, or eaves where water has been getting in for years. Once moisture reaches structural wood, rot sets in quietly, and by the time a sag is visible from the street, the underlying members may have lost 30 to 50 percent of their load-bearing capacity.
Removed or altered interior walls. A common culprit in century homes that have been renovated is the removal of a load-bearing interior partition that was originally helping support the roof structure. Without proper engineering to redistribute that load, the roof frame above begins to sag toward the missing support.
Undersized ridge beams in older post-and-beam construction. Homes built with true post-and-beam or timber-frame roof systems sometimes used ridge beams that span too great a distance for their depth, leading to a visible dip at the centre of the roof over time, known as ridge sag.
Improper previous repairs. We regularly find sistered rafters that were never properly fastened, undersized replacement lumber, or repairs that addressed a symptom (a leak) without addressing the structural cause. These botched fixes tend to fail again within five to ten years.
A proper roof repair assessment starts in the attic, not on the roof deck. We check rafter dimensions, look for compression fractures, measure deflection with a level and string line, and probe for rot with an awl at every suspect connection point. Only once the cause is identified can a correct repair plan be built.
Diagnosing the Severity: When to Repair vs. When to Rebuild
Not every sagging roof needs the same level of intervention. Severity generally falls into three categories, and knowing which one you are dealing with changes the entire scope and cost of the project.
Cosmetic sag with sound structure. Sometimes a roofline appears to sag because the original builders used slightly irregular lumber, or because roofing material has settled unevenly over a century. If rafters test solid, there is no active deflection under load, and moisture readings are normal, this may require only cosmetic correction such as furring strips to true up the roof deck before new shingles or metal are installed.
Moderate structural sag with localized rot or undersizing. This is the most common scenario we encounter. A section of the roof, often above a bay window, dormer, or chimney, has weakened framing that needs sistering, bracing, or a localized beam replacement. The rest of the structure remains sound.
Severe structural failure. When multiple rafters have failed, the ridge beam has cracked, or there is widespread rot throughout the attic, a full structural rebuild of the roof frame becomes necessary. This is still far short of demolishing the home, but it does mean removing the roof covering, often the sheathing, and rebuilding the frame to current engineering standards while preserving the original roof pitch and profile.
The table below summarizes how we categorize severity during inspection, since homeowners often ask us to put a number on how bad things really are before committing to a scope of work.
| Severity Level | Visual Signs | Typical Cause | Recommended Approach |
|---|---|---|---|
| Cosmetic | Slight roofline waviness, no interior cracking | Original construction irregularities, minor settling | Deck furring, re-cover with new material |
| Mild structural | Visible dip under 25mm over a rafter span | Isolated rot or minor undersizing | Sistering affected rafters |
| Moderate structural | Dip of 25-75mm, cracking plaster below | Multiple rafter failures, water damage | Sistering plus bracing, partial sheathing replacement |
| Severe structural | Dip over 75mm, visible rafter cracks, spongy decking | Widespread rot, ridge beam failure, removed load walls | Full frame rebuild with engineering review |
Structural Correction Techniques That Preserve Historic Character
The central challenge in restoring a historic roof is fixing the structure without destroying what makes it historic. There are several proven techniques we use, often in combination, depending on what the diagnosis reveals.
Sistering rafters. This is the most common and least invasive correction. A new rafter of matching or superior dimension is fastened alongside the original, sharing the load and restoring strength without removing the historic timber. Sistering works well when the original rafter is still mostly sound but undersized or partially rotted at one end.
Jacking and shoring to correct ridge sag. For roofs where the ridge beam itself has sagged, we use hydraulic jacks and temporary shoring posts to very gradually raise the ridge back toward level over a period of days or weeks, not hours. Moving too quickly can crack plaster, jam windows, or snap dried-out timber that has adapted to its sagging position. This is a slow, patient process, and it is one of the more specialized parts of historic roof restoration.
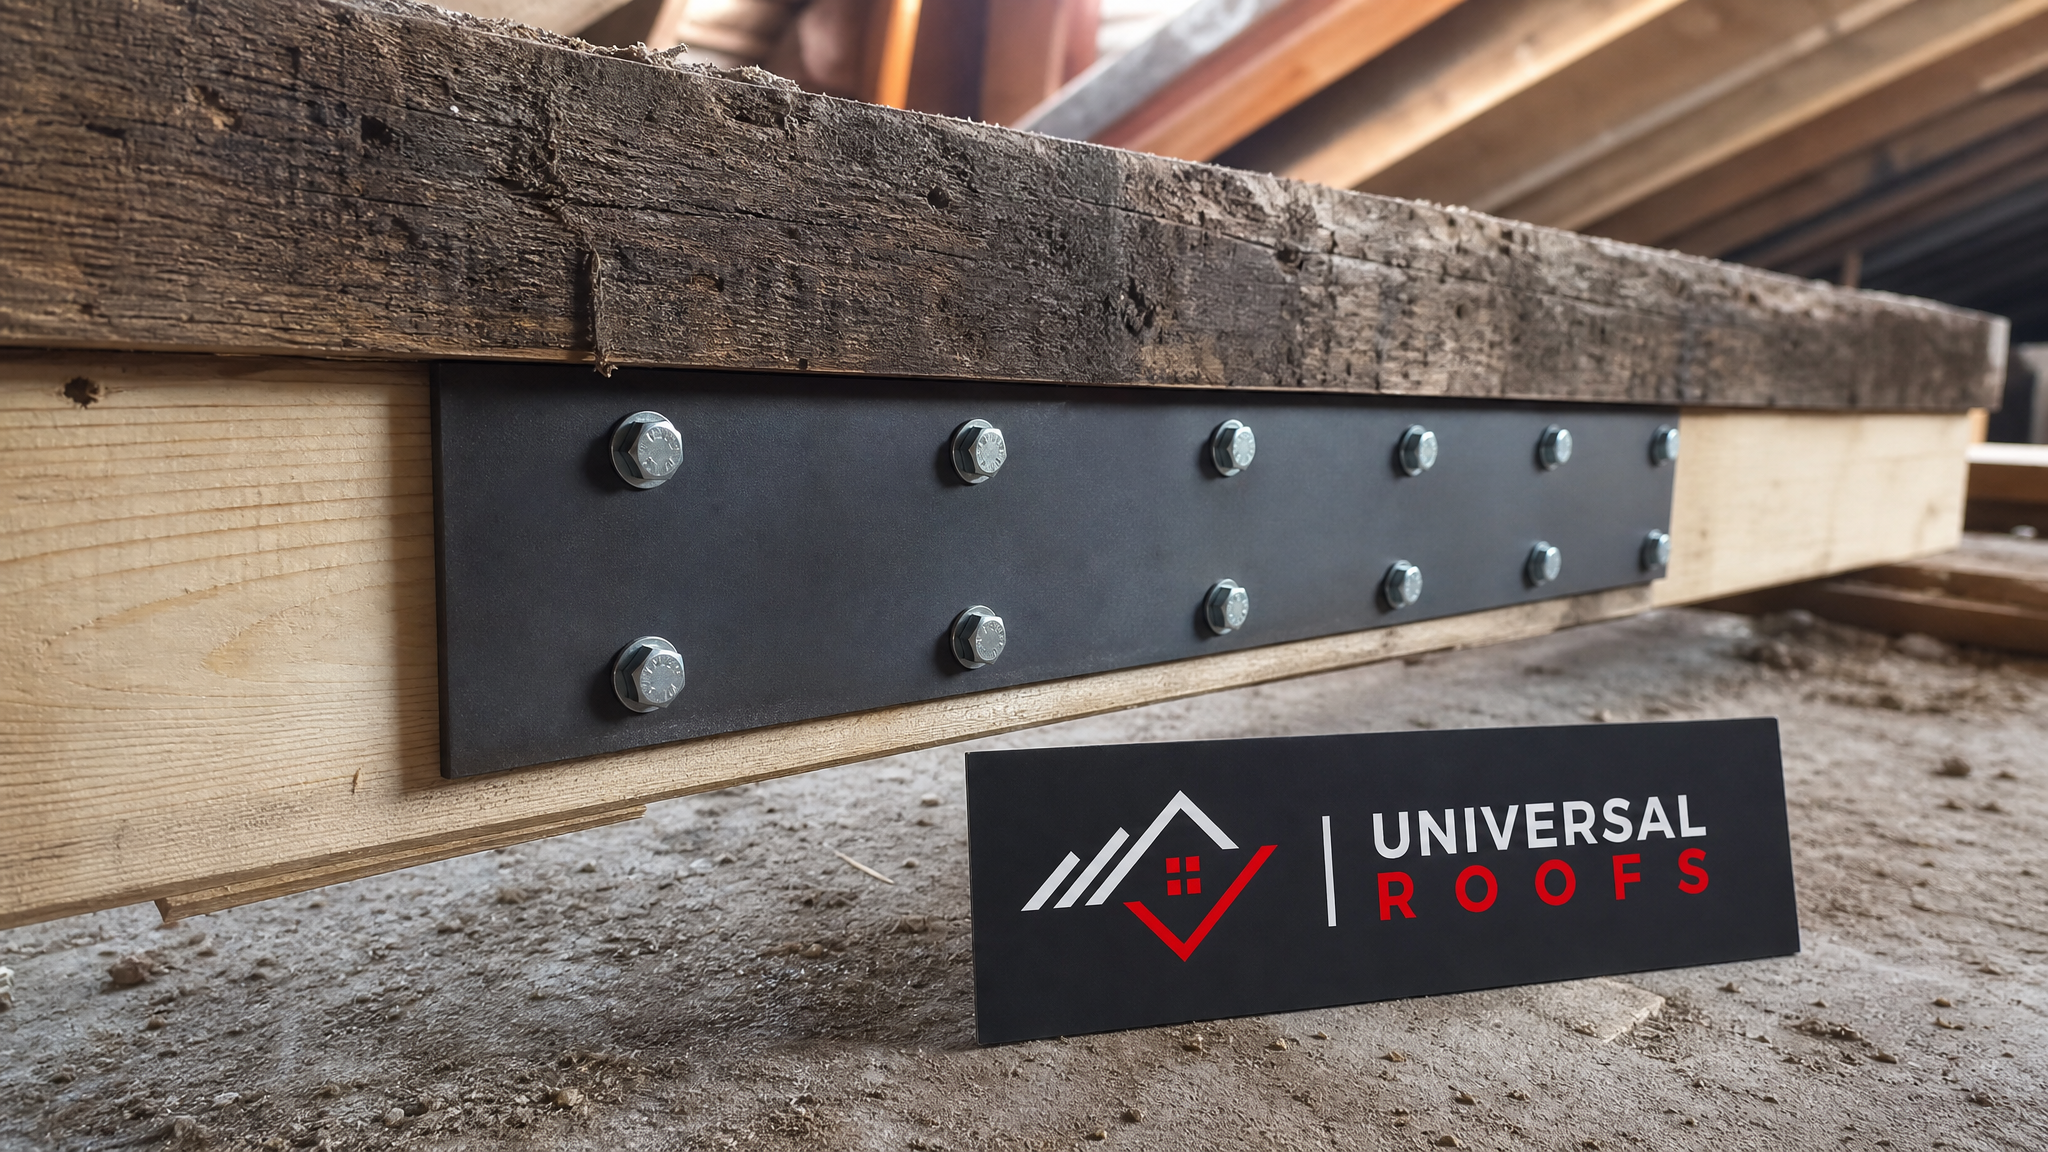
Steel reinforcement plates and flitch plates. Where a beam needs additional strength but cannot be replaced without disturbing finished ceilings or exterior trim, we sandwich a steel plate between the original timber and a new wood member, bolted through to create a flitch beam. This adds significant load capacity while keeping the beam’s original dimensions and appearance intact.
Collar tie and rafter tie reinforcement. Many older roofs lack sufficient horizontal ties between opposing rafters, which allows the roof to spread outward and the ridge to sag over time. Adding properly sized collar ties or rafter ties at the correct height restores the triangulated strength the roof needs.
Selective sheathing and decking replacement. Once the frame is corrected, deteriorated sheathing is replaced board by board where possible, rather than sheeting over the entire roof, to keep as much of the original wood in place as the structure allows.
Matching Historic Roofing Materials During Restoration
Structural correction is only half the job. Once the frame is sound, the roof covering needs to be restored or replaced in a way that respects the building’s original character, particularly for designated heritage properties where municipal heritage committees may review exterior changes.
Slate, cedar shake, and standing seam metal are the three materials we most often encounter on historic GTA homes, and each has its own restoration considerations.
Slate roofs. Original slate can often last well over a century, and individual cracked or slipped slates can be replaced without touching the rest of the roof. However, the flashing beneath slate typically fails long before the slate itself, so a slate restoration project usually focuses on flashing replacement, ridge repair, and selective slate replacement rather than a full tear-off.
Cedar shake. Cedar has a shorter lifespan than slate, generally 25 to 35 years in the GTA climate, so most historic cedar roofs we restore today have already been replaced once or twice. Matching the original profile, exposure, and grade of cedar is important for heritage-designated properties, and fire-treated shakes are often required by current code even when the original roof predates those rules.
Standing seam metal. Many older homes had metal roofs installed decades ago as a durable, lower-maintenance option, and these can often be repaired at the seams and fasteners rather than fully replaced, provided the substrate beneath has not corroded through.
For homeowners weighing whether to restore the existing material or move to a full roof replacement, the decision often comes down to the condition of the structure underneath, the availability of matching materials, and whether the property carries heritage designation that restricts material changes.
| Original Material | Typical Lifespan | Common Failure Point | Restoration Approach |
|---|---|---|---|
| Natural slate | 75-125+ years | Flashing, nail sickness | Selective slate and flashing replacement |
| Cedar shake | 25-35 years | Splitting, moss, rot | Full re-cover with matching profile |
| Standing seam metal | 50-75 years | Seam separation, fastener corrosion | Seam resealing, panel replacement |
| Clay tile | 60-100 years | Cracking, underlayment failure | Tile salvage and underlayment renewal |
Cost Considerations for Historic Roof and Structural Restoration
Homeowners understandably want a sense of cost before committing to an inspection. While every historic roof is different, and only an on-site assessment can give an accurate number, the ranges below reflect what we typically see across projects in Toronto, Peel Region, and York Region.
| Scope of Work | Typical Cost Range (CAD) | Timeline |
|---|---|---|
| Localized rafter sistering (1-4 rafters) | $1,800 – $4,500 | 2-4 days |
| Ridge jacking and reinforcement | $6,000 – $15,000 | 1-3 weeks |
| Flitch plate beam reinforcement | $3,500 – $9,000 | 3-6 days |
| Partial re-roof with material matching | $12,000 – $30,000 | 2-4 weeks |
| Full structural rebuild of roof frame | $35,000 – $90,000+ | 4-10 weeks |
Costs climb when a structural engineer’s stamped drawings are required, which is common for anything beyond simple sistering, and when a property’s heritage designation requires materials or methods that cost more than modern equivalents. It is worth budgeting for an engineering assessment as a separate line item early in the process rather than treating it as an afterthought.
Permits, Heritage Approval, and Engineering Requirements
Anywhere in the GTA, structural work on a roof typically requires a building permit, and homes within a designated heritage conservation district or individually listed on a municipal heritage register face an additional layer of review. Toronto’s heritage preservation staff, for example, will generally want to see that repairs match the original roofline, pitch, material, and detailing as closely as possible, even when the covering material has changed.
For structural corrections specifically, most municipalities will require a permit application accompanied by drawings from a licensed structural engineer whenever load-bearing members are being repaired, reinforced, or replaced. This is not simply bureaucracy: an engineer’s calculations confirm that the corrected structure will actually handle current snow and wind load requirements, which is especially important given how much heavier Ontario’s snow load standards are compared to when many historic homes were originally framed.
We manage this process for our clients by coordinating directly with the structural engineer, submitting the required drawings, and scheduling inspections at each stage so the project keeps moving without unnecessary delays. Skipping this step, or hiring a contractor willing to skip it, is one of the fastest ways to end up with a roof that fails an eventual home sale inspection or, worse, an insurance claim after storm damage.
Preventing Future Sagging: Attic Ventilation and Ongoing Maintenance
Once a historic roof has been structurally restored, protecting that investment means addressing the conditions that caused the sag in the first place. Attic ventilation is one of the most overlooked factors in roof longevity. Poor airflow traps moisture against the underside of the roof deck, accelerating rot in exactly the rafters and sheathing that were just repaired.
A proper attic assessment checks for balanced intake and exhaust ventilation, adequate insulation that does not block soffit vents, and signs of condensation on the underside of the sheathing. Many historic homes were built before continuous ridge and soffit venting was standard practice, so retrofitting proper ventilation is often part of a complete restoration even though it is invisible from the street.
Skylights and dormers are another common weak point on older roofs, since they interrupt the roof plane and create additional flashing details that need maintenance. If your historic home has existing skylights that are original or decades old, it is worth having them inspected alongside the main roof; our skylights and skylight replacement teams frequently find that failed skylight flashing is contributing to the same moisture problems driving structural rot nearby.
Ongoing maintenance for a restored historic roof should include an annual attic inspection, gutter cleaning each spring and fall to prevent ice damming, and a professional roof check every two to three years to catch flashing or material issues before they become structural ones again.
Seasonal Timing: Why Summer Is the Right Window for This Work
Structural roof restoration, particularly ridge jacking and rafter sistering, goes far more smoothly in warm, dry conditions. Summer in the GTA gives crews stable weather to work in, allows wood moisture content to be assessed accurately without snow or rain interference, and lets any newly installed lumber acclimatize properly before the roof is closed back up for winter.
Attempting major structural correction during the winter freeze-thaw cycle is far riskier: temperature swings can cause additional movement in an already-compromised frame, and materials like sealants and flashing compounds do not cure properly in cold temperatures. If you have noticed a sag developing, scheduling an assessment in summer or early fall gives you the best chance of completing the repair before winter loads test the structure again.
Comparing Repair Approaches: A Quick Reference
Homeowners often ask us to lay out the trade-offs between the different correction methods side by side. The table below summarizes when each technique applies and its relative invasiveness.
| Method | Best For | Invasiveness | Preserves Original Material |
|---|---|---|---|
| Sistering | Isolated rafter weakness or rot | Low | Yes, original rafter stays in place |
| Jacking and shoring | Ridge beam sag across the roof | Moderate | Yes, gradual correction avoids demolition |
| Flitch plate reinforcement | Beams needing added strength without size change | Moderate | Yes, appearance unchanged |
| Collar/rafter tie addition | Roof spreading and ridge drop over time | Low | Yes, hidden in attic space |
| Full frame rebuild | Widespread failure across multiple members | High | Partial; profile and pitch preserved |
Choosing a Contractor for Historic Roof Restoration
Not every roofing company is set up to handle structural correction on a historic home. Standard reroofing crews are skilled at removing and replacing shingles, but sagging structure repair calls for a different skill set: reading old framing, coordinating with structural engineers, sourcing period-appropriate materials, and working slowly enough to avoid damaging fragile plaster, trim, or masonry.
When vetting a contractor for this kind of work, ask specifically about their experience with structural sistering and jacking, whether they routinely work with structural engineers on permit drawings, and whether they have handled projects within heritage conservation districts before. It is also worth checking a company’s track record directly. You can read verified feedback from other GTA homeowners on our reviews page, and our about page outlines our history working on roofs throughout the region since 2005.
Universal Roofs has completed structural restoration projects across Toronto, Peel Region, Halton Region, and Durham Region, including many designated heritage properties. We work with local structural engineers as a matter of course on any project involving load-bearing correction, and we document each stage of the process for municipal permit compliance and, where relevant, heritage committee review.
If you are unsure whether your roof’s sag is cosmetic or structural, the safest first step is a professional inspection rather than guesswork, since misjudging the severity can lead either to overspending on unnecessary work or underspending on a repair that fails within a few years. Our FAQ page covers additional questions homeowners commonly ask about roof repair timelines, warranties, and materials.
How do I know if my historic roof’s sag is structural or just cosmetic?
Can a sagging historic roof be fixed without a full tear-off?
Do I need a structural engineer to repair a sagging roof on a heritage home?
What causes roof sagging in older Toronto homes?
How much does it cost to repair a sagging historic roof in the GTA?
Is summer a good time to schedule structural roof restoration?
Need Help With Restoring Historic Roofs Repairing?
A sagging roofline does not have to mean losing the character of your historic home. With the right diagnosis and structural approach, Universal Roofs can correct the sag, reinforce the frame, and restore the roof covering while preserving what makes the property worth keeping.
Call us today at (416) 732-2421 or request a free inspection to get started.
Universal Roofs proudly serves Toronto, Mississauga, Brampton, Vaughan, Markham, Oakville and the GTA since 2005.