
Dormers add character and headroom to a home, but they also create some of the trickiest waterproofing junctions on the entire roof. Wherever a vertical dormer wall meets a sloped roof plane, water is looking for the smallest gap to exploit, and only the right roof flashing for dormers stands between a dry attic and a slow, expensive leak. Homeowners across Toronto and the wider GTA often discover dormer flashing problems only after a stain appears on a ceiling below a dormer window, by which point moisture may have been tracking behind the wall for months.
This guide breaks down the six best types of roof flashing for dormers, explains where each one belongs on the structure, and walks through the installation, maintenance, and troubleshooting details that matter most in a climate defined by freeze-thaw cycles, ice damming, and heavy spring rain. Whether you are planning a new dormer, replacing a roof that includes one, or chasing down a leak around an existing dormer, the goal is the same: a flashing system that sheds water in every direction, layer by layer, for decades.
If you are dealing with an active leak right now, do not wait for the next storm to make things worse — our roof repair team can diagnose the exact flashing failure and stop the water before it reaches the framing.
Why Dormer Flashing Fails More Often Than Other Roof Areas
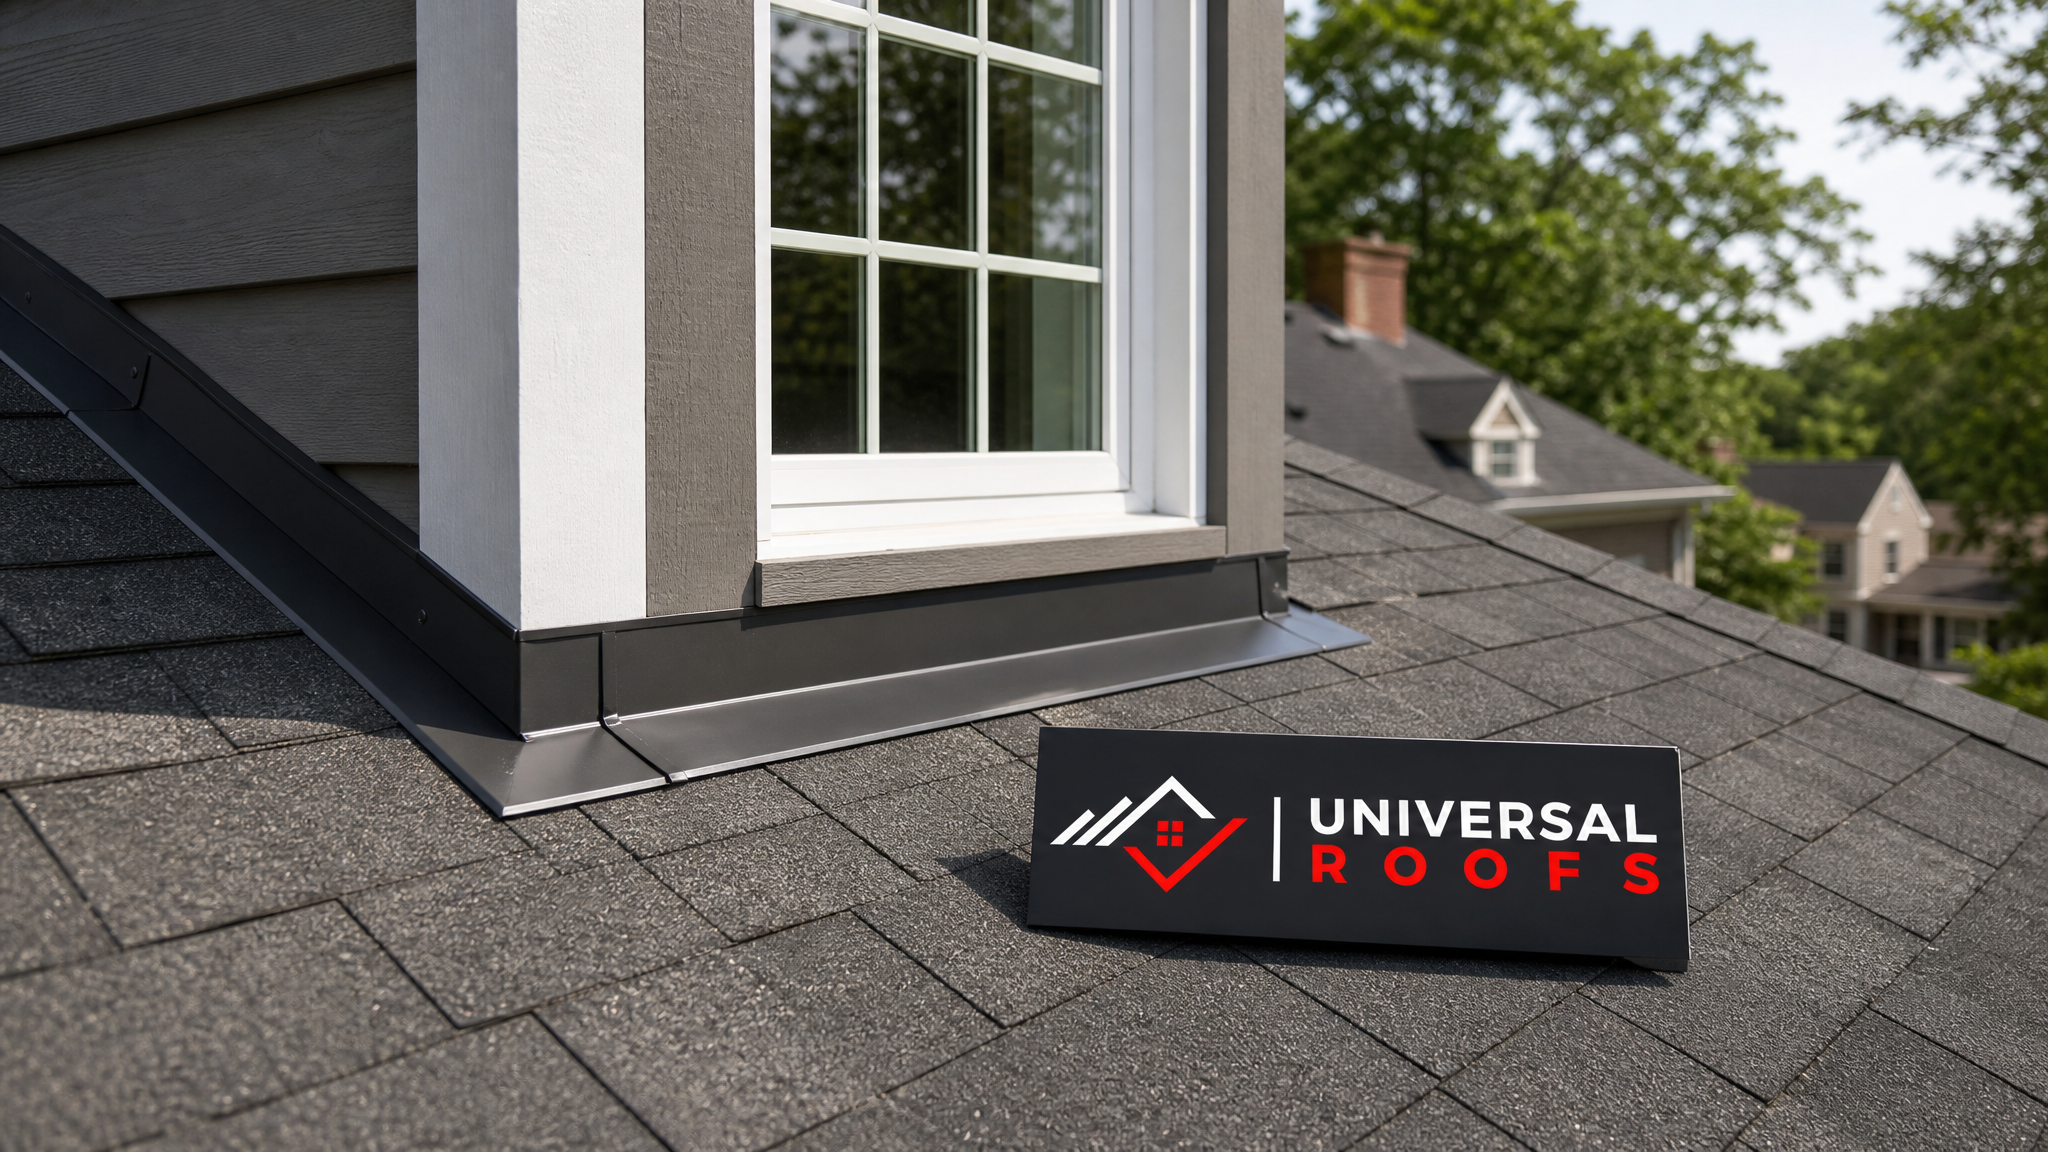
Dormers are essentially small houses built on top of a larger roof, and every place their walls meet the main roof plane is a potential entry point for water. Unlike a simple gable or hip roof with continuous, unbroken slopes, a dormer introduces valleys, sidewalls, and a front-facing cheek wall that all need distinct flashing details. Each transition changes the direction water is travelling, and if the flashing at any single point is undersized, corroded, or improperly lapped, water will find it.
In the GTA, the problem is compounded by our climate. Winter freeze-thaw cycles expand and contract metal flashing dozens of times a season, gradually working fasteners loose and opening hairline gaps in sealant. Ice damming along the eaves can back water up under shingles and directly into dormer valley flashing, which is one of the most common root causes we see when a homeowner calls about a ceiling stain below a dormer. Spring downpours then test every seam at once, and any flashing that was marginal in the fall becomes an active leak by May.
Because dormers sit at a roof-to-wall junction rather than a simple field of shingles, they also require exterior cladding, house wrap, and roofing underlayment to all integrate correctly with the flashing. A flashing detail that looks fine from the ground can still be failing behind the siding. This is why a full roof replacement is often the right time to correct dormer flashing that has been patched repeatedly over the years rather than properly rebuilt.
1. Step Flashing — The Workhorse for Dormer Sidewalls
Step flashing is the single most important flashing type for any dormer, and it is used along the sidewalls where the sloped roof meets the vertical dormer wall. Each piece is a small L-shaped metal shingle, typically 5 by 7 inches for a standard shingle exposure, installed one at a time and woven in with each course of roof shingles as the roofer works up the slope. The result is a continuous overlapping shingle-and-flashing assembly that directs water down and away from the wall at every single course.
The critical detail with step flashing is that each piece must be individually let into the roofing course below it and lapped by the course above — it is never acceptable to use one long continuous strip bent to fit the slope, because that approach cannot accommodate the roof’s thermal movement and will crack or pull away from the wall within a few years. Step flashing should always be paired with counterflashing above it (see below) so the top edge is mechanically protected rather than relying on caulking alone.
Materials matter here. Aluminum step flashing is common and cost-effective, but it corrodes quickly if it contacts pressure-treated lumber or masonry without a separator. Galvanized steel is more durable in most siding applications, while copper step flashing, though the most expensive option, essentially never needs replacement and is often specified on higher-end dormer rebuilds where the roof is expected to last 40-plus years.
2. Counterflashing — Locking Out Water From Above
Counterflashing is the second half of the step flashing system, and skipping it is one of the most common shortcuts that leads to dormer leaks. Where step flashing meets a masonry wall, brick veneer, or stucco, counterflashing is cut into a reglet (a small groove) in the wall material and bent down to overlap the top edge of the step flashing, creating a two-piece system that can move independently with temperature changes while still shedding water.
On dormers clad in vinyl, wood, or fibre-cement siding rather than masonry, counterflashing is typically integrated as a continuous head-wall or side-wall flashing tucked up under the house wrap and siding, rather than cut into a reglet. Either way, the principle is identical: the upper flashing must always overlap the lower flashing, and the joint should never rely on caulk or sealant as the primary water barrier — sealant is a backup, not a strategy.
We frequently find dormer leaks where counterflashing was omitted entirely and a contractor simply caulked the top of the step flashing to the wall. Caulking shrinks, cracks, and fails within a handful of Toronto winters, so any dormer inspection should specifically check whether true counterflashing exists or whether the joint is sealant-dependent.
3. Dormer Valley Flashing — Where Two Slopes Meet a Wall
Where a dormer roof meets the main roof at an inside corner, water from both slopes concentrates into a valley, and this is arguably the highest-volume water path on the entire structure during a heavy storm. Valley flashing for dormers needs to be wide enough to handle that concentrated flow — typically a minimum of 500mm (about 20 inches) of exposed metal width for open valleys in our climate — and needs a smooth, closed W-profile or open valley design that resists debris buildup.
Open metal valleys, usually galvanized steel or aluminum, are generally the most reliable choice for dormer valleys in the GTA because they allow water and slush to move freely without ice becoming trapped against shingle edges. Closed (shingle-over) valleys can work on lower-slope sections but are more prone to granule wear and ice damage over time. Because dormer valleys often sit in partial shade and collect snow that the main roof sheds elsewhere, this is also the area where ice and water shield membrane underlayment is most critical, extending at least 900mm up the valley on both sides before the metal is installed.
If you have noticed granule loss, rust streaking, or standing debris in a dormer valley, that is a strong sign the flashing needs attention before the next freeze-thaw cycle, not after a leak appears.
Comparing the Core Dormer Flashing Types
| Flashing Type | Location on Dormer | Typical Material | Expected Lifespan | Failure Risk if Skipped |
|---|---|---|---|---|
| Step flashing | Sidewalls where slope meets wall | Aluminum, galvanized steel, copper | 20-40+ years | Water tracks behind wall cladding |
| Counterflashing | Above step flashing, into wall | Galvanized steel, copper, aluminum | 25-40+ years | Reliance on failing caulk joint |
| Dormer valley flashing | Inside corner of two slopes | Galvanized steel, aluminum | 20-30 years | Concentrated water overwhelms shingles |
| Head wall flashing | Front-facing cheek wall base | Aluminum, galvanized steel | 20-35 years | Water pools against front wall |
| Kickout flashing | Where step flashing ends at eave | Aluminum, galvanized steel | 20-30 years | Water diverted into wall cavity |
| Apron/base flashing | Roof-to-wall base transitions | Aluminum, galvanized steel | 20-30 years | Gap at base allows wind-driven rain in |
4. Head Wall Flashing — Protecting the Front-Facing Wall
The front, or cheek, of a dormer usually presents a flat vertical wall facing down-slope, and this is where head wall flashing (sometimes called apron flashing) comes in. It is installed at the base of this wall, extending up the wall face and out over the roof deck, so that water running down the dormer’s own small roof and any water shedding from the main roof above is directed out onto the shingles rather than behind the wall’s cladding.
Head wall flashing should always be a continuous L-shaped piece long enough to span the full width of the wall, with the vertical leg running up behind the house wrap and siding and the horizontal leg lapping over the shingle course below it by at least 75mm. A common mistake on older dormers is head wall flashing that was cut too short or installed with the horizontal leg tucked under the shingle course instead of over it, which reverses the intended water path and channels moisture straight into the wall assembly.
Because the front wall of a dormer often includes a window, head wall flashing also needs to coordinate carefully with window flashing and drip caps above the window opening, creating a layered system rather than a single flat piece of metal.
5. Kickout Flashing — The Small Piece That Prevents Big Damage
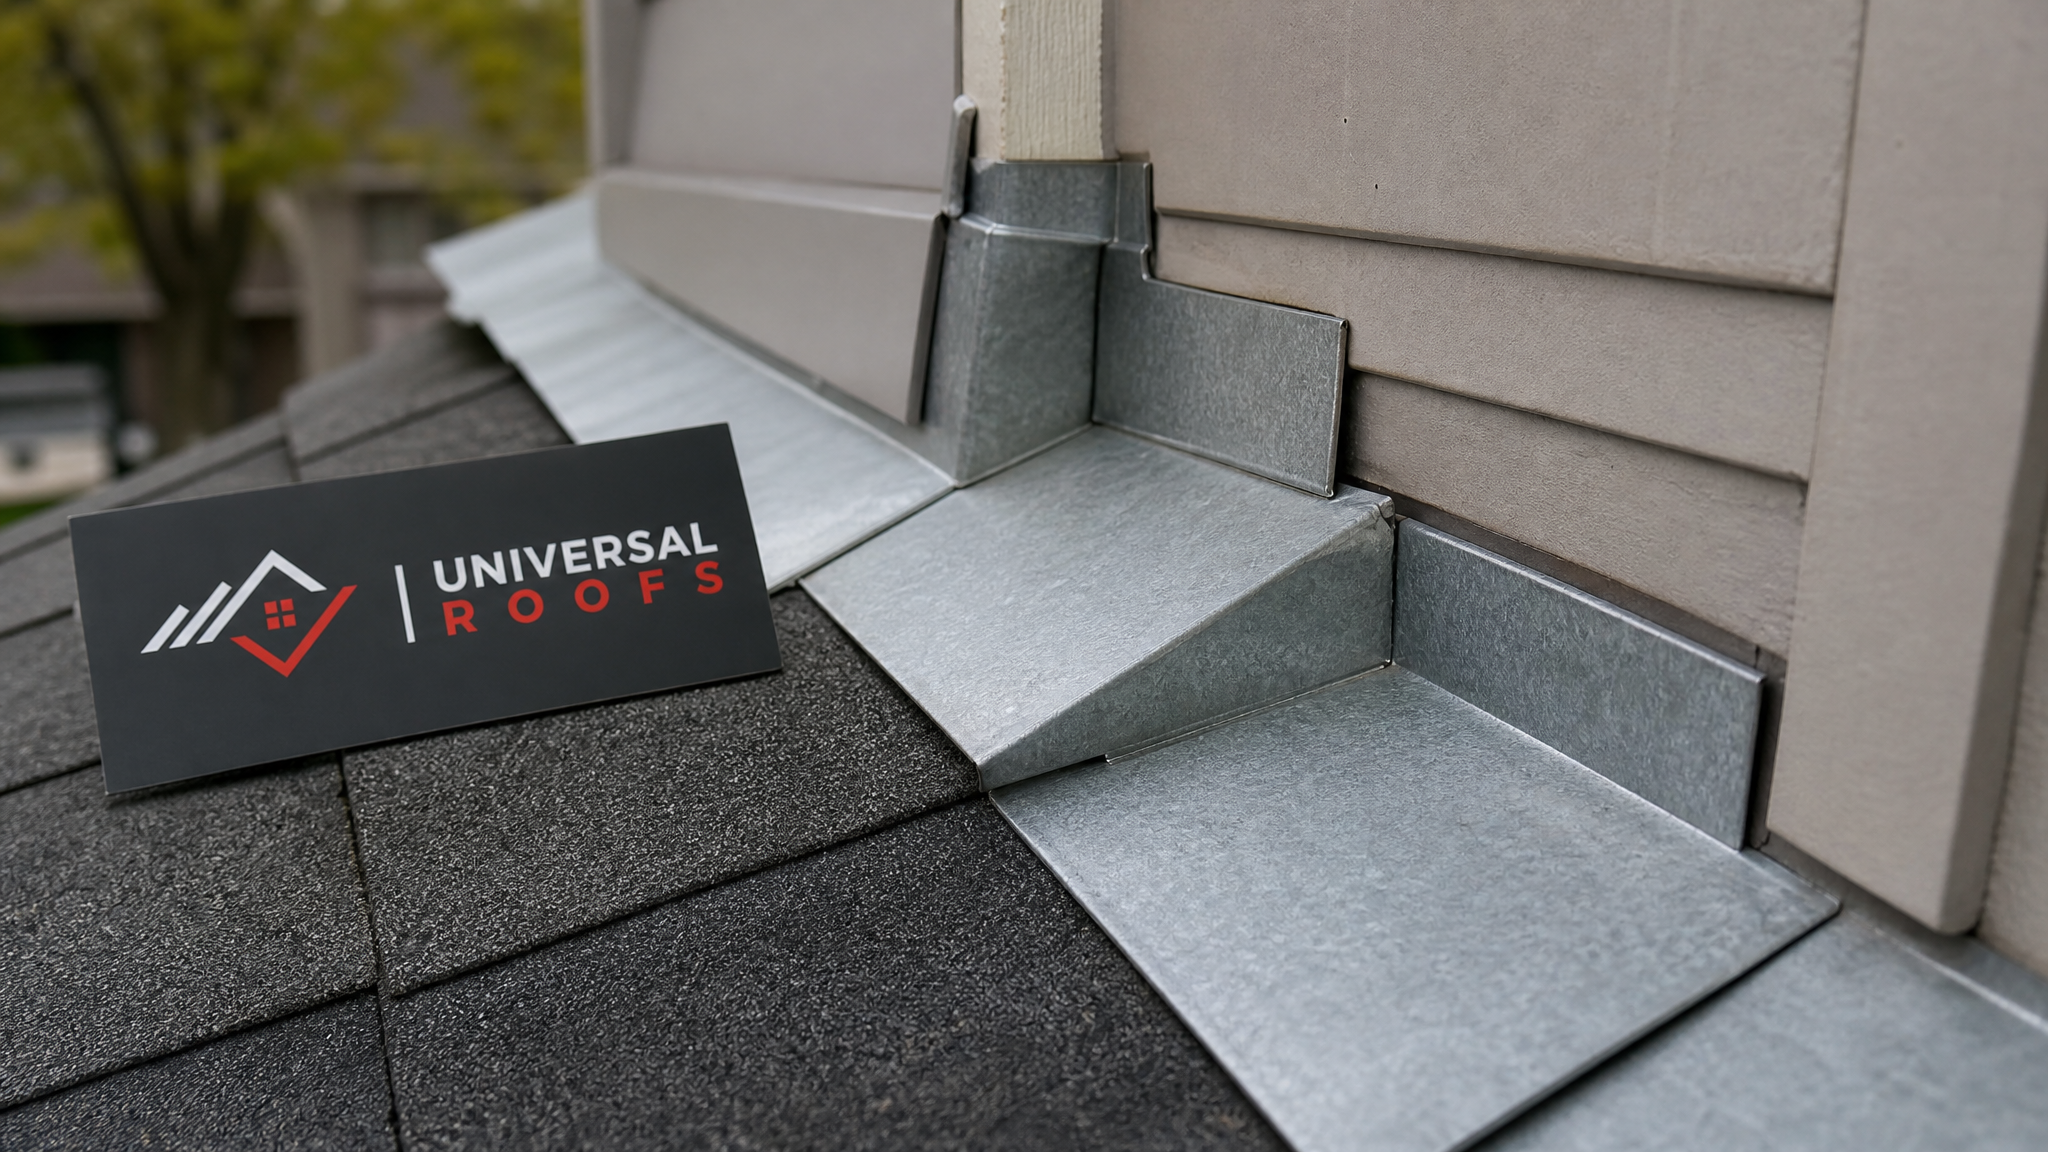
Kickout flashing, sometimes called a diverter, is a small but critical piece installed at the exact point where a dormer’s step flashing run ends and meets a gutter or eave. Without it, water travelling down the step flashing system simply runs off the last piece and directly into the wall cavity behind the siding, rather than being kicked outward into the gutter where it belongs. This single missing piece is one of the most common causes of hidden wall rot beneath dormers, and it is frequently overlooked because it is small and easy to miss during a quick roof inspection.
A properly formed kickout flashing has a flared, angled profile that physically redirects water away from the wall and out over the fascia or into the gutter trough. It should be installed as the step flashing is being run, not added afterward as a patch, since it needs to integrate with both the step flashing above it and the wall cladding beside it. If you are inspecting an older dormer and cannot see a distinct diverted piece where the step flashing meets the eave, that is worth flagging during your next roof assessment.
6. Apron and Base Flashing — Sealing the Roof-to-Wall Transition
Apron flashing, sometimes used interchangeably with base flashing, refers to the flashing installed along the base of any dormer wall section that runs parallel to the roof slope rather than perpendicular to it, and also includes the transition pieces used where a dormer roof deck meets the main roof deck at a low, nearly flat juncture. This flashing type ties the other five together, providing the final continuous seal at grade-level transitions that step flashing and head wall flashing do not directly cover.
Apron flashing typically extends a minimum of 100mm up the wall and 75-100mm out over the roof deck, and like every other flashing type on a dormer, it should be installed to shed water downhill in a continuous overlap with adjacent pieces — never simply butted edge to edge. On lower-slope dormer roofs, self-adhering ice and water shield membrane should also run beneath the apron flashing as a secondary line of defence, which is particularly important given how often GTA dormers see snow accumulation against these lower walls through the winter.
Materials Comparison: Choosing the Right Metal for GTA Dormers
Not every flashing metal performs the same way in our climate, and the choice affects both lifespan and cost. Galvanized steel offers a strong balance of durability and price and is the most common choice across GTA roofs. Aluminum is lightweight, resists rust, and is easy to form on site, but it can corrode quickly if it contacts masonry, mortar, or pressure-treated wood without a protective barrier. Copper is the premium option, forming an attractive weathered patina and lasting well beyond the roofing material around it, though it comes at a significantly higher upfront cost. Painted or pre-finished steel and aluminum are popular where flashing will remain visible and needs to match trim colour.
| Material | Approx. Cost (relative) | Corrosion Resistance | Best Use on Dormers | Notes for GTA Climate |
|---|---|---|---|---|
| Galvanized steel | $ | Good | Valleys, step, counterflashing | Reliable under freeze-thaw; recoat if scratched |
| Aluminum | $ | Very good (except vs. masonry/PT wood) | Step, head wall, kickout, apron | Easy to form; isolate from mortar contact |
| Copper | $$$ | Excellent | All types on premium dormers | 40+ year lifespan; develops green patina |
| Pre-finished steel | $$ | Very good | Visible flashing needing colour match | Coating can chip if handled roughly |
| Lead-coated copper | $$$$ | Excellent | Heritage or high-end dormer restorations | Premium option, rarely needed on standard homes |
Signs Your Dormer Flashing Is Failing
Dormer flashing problems rarely announce themselves clearly at first. Instead, they tend to show up as small, easy-to-dismiss clues that compound over a season or two. Homeowners should watch for a ceiling stain directly below a dormer window or sidewall, peeling paint or bubbling drywall on an interior wall that backs onto a dormer, visible rust streaking on exterior flashing, gaps where caulking has shrunk away from a joint, or moss and debris buildup in a dormer valley that suggests water is not draining freely.
From the exterior, look for step flashing pieces that appear to have shifted, lifted, or separated from the wall, siding that looks discoloured or soft near the base of a dormer wall, and shingles around the dormer that are cracked, curling, or missing granules more heavily than the rest of the roof. Inside the attic or the room directly below a dormer, a musty smell or visible mould on framing near the dormer knee wall is often the first indoor sign of a flashing leak that has been ongoing for some time.
| Symptom | Likely Flashing Cause | Urgency | Recommended Next Step |
|---|---|---|---|
| Ceiling stain below dormer | Step flashing or head wall flashing failure | High | Book a roof repair inspection immediately |
| Rust streaks on visible flashing | Galvanized coating breakdown | Medium | Plan flashing replacement this season |
| Debris pooling in dormer valley | Undersized or clogged valley flashing | Medium | Clear debris, inspect valley width and slope |
| Soft or discoloured siding near wall base | Missing or failed kickout flashing | High | Have a professional check for hidden wall rot |
| Musty attic smell near knee wall | Long-term hidden leak behind flashing | High | Full moisture assessment and flashing rebuild |
Installation Best Practices and Common Mistakes
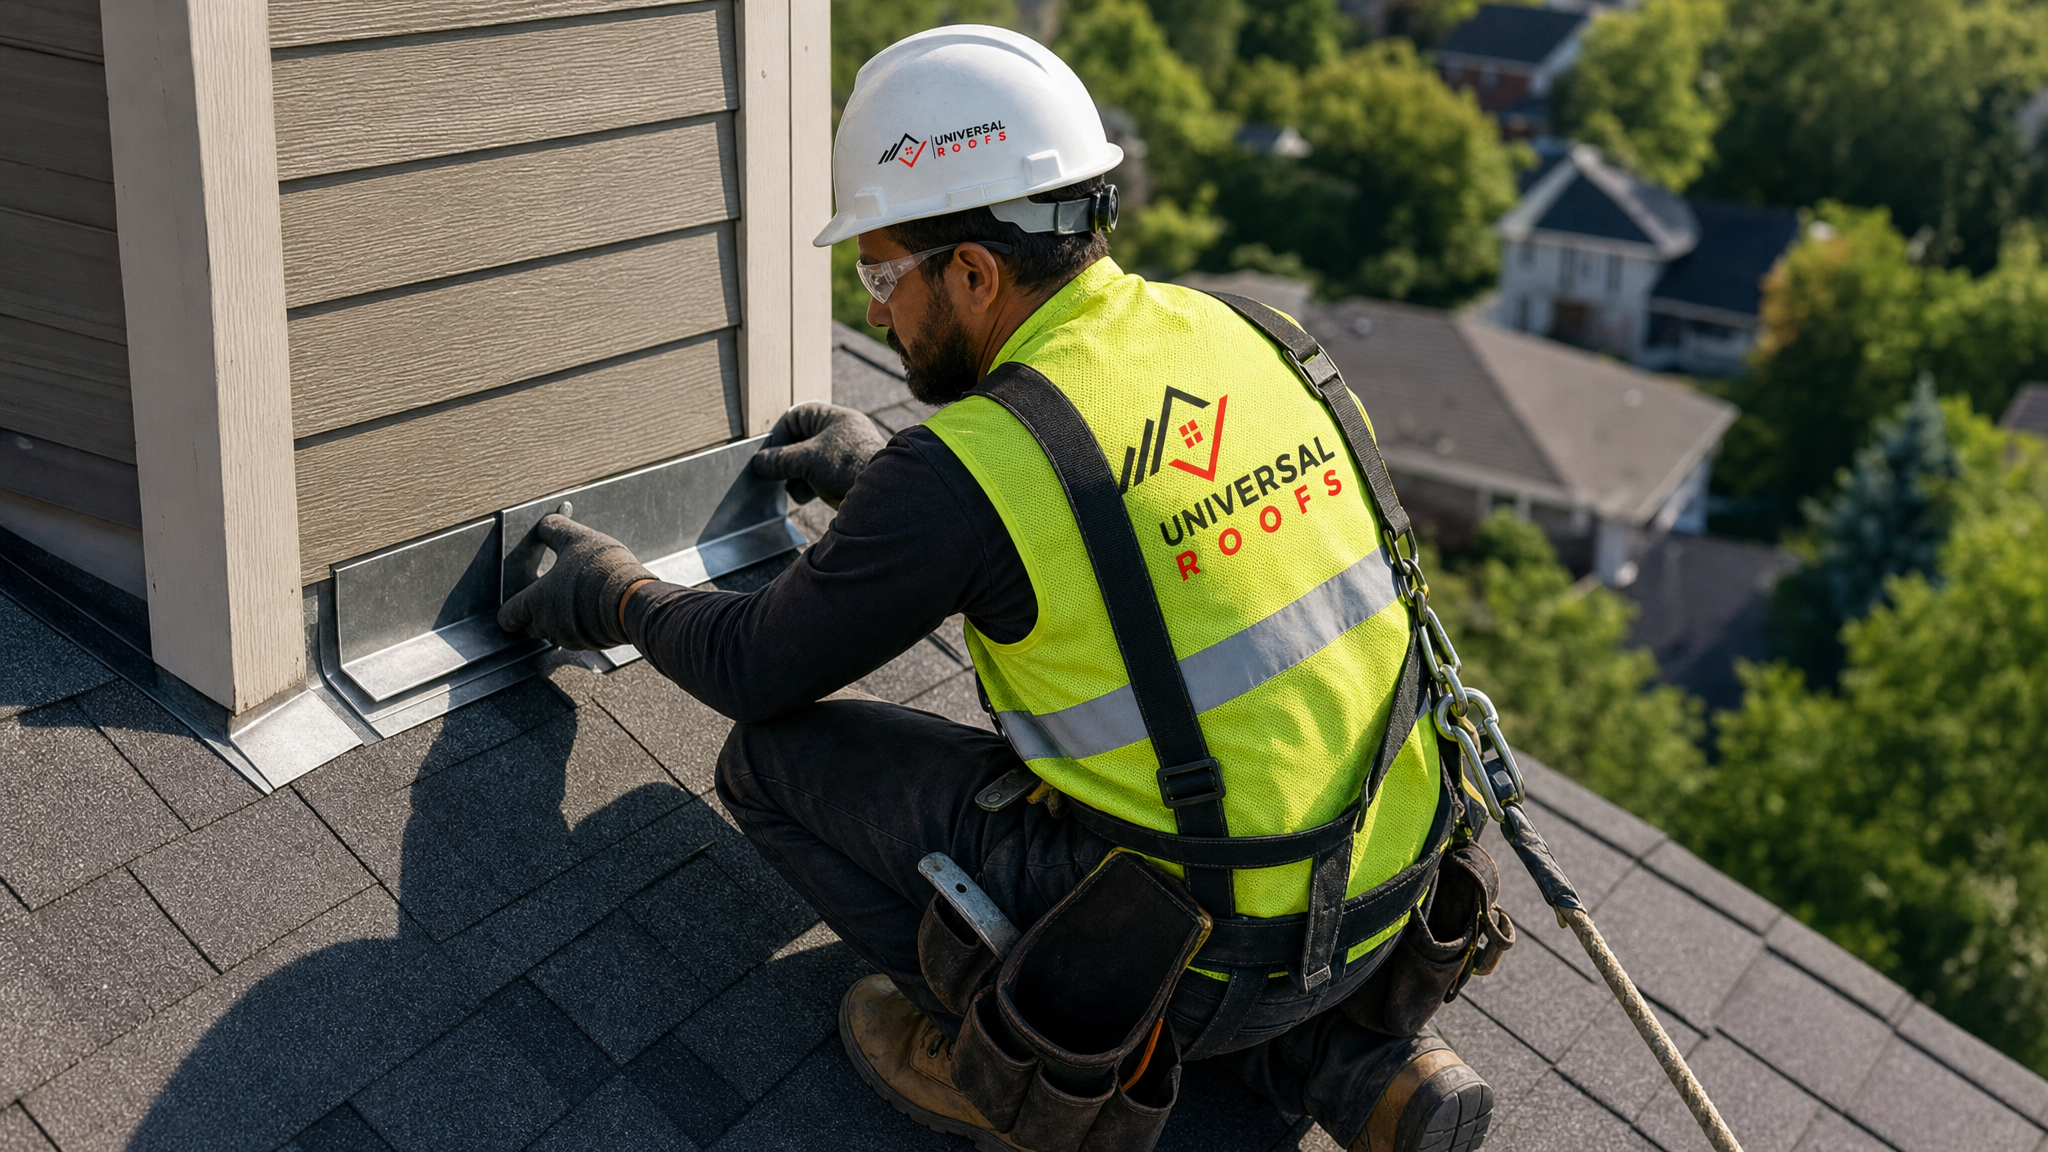
Correct dormer flashing installation depends as much on sequencing as it does on material choice. Every piece needs to be installed in the right order relative to the underlayment, house wrap, siding, and shingle courses so that water is always directed onto the layer below it, never behind it — a principle roofers call proper “shingling” of the components. Working from the bottom of the dormer upward, ice and water shield membrane goes down first in valleys and along wall bases, followed by step flashing woven in with each shingle course, then counterflashing tied into the wall assembly above, and finally kickout flashing at any point where step flashing terminates at an eave or gutter.
The most common installation mistakes we encounter on dormer inspections across the GTA include continuous bent step flashing instead of individual pieces, counterflashing omitted in favour of caulk, kickout flashing skipped entirely, valley flashing installed too narrow for the roof’s water volume, and fasteners driven through the face of the flashing rather than along the top edge where they can be covered by the course above. Any one of these shortcuts can undermine an otherwise well-built roof, which is why flashing deserves as much attention during a roof replacement as the shingles themselves.
Because dormer work often involves coordinating roofing, siding, and sometimes window trades, it also pays to have a single roofing contractor take responsibility for the whole flashing system rather than splitting it across trades who may each assume someone else is handling the overlap details.
Maintenance, Lifespan, and When to Replace Dormer Flashing
Even correctly installed flashing benefits from a periodic check, ideally each spring and fall as part of a broader roof and gutter inspection. Clearing debris from dormer valleys, checking that sealant at any masonry counterflashing reglets has not shrunk away, and looking for early rust spotting on galvanized components can catch small issues years before they become leaks. Most quality flashing systems, properly installed, will outlast a single asphalt shingle roofing cycle, meaning well-installed copper or galvanized steel dormer flashing can often be reused when the shingles themselves are replaced, provided it is inspected and confirmed sound.
That said, flashing that has been patched multiple times, that uses inconsistent materials from past repairs, or that shows active rust-through is a strong candidate for full replacement rather than another patch. A dormer that has had two or three localized repairs over the years is usually telling you the underlying system needs to be rebuilt properly rather than spot-treated again. This is also a good moment to check the condition of the attic insulation and ventilation near the dormer knee walls, since long-standing flashing leaks often leave moisture damage that extends well past the flashing itself.
If your dormer includes a window and you are noticing condensation, drafts, or light staining around the frame in addition to roof-level symptoms, it is also worth having the window and its flashing integration reviewed — our skylights and skylight replacement teams frequently handle these combined roof-and-window flashing assessments where a dormer includes glazing.
Cost Considerations for Dormer Flashing Work in the GTA
Cost for dormer flashing work varies widely depending on whether it is a targeted repair, a full re-flash during a re-roof, or part of a larger dormer construction project. Simple kickout flashing repairs or resealing counterflashing joints are relatively inexpensive and quick. A full re-flash of an existing dormer, including new step flashing, counterflashing, valley metal, and kickouts, costs more but is far more economical than the water damage and interior repairs that result from a failed system left unaddressed for years. Material choice also affects price meaningfully, with copper commanding a significant premium over galvanized steel or aluminum, though it rarely needs replacement again afterward.
Homeowners considering a broader exterior renovation should also weigh dormer flashing against related roofing work happening at the same time. If a flat roofing section adjoins the dormer, or if the home has other transitions needing attention, bundling the flashing work into the same project reduces both cost and the risk of mismatched details between separately scheduled repairs.
Regional service coverage matters too — flashing details that work well in one microclimate can behave differently elsewhere in the GTA depending on tree cover, wind exposure, and snow load. We regularly handle dormer flashing projects across Toronto, Peel Region, York Region, Halton Region, and Durham Region, and the details we recommend often reflect what we have seen hold up longest in each specific area.
Why Professional Installation Matters for Dormer Flashing
Dormer flashing is one of the few roofing details where a small measurement error or a skipped step has an outsized consequence, because every piece depends on correct sequencing with the roofing, siding, and window components around it. A DIY approach or a rushed patch job can look fine for a season or two before failing, often in the coldest, wettest part of winter when access for repairs is hardest. Professional installation ensures the right combination of step flashing, counterflashing, valley metal, head wall flashing, kickouts, and apron flashing work together as one integrated system rather than six separate afterthoughts.
It is also worth reading what past clients have said about flashing and leak repair work before choosing a contractor — our reviews page includes feedback from homeowners across the GTA who have had dormer and valley flashing issues resolved, and our FAQ page answers many of the follow-up questions homeowners ask once an inspection has identified a flashing problem. You can also learn more about our licenced roofing team and experience since 2005 on our about page.
What is the best type of roof flashing for dormers?
How do I know if my dormer flashing is leaking?
What material is best for roof flashing for dormers in the GTA climate?
Can I install roof flashing for dormers myself?
How long does dormer flashing typically last?
What is kickout flashing and why does my dormer need it?
Need Help With 6 Best Roof Flashing?
Getting dormer flashing right the first time protects your home from years of hidden water damage, and it is exactly the kind of detail-oriented work that Universal Roofs has been handling on GTA homes since 2005.
Call us today at (416) 732-2421 or request a free inspection to get started.
Universal Roofs proudly serves Toronto, Mississauga, Brampton, Vaughan, Markham, Oakville and the GTA since 2005.