
If you are thinking about rain barrels in Toronto, or you have just noticed that your downspouts still disappear into a pipe in the ground, the place to start is downspout disconnection. The City requires most homes whose downspouts drain into the sewer system to disconnect them and send roof water onto the ground instead, where it can soak in. Done well, it takes pressure off the sewers during storms. Done badly, it dumps water against your foundation, across a walkway or into the neighbour’s yard.
This guide covers the requirement in general terms, what a proper disconnection involves, how to place extensions and splash pads, how to add a rain barrel without creating new problems, and how to get barrels and downspouts ready for the colder months.
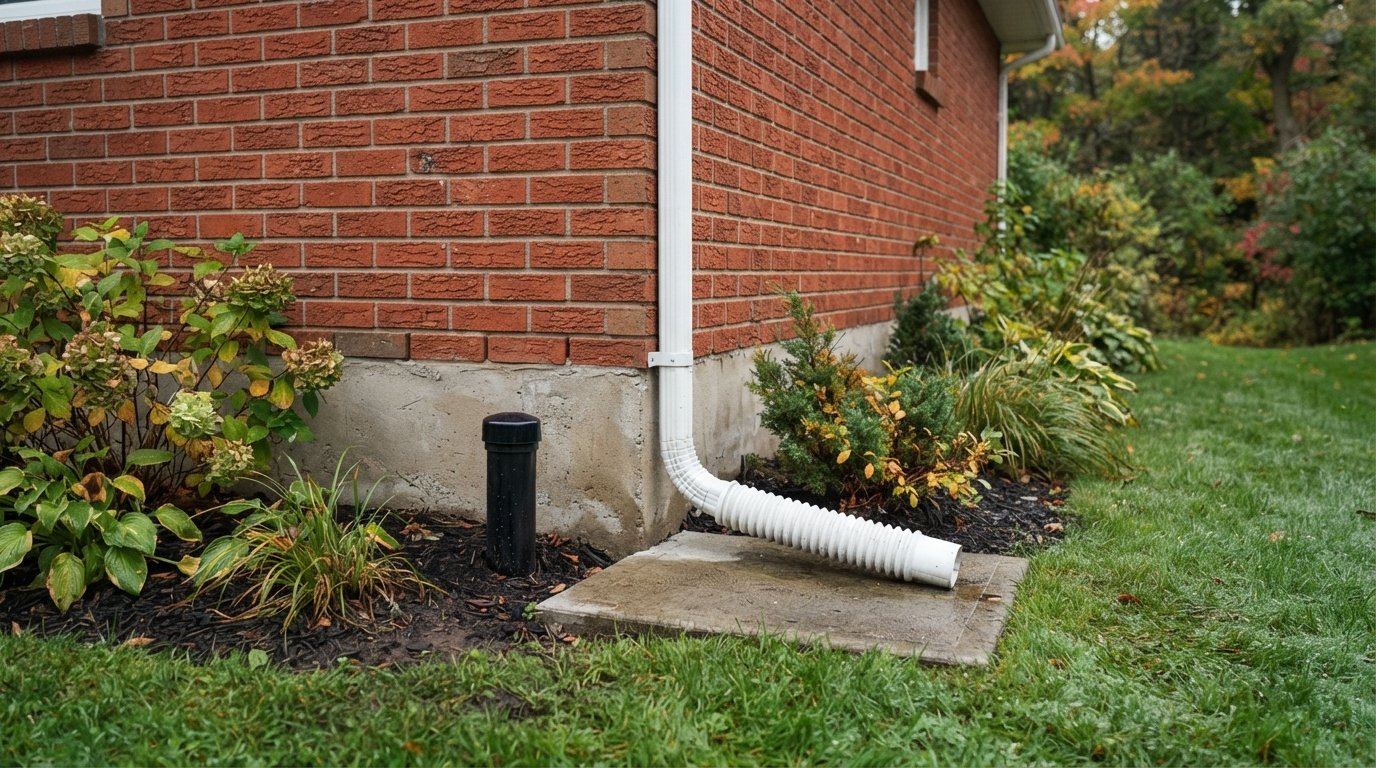
What Downspout Disconnection Means
Many older homes were built with downspouts that feed directly into a vertical pipe, often called a standpipe, which connects underground to the sewer. Every time it rained, roof water from those houses went straight into the pipe network. In older parts of the city with combined sewers, that water shared pipes with household wastewater, and heavy storms could overload the system, contributing to basement flooding and overflows into local waterways.
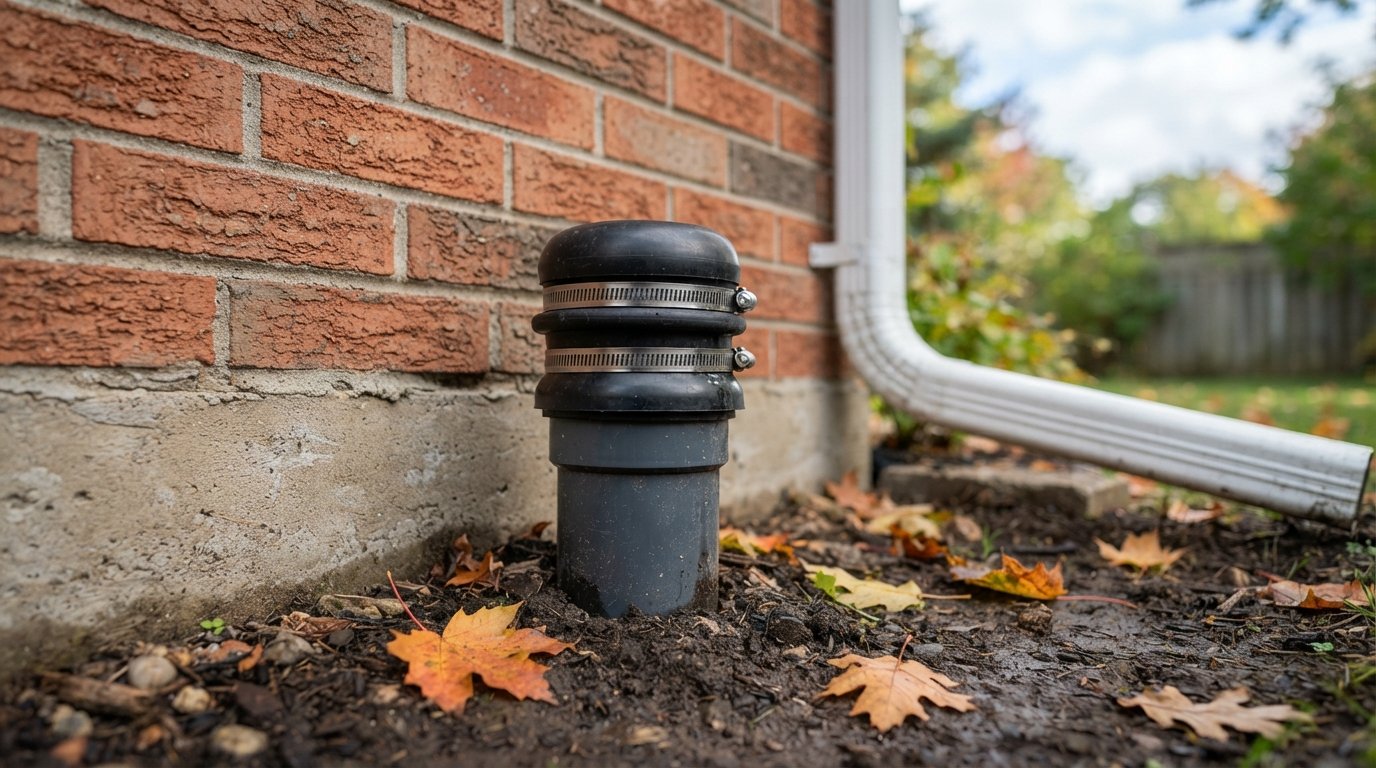
Downspout disconnection reverses that. The downspout is cut above the standpipe, the standpipe is sealed with a watertight cap, and the downspout is redirected onto the ground through an elbow and extension, so roof water soaks into lawns and gardens instead of entering the sewer.
For the homeowner, the goal is simple: water leaves the downspout, travels far enough from the house not to cause trouble, and lands somewhere it can drain safely.
The City Requirement In General Terms
The City made downspout disconnection mandatory for most properties whose downspouts were connected to the sewer system, under its sewer by-law, after years of running it as a voluntary program. The rule was phased in, and it includes an exemption process for properties where disconnection is not practical or safe, for example where there is not enough space for water to drain away from the house without affecting a neighbour or creating a hazard.
We are deliberately keeping this general. Requirements, exemption criteria, application steps and any related programs can change, and the specifics for your property matter. Before you start work, or if you are unsure whether your house is affected or might qualify for an exemption, check the City’s current downspout disconnection information or contact the City directly. Do not rely on a neighbour’s experience or an old flyer.
A few general points hold true regardless of the fine print:
- Disconnection is about where the water goes, not just cutting a pipe. The discharge still has to be managed responsibly.
- Water should not be directed onto a neighbour’s property or across public sidewalks where it can freeze.
- The sewer connection must be properly capped so that nothing, including debris and pests, enters the old standpipe.
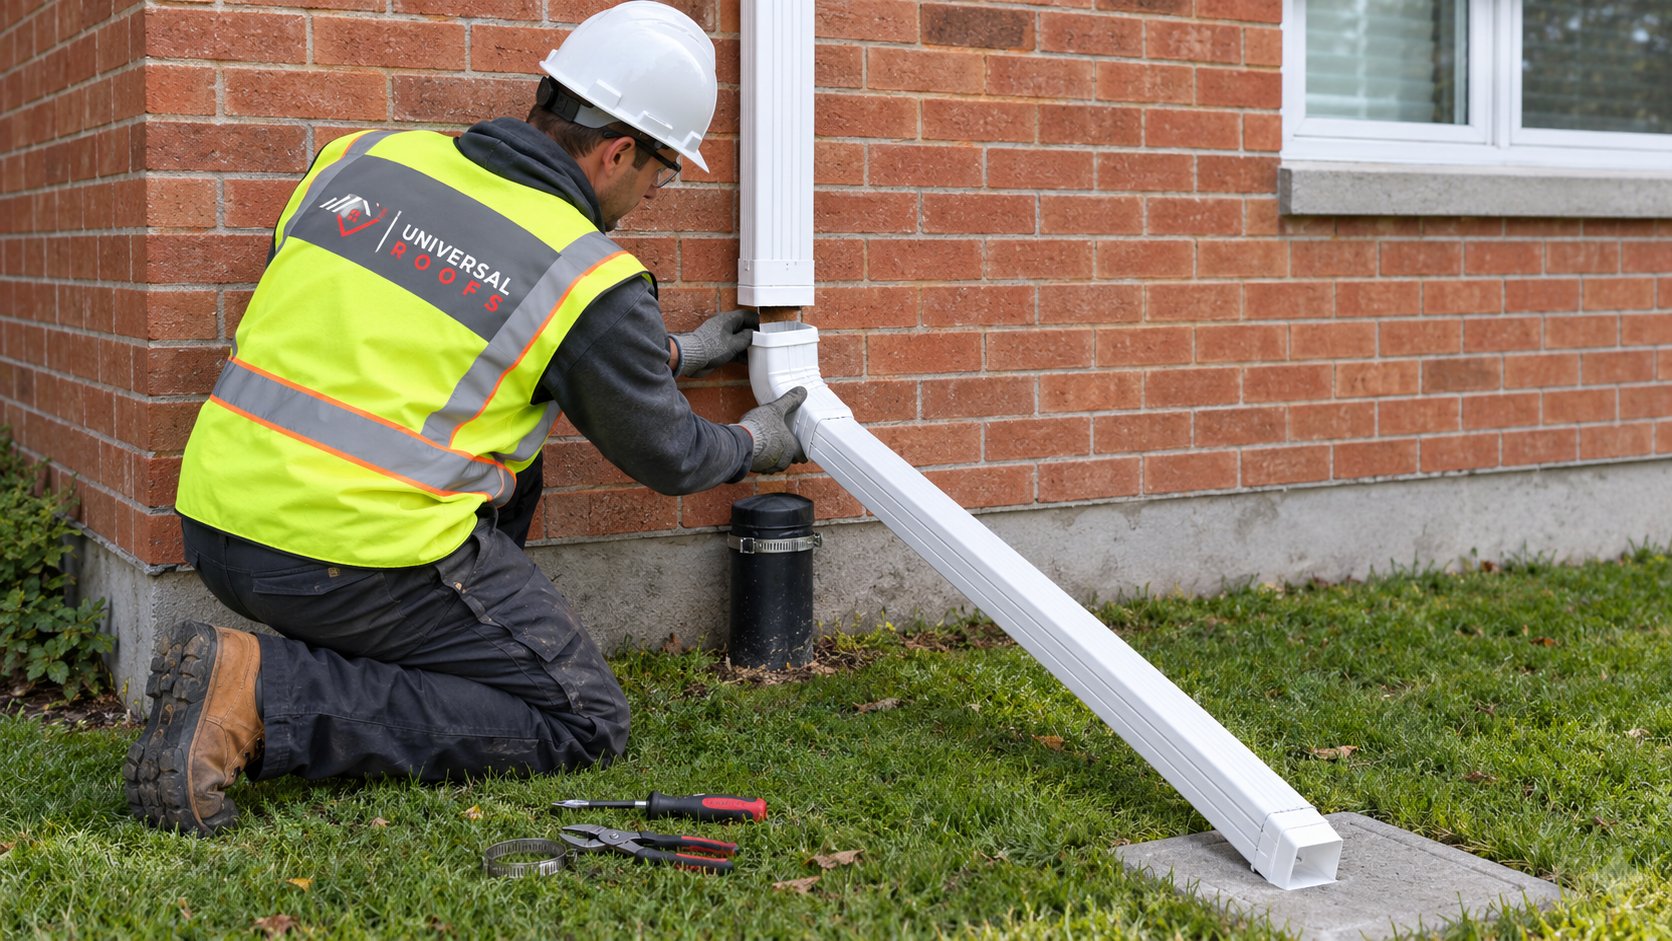
How A Proper Disconnection Is Done
This is a common add-on when we work on troughs, and the crew handles the sequence below on every house.
| Step | What happens | What to watch for |
|---|---|---|
| 1. Measure and mark | Mark the downspout a short distance above the top of the standpipe | Leave room for the elbow and a slight fall to the extension |
| 2. Cut the downspout | Cut cleanly with a hacksaw or snips and remove the lower piece | Support the downspout so it does not twist or pull off the wall |
| 3. Cap the standpipe | Fit a watertight cap sized to the pipe and secure it | A loose or cracked cap lets water and debris into the sewer line |
| 4. Fit the elbow | Attach an elbow to the cut end, crimped end inside the lower piece | Overlaps must run downhill so they do not leak |
| 5. Add the extension | Attach an extension and fasten it securely | Direct it away from the foundation, walkways and lot lines |
| 6. Place a splash pad | Set a splash pad at the outlet | Stops erosion and spreads the flow |
| 7. Test | The crew water-tests the trough and downspout and watches the discharge; you can also watch a real rainfall from the ground | Water should flow away from the house and soak in, not pond |
Some situations are better handled by a crew: downspouts on two-storey walls, troughs that are sagging or leaking where the downspout connects, rotted fascia around the outlet, or cases where the downspout needs to be relocated to a different corner entirely. If the eavestrough system itself is failing, it makes sense to address it at the same time, and that falls under our roof and eavestrough repair services.
Extensions And Splash Pads: Getting Water Far Enough Away
Where the water lands after downspout disconnection is the part that decides whether your basement stays dry. A few principles apply to almost every house.
Distance
Water should discharge well clear of the foundation, commonly a couple of metres or more, onto ground that slopes away from the house. The City’s guidance describes what it expects, so check it for your situation. On most lots, a standard extension plus a splash pad achieves this.
Grading
An extension that empties onto soil sloping back toward the house just moves the problem a few feet. Look at the ground around the discharge point. If it slopes toward the wall, the soil may need regrading so water drains away. Flower beds built up against the foundation often create this reverse slope.
Neighbours and walkways
On narrow lots with side yards only a metre or so wide, pointing an extension sideways can put water straight onto the neighbour’s side or onto a shared walkway. In winter, that water freezes into a slip hazard. Choose a discharge direction toward your own front or back yard where possible.
Extension options
| Option | Best for | Trade-offs |
|---|---|---|
| Fixed aluminum extension | Permanent discharge where nothing needs to pass | Can be a trip hazard or in the way of the lawnmower |
| Hinged or flip-up extension | Paths and lawns you need to cross or cut | Must be flipped back down or it discharges at the wall |
| Roll-out sleeve that unrolls in rain | Short-term or tight spaces | Less durable, can blow around, clogs with debris |
| Splash pad alone | Spots where the downspout is already far from the wall | Rarely enough on its own next to a foundation |
| Rain barrel with overflow extension | Garden use and reducing runoff | Needs seasonal attention and a planned overflow path |
Whatever you choose, check it in the first heavy autumn rain. Watch where the water actually goes, not where you expected it to go.
Adding A Rain Barrel The Right Way
Rain barrels are a natural companion to downspout disconnection. They capture roof water for gardens and slow down how much reaches the ground in a storm. Many homeowners set up rain barrels in Toronto as part of the same project. A barrel only helps, though, if it is installed so its overflow is handled as carefully as the downspout itself.
Choosing a barrel
- A screened or sealed lid to keep out mosquitoes, leaves and small animals.
- An overflow port near the top that accepts a hose or extension.
- A spigot near the bottom for a watering can or hose.
- A dark, opaque body, which discourages algae growth.
Setting it up
- Build a level, solid base. A full barrel is very heavy. Concrete blocks or patio stones on compacted gravel work well; soft soil can settle and tip it.
- Raise it high enough to fit a watering can under the spigot and give some water pressure.
- Cut the downspout so it feeds the lid, or use a diverter kit that sends water to the barrel and bypasses it when full.
- Plan the overflow. Attach an extension or hose to the overflow port that carries water away from the foundation, just like a standard extension would.
- Keep it clear of walkways and property lines so overflow does not create ice or run into a neighbour’s yard.
The most common mistake we see is an overflow that simply spills over the rim or out of a short port right beside the wall. In a heavy autumn storm, a barrel fills quickly, and from that moment everything the roof sheds comes out of the overflow. Treat that outlet exactly as you would a downspout.
Winterising Rain Barrels And Downspouts In Autumn
Early autumn is the time to plan for freeze-up. Water left in a barrel can freeze and crack it, and a barrel full of ice cannot take water, so everything backs up the downspout. Late in the season, before the first hard frost, work through this list:
- Drain the barrel completely using the spigot, then tip it to empty the last water.
- Clean it out with a brush and water to remove sludge and leaves.
- Disconnect it and store it upside down or indoors, with the spigot open.
- Reconnect the downspout to a full extension so winter meltwater still discharges away from the house. If you use a diverter, switch it to bypass.
- Check extensions and splash pads are in place, secure and pointing away from walkways that will ice up.
- Inspect the standpipe cap for cracks or looseness.
- Clean the eavestroughs after most leaves drop so outlets are clear before snow and ice arrive.
Winter downspout discharge needs extra thought. Meltwater during thaws can refreeze on paths and driveways overnight. Pointing extensions toward lawn or garden beds, rather than hard surfaces, reduces icy patches.
Common Problems After Disconnection
Most disconnections work without trouble. When they do not, the signs usually appear in the first few heavy rains.
| Problem after disconnection | Likely cause | What to try |
|---|---|---|
| Damp basement wall at a corner where there was none before | Discharge too close, or ground sloping toward the house | Lengthen the extension and regrade soil away from the wall |
| Pooling on the lawn | Heavy clay soil that drains slowly | Longer extension or a different discharge spot |
| Erosion or bare patches | No splash pad, water hitting soft soil hard | Add a splash pad or a bed of stone |
| Ice on walkways in winter | Discharge pointed at hard surfaces | Redirect toward lawn or garden beds |
| Water crossing into the neighbour’s yard | Extension aimed sideways on a narrow lot | Redirect it; if the lot cannot manage the water, ask the City about exemptions |
| Troughs overflowing above the downspout | Undersized, clogged or poorly pitched troughs | Clean, re-pitch or add an outlet |
Give any change a few rainfalls before judging it. Soil that has been dry all summer absorbs water very differently from soil that is already saturated in late autumn, so the same downspout disconnection can behave well in September and pond in November. If a spot stays wet for days after rain, move the discharge point rather than waiting for it to improve on its own.
That last point is common. Once the downspout is visible above ground, homeowners start watching the whole system and notice overflow they never saw before. Our roofing, eavestroughs and attic work across Toronto often starts with a downspout question and ends with re-pitching a run or adding an outlet.
Cost Of Professional Help
A straightforward downspout disconnection on a single-storey corner is often a small job. As a broad estimate that varies by house and scope, it commonly falls in the range of a modest service call per downspout, rising where downspouts need relocating, troughs need repair or fascia needs replacing. Adding a rain barrel is inexpensive in parts; most of the cost is in the base and the overflow setup. For anything involving troughs, fascia or second-storey work, a site visit gives an accurate quote.
If you are setting up a rain barrel or planning a downspout disconnection and want the troughs checked at the same time, early autumn is a sensible window: the system gets tested by real rain, and the work is done before the ground freezes.
Frequently Asked Questions
Is disconnecting my downspouts mandatory?
How far should the extension carry water?
Can I do the disconnection myself?
What should I do with the old standpipe?
Do rain barrels need to come down for winter?
My basement got damp after disconnecting. What now?
Get Help With Downspout Disconnection
A good downspout disconnection is about more than a cut and a cap: it is about where every litre of roof water ends up. Universal Roofs can cap standpipes, install extensions and splash pads, relocate downspouts and repair the troughs that feed them, so water leaves your roof and stays away from your foundation.
Call us today at (416) 732-2421 or request a free estimate.
Serving homeowners in Toronto and across the wider GTA.