
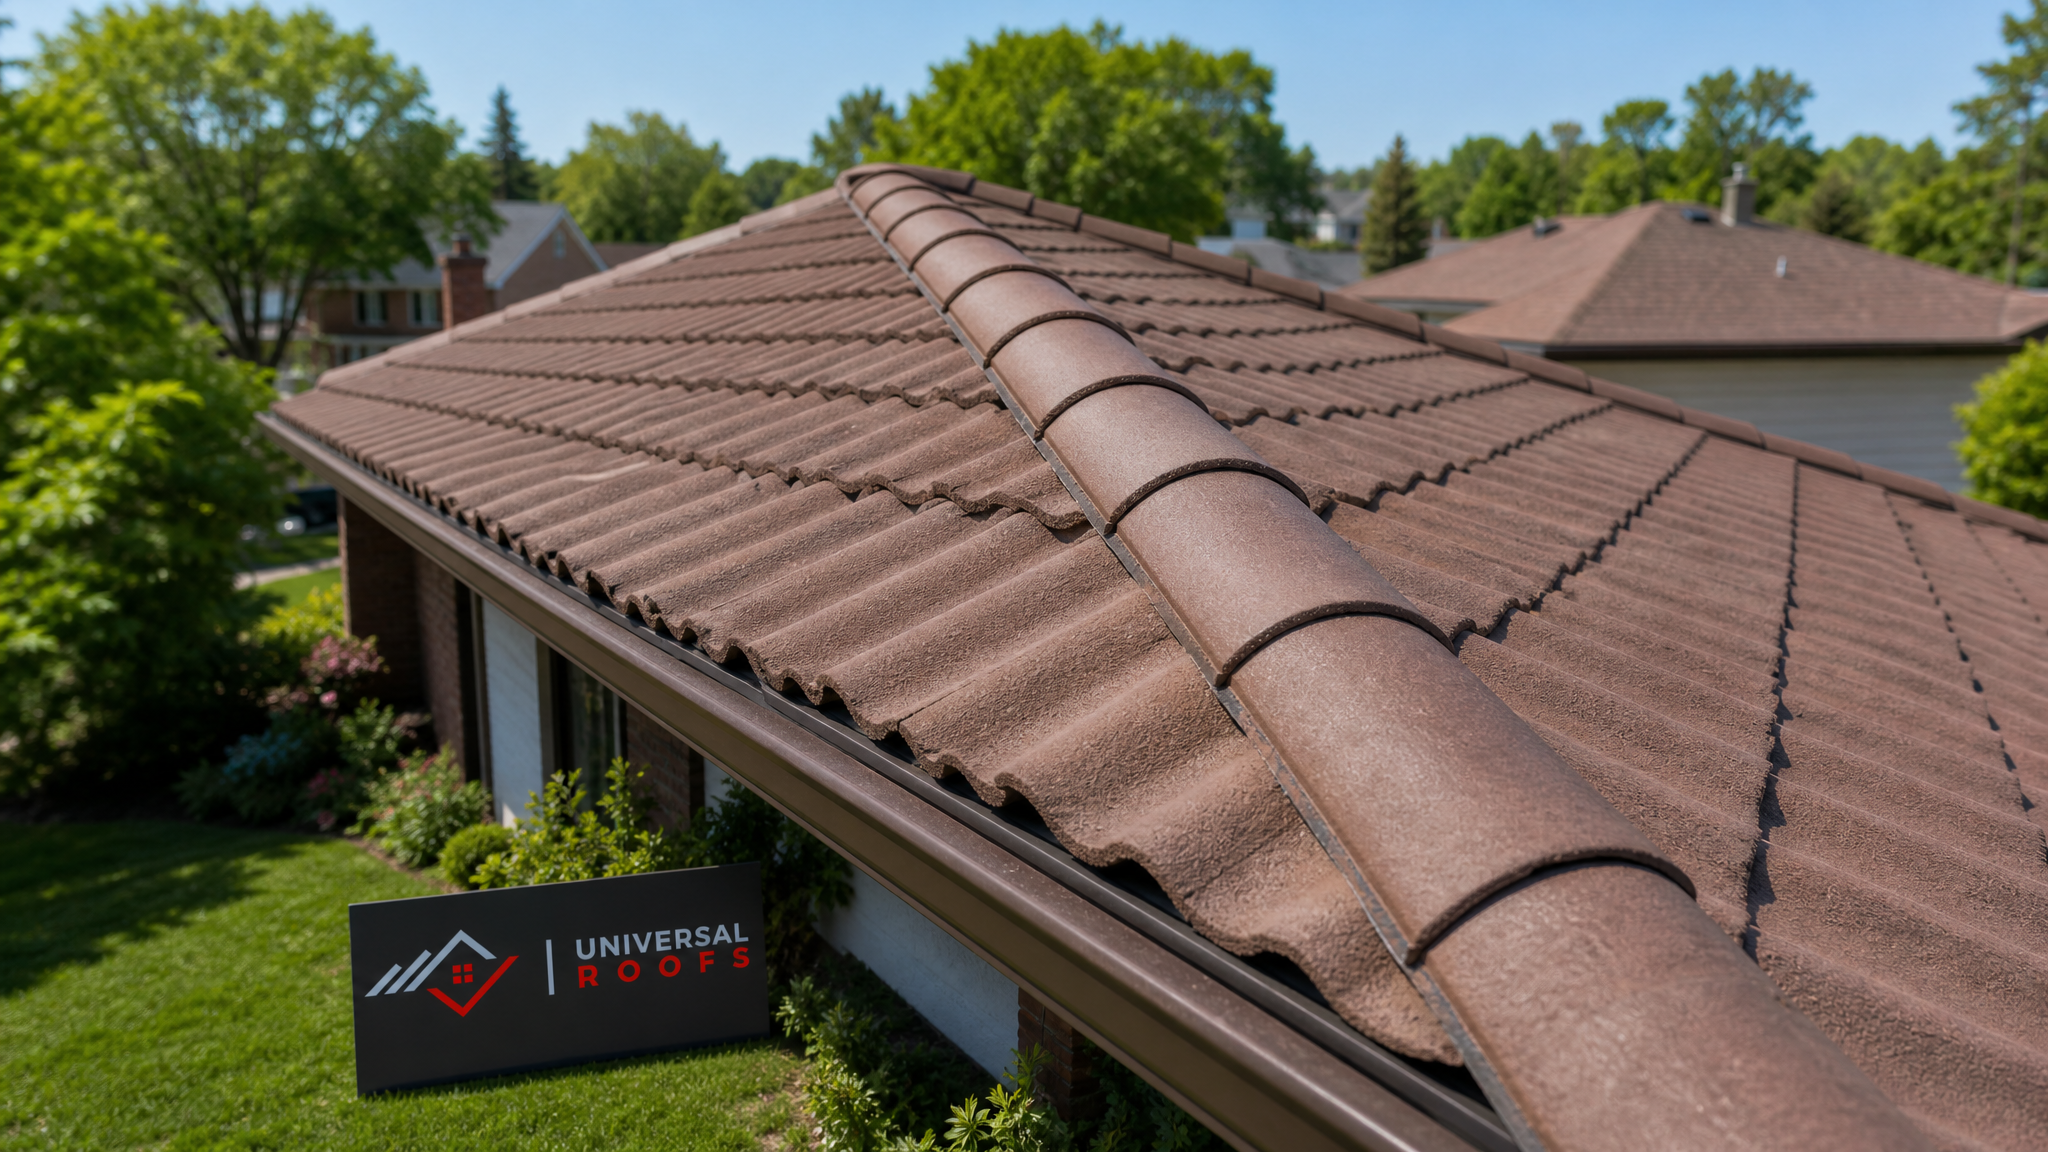
A cracked or missing ridge cap tile might look like a minor cosmetic flaw from the driveway, but it is one of the most consequential small failures a tile roof can suffer. The ridge cap is the crowning row of tiles that bridges the peak where two roof slopes meet, and it is the single most exposed, most weathered, and most structurally important line on the entire roof. When you need to repair broken tile roof ridge caps, you are not just fixing an eyesore — you are closing off the fastest route water, wind, and pests have into your attic.
In the Greater Toronto Area, ridge caps take a beating that few other roof components experience. They sit at the highest point of the structure, catching the full force of wind gusts off Lake Ontario, absorbing direct summer sun that bakes the mortar bedding brittle, and enduring repeated winter freeze-thaw cycles that force microscopic cracks wider with every thaw. Tile roofs are a smaller share of GTA housing stock than asphalt shingles, which means many local homeowners have never dealt with ridge cap failure before and are not sure whether it is a weekend DIY project or a job that belongs to a licensed contractor.
This guide walks through exactly how ridge caps fail, how to assess the damage safely, the step-by-step repair process professionals use, when DIY is genuinely reasonable, and when it is time to bring in a roofing crew. Along the way we will cover materials, mortar mixes, mechanical fastening methods, and the maintenance habits that keep a tile roof’s ridge line intact for decades.
Why Tile Roof Ridge Caps Break in the First Place
Understanding the root cause of ridge cap failure is the first step toward a repair that actually lasts, rather than one that cracks again within a season. Ridge caps fail for a combination of mechanical, thermal, and installation-related reasons, and in most cases more than one factor is at play.
Freeze-thaw cycling is the dominant cause of ridge cap deterioration across Toronto, Mississauga, Brampton, and the rest of the GTA. Clay and concrete tile are both porous to some degree. Rain and melting snow seep into hairline surface cracks or the mortar bedding beneath the cap, then freeze overnight. Water expands roughly nine percent in volume as it turns to ice, and that expansion forces existing cracks wider every single cycle. A roof might survive twenty freeze-thaw cycles with no visible issue, then fail visibly on the twenty-first once the crack finally breaches the tile’s structural integrity.
Wind uplift is the second major culprit. Ridge caps are mounted at the highest, most exposed point of the roof, where wind speed and turbulence are both at their peak. If the original mortar bedding has degraded, or if the caps were mechanically fastened with clips or screws that have corroded or worked loose, a strong gust can rock a cap tile just enough to fracture the bedding or crack the tile itself against its neighbours.
Foot traffic damage is common and often accidental. Ridge caps are not designed to be walked on directly, yet they are frequently the path of least resistance for anyone accessing the roof for antenna work, chimney inspection, or even previous repair attempts. A single misplaced step can hairline-crack a cap tile that then fails completely months later under thermal stress.
Age and mortar degradation play a role on any roof over 15 to 20 years old. The mortar bed that originally held ridge caps in place is a cement-based product, and cement mortar has a service life. As it ages it becomes chalky, loses adhesion, and eventually crumbles, leaving the cap tiles resting loosely rather than firmly bonded. At that point even light wind can dislodge a cap that would have held firm a decade earlier.
Manufacturing or installation defects account for a smaller share of failures but are worth ruling out, particularly if multiple caps in the same section fail within a short time of each other. Inconsistent tile thickness, poor batch quality, or a rushed original installation with inadequate mortar coverage can all set a ridge line up for early failure.
Recognizing the Warning Signs Before a Cap Fully Breaks
Most ridge cap failures do not happen overnight. They telegraph their arrival for weeks or months before a piece actually comes loose or shatters. Catching these signs early turns a same-day repair into the job, rather than letting it escalate into interior water damage that requires a much larger and more expensive fix.
Look for hairline cracks running across the width of a cap tile, visible either from the ground with binoculars or, more reliably, from a ladder positioned safely at the eave line. Check for cap tiles that appear to sit slightly higher, lower, or at a different angle than their neighbours — this “stepping” pattern usually means the mortar bed underneath has failed even if the tile itself looks intact. Watch for small chips of mortar or tile fragments collecting in the gutters after windstorms, which is often the first physical evidence that something at the ridge line has started to fail. Inside the home, check the attic after any heavy rain for damp insulation, water staining on the underside of the roof deck near the ridge board, or a musty smell concentrated at the highest point of the attic space.
DIY Repair vs. Professional Repair: An Honest Comparison
Ridge cap repair sits in an unusual category of home maintenance: the individual steps are not technically difficult, but the working conditions make the job genuinely dangerous for anyone without proper roofing experience and equipment. Before deciding to tackle this yourself, weigh the following factors honestly.
| Factor | DIY Approach | Professional Repair |
|---|---|---|
| Fall risk | High — ridge line is the steepest, highest point on the roof | Mitigated with harness, rope, and roof anchors |
| Tile matching | Difficult to source exact colour and profile match | Access to supplier networks and salvaged stock |
| Mortar mix expertise | Easy to get ratio or curing time wrong | Correct mix and weather-appropriate curing every time |
| Warranty impact | May void existing roof or tile warranty | Repair typically backed by workmanship warranty |
| Time investment | Half a day to a full day for a novice, per section | Usually completed within a few hours per section |
| Cost | Lower material cost, but tool rental and mistakes add up | Higher upfront cost, but done right the first time |
For a single, easily reached cap near the eave with clear sightlines and stable weather, a confident and properly equipped homeowner can reasonably attempt the repair. For anything at true ridge height, on a steep pitch, involving multiple broken caps, or on a roof accessed only via extension ladder over two storeys, this is squarely a job for a licensed roof repair professional. The math rarely favours DIY once you account for harness rental, matching tile sourcing, and the real cost of a fall.
Step-by-Step: How Professionals Repair Broken Tile Ridge Caps
Whether you hire a contractor or you are simply trying to understand what proper work looks like, here is the process a competent roofing crew follows when repairing broken ridge caps.
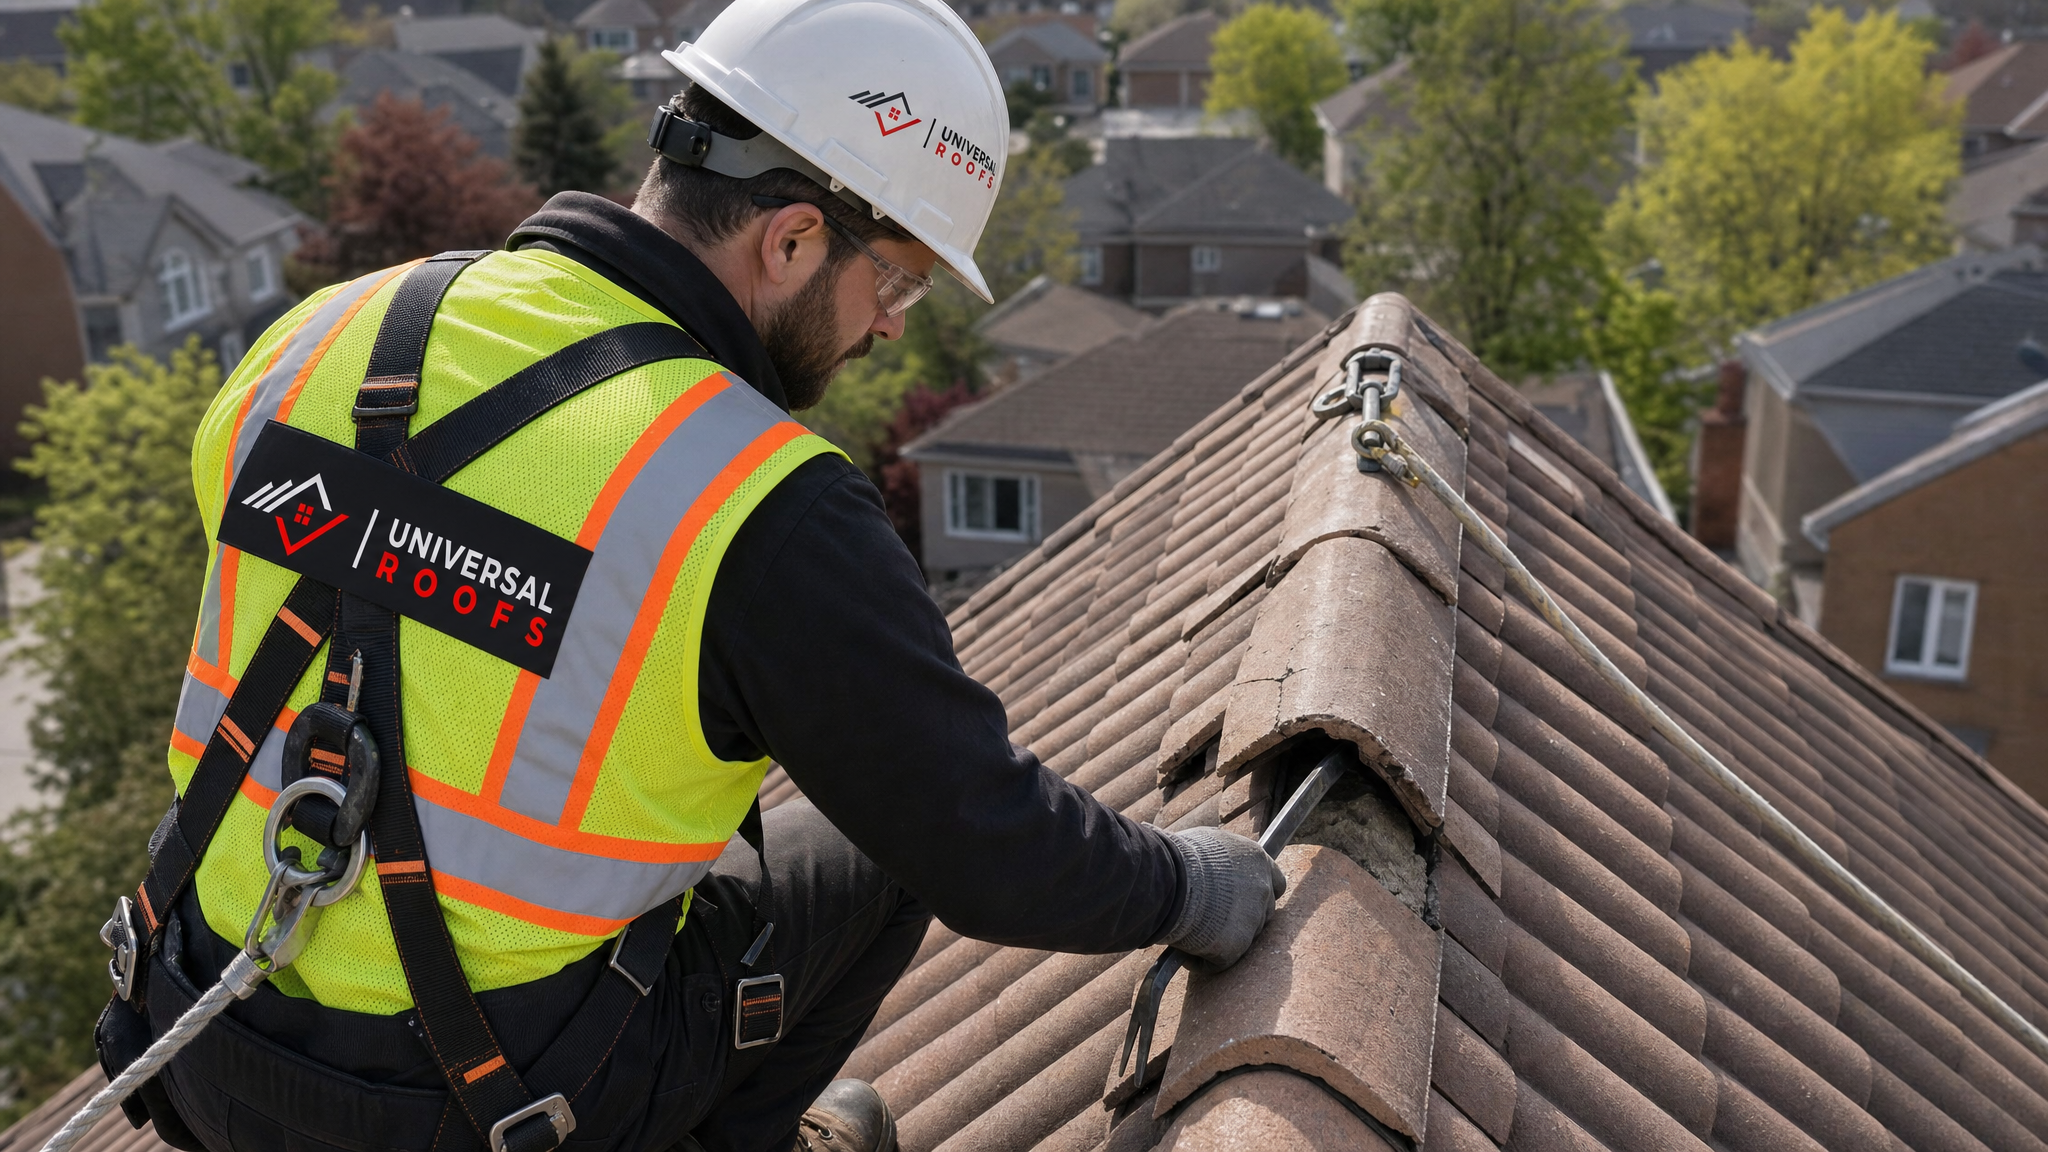
1. Safety Setup
Before anyone steps onto the ridge, a proper roof anchor is installed, and the technician clips into a full-body harness with a rope and grab device. This is non-negotiable at ridge height — falls from residential roofs are among the leading causes of serious injury in the trades, and the ridge is the highest, most exposed section of any tile roof.
2. Damage Assessment
The technician walks the entire ridge line, not just the visibly broken section, tapping each cap tile lightly to listen for a hollow sound that indicates a failed mortar bond underneath. Adjacent tiles that look fine from the ground often show hairline cracks up close, and it is far more efficient to address them in the same visit than to return for a second callout.
3. Removal of Damaged Tiles
Broken cap tiles are carefully lifted using a flat pry bar, working from the edges inward to avoid cracking neighbouring tiles. Old, degraded mortar is chiseled away completely from both the ridge board and the adjoining field tiles — leaving old mortar in place is one of the most common reasons a repair fails again within a year, because fresh mortar will not bond properly to crumbling old material.
4. Substrate Inspection
With the tiles removed, the crew inspects the ridge board, battens, and any underlayment for rot or water damage. This is the step DIY repairs most often skip, and it is the step that determines whether the repair actually solves the underlying problem or just patches the surface. If the wood substrate is compromised, it must be repaired or replaced before any new tile goes back on.
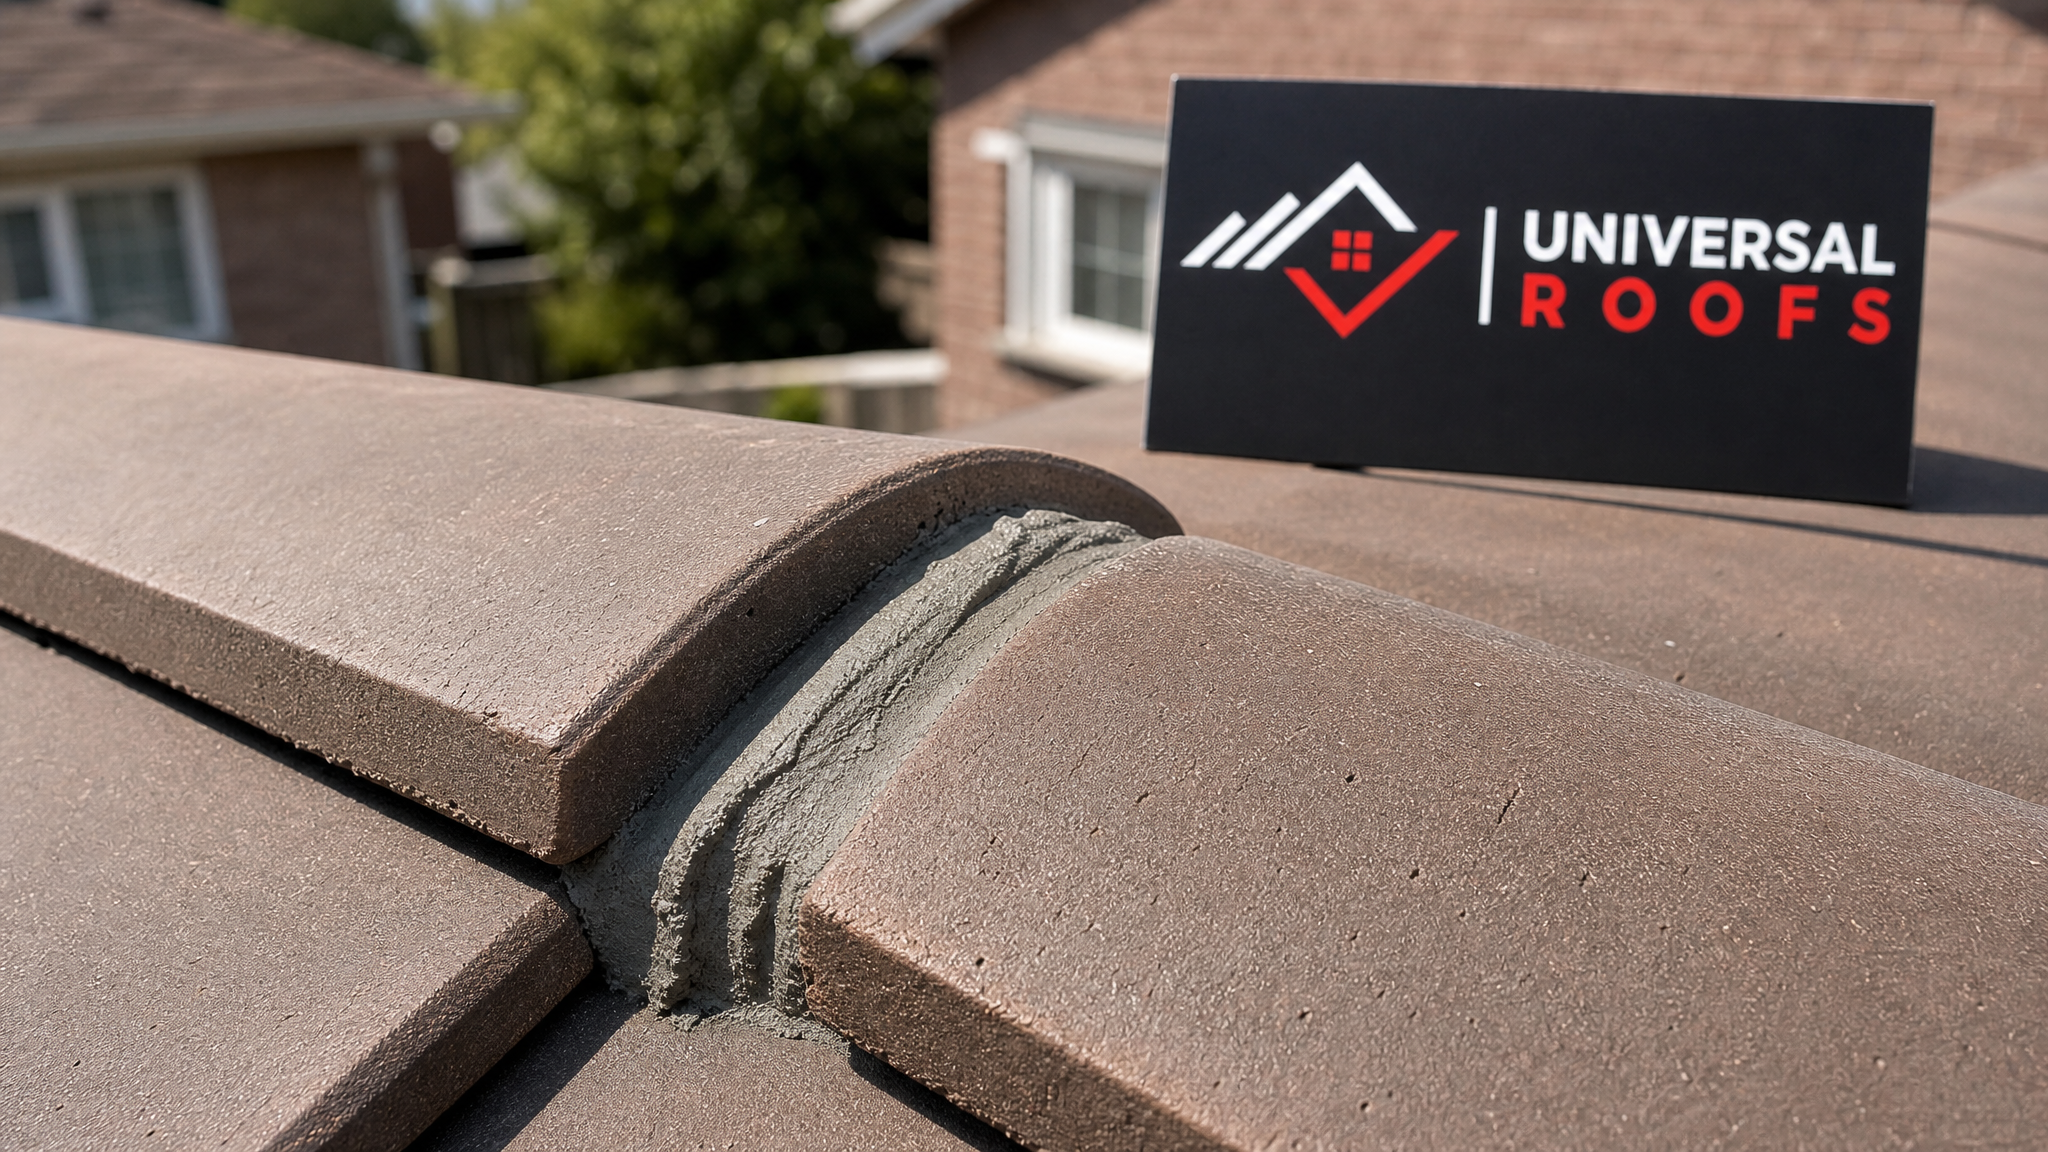
5. Fresh Mortar Bedding or Mechanical Fastening
Depending on the roof’s original construction method and current building code guidance, the crew either lays a fresh bed of weather-appropriate mortar (typically a Type N or Type S mix suited to the local climate) or installs mechanical ridge clips and corrosion-resistant screws, sometimes combining both methods for maximum wind resistance. Modern ridge cap installations increasingly favour mechanical fastening over mortar alone, since it performs more predictably through freeze-thaw cycles.
6. Setting New or Salvaged Tiles
Replacement cap tiles — either new stock matched to the existing profile and colour, or carefully salvaged tiles from a less visible part of the roof — are set into the fresh bedding, aligned precisely with the existing ridge line, and pressed firmly to seat them into the mortar or clip system.
7. Sealing and Curing
A weather-resistant flashing sealant is applied at any transition points, and the crew allows appropriate curing time before declaring the repair complete. Mortar-based repairs typically need at least 24 to 48 hours of dry weather to cure properly, which is why experienced crews always check the forecast before starting.
8. Final Inspection and Cleanup
Every repaired and adjacent tile is tapped and visually checked one more time, the gutters are cleared of any debris from the work, and the ridge line is photographed for the homeowner’s records.
Materials and Costs: What Ridge Cap Repair Actually Involves
Costs for ridge cap repair vary based on the number of tiles involved, the tile material (clay versus concrete), roof pitch, and accessibility. The table below outlines typical ranges for GTA homeowners, though every roof is different and a proper on-site assessment is always the most accurate way to get a number.
| Repair Scope | Typical Materials Needed | Approximate Timeframe | Relative Cost Range |
|---|---|---|---|
| Single cracked cap tile | 1 matching tile, mortar or clips, sealant | 1–2 hours | Low |
| Small section (2–5 caps) | Matching tiles, mortar mix, fasteners | Half a day | Low to moderate |
| Full ridge line replacement | Full run of caps, mortar or mechanical clip system, underlayment | 1–2 days | Moderate to high |
| Ridge repair with substrate rot | Ridge board repair/replacement, plywood, underlayment, new caps | 2–3 days | High |
| Emergency temporary patch | Tarp, temporary flashing, sealant | 1–2 hours | Low (short-term only) |
It is worth noting that clay tile generally costs more to match and source than concrete tile, since exact colour runs are sometimes discontinued after ten or more years and a near-match is the realistic outcome. This is one more reason a full roof inspection at the time of repair is valuable — it lets the contractor plan for tile availability and order slightly extra stock for future repairs while the match is still available.
When a Ridge Cap Problem Signals a Bigger Roof Issue
Not every broken ridge cap is an isolated event. Sometimes it is the visible symptom of a roof-wide problem that deserves a broader look. If you notice any of the following alongside the ridge damage, it is worth having the entire roof assessed rather than treating the ridge in isolation:
- Multiple ridge caps failing in different sections within the same season
- Sagging visible along the ridge line itself, which can indicate structural movement in the roof deck or trusses
- Granule loss, moss growth, or valley deterioration elsewhere on the roof suggesting the tile roof is nearing the end of its service life
- Recurring attic moisture even after the ridge repair is completed, which often points to a separate flashing or ventilation issue
- The roof is 25 years or older and has never had a comprehensive inspection
In these cases, a targeted ridge repair is still the right immediate fix, but it should be paired with a full roof evaluation. A contractor who also handles roof replacement can tell you honestly whether you are looking at years of remaining service life or whether the ridge failure is an early signal of broader deterioration.
Attic Ventilation and Its Connection to Ridge Cap Health
Many homeowners are surprised to learn that poor attic ventilation can accelerate ridge cap failure. A ridge vent system, where one exists, relies on properly sealed and correctly installed ridge caps to function without leaking, and conversely, inadequate attic ventilation traps heat and moisture that stresses the roof deck and ridge assembly from underneath. If your home’s attic ventilation has never been assessed, a ridge cap repair is a natural moment to check intake and exhaust airflow, since correcting both issues together prevents a repeat callout for the same underlying moisture problem.
Similarly, if your roof includes skylights near the ridge line — common in additions and renovated attic spaces — flashing at those transitions should be inspected at the same time, since failed ridge caps and failed skylight flashing often share the same root cause: age-related sealant and mortar breakdown. A quick check of nearby skylight flashing during a ridge repair visit can save a second roof-access trip later.
Preventing Future Ridge Cap Damage
Once a ridge line has been properly repaired, a handful of maintenance habits will meaningfully extend the life of the fix and reduce the odds of a repeat failure.
| Maintenance Task | Recommended Frequency | Why It Matters | Who Should Do It |
|---|---|---|---|
| Visual ridge inspection from ground with binoculars | Twice yearly (spring and fall) | Catches hairline cracks before winter freeze-thaw widens them | Homeowner |
| Professional roof inspection | Every 2–3 years, or after major storms | Identifies mortar degradation and loose caps before failure | Licensed roofer |
| Gutter clearing | Spring and fall | Prevents debris backup that traps moisture near eaves and ridges | Homeowner or contractor |
| Post-windstorm walk-around | After any wind event over 70 km/h | Wind uplift is a leading cause of sudden cap displacement | Homeowner |
| Avoid unnecessary roof foot traffic | Ongoing | Foot traffic is a common, avoidable cause of tile cracking | Homeowner and any contractors on site |
Homeowners in Toronto, Mississauga, Brampton, Vaughan, Markham, and across the wider Toronto, Peel Region, York Region, and Halton Region service areas all deal with the same freeze-thaw climate stress, so this maintenance schedule applies broadly regardless of which municipality you are in. Homes closer to the lakeshore and in more exposed, higher-wind locations may benefit from slightly more frequent post-storm checks.
Tools and Materials Checklist for a DIY Attempt
If you have assessed the job honestly and decided a single, easily accessible cap repair is within your skill level, here is what you will need on hand before starting:
- OSHA/CSA-rated roof anchor and full-body harness with rope grab
- Stable extension ladder rated for the required height, secured at the base
- Flat pry bar and cold chisel for removing old tile and mortar
- Wire brush for cleaning the ridge board and adjoining tile edges
- Pre-mixed roofing mortar (or Type N/S mortar mix plus mixing tools) matched to your original installation
- Replacement ridge cap tile matched in colour and profile
- Corrosion-resistant ridge clips and screws, if your roof uses mechanical fastening
- Weather-resistant roofing sealant
- Soft-soled shoes designed for roof work, to avoid cracking adjacent tiles
- A second person on the ground for spotting and equipment handling
Never attempt this work in wet, icy, or high-wind conditions, and never work alone at ridge height. If, once you are on the ladder, the pitch or height feels more intimidating than it did from the ground, it is always reasonable to stop and call a professional rather than push forward.
Can I repair broken tile roof ridge caps myself, or do I need a professional?
What causes tile roof ridge caps to crack in the first place?
How much does it cost to repair broken tile roof ridge caps?
How do I know if my ridge cap damage is an emergency?
Should I replace all the ridge caps if only one or two are broken?
Does homeowner’s insurance cover ridge cap repair?
Need Help With How to Repair Broken?
A ridge line that has started shedding cap tiles rarely fixes itself, and every missed windstorm adds a little more risk of water finding its way into your attic. Universal Roofs has been assessing and repairing tile roofs across the GTA since 2005, and our crews are equipped with the harness systems, tile-matching resources, and mortar expertise this kind of ridge-height repair demands.
Call us today at (416) 732-2421 or request a free inspection to get started.
Universal Roofs proudly serves Toronto, Mississauga, Brampton, Vaughan, Markham, Oakville and the GTA since 2005.