
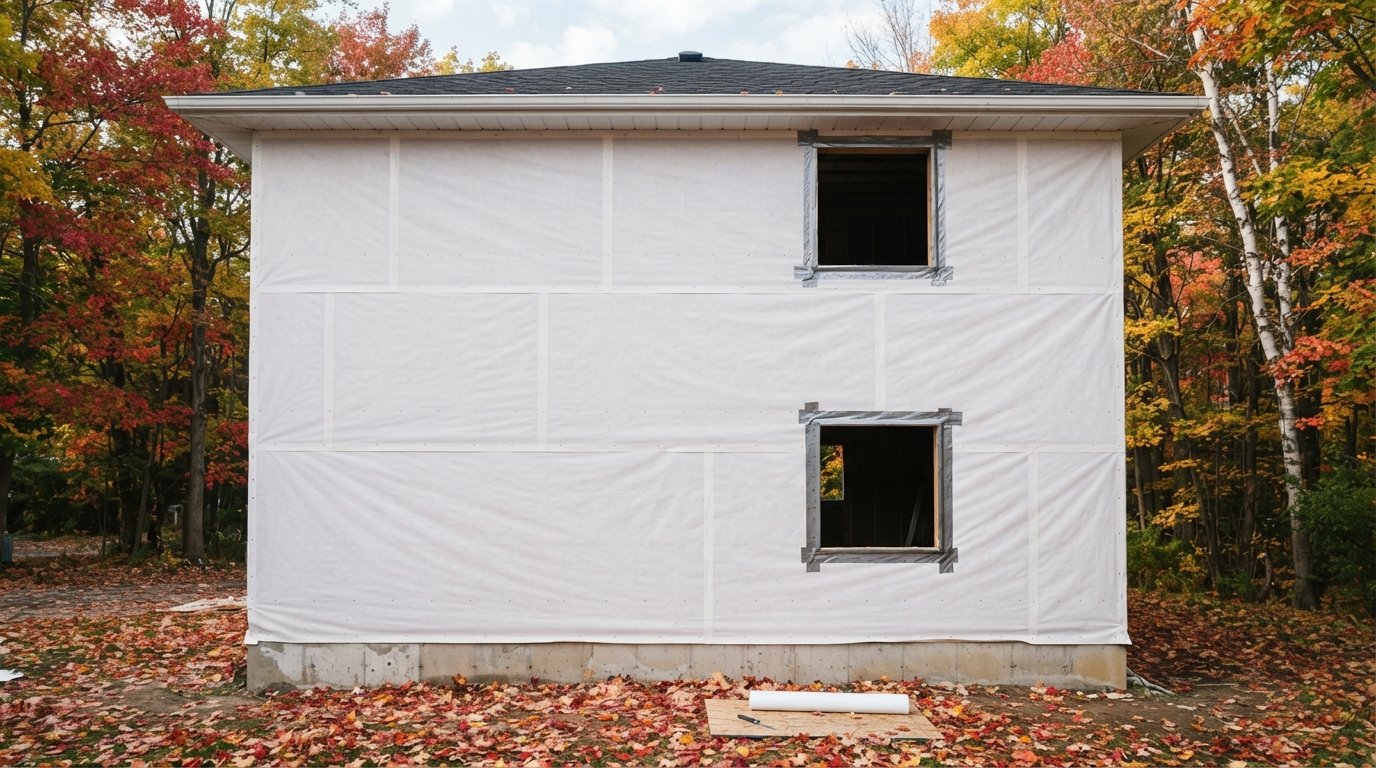
House wrap is the thin sheet you see stapled across a wall before the siding goes on, usually white and printed with a manufacturer’s name. Most homeowners only see it for a few days during a renovation, then it disappears behind cladding for decades. That is exactly why it matters: siding is not waterproof, and the wrap behind it is what keeps the water that gets past the siding away from the sheathing and framing. When it is installed well, you never think about it. When it is lapped backwards, torn or cut around windows without flashing, it can quietly rot a wall from the inside.
Nearly every wrap failure we uncover during re-siding comes down to order: which piece went on first, which way a lap faces and whether the window flashing was layered over or under the sheet. Get the order right and a very ordinary product performs well for decades.
What House Wrap Actually Does
The technical name for house wrap is a water-resistive barrier, or sheathing membrane. Its job is to stop liquid water that gets behind the siding from reaching the sheathing, while still allowing water vapour to pass through so the wall can dry. Every cladding leaks to some degree. Wind-driven rain gets behind vinyl laps, through joints in fibre cement and engineered wood, and around trim. Water also condenses on the back of cladding. The wrap catches that water and directs it down and out at the bottom of the wall.
That last part is important. A water-resistive barrier is not a raincoat that works anywhere. It is one layer in a drainage system: water runs down its face, over each lower lap and finally out at a flashing or the bottom of the wall. If any piece of wrap is lapped so water runs behind it instead of over it, the system fails at that point.
House wrap is also not the same as the vapour barrier. In Ontario homes, the polyethylene vapour barrier sits on the warm, inside face of the wall to limit moisture moving from the house into the wall. The exterior wrap is deliberately vapour-open so that any moisture in the wall can escape outward. Putting a vapour-tight sheet on the outside of a wall that already has polyethylene inside can trap moisture between them.
The Ontario Building Code requires a sheathing membrane behind most types of exterior cladding, with specific requirements for materials, laps and installation. Confirm current requirements with your municipality and follow the cladding and wrap manufacturers’ instructions. Before a re-siding project, it helps to understand how our siding, soffit and fascia installations treat the wrap, flashing and cladding as one system rather than separate trades.
Types Of Water-Resistive Barrier
There are several kinds of product on the market. Each manufacturer publishes its own installation instructions, and those instructions, not general habits, set how the product should be lapped, fastened and taped.
| Type | What it is | Strengths | Watch for |
|---|---|---|---|
| Non-woven polyolefin wrap | Spun-bonded synthetic sheet, the classic white wrap | Vapour-open, light, widely used | Tears if handled roughly; UV exposure limits |
| Woven or perforated wrap | Woven polymer with a coating, sometimes micro-perforated | Strong, tear-resistant | Perforations can let more water through; check ratings |
| Building paper or felt | Asphalt-saturated paper or felt | Traditional, absorbs and releases small amounts of water | More laps, can deteriorate if exposed too long |
| Drainable or textured wrap | Wrap with crinkles, ribs or spacers on the surface | Creates a small drainage path behind cladding | Not a full rainscreen gap; orientation matters |
| Fluid-applied or self-adhered membrane | Liquid or sticky membrane bonded to the sheathing | Continuous, also acts as an air barrier | Sheathing prep and temperature limits are critical |
On most single-family re-siding projects, a non-woven synthetic wrap with the manufacturer’s tape and cap fasteners is the common choice. Whatever product is used, the details below decide whether it works.
Laps, Fasteners And Tapes
Shingle-lapping
House wrap is installed from the bottom of the wall upward, so each upper piece overlaps the piece below, the same way shingles overlap on a roof. Water running down the face always flows over a lap, never into it. Horizontal laps and vertical laps both have minimum overlaps in the manufacturer’s instructions, commonly several inches. At inside and outside corners, the wrap is wrapped around the corner rather than ending at it.
Fastening
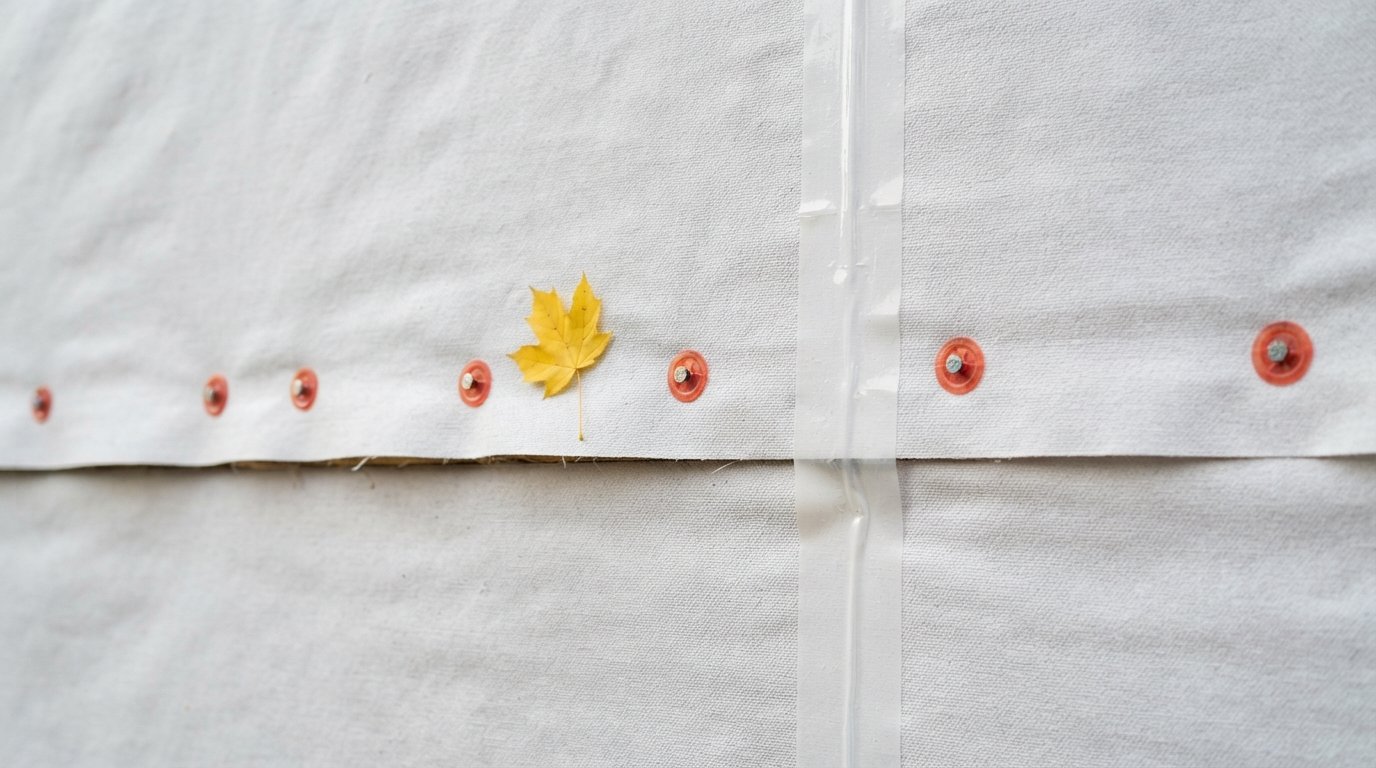
Most synthetic wraps are fastened with cap nails or cap staples, which have a wide plastic washer that holds the sheet without tearing it. Plain staples hold poorly in wind and leave small holes that can tear. Fasteners are spaced as the manufacturer specifies and driven into the sheathing or framing.
Taping
Vertical seams are usually taped with the manufacturer’s tape, which is made to bond to that product. Taping horizontal laps is often optional for water resistance, because the lap already sheds water, but many manufacturers recommend it when the wrap is also meant to act as an air barrier. Tape is pressed firmly with a roller or hand pressure, onto clean, dry wrap. Ordinary duct tape or packing tape does not last and is not a substitute.
A reverse lap, where tape is the only thing keeping water out because an upper piece is tucked behind a lower one, is one of the most common errors. Tape will eventually fail, and when it does, water runs straight behind the wrap.
Windows And Doors: Where Most Leaks Start
Windows and doors are where wall leaks most often begin, on new and old houses alike. The wrap and the flashing around them have to be layered in the right order so water that reaches the opening is pushed outward, not into the rough opening.
A typical sequence for a flanged window in a wrapped wall looks like this:
- Cut the wrap in the pattern the window or wrap manufacturer specifies, usually with a flap at the head that can be lifted.
- Fold the side and bottom flaps into the rough opening and fasten them, so the sill and jambs are covered.
- Install sill flashing, often a flexible flashing membrane or a pan, turned up at the back and the corners so water that gets in at the sill drains out.
- Set the window following the manufacturer’s instructions, typically with sealant behind the side and head flanges but not along the bottom, so the sill can drain.
- Flash the jambs with flashing tape over the side flanges, lapped over the sill flashing.
- Flash the head with tape over the top flange, then drop the head flap of the wrap over it and tape the diagonal cuts.
- Add a head flashing or drip cap above the trim when the cladding goes on, tucked behind the wrap above.
The most common error is putting the head flap of the wrap under the window flange instead of over it. That sends water running down the wrap straight into the top of the window. Another is taping across the bottom flange, which traps water that needs to drain out.
Doors follow similar principles, with a sill pan under the threshold. On re-siding projects where existing windows stay, the crew often has to integrate new wrap with old flanges that were never properly flashed, which takes careful thought and sometimes trim removal.

Penetrations, Corners And The Bottom Of The Wall
Windows get most of the attention, but every other hole through the wall needs the same thinking. A dryer vent, an exterior light, a hose bib, a gas line, a cable entry or an air conditioning line set each creates a cut in the house wrap. The reliable approach is a manufactured mounting block or flashed sleeve for each one, with the wrap lapped over the top flange and under the bottom, and flashing tape sealing the sides. Simply cutting an X in the wrap and pushing a pipe through leaves a small funnel that collects water running down the wall.
Corners are another weak point. When the wrap stops at an outside corner and a new sheet starts on the next wall, wind-driven rain can get in at the joint. Running the wrap continuously around the corner, with a generous overlap, avoids that. At inside corners, where two walls meet, the wrap should be pushed fully into the corner rather than bridging across it, so it does not tear when the trim is fastened.
The bottom of the wall is where all that drained water finally leaves. The wrap must lap over the top of the base flashing, the starter strip or the foundation transition, so water running down it ends up outside. If the wrap is tucked behind the flashing, water drains into the sill plate area, which is one of the most common places we find rot during re-siding. The cladding above also needs its specified clearance from grade, decks and roofs so the bottom edge is not sitting in splash-back or snow.
Rainscreen Gaps Behind Siding
A rainscreen is a small air space between the wrap and the back of the cladding. It can be created with vertical furring strips, a drainage mat or some drainable wraps. The gap does two things. It breaks the contact between the cladding and the wrap, so water is not held against the wall by capillary action, and it lets air move behind the siding, which helps the wall dry.
Vinyl siding has a natural, if imperfect, gap behind it because of its shape and loose fastening. Fibre cement, engineered wood and wood siding sit flatter against the wall, and many manufacturers recommend or require a drainage gap, especially in wet exposures or where the wall has a history of moisture trouble. Depending on the cladding and wall assembly, the Ontario Building Code may also require a drainage cavity; confirm current requirements with your municipality.
Where a rainscreen is used, the top and bottom of the cavity need attention. Insect screen or vented closure strips keep insects out at the bottom while letting water drain, and the cavity is vented or detailed at the top so air can move. Trim around windows and doors has to be built out to the new cladding depth.
How House Wrap Fails
House wrap rarely fails because the material wears out. It fails because of how it was installed, how long it was left exposed, or what happened to it later.
| Problem | How it happens | What it causes |
|---|---|---|
| Reverse laps | Upper piece tucked behind lower piece, relying on tape | Water runs behind the wrap when the tape fails |
| Tears left open | Wind, ladders or rough handling tear the sheet; no one patches it | Water reaches the sheathing at the tear |
| Head flap under the window flange | Window installed over the wrap at the head | Water directed into the top of the window opening |
| Long UV exposure | Wrap left uncovered beyond the manufacturer’s limit | Material weakens and loses water resistance |
| Unflashed penetrations | Dryer vents, hose bibs, lights and wires cut through without flashing | Water tracks into the wall at each opening |
| No kick-out at roof-to-wall joints | Water from a lower roof edge runs down behind the cladding | Rot at the bottom of the wall beside the roof |
| Wrap tucked behind the base flashing | Wrap ends behind the bottom flashing instead of over it | Water drains behind the flashing into the sill area |
Exposure time matters on renovations that drag on. Manufacturers set limits on how long their wrap can be left uncovered in sunlight, often measured in months. If a project stalls over a season, ask whether the wrap needs inspection or replacement before cladding goes on. Autumn projects deserve the same thought: cladding should go on promptly after the wrap so wind does not tear it before winter.
What A Siding Crew Checks Before Cladding
On a re-siding project, removing the old cladding is the one chance to see the wall underneath. A careful crew uses it. These are the checks we work through before any new cladding goes up, because the house wrap is only as good as the wall it covers:
| Check | What the crew looks for | Typical fix before cladding |
|---|---|---|
| Sheathing condition | Soft, stained or delaminated boards, especially below windows and at the bottom of the wall | Cut out and replace damaged sheathing; find the water source |
| Existing wrap | Tears, brittleness, reverse laps, incompatible tape patches | Repair with the manufacturer’s tape or replace the wrap |
| Windows and doors | Missing sill flashing, head flap under the flange, no drip cap | Add or correct sill, jamb and head flashing in the right order |
| Penetrations | Lights, vents, hose bibs and wires cut through without flashing | Install mounting blocks and flash them into the wrap |
| Roof-to-wall joints | Missing step flashing or kick-out flashing beside lower roofs | Install step, counter and kick-out flashing |
| Bottom of the wall | Wrap tucked behind the base flashing, cladding too close to grade | Lap the wrap over the base flashing; set the required clearance |
| Corners and transitions | Wrap ending at corners, no flashing between materials | Wrap continuously around corners; flash material transitions |
This is also when soffit and fascia condition gets checked, because the top of the wall is where the wrap, the soffit and the roof edge meet. On walls we open during roofing, eavestroughs and attic work across Peel Region, stained sheathing regularly leads back to a missing kick-out flashing or an overflowing eavestrough rather than to the siding.
Questions to ask your contractor
- What wrap product will be used, and will it be installed to the manufacturer’s instructions?
- How will windows and doors be flashed, and in what order?
- Will there be a drainage gap behind the cladding?
- How will damaged sheathing be identified and priced?
- How long will the wrap be exposed before cladding goes on?
House Wrap Questions
Is house wrap the same as a vapour barrier?
Does the wrap need to be taped?
Can I leave house wrap exposed over winter?
Should old wrap be replaced when re-siding?
What is a rainscreen?
Why do walls leak under windows?
Getting House Wrap Right On Your Project
If you are re-siding or replacing windows and want the house wrap and flashing done properly, Universal Roofs can inspect the wall when the old cladding comes off, explain what needs repair and install the wrap and flashing in the right order.
Call us today at (416) 732-2421 or request a free estimate.
Re-siding and wall repairs for Peel Region homes and the wider GTA.