
Board and batten siding is the vertical look you see on modern farmhouse renovations, refreshed bungalow gables and new infill homes: wide flat boards running up the wall with narrow strips, the battens, covering the joints. Originally it was solid lumber nailed to barns. Today most homeowners in Ontario choose between three manufactured versions: vinyl, fibre cement and engineered wood, and each one is installed, trimmed and maintained differently.
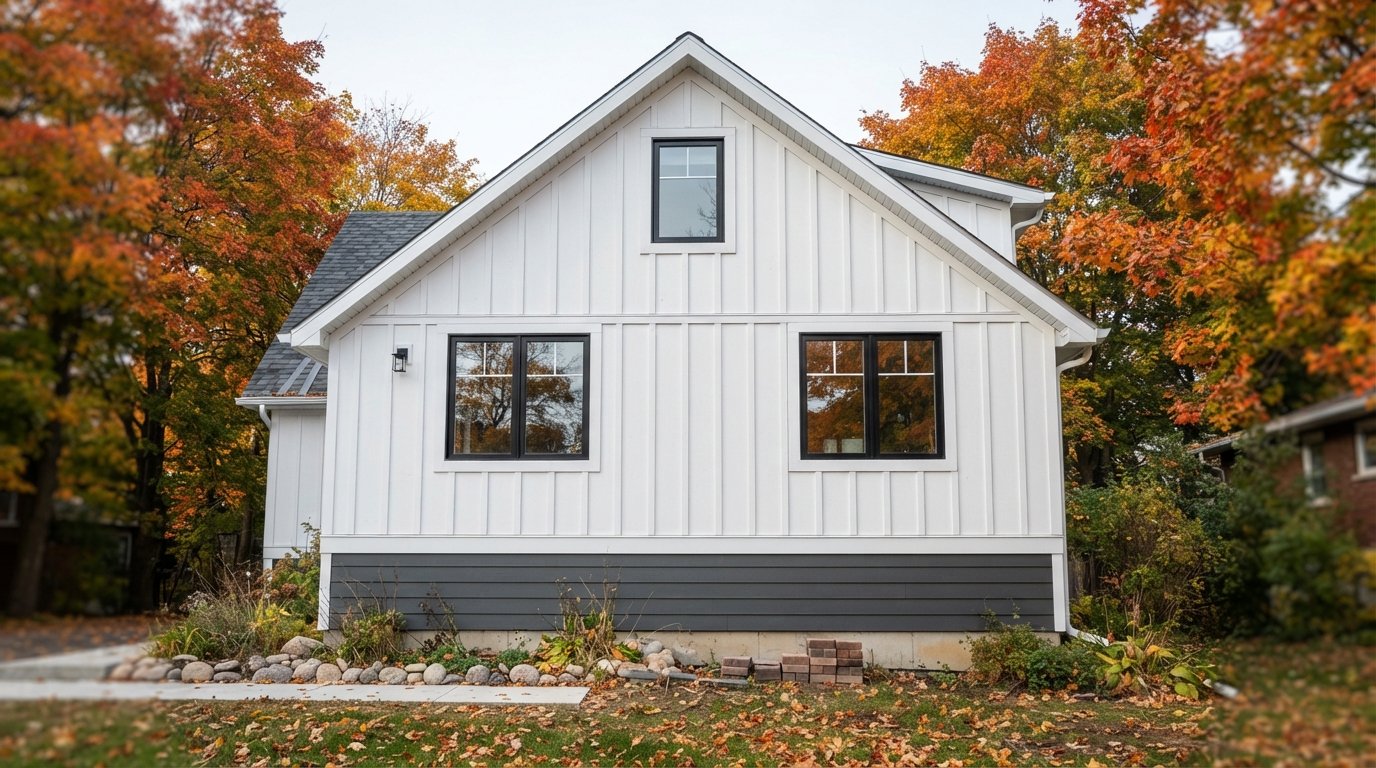
The decisions that make or break the look are rarely about colour. They are about how far apart the battens sit, how they land beside each window, how the corners are framed and how the vertical section meets any lap siding below, because that last joint is where vertical cladding most often lets water in.
What Board And Batten Siding Is Today
In its traditional form, board and batten siding was wide boards installed vertically with gaps between them, and narrow battens nailed over each gap. The battens kept rain out of the joint and allowed each board to swell and shrink without splitting. That basic idea of a flat field with raised vertical ribs is what modern products imitate.
The three manufactured versions achieve it in different ways:
- Vinyl comes as vertical panels with the batten profile moulded in. Each panel interlocks with the next, so the battens are part of the panel rather than separate pieces.
- Fibre cement is usually installed as large vertical sheets, smooth or textured, with separate fibre cement trim boards fastened over them as battens. Some lines also offer vertical panels with a grooved pattern.
- Engineered wood follows a similar sheet-and-trim approach, with large treated wood-strand panels and matching trim boards used as battens.
The look can be close from the street, but the details are not. Vinyl battens are shallow and evenly spaced by the manufacturer. Sheet-and-trim systems give real shadow lines and let you choose spacing, but every batten is a separate piece that has to be fastened, caulked where required and finished. Before choosing, it helps to see how a crew handles siding, soffit and fascia installation as one system, because the trim and soffit details are where vertical cladding succeeds or fails.
Vinyl, Fibre Cement And Engineered Wood Compared
None of these materials is the best choice for every house. The right one depends on budget, how much of the wall will be vertical, what is already on the house and how much maintenance you will accept.
| Factor | Vinyl | Fibre cement | Engineered wood |
|---|---|---|---|
| How battens are formed | Moulded into the panel | Separate trim boards over sheets | Separate trim boards over sheets |
| Shadow line depth | Shallow | Deep, set by trim thickness | Deep, set by trim thickness |
| Batten spacing | Fixed by the product profile | Chosen by the designer and installer | Chosen by the designer and installer |
| Weight and handling | Light, easy to cut | Heavy, needs dust control when cutting | Lighter than fibre cement, cuts with standard tools |
| Movement | Expands and contracts noticeably with temperature | Very stable | Some moisture movement, gapping rules matter |
| Finish | Colour through the material, no painting | Prefinished or field-painted | Primed or prefinished |
| Impact resistance | Can crack in hard cold impacts | Hard surface, edges can chip | Good, with sealed edges important |
Vinyl is the most forgiving on budget and the easiest to keep clean. Fibre cement gives the crispest, most architectural look and does not burn, which some homeowners value near decks or neighbouring houses. Engineered wood sits between them, with the warmth of a wood texture and less weight than fibre cement. Manufacturers publish detailed installation instructions for each product line, and following the current version is what keeps the product within its warranty.
Choosing Batten Spacing And Proportion
Batten spacing is the single biggest design decision with board and batten siding, and it is easy to get wrong on a house with tall, narrow walls or short gables. Narrow spacing reads as busy and more traditional. Wider spacing looks calmer and more contemporary. The batten width matters too: a thin batten on wide boards looks modern; a broad batten looks more rustic.
With vinyl, spacing is limited to the profiles the manufacturer makes. With sheet-and-trim systems, the installer usually aligns battens with the framing behind so they fasten into studs, which is why spacing in multiples of stud spacing is common. Sheet joints must land under a batten or be detailed as the manufacturer specifies, so the layout is worked out before the first sheet goes up.
| Spacing approach | Visual effect | Where it suits | Watch for |
|---|---|---|---|
| Narrow, roughly a hand width apart | Busy, traditional, strong vertical texture | Small gables, porch walls, cottage styles | More battens to fasten and finish |
| Medium, close to common stud spacing | Balanced, the most familiar look | Full walls on two-storey homes | Layout must keep sheet joints under battens |
| Wide, about double stud spacing | Calm, contemporary, flatter wall | Modern homes, large plain walls | Wide fields show waviness in the wall below |
| Irregular or grouped | Custom, architectural | Feature walls, entrance surrounds | Needs careful drawings, harder to repair later |
| Reverse board and batten | Grooves instead of raised battens | Modern looks with less depth | Usually a grooved panel, not separate trim |
A useful trick before committing is to tape vertical strips of painter’s tape on the wall at two or three spacings and look from the street and the sidewalk. What reads well up close can look crowded from a distance.
How Each Material Goes On The Wall
Vertical cladding is not just horizontal siding turned sideways. Water runs down the face and into every joint, and the fastening and drainage rules differ for each material.
Vinyl panels
Vertical vinyl needs a flat, nailable surface. On older homes, a crew often adds horizontal strapping or furring so there is solid material to nail into and the wall is flat. Vinyl expands and contracts more than the other two materials, so panels hang from the top fasteners and the remaining nails go in the centre of the slots, not driven tight. The bottom receiving channel needs a way for water to escape, and the top needs room for the panel to move. Fastening a vinyl panel too tightly produces the rippled, wavy wall people associate with cheap siding.
Fibre cement sheets and trim
Fibre cement sheets go on vertically with joints that meet over framing. Horizontal joints, where one sheet sits above another on a tall wall, need flashing so water running down the face is turned out. Battens then fasten over the joints and at regular intervals between them. Cutting fibre cement creates fine silica dust, so cutting is done outdoors, with dust-reducing saws or shears and proper respiratory protection, away from open windows.
Engineered wood sheets and trim
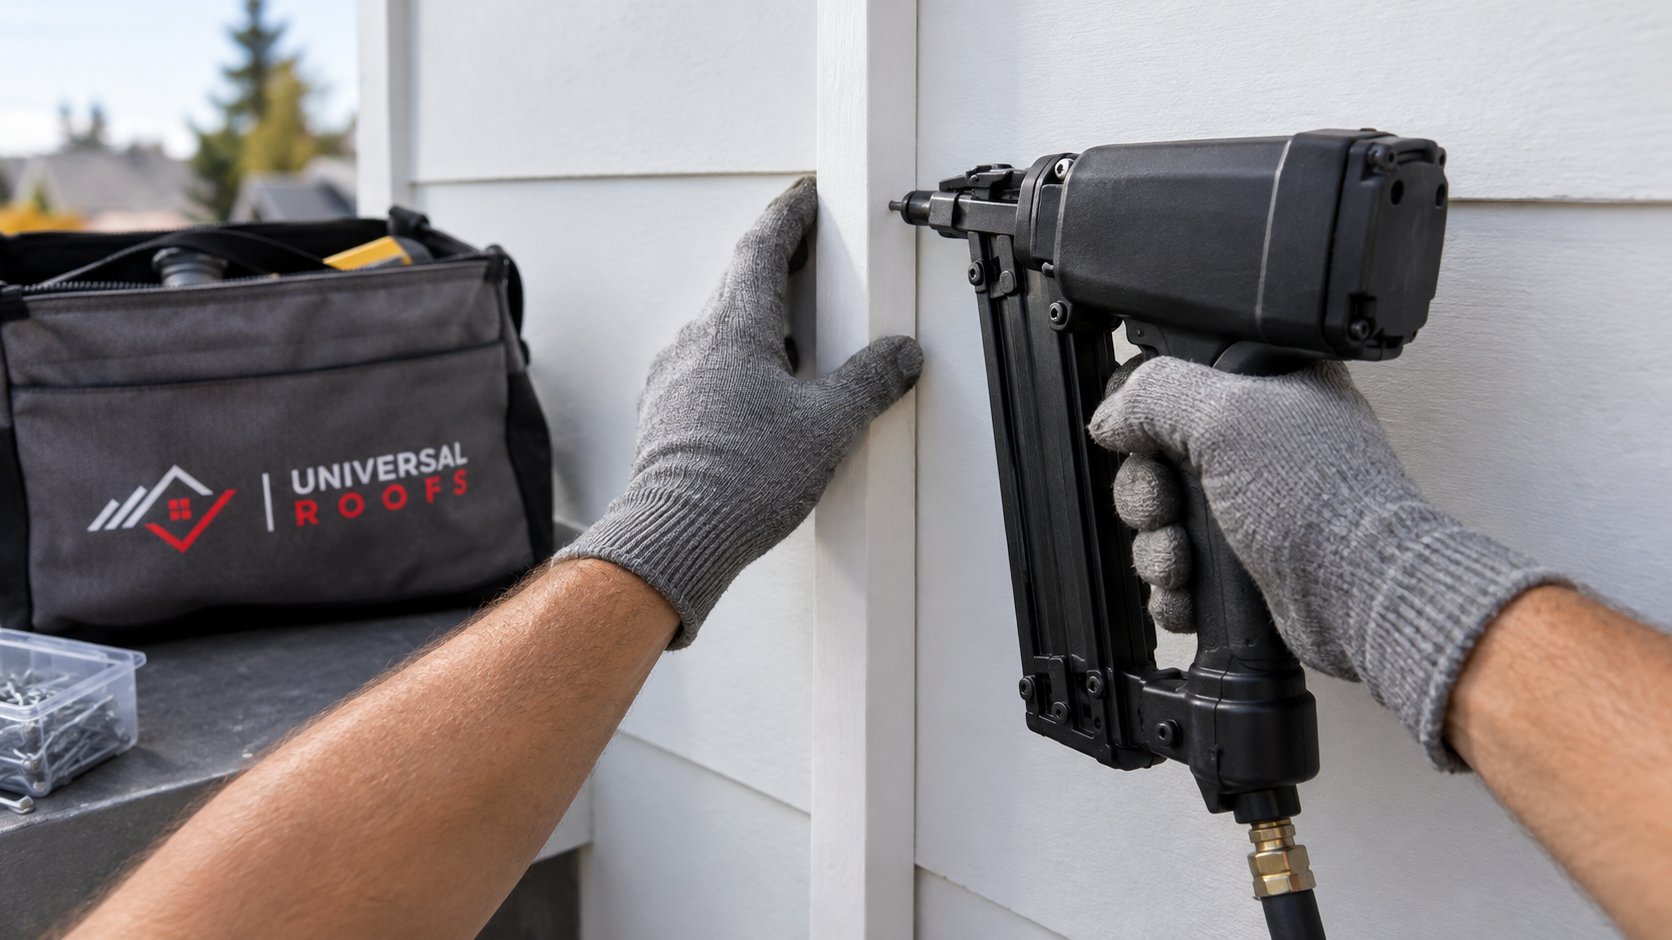
Engineered wood panels follow a similar layout, but the manufacturer’s rules on gaps at joints, clearance above grade and roof surfaces, and sealing of cut edges are critical. Field-cut edges must be primed or sealed as the instructions require, because exposed wood strand edges absorb moisture. Battens are fastened through to the framing, and their ends and joints get the same edge treatment.
Drainage behind the cladding
Drainage is a particular concern with board and batten siding. Vertical cladding needs horizontal nailing behind it, and a plain horizontal strap acts like a little shelf that holds water against the wall. Where a drained cavity is used, crews either fasten vertical strapping first with a horizontal layer over it, so water can run down behind the horizontal strips, or use notched or vented strapping made for the purpose. The Ontario Building Code sets requirements for wall assemblies and cladding, and these can depend on the cladding type and the location; confirm the current requirements with your municipality and follow the manufacturer’s details.
Trim, Corners And Openings
Trim is where board and batten siding shows the quality of the installation most clearly. On sheet-and-trim systems, corner boards are typically wider than the battens so the corner reads as a frame. Battens should stop cleanly against window and door casings, not run into them at odd distances. Good layout starts by marking the windows on the wall and adjusting spacing so the battens fall neatly beside them where possible.
Above every window and door, the head flashing has to shed water out over the trim, and the cladding above it needs a small gap so water is not trapped against the top of the casing. Where the cladding meets a roof, such as a dormer cheek wall or a porch roof, the manufacturer’s clearance to the roof surface applies and the step and kick-out flashing must be in place before cladding goes on. A missing kick-out flashing at the bottom of a roof-to-wall joint is one of the most common causes of rot we find behind any siding.
At the soffit, the top of vertical cladding usually finishes under a frieze board or into a channel. On vinyl, the top channel must leave room for expansion. On fibre cement and engineered wood, the top edge is often covered by a trim board that also carries the soffit. Corners on vinyl use outside corner posts, and on sheet systems they use two trim boards butted together.
Mixing Board And Batten With Horizontal Siding
Many of the best-looking board and batten siding projects use vertical cladding as an accent: upper gables, dormers, an entrance bump-out or a second storey above lap siding or brick. The visual rule is simple: let the change in direction follow a clear architectural line, such as a floor level, a gable base or the edge of a projection. Changing direction in the middle of a flat wall usually looks like a mistake.
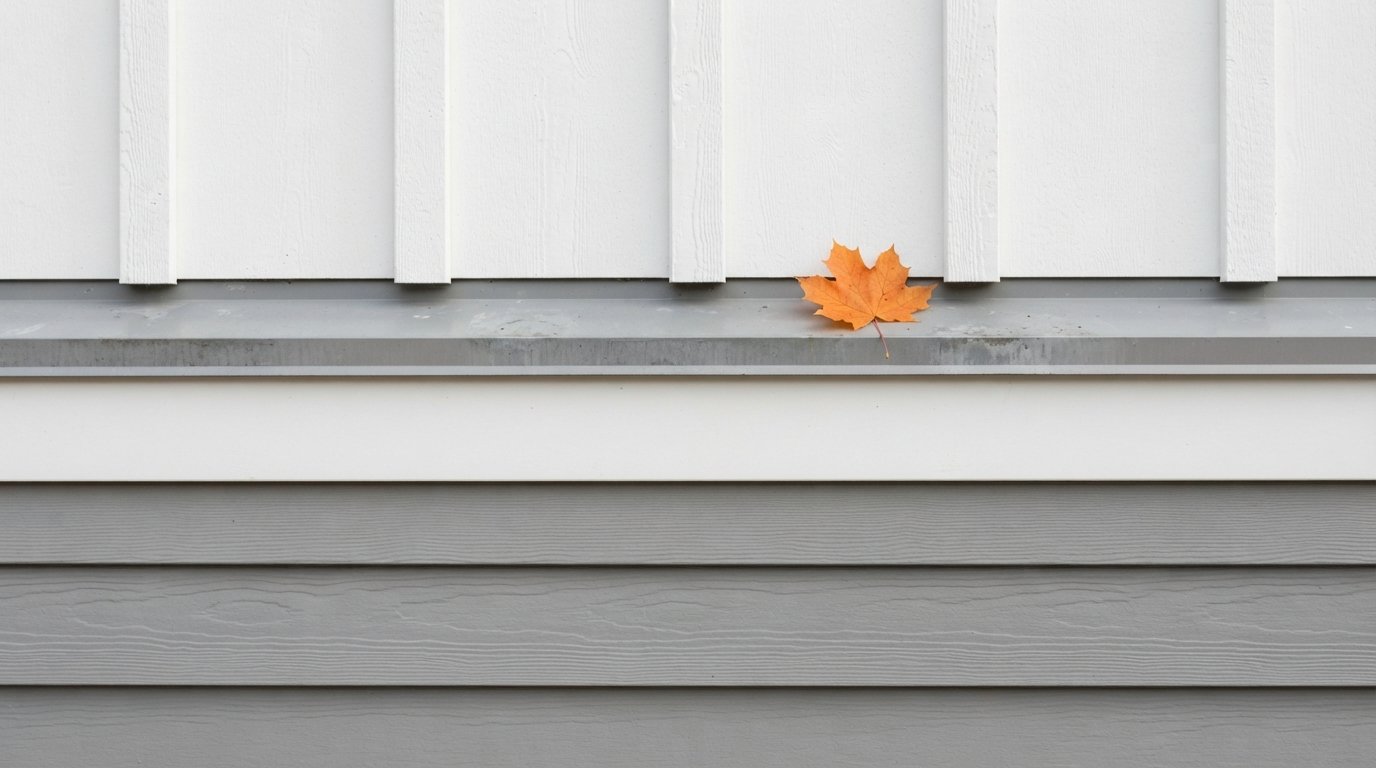
The technical rule is just as important. Wherever vertical cladding sits above horizontal siding, water running down the vertical boards must be kicked out over the siding below. That means a horizontal trim board or belly band with flashing behind and above it, so water cannot get behind the lower course. The flashing should lap correctly with the water-resistive barrier behind it. A band that is simply caulked will eventually crack and leak.
Colour can help or hurt. A single colour across both directions gives a calm, textured look. Contrasting colours make the vertical section a feature, which works best when it covers a whole gable or projection rather than a strip. On homes where existing lap siding stays, matching profile depth and finish to the existing cladding avoids a patched look. Once scaffolding is up for a gable, renewing the soffit, fascia and eavestroughs above it costs far less than a separate visit, which is why our roofing, eavestroughs and attic work across Peel Region is usually quoted with the roof edge included as an option.
What Board And Batten Siding Typically Costs
The cost of board and batten siding varies widely with wall height, access, the condition of the sheathing, how many windows and corners are involved, and how much existing cladding has to be removed. The ranges below are rough estimates for installed work in the GTA and should be treated as a starting point for budgeting, not a quote.
| Scope | Vinyl (estimate) | Fibre cement (estimate) | Engineered wood (estimate) |
|---|---|---|---|
| Installed cost per square foot of wall | Often around $8 to $14 | Often around $14 to $25 | Often around $12 to $20 |
| Single gable accent on a two-storey home | Roughly $2,500 to $6,000 | Roughly $4,500 to $10,000 | Roughly $4,000 to $9,000 |
| Full second storey above brick | Roughly $10,000 to $22,000 | Roughly $18,000 to $38,000 | Roughly $15,000 to $32,000 |
| Field painting or touch-up | Not required | Often extra if not prefinished | Often extra if primed only |
| Removal of old cladding and sheathing repair | Varies with what is found | Varies with what is found | Varies with what is found |
Prefinished sheet and trim products usually cost more up front but save the painting step and give a more even finish. Field-painted systems let you choose any colour but add labour, weather risk and a repaint cycle. Always ask whether a quote includes the trim, flashing, soffit transitions and disposal, because those items are often where quotes differ most.
Problems We See And How To Avoid Them
Most of the failures we are called to look at on board and batten siding are installation details rather than material defects:
- Wavy vinyl walls: fasteners driven too tight or panels pinned at the bottom, so expansion has nowhere to go.
- Sheet joints with no batten: layout not planned, leaving open vertical joints that rely on caulk alone.
- Unsealed cut edges: engineered wood or fibre cement cut on site and installed without the edge treatment the manufacturer requires.
- Cladding tight to the roof or grade: no clearance, so the bottom edge sits in water and snow.
- Leaking transitions: a belly band or trim board without flashing where vertical meets horizontal.
- Missing kick-out flashing: water from a roof-to-wall joint running behind the cladding.
Autumn is a good time to plan a project, inspect the existing walls and order materials. Many manufacturers set minimum temperatures for sealants, coatings and some installation steps, so cold-weather work may need scheduling or extra precautions.
Board And Batten Questions
Which material is best for vertical siding in Ontario?
How far apart should battens be?
Can I put board and batten on just my gables?
Does vertical vinyl siding install differently?
Do vertical boards need special strapping behind them?
What usually causes leaks behind siding?
Planning Board And Batten Siding For Your Home
If you are considering board and batten siding for a gable, a second storey or the whole house, Universal Roofs can walk the walls with you, talk through vinyl, fibre cement and engineered wood, lay out batten spacing around your windows and plan the flashing at every transition.
Call us today at (416) 732-2421 or request a free estimate.
Siding, soffit and roofline projects for Peel Region homes and the rest of the GTA.