
Running a dryer vent through roof sheathing is common on GTA houses and townhomes where the laundry sits on the second floor or in the middle of the house, far from any outside wall. It works, but it is the hardest kind of dryer exhaust to keep clean. Lint has to travel upward, the duct passes through a cold attic, and the cap on the roof is out of sight and out of reach for most owners. When things go wrong, the result can be anything from slow drying to a ceiling stain to a genuine fire risk.
Most of the trouble comes from three places: the wrong cap at the top, the wrong duct in the attic and a run that is simply too long for the dryer’s fan. Each one is fixable, and mid autumn, before the furnace season and the first hard frost, is a good time to deal with them.
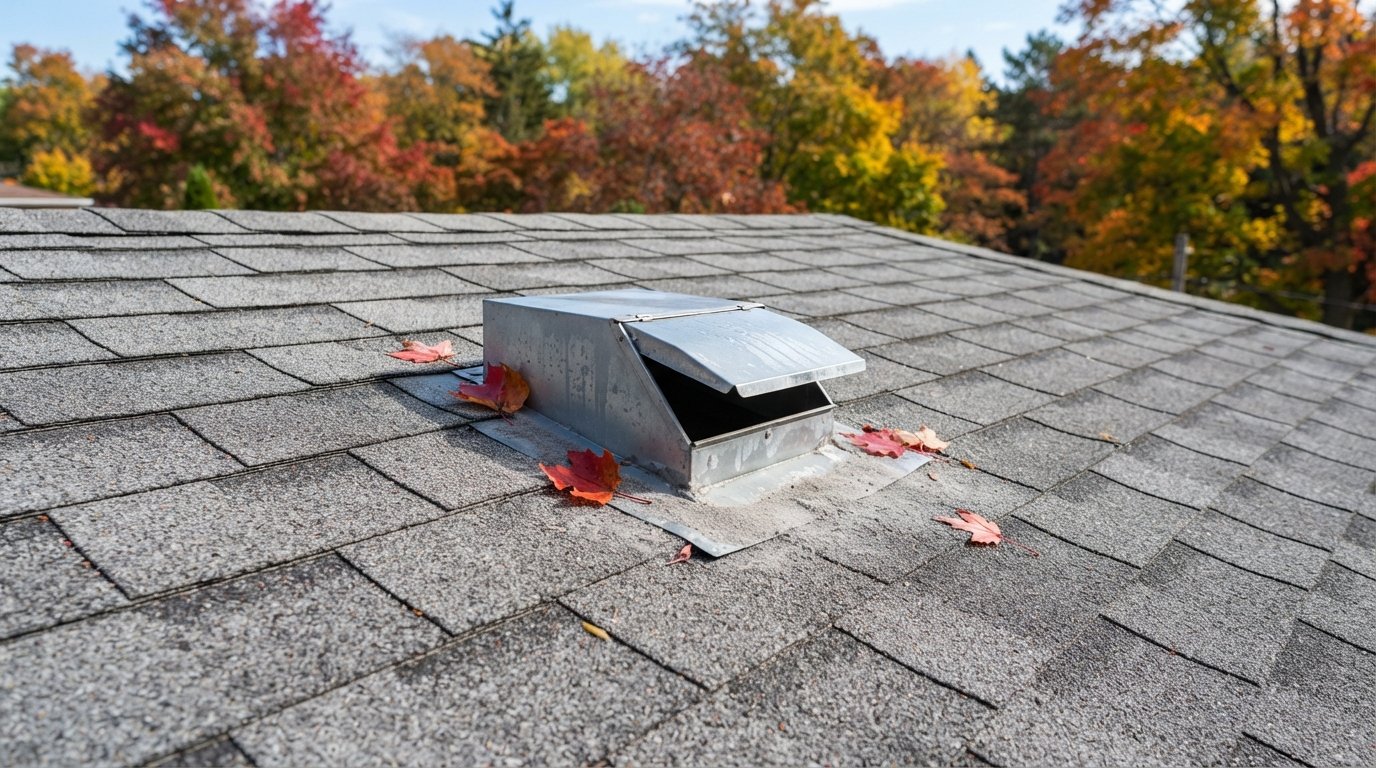
Dryer Vent Through Roof Routes: Why They Clog More Easily
A dryer pushes out a stream of hot, humid air full of fine lint fibres. In a short, straight run to a wall, most of that lint is blown clear. A roof route makes the fan work against gravity, distance and temperature all at once.
Gravity and air speed
A typical household dryer fan is designed to move air through a limited length of duct. Every vertical metre, elbow and rough joint slows the airflow. As air speed drops, heavier lint settles out on the duct walls and in elbows. In a vertical run, some of it also falls back down toward the dryer between loads, building a plug at the lowest bend.
Condensation in a cold attic
The duct to the roof almost always crosses the attic, which in autumn and winter is close to outdoor temperature. Warm exhaust hitting cold metal condenses. That water wets the lint and turns it into a paste that sticks far more firmly than dry fluff. If the duct is uninsulated or has loose joints, condensation can drip back to the dryer, leak onto the attic insulation, or show up as a brown ring on the ceiling below. In cold weather the same moisture can freeze at the cap and hold the damper shut.
Caps that were never meant for dryers
One of the most common problems on roof routes is simply the wrong cap. Bathroom fan caps, kitchen caps and generic roof vents often have a bird screen or tight louvres. On a dryer line, lint builds up against that screen within months, the opening shrinks and backpressure rises. Dryer manufacturers’ installation instructions generally call for a termination with a backdraft damper and no screen. If you can see a mesh grille on your dryer vent through-roof cap, assume it is a problem.
When the cap or the flashing around it has been damaged or leaks, it is a job for a roof repair crew who can replace the cap and integrate new flashing properly with the shingles.
Warning Signs Of A Blocked Roof Vent
Because you cannot see the top end of a dryer vent through-roof line, you usually have to read the symptoms indoors and in the attic.
| What you notice | Likely cause | What to check |
|---|---|---|
| Loads take two cycles to dry | Restricted airflow from lint buildup or a clogged cap | Feel for airflow at the roof cap, inspect the duct |
| Dryer top and laundry room unusually hot | Exhaust backing up into the cabinet | Stop using the dryer until the line is cleared |
| Burning or scorched smell | Lint near the heating element or a crushed transition duct | Unplug the dryer and have it inspected promptly |
| Brown stain on ceiling below the duct route | Condensation leaking from joints or an uninsulated duct | Attic inspection of joints, insulation and slope |
| Lint on shingles around the cap | Screened or louvred cap trapping fibres | Replace with a dryer-rated roof cap |
| Damp attic insulation or frost on sheathing near the duct | Disconnected or leaking duct venting into the attic | Reconnect and seal, dry out insulation |
Modern dryers sometimes display a restricted vent warning. Take it seriously rather than clearing the message and carrying on.
Fire And Moisture Risks You Should Know About
Lint is fine, dry and highly flammable, and a long vertical run up to the roof gives it more places to collect. When airflow is restricted, the dryer runs hotter and longer, and the thermal safety devices are working closer to their limits. Fire services routinely warn that lint buildup in the machine or the duct is a common cause of dryer fires, which is why manufacturers and insurers also stress regular cleaning.
A gas dryer adds another hazard. Its exhaust contains combustion products, including carbon monoxide, and a blocked vent can push them back into the house. In Ontario, gas appliance installation and venting fall under rules overseen by the Technical Standards and Safety Authority, so any change to a gas dryer’s connection or venting should be done by a licensed gas technician. Working carbon monoxide alarms are important in any home with fuel-burning appliances; confirm current alarm requirements with your municipality or local fire service.
Moisture is the slower risk. A duct that leaks into the attic releases a large amount of water vapour with every load. That moisture condenses on the underside of the roof sheathing, wets insulation, and can feed mould on the decking. Attic frost and stained sheathing are often traced to a dryer duct that came apart years ago. If this sounds familiar, our attic insulation and ventilation services deal with the damage left behind.
Duct Material, Length And Layout
How the duct is built matters as much as where it ends. Many problems blamed on the roof cap are really duct problems.
Choosing the right duct
| Duct type | Where it belongs | Strengths | Weaknesses |
|---|---|---|---|
| Rigid smooth metal duct | The main run through walls, floors and the attic | Smooth interior, least lint buildup, durable | Needs careful layout and sealed joints |
| Semi-rigid aluminum | Short connection behind the dryer | Easy to bend without crushing too readily | Ribbed interior holds more lint than smooth pipe |
| Foil flexible duct | Short transition only, if listed for dryer use | Very flexible in tight spaces | Crushes easily, sags, traps lint in long runs |
| Plastic or vinyl flex duct | Nowhere on a dryer | Inexpensive | Not suitable for dryer exhaust, a fire concern |
| Insulated metal duct in the attic | The attic section of a roof route | Reduces condensation and dripping | Costs more, must still be sealed and supported |
Joints, length and elbows
- Seal joints with foil tape or approved clamps, not screws. Screws poke into the airstream and snag lint, starting a clog from the inside.
- Point male ends in the direction of airflow so lint slides past each joint rather than catching on an edge.
- Respect the maximum length. Each dryer’s installation manual lists a maximum equivalent duct length, and every elbow counts against it. Roof routes often exceed that limit once all the bends are added. If yours does, the dryer is working outside its design.
- Support the duct so it cannot sag. Low spots collect water and lint.
- Keep the run as straight and short as the house allows. Two gentle bends are better than four tight ones.
Where a long run cannot be avoided, some homes use an in-line dryer booster fan designed for lint-laden exhaust. These must be compatible with your dryer and installed to the fan maker’s instructions, usually with an accessible location for service. They are not a substitute for cleaning.
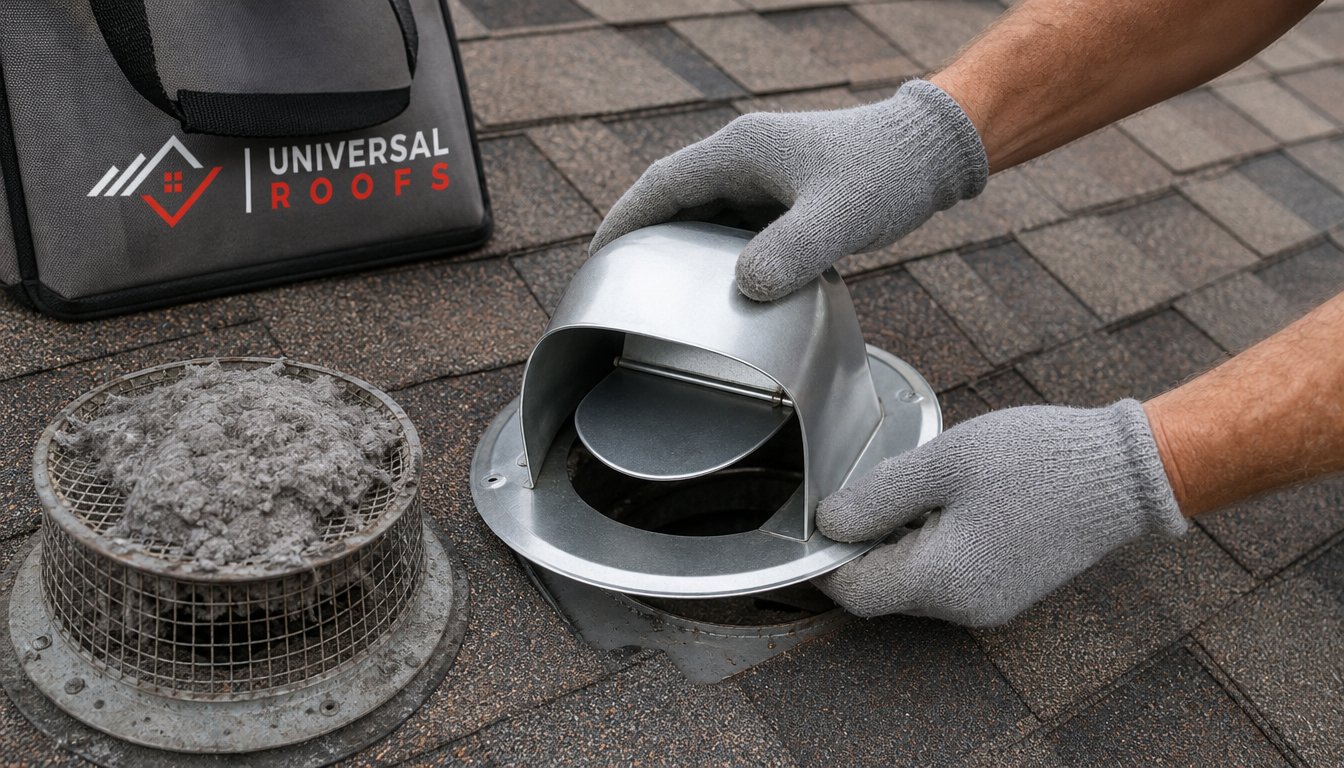
What A Proper Roof Termination Looks Like
If you are keeping the roof route, a dryer vent through-roof termination should be built for that job:
- A dryer-rated roof cap with a hinged or gravity damper that opens under airflow and closes against wind and pests, and no screen.
- The correct diameter, matching the duct so there is no restriction at the very end of the run.
- Flashing woven into the shingles, with the upper flange under the courses above and the lower flange over the courses below, sealed at the fasteners.
- A fully sealed connection between the duct and the cap collar, so no exhaust escapes into the attic.
- Insulation around the attic section to keep the exhaust warm until it leaves the house.
- A location that allows access, ideally away from valleys where leaves pile up and where a roofer can work safely.
Roof caps should never be connected to a ridge vent, soffit or plumbing stack, and the duct must never end in the attic itself. Both still turn up on older installations.
Rerouting From The Roof To A Wall
When a roof-routed dryer vent keeps clogging, runs past its maximum length or leaves a history of ceiling stains, moving the exhaust to an exterior wall is often the cleaner long-term answer.
When rerouting makes sense
- The laundry is near an outside wall, or a joist bay runs straight to one.
- The current route has more bends than the dryer manual allows.
- Condensation keeps damaging the ceiling despite insulation.
- Cleaning requires a roofer every time.
How the work usually goes
A new opening is cut through the rim joist or wall, a short rigid duct is run to it, and a wall hood with a damper is installed and flashed into the cladding. The old dryer vent through-roof cap is removed, the hole in the decking is patched with new sheathing, and the area is reshingled so it matches the surrounding courses. Inside the attic, the old duct is taken out and any wet insulation is replaced. On a semi-detached or townhouse, check that the new wall location stays clear of neighbouring windows, decks and walkways, and confirm local rules with your municipality, since requirements around terminations can vary.
Wall terminations have their own rules of thumb: keep the hood well above grade and expected snow, away from windows and doors, and never under a deck or into a soffit, where exhaust would be drawn back into the attic.
| Option | Typical scope | Estimated range in CAD |
|---|---|---|
| Professional cleaning of a dryer vent through roof route, both ends | Brushing the full run, clearing the cap, checking airflow | Often $150 to $400 |
| Replace a screened cap with a dryer-rated roof cap | New cap, flashing, sealing, shingle repair around it | Often $300 to $800 |
| Replace and insulate the attic duct section | New rigid or insulated duct, sealed joints, supports | Often $400 to $1,200 |
| Reroute to an exterior wall and close the roof opening | New duct and wall hood, decking patch, reshingling | Often $800 to $2,500 |
| Attic cleanup after long-term leakage | Removing wet insulation, treating stained sheathing | Often $1,000 to $4,000 or more |
These are rough estimates only. Height, roof pitch, access to the attic and how much damage has built up all change the price, and an on-site look is the only way to quote accurately.
Autumn Cleaning And Maintenance
Mid autumn is a sensible time to have the dryer vent through-roof cap and duct serviced. Leaves and seed pods collect around caps, birds and wasps have vacated nests, and cleaning before the first freeze prevents lint and frost from locking the damper shut during winter.
What owners can do from inside
- Clean the lint screen before every load, and wash it occasionally if fabric softener leaves a film.
- Pull the dryer out once a season, check the transition duct is not crushed, and vacuum lint from the cabinet opening.
- Run the dryer briefly and notice whether loads are drying in one normal cycle.
- Look in the attic, with a flashlight from the hatch, for stains, frost or a disconnected duct.
What should be left to a professional
Cleaning the roof end means working on a sloped roof, often from a ladder over a second-storey wall. That calls for fall protection and experience, especially on cool mornings when shingles are wet and slippery with leaves. A professional cleaning typically brushes the duct from both ends with rotating rods, vacuums the lint, inspects the cap and damper, and checks airflow at the roof. Roof-terminated lines usually need this more often than wall vents, particularly in busy households. Ask your contractor to suggest an interval based on what they find.
A single visit from our Peel Region roofing, eavestroughs and attic work team can cover the dryer vent through-roof cap, its flashing and the attic duct below it, and that combined look is often when hidden condensation damage first comes to light.
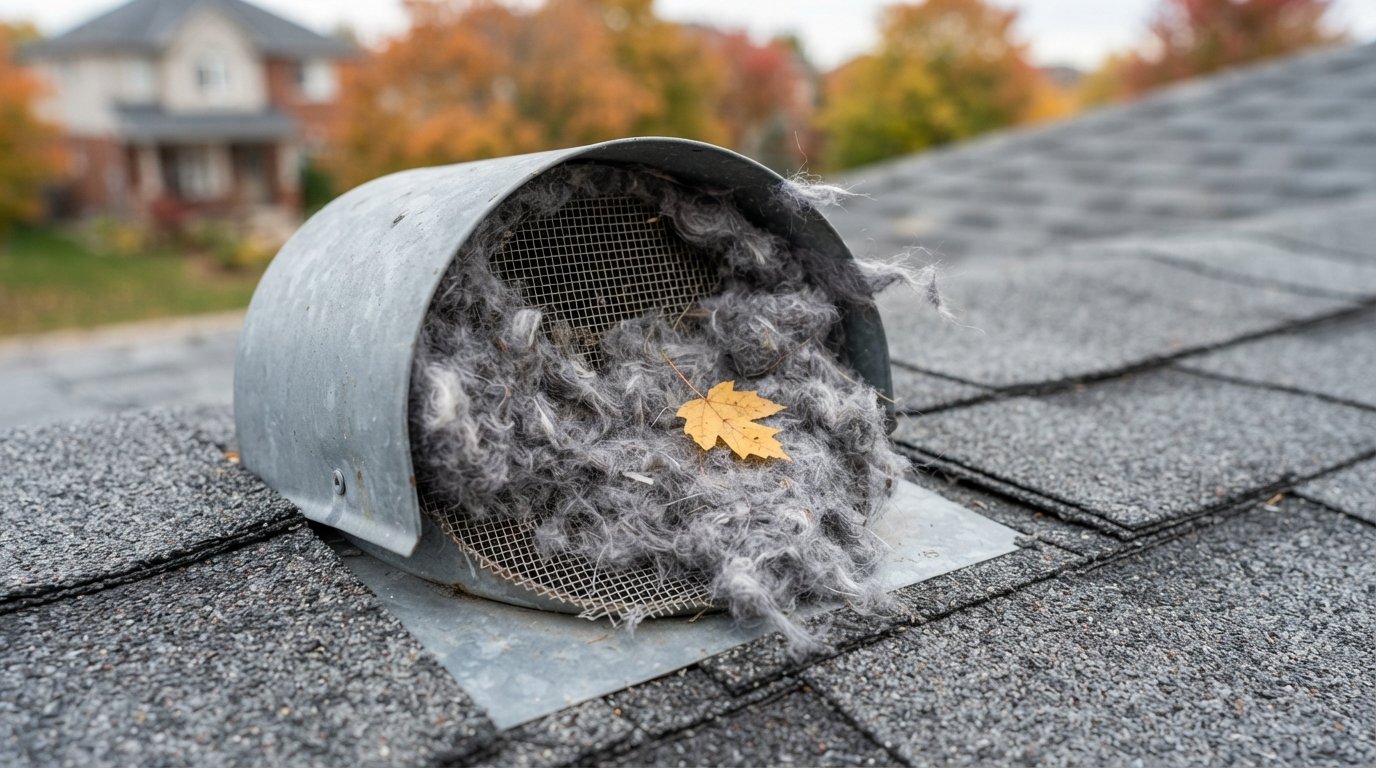
Roof Dryer Vent Questions We Hear Most
Is it safe to vent a dryer through the roof?
Why does my roof dryer vent have lint on the shingles?
How often should a roof dryer vent be cleaned?
Why is water dripping from my dryer vent in the ceiling?
Can I move my dryer vent from the roof to a wall?
Can I use flexible foil duct for the whole run?
Book An Inspection Of Your Dryer Vent Through-Roof Cap And Duct
If your loads are taking longer, your ceiling has a mystery stain or you have never seen what is on the roof above your laundry, it is worth a proper look. Universal Roofs inspects the cap, flashing, attic duct and insulation together and recommends whether to clean, repair or reroute.
Call us today at (416) 732-2421 or request a free estimate.
Roof caps, flashing and attic ducts put right in Peel Region and across the GTA.