
If you live in a storey-and-a-half house, you probably know the upstairs bedrooms well: sloped ceilings, short walls along the sides, maybe a little door into a crawl space under the roof. That short wall is the attic knee wall, and behind it sits one of the most common sources of cold rooms, high heating bills and ice dams in older GTA homes. This guide explains how the upper floor of a 1.5-storey house is put together, where heat actually escapes, and the two main ways to fix it before the heating season.
These houses were built in large numbers after the Second World War and are common in older neighbourhoods across the region. Their layout is charming and efficient in terms of space, but the insulation details were rarely good by today’s standards, and many have been partly upgraded in ways that missed the biggest leaks.
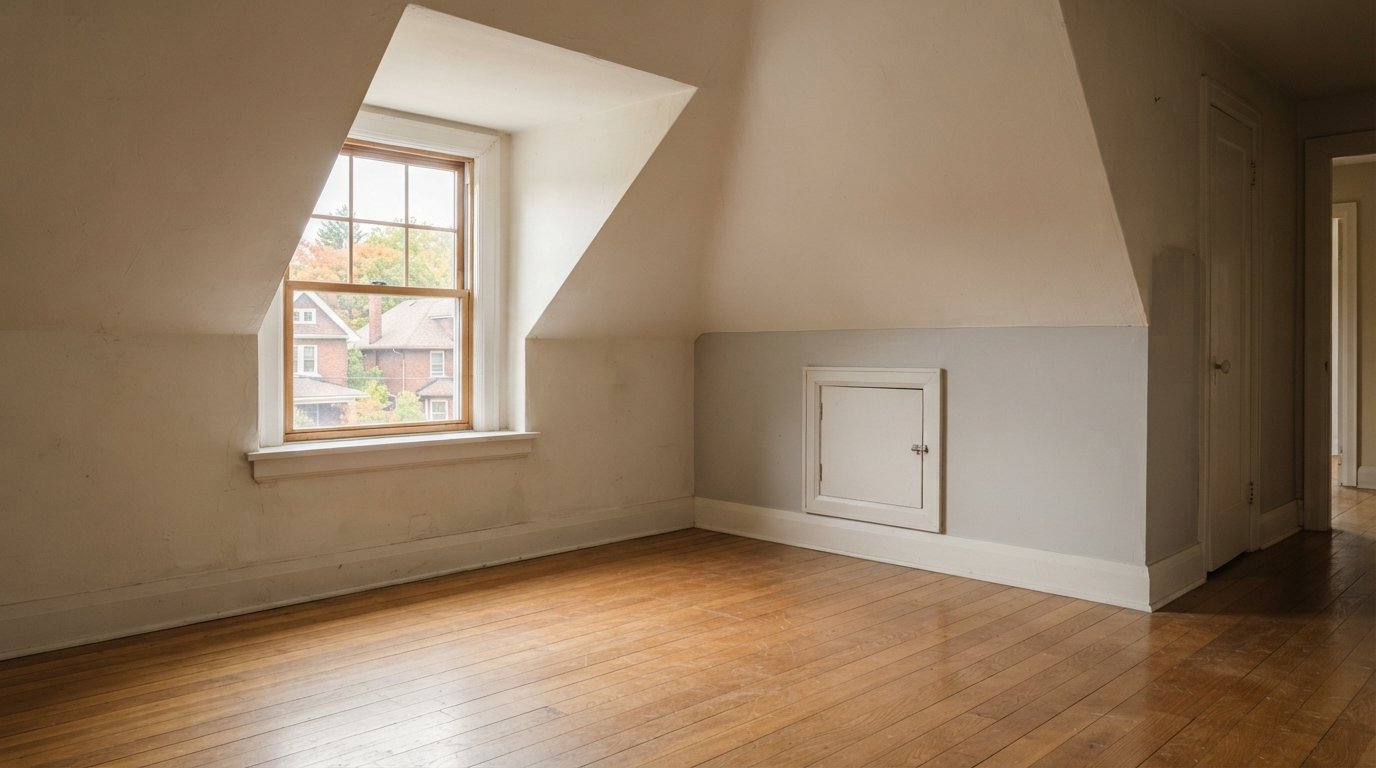
How an Attic Knee Wall House Is Built
To fix a storey-and-a-half house you need a clear picture of its upper floor. Think of it in cross-section, from the outside wall inward:
- The side attic. Behind each attic knee wall is a triangular space under the roof. It is outside the heated envelope and, in winter, close to outdoor temperature.
- The knee wall. A short framed wall, often somewhere around a metre or a little more in height, separating the room from the side attic.
- The sloped ceiling. Above the knee wall, the room’s ceiling follows the roof rafters upward. There is only the depth of the rafters between the drywall or plaster and the roof deck.
- The flat ceiling and upper attic. At the top, a short flat ceiling is framed across collar ties, with a small attic above it that is usually the only easy-to-reach part.
Each of those surfaces is part of the boundary between heated and unheated space, and each needs insulation and an air barrier. In many older houses, only one or two of them were done properly. For a broader look at how attic insulation and ventilation upgrades are planned, the same principles apply, but a 1.5-storey house has more pieces to connect.
Where the Heat Actually Escapes
When people feel a cold bedroom, they assume the knee wall is not insulated enough. Sometimes that is true. More often, the bigger problem is air moving around the insulation rather than through it.
Open floor joists behind the knee wall
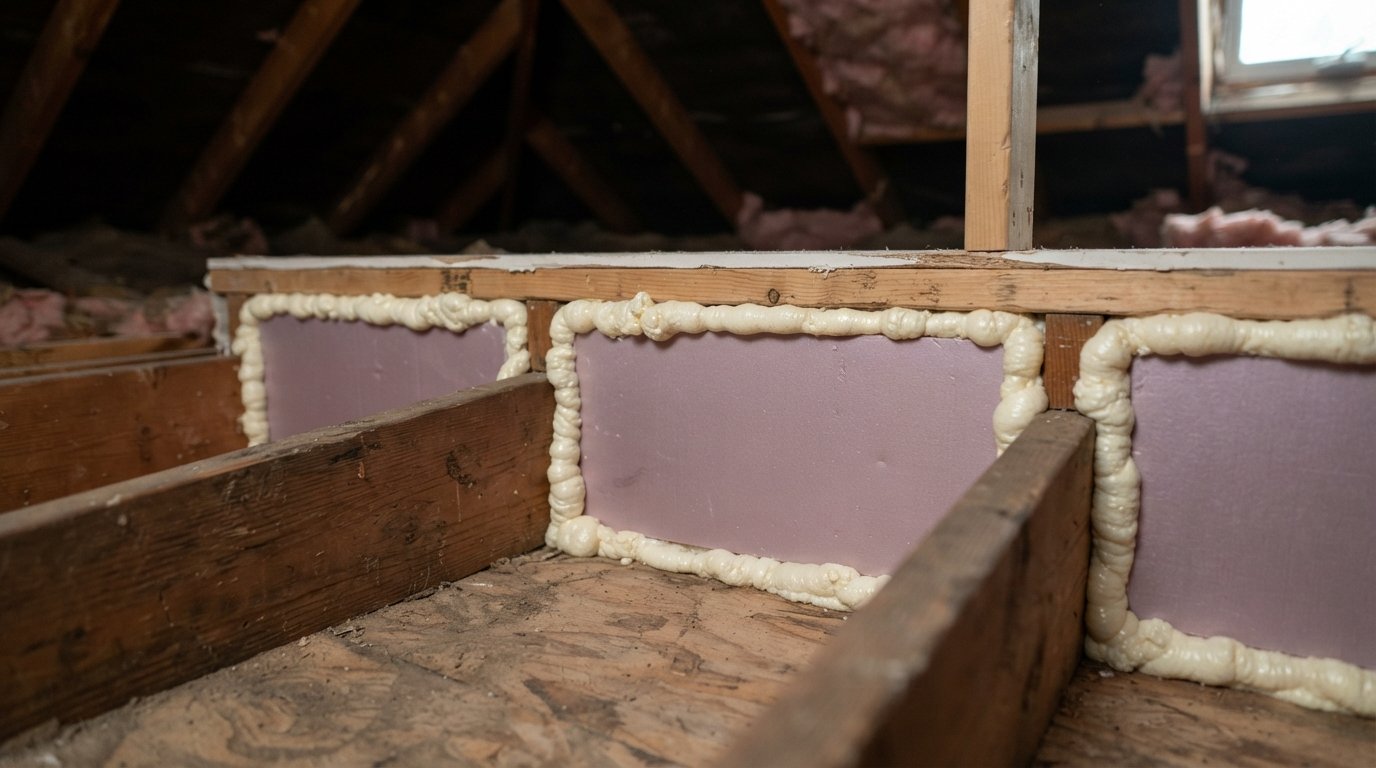
This is the most overlooked leak in these houses. The floor joists of the upper storey run out past the knee wall into the side attic. Between each pair of joists there is an open channel, with the heated room above and the heated main-floor ceiling below. If that channel is not blocked where it meets the knee wall, cold side-attic air flows straight into the floor system. Upstairs floors along the outer walls can feel cold underfoot, and warm air from the house can escape into the side attic through the same bays.
Uninsulated or unsealed knee walls
Many an attic knee wall in an older house has batts stapled in the stud cavities with nothing on the attic side. Air moves freely through and around loose fibreglass, so the batts do far less than their label suggests. Some knee walls have batts that have fallen out or were never installed.
The thin sloped ceiling
The sloped section has very little depth. Older houses often have small rafters, and whatever insulation is in there may have settled, or may be packed tight against the roof deck with no air space. That creates a warm stripe on the roof above the sloped section.
The access door
The little door in the attic knee wall is usually a plain panel with no weatherstripping and no insulation. It behaves just like an uninsulated attic hatch, only it is in a wall.
| Symptom | Likely source | What to check |
|---|---|---|
| Cold floors along the outer edges of upstairs rooms | Open joist bays behind the knee wall | Look into the side attic where the floor framing meets the knee wall |
| Cold drafts at baseboards on the knee wall | Air leaking through or under the knee wall | Check for an air barrier on the attic side and gaps at the bottom plate |
| Icicles and ice dams in the middle of the roof slope | Heat loss through the sloped ceiling warming the roof | Insulation depth and condition in the rafter bays |
| Upstairs rooms much colder in winter and hotter in summer than the main floor | Combination of knee wall, slope and joist bay leaks | Whole-envelope assessment of the upper floor |
| Frost or staining on the roof deck in the side attic | Warm, moist house air leaking into the side attic | Air sealing around the knee wall, access door and wiring penetrations |
| Draft from the little access door | No weatherstripping or insulation on the door | Door fit, gasket and latch |
The Ice Dam Connection
Storey-and-a-half homes are known among roofers for ice dams, and the reason is in the geometry. Heat escaping through the thin sloped ceiling warms the roof deck in a band partway up the roof. Snow melts on that warm band, water runs down to the colder eaves over the side attic, and it refreezes. The ice builds up, and later meltwater backs up behind it and can find its way under the shingles.
Roofing details such as ice and water membrane at the eaves help protect the roof, but they manage the symptom. The lasting fix is keeping heat out of the roof deck by air sealing and insulating the knee wall, the joist bays and the sloped section properly. Early autumn is the time to do it, before the heating season makes the problem visible again.
Strategy One: Insulate the Attic Knee Wall and Side Attic Floor
The traditional approach treats the side attic as outdoor space. The heated boundary runs along the attic knee wall, across the joist bays and along the side attic floor to the outer wall.
How the work is done
- Block the joist bays. Each open bay under the knee wall is sealed with a solid blocker such as rigid foam or wood cut to fit, sealed at the edges with caulk or canned foam. This is the step most often missed, and it is usually the most important.
- Insulate and air seal the knee wall. The stud cavities are filled, and a continuous air barrier is added on the side attic face, often rigid foam board with taped seams. That board also adds insulation over the studs.
- Insulate the side attic floor. Between the knee wall and the outer wall, the floor of the side attic gets insulation over the joists to connect the knee wall insulation to the exterior wall.
- Seal the access door. Weatherstrip it, add rigid foam to the back, and add a latch so it compresses the gasket.
What it does not solve
This strategy leaves the sloped ceiling as a separate problem. The rafter bays above the knee wall still need attention, and often the best you can do from inside the side attic is to check that ventilation baffles are in place and add what insulation the depth allows.
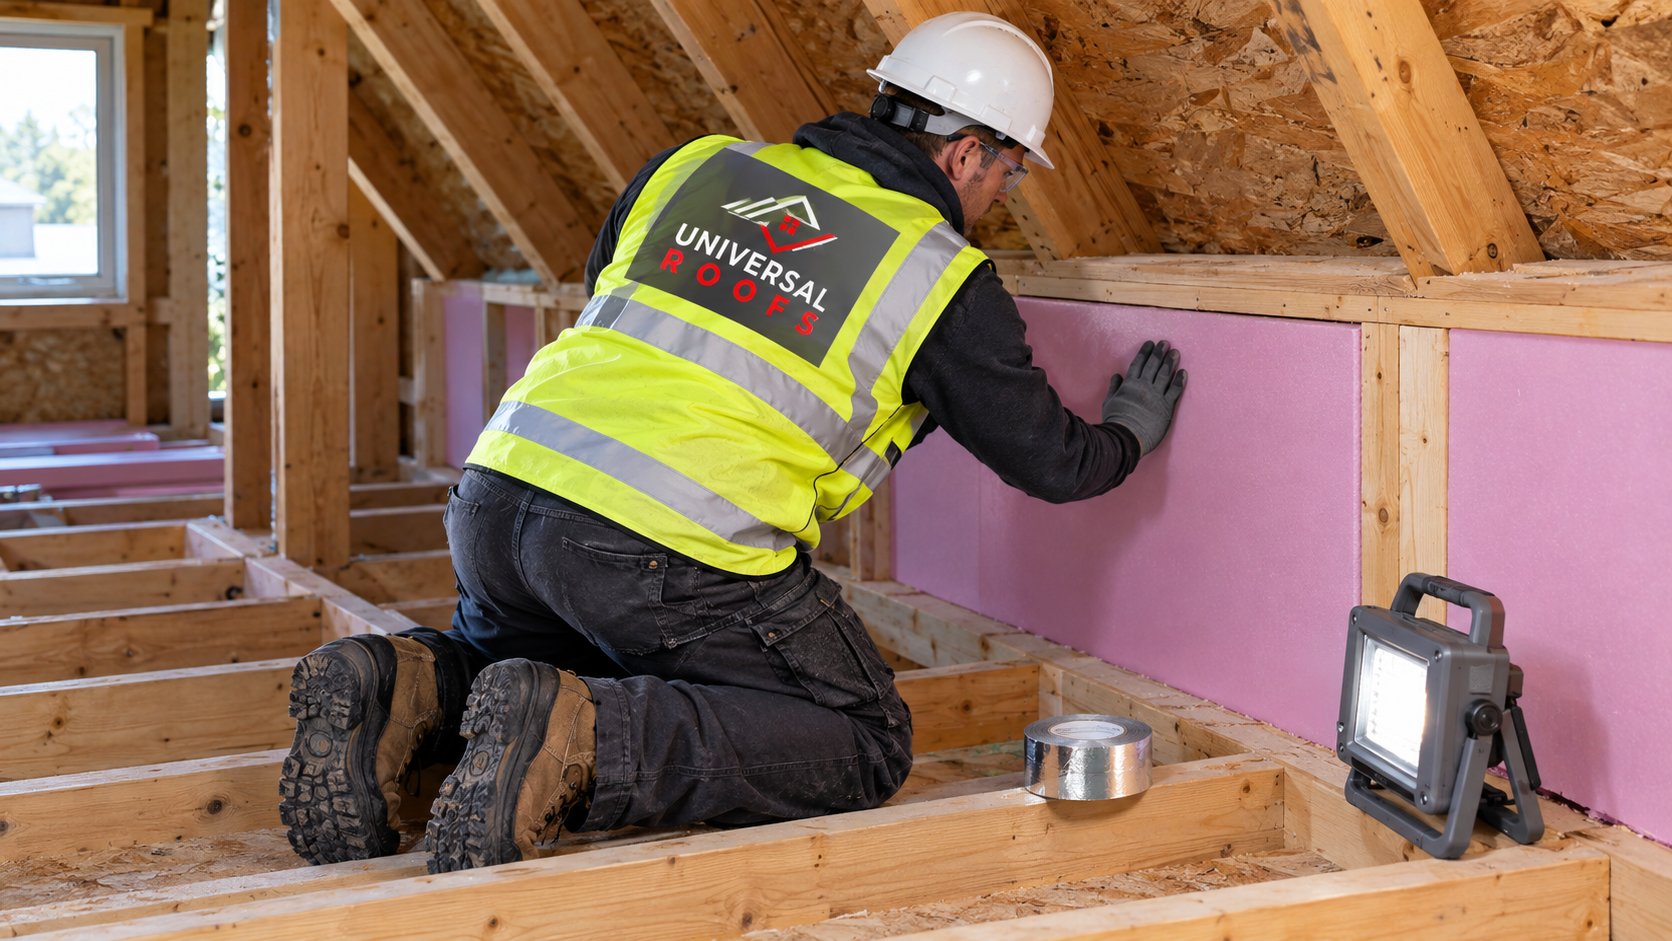
Strategy Two: Insulate the Roof Slope
The alternative moves the heated boundary out to the roof. Instead of insulating the knee wall and side attic floor, you insulate the underside of the roof deck from the outer wall all the way up the slope. The side attic becomes part of the conditioned space.
How it works
Typically this is done with spray foam applied to the underside of the roof sheathing in the side attic, continuing up the sloped section if it can be reached, sometimes from inside by opening the ceiling. Closed-cell spray foam provides both insulation and an air barrier in limited depth. Other assemblies, such as rigid foam over the roof deck during a re-roof, are also possible and are usually designed case by case.
Pros and cons
- Pros: it wraps the joist bays, knee wall and slope in one continuous layer; it can make the side attic usable storage; it removes the need to seal every joist bay individually.
- Cons: higher cost; it removes the ventilated roof space under that part of the roof; foam work needs careful detailing, a qualified installer and attention to fire protection requirements where foam is exposed; roof leaks can be harder to spot later.
This is a bigger design decision than it looks. It affects how the roof deck dries and how the rest of the attic is ventilated. It should be planned by someone who understands both the attic and the roof, and requirements for the assembly should be confirmed with the manufacturer and, where applicable, your municipality.
| Factor | Insulate knee wall and side attic floor | Insulate the roof slope |
|---|---|---|
| Side attic becomes | Cold, ventilated space | Part of the heated envelope |
| Joist bay sealing | Must be done bay by bay | Covered by the continuous roof layer |
| Roof ventilation | Side attic stays vented; baffles needed in the slope | Usually no venting in the foamed area; design matters |
| Disruption | Mostly work inside the side attic | Side attic work plus possible ceiling openings or roof work |
| Relative cost | Lower | Higher |
| Best suited to | Most houses where side attic access is reasonable | Houses with ductwork in the side attic, awkward framing, or planned storage use |
Venting the Sloped Section
Whichever strategy you choose for the attic knee wall, the sloped ceiling above it needs a plan. In a conventional vented roof, air should flow from the soffit vents, up through the rafter bays over the sloped ceiling, into the upper attic and out through roof or ridge vents. That airflow carries away moisture and helps keep the roof deck cold and even in temperature, which reduces ice damming.
The problem is that many sloped sections are packed full of insulation right up against the roof deck, or the soffit vents are blocked where they meet the side attic. When we open these up, we often find:
- No baffles at all, with insulation touching the underside of the deck.
- Soffit vents painted over or covered by later siding work.
- Blocking at the top of the knee wall that stops air getting from the side attic into the slope.
- An upper attic with limited exhaust, so air that does get up there has nowhere to go.
Restoring the air channel usually means installing baffles in each rafter bay, clearing intake at the soffit, and making sure the upper attic has adequate exhaust. If the sloped section has to be opened from inside to do this properly, that is often the moment to upgrade its insulation too.
For homeowners working with our Peel Region roofing, eavestroughs and attic work team, we usually check soffit intake from outside and the upper attic exhaust from the hatch before recommending anything for the slope.
Costs and Planning
Pricing for attic knee wall work varies widely with the house layout, access into the side attics, the condition of existing insulation and which strategy you choose. The ranges below are rough estimates only, not quotes.
| Scope | What it usually includes | Typical range (estimate, CAD) |
|---|---|---|
| Access door upgrade | Weatherstripping, rigid foam on the door, latch | Often a few hundred dollars per door |
| Joist bay blocking and sealing | Cutting and sealing blockers in every open bay under both knee walls | Often falls around $800 to $2,500 depending on bay count and access |
| Full attic knee wall package | Joist bays, knee wall insulation and foam air barrier, side attic floor insulation, access doors | Often falls around $1,500 to $5,000 for a typical storey-and-a-half house |
| Spray foam on the side attic roof slope | Closed-cell foam on the underside of the deck from outer wall to knee wall height or higher | Usually several times the knee wall package; depends on area and thickness |
| Opening and re-insulating the sloped ceiling | Removing finishes, baffles, insulation, new drywall and finishing | Priced per room; finishing work adds significantly |
A proper assessment of your house is the only way to price it reliably, and it is common to phase the work: joist bays and knee walls first, the sloped ceiling later when a room is being renovated.
What to Ask Before Hiring Anyone
- Will you seal the floor joist bays under the knee walls, and how?
- What air barrier will go on the side attic face of the knee wall?
- Will you insulate the side attic floor to connect to the exterior wall?
- What is your plan for the sloped ceiling, and will ventilation be maintained?
- How will you treat the access doors?
- If you recommend foam on the roof slope, why, and how will the rest of the attic be vented?
A contractor who only offers to “blow more insulation in the attic” has not understood the house. The upper attic is usually the easy part; the attic knee wall and the joist bays are where the real work is.
Frequently Asked Questions
Why are my upstairs rooms so cold in a storey-and-a-half house?
What are open joist bays and why do they matter?
Is it better to insulate the knee wall or the roof slope?
Do these houses get more ice dams?
Are batts in the knee wall enough?
When should this work be done?
Fix Your Attic Knee Wall Before the Heating Season
A storey-and-a-half house can be warm and comfortable upstairs once the right leaks are sealed. Universal Roofs can assess your knee walls, joist bays, sloped ceilings and roof ventilation together and recommend a plan that suits your house. Call us today at (416) 732-2421 or request a free estimate.
Serving homeowners across Peel Region and the wider GTA with roofing, eavestroughs and attic work.