
An underground downspout looks tidy: the metal downspout comes down the wall, disappears into a pipe in the ground, and the water goes somewhere out of sight. The trouble is that “out of sight” also means out of mind, right up until the eavestrough starts spilling over during a heavy autumn rain or water starts bubbling up from the joint at the base of the wall. This guide explains why buried downspout pipes clog, how to tell where the blockage is, and when it makes more sense to stop fighting the pipe and move the water above ground.
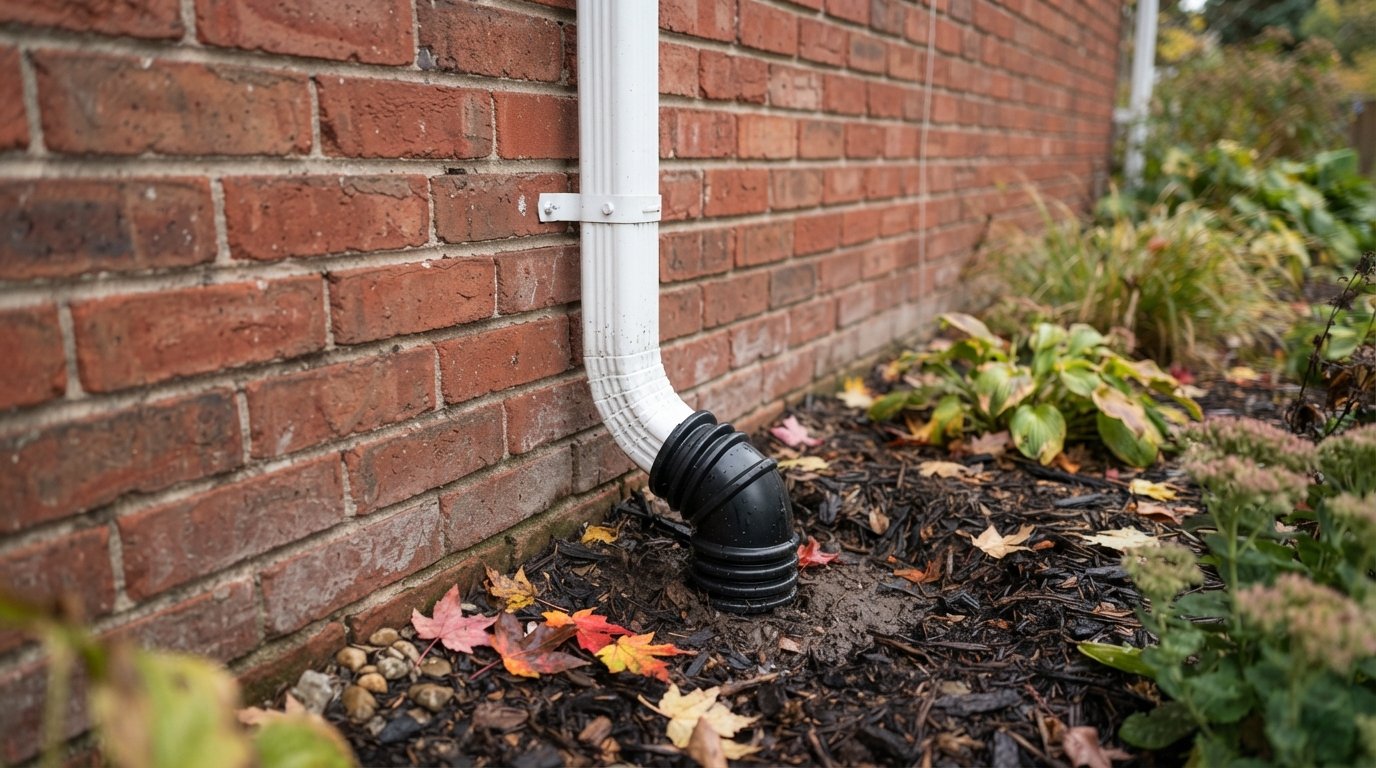
We look at a lot of these every fall, because leaf season and the first cold snaps are when a marginal drain finally gives up. The good news is that most problems are diagnosable in an afternoon, and many are fixable without digging up the whole yard.
How an Underground Downspout System Works
Every underground downspout setup has the same basic parts, even if the details vary from house to house:
- The downspout, usually aluminum, carrying water from the eavestrough outlet down the wall.
- An adapter or boot at the bottom, where the rectangular downspout transitions into a round pipe, typically 3 or 4 inches in diameter.
- The buried pipe, which may be solid PVC or ABS, corrugated flexible pipe, or in older houses clay tile or cast iron.
- The discharge point: a pop-up emitter in the lawn, an outlet at a ditch or slope, a dry well, or in some older homes a connection into the foundation drain or a sewer lateral.
Water only moves through this system by gravity. The pipe has to fall continuously from the downspout to the outlet. Any section that is flat, sags or rises even slightly becomes a place where water sits, debris settles and, later in the year, ice can form.
That last type of discharge, into a sewer or foundation drain, deserves a note. A number of Ontario municipalities have programs that require or encourage homeowners to disconnect downspouts from the sewer system. The rules and exemptions differ by municipality, so before you change where your underground downspout ends up, or if you discover it ties into the house drain, confirm the current requirements with your local municipality.
Why Buried Downspout Pipes Clog
Clogs almost never come from one single thing. They build up from several sources over years, and the pipe’s layout decides how quickly.
Leaves, seeds and roof debris
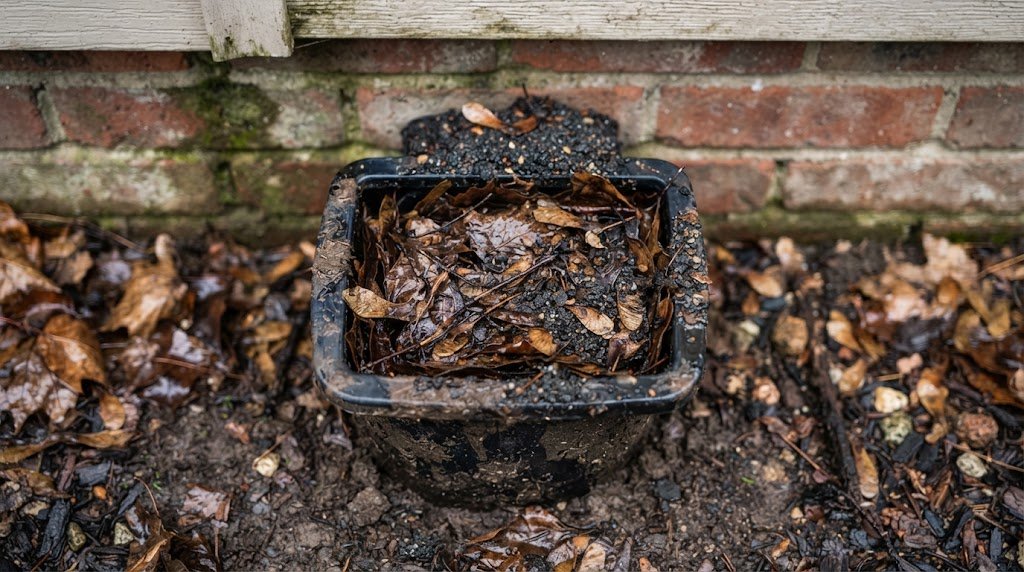
Anything that gets past the eavestrough ends up in the downspout. Maple keys, oak leaves, pine needles and helicopter seeds are the usual suspects in the fall. In a short above-ground downspout they wash out. In a long buried pipe they settle at the first low spot or bend and start forming a mat.
Asphalt shingle granules
This one surprises people. Asphalt shingles shed granules gradually, and more heavily in the first year after installation and again as the roof nears the end of its life. Those granules are heavy, sand-like grit. They drop out of the water wherever it slows down, which is exactly the flat or sagging sections of an underground pipe. We have opened pipes with several centimetres of packed grit along the bottom. If you are seeing a lot of granules at the outlet, that is also worth mentioning to a roofer, because heavy granule loss can signal an ageing roof. Our team can assess that as part of roof repair and shingle condition checks.
Root intrusion
Tree and shrub roots go looking for water. Joints in clay tile, loose couplings in PVC and the ribs of perforated corrugated pipe all give roots a way in. Once inside, fine roots form a net that traps everything flowing past. Root problems tend to get worse every year, not better.
Crushing and sagging
Corrugated pipe buried shallowly under a walkway or lawn edge can crush or oval over time. Soil settles after construction, so a pipe laid with proper slope can end up with a belly in it years later. Both leave standing water in the line.
Freezing
Water that sits in a low spot in a shallow pipe can freeze solid in the colder months. On a mild day, snowmelt from the roof comes down the downspout, hits an ice plug and has nowhere to go. It backs up the downspout and overflows at the adapter or at the eavestrough. Clearing the pipe in the fall, so it drains completely, is the best protection.
| Symptom you notice | Most likely cause | What to check first |
|---|---|---|
| Water bubbling out at the joint where the downspout meets the pipe | Blockage somewhere downstream in the buried pipe | The crew removes the downspout and flushes the pipe |
| Eavestrough overflows only at one corner in heavy rain | Downspout or underground line cannot take the flow | Check the downspout itself first, then the buried section |
| Dirty, gritty water at the outlet or a pile of granules | Shingle granules settling in the line | Flush the pipe and have the roof looked at |
| Wet basement wall or damp corner near one downspout | Leaking joint underground or water backing up near the foundation | Temporarily disconnect and discharge above ground, then watch |
| Pop-up emitter never opens | Emitter jammed, pipe blocked, or pipe no longer connected | Lift the emitter cap and flush from the downspout end |
| Water flows well in summer, backs up in cold months | Sag or low spot holding water that freezes | Camera inspection to find the belly |
Overflow at the Elbow: The Most Common Complaint
If there is one thing homeowners call us about with an underground downspout, it is water spilling out at the bottom of the wall where the downspout enters the ground. Sometimes it is a slow leak at the joint. Sometimes it is a full gush that sprays water against the foundation during a storm.
That spot overflows first because it is the lowest open joint in the system. When the buried pipe cannot drain as fast as the roof sends water down, the water rises in the pipe until it reaches that joint, then escapes. So the overflow is a symptom, not the cause. Sealing the joint with caulk or tape might stop the visible leak, but the water then backs up higher in the downspout and can overflow the eavestrough instead. Worse, if the joint is below grade, sealing it can hide the problem while water still seeps out underground right beside the foundation.
The other common cause at this spot is the adapter itself. Rectangular-to-round adapters collect debris right at the transition, and a handful of wet leaves can block it. Always pull the downspout off and look into the adapter before assuming the whole underground run is blocked.
Diagnosing a Clog Step by Step
You can do the first few checks yourself from the ground. Do not climb onto the roof; the checks below all start at the base of the wall.
| Step | What you do | What it tells you |
|---|---|---|
| 1. Look at the eavestrough outlet from the ground | During rain, watch whether water enters the downspout or spills past it | If it spills at the outlet, the blockage may be at the top, not underground |
| 2. Disconnect the downspout at the adapter | Loosen the screws or lift the downspout out of the boot | Lets you see debris in the adapter and test each part separately |
| 3. Run a garden hose into the buried pipe | Let water run for several minutes and watch the outlet | Slow or no flow at the outlet confirms a blockage in the line |
| 4. Measure roughly where the blockage is | Feed a plumbing snake or a flexible rod until it stops, and note the length | Tells you whether the problem is near the house or near the outlet |
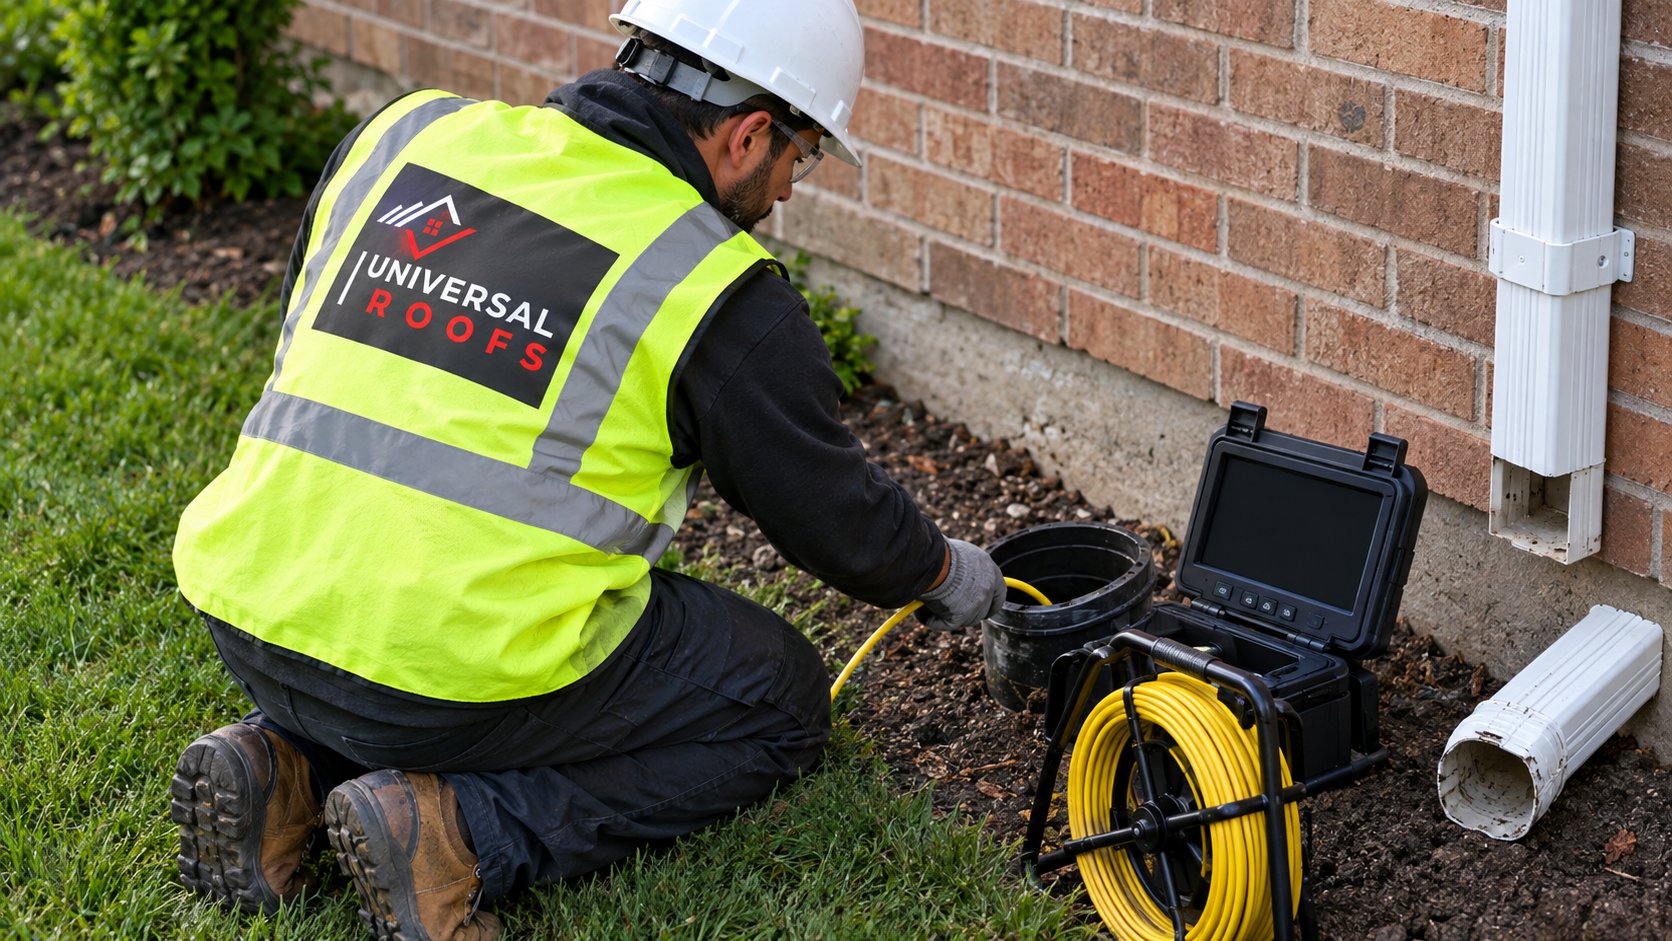
| 5. Camera inspection | A drain camera is fed through the pipe from the downspout end | Shows roots, crushing, sags, disconnected joints and the exact location |
A camera inspection is the step that saves money. Without it, people dig in the wrong place, or they flush a pipe that is actually crushed and will clog again within months.
Clearing the Line: Flushing, Snaking and Jetting
Once you know what you are dealing with, the clearing method follows from it.
Flushing with water
For loose leaves and light sediment, a hose run into the pipe from the top end often does the job, especially with a hose nozzle designed for drain cleaning that pushes water forward. Work from the downspout end toward the outlet so debris moves in the direction the pipe drains.
Snaking
A hand auger or small drain snake breaks up matted leaves and can pull out root masses near the entry. Be careful with corrugated pipe: an aggressive snake can catch the ribs and tear it.
Hydro jetting
For packed granules and fine roots, a plumbing or drain contractor can jet the line with high-pressure water. It is the most thorough way to clean a long run, but it will not fix a crushed or broken pipe. If the camera shows structural damage, jetting only buys time.
Spot repairs
If the camera finds one bad section, such as a crushed length under a walkway or a joint full of roots, it is often possible to dig down at that one spot, replace a few metres of pipe with solid-wall pipe, and restore the slope. That is far less disruptive than replacing the whole line.
Should You Convert to Above-Ground Discharge?
This is the question we get asked most after a clog. There is no single answer, but here is how we think about it.
Converting means cutting the downspout off above the buried pipe, capping the pipe and sending the water across the surface instead. How far the extension runs and where it should end is covered in our guide to downspout disconnection and rain barrels.
Reasons to convert:
- The underground line keeps clogging despite cleaning.
- The camera shows crushing, sags or root damage along much of its length.
- The line connects to a sewer or foundation drain and your municipality requires disconnection.
- You want to be able to see, at a glance, whether each downspout is working.
Reasons to keep or rebuild the underground downspout:
- The downspout sits beside a driveway, walkway or patio where a surface extension is a tripping or icing hazard.
- The lot is flat or slopes toward the house near that corner, so there is nowhere safe to release water at the surface.
- The line is in good condition and only needed a one-time flush.
When keeping an underground line, rebuilding it with smooth solid-wall pipe, a continuous slope and a proper outlet makes a real difference. So does a cleanout fitting near the downspout, so the next flush takes minutes instead of an hour.
| Option | Best for | Trade-offs | Typical range (estimate, CAD) |
|---|---|---|---|
| Flush and clean the existing line | Loose debris, recent clog, pipe in good shape | Will not fix sags or damage | Often falls around $150 to $400 per line |
| Camera inspection | Recurring clogs, unknown pipe route | Diagnostic only, but prevents guessing | Often falls around $200 to $450 |
| Spot excavation and repair | One crushed or root-filled section | Some lawn or landscaping disturbance | Often falls around $500 to $1,500 depending on depth and surface |
| Replace the full underground run | Old clay or badly damaged corrugated pipe | Most disruptive, needs a good outlet location | Often falls around $1,200 to $3,500 or more depending on length |
| Convert to above-ground discharge | Recurring clogs, sewer-connected lines, open lawn nearby | Visible extension, needs a safe drainage path | Often falls around $100 to $350 per downspout |
All of these are broad estimates. Actual pricing depends on length, depth, access and what is on top of the pipe, whether that is lawn, interlock or concrete.
Preventing the Next Clog
Most underground downspout problems start at the top. Keep less debris from getting in, and the buried pipe has far less work to do.
- Clean the eavestroughs in the fall, ideally after most leaves have dropped. In yards with heavy tree cover, a second clean late in the season is often worth it.
- Use an outlet strainer or leaf screen at the top of the downspout, or eavestrough guards that suit your tree types.
- Add a cleanout or a debris-catching adapter near the base of the downspout so grit and leaves can be removed before they enter the buried pipe.
- Flush the line every fall before the ground freezes, so it drains completely.
- Keep the outlet clear. A pop-up emitter buried under mulch or sod cannot open.
If the eavestrough itself is sagging, pitched the wrong way or pulling off the fascia, fix that as well. A trough that holds water sends it down in surges and drops more debris into the downspout. Crews doing roofing, eavestroughs and attic work across Durham Region and the rest of the GTA usually check the trough pitch, outlets and downspouts together, because a problem in one tends to show up in another.
What a Good Contractor Will Tell You
When you get someone out to look at a clogged underground downspout, a thorough visit should cover:
- Whether the blockage is in the eavestrough outlet, the downspout, the adapter or the buried line.
- What the pipe is made of and roughly where it runs.
- Where it discharges, and whether that discharge is allowed and actually working.
- Whether a camera inspection is worth it before anyone digs.
- Whether converting to above-ground discharge is practical at that corner of the house.
Be cautious of anyone who wants to replace a whole line without first confirming what is wrong with it, and equally of anyone who seals the overflowing joint and calls it fixed.
Frequently Asked Questions
Why is water coming out where my downspout goes into the ground?
Can I clear a buried downspout pipe myself?
Do roots really get into downspout pipes?
Is it better to disconnect downspouts and discharge above ground?
Why does my downspout back up only in cold weather?
How often should an underground downspout be cleaned?
Get Your Underground Downspout Checked Before Freeze-Up
A clogged buried line is one of those problems that is easy to ignore until water ends up against your foundation. Universal Roofs can check your eavestroughs, downspouts and roof together, find where the water is getting stuck, and recommend whether to clean, repair or convert. Call us today at (416) 732-2421 or request a free estimate.
Serving homeowners across Durham Region and the wider GTA with roofing, eavestroughs and attic work.