
If you stand under your attic hatch on a cool September evening and hold the back of your hand near the edge of the trim, you will often feel a faint draft. That small sensation tells you a lot. In many GTA homes the attic hatch is the single biggest intentional hole in the ceiling, and it is usually the least insulated and least sealed part of the whole attic floor. Fixing it is one of the cheapest, fastest upgrades you can make before the furnace starts running every day.
This guide walks through how a hatch leaks, how to weatherstrip it properly, what makes a good insulated cover, how to add rigid foam to the lid, why latches matter more than most people think, and what to do if you have a pull-down ladder instead of a simple panel. It is written the way we would explain it to a client standing in their upstairs hallway, looking up at a painted plywood square.
Why the Attic Hatch Leaks More Than the Rest of the Ceiling
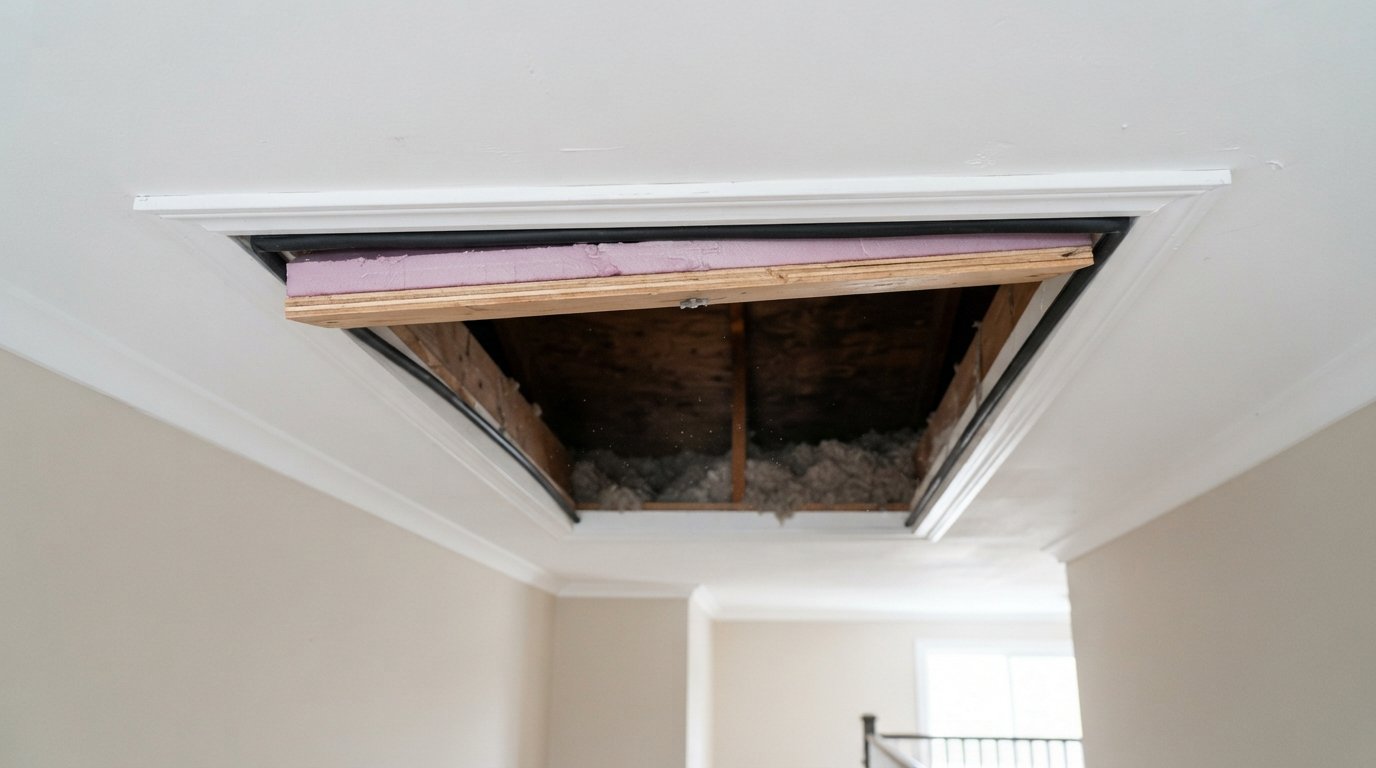
A typical attic floor in an older Ontario house might have anywhere from a few inches to well over a foot of loose-fill or batt insulation. The attic hatch, by contrast, is often a single piece of plywood or drywall resting loosely on a wood stop. Two separate problems stack on top of each other here: air leakage and conduction.
Air leakage is the bigger of the two. Warm indoor air rises, and during the heating season the upper floor of your house sits under slight positive pressure relative to the attic. That pressure pushes warm, moist air through any crack it can find. A hatch panel that simply sits on its stop has a gap all the way around its perimeter, sometimes only a millimetre or two, sometimes much more where the stop has warped or the paint has built up unevenly. Add those gaps together and you can have a crack several metres long in total. Even a thin crack of that length moves a surprising amount of air over a whole winter.
Conduction is the second problem. A bare plywood lid has almost no insulating value compared with the insulation around it. So even if the hatch were perfectly airtight, it would still be a cold rectangle in the ceiling. In a closet you may notice condensation or a darker patch on the paint above the hatch trim on cold mornings. That is the lid acting as a cold spot.
The moisture side matters to us as roofers. Warm air leaking into the attic carries water vapour, and when it reaches cold roof sheathing it can condense or frost. Over time that shows up as darkened sheathing, rusty nail tips, damp insulation and, in bad cases, mould. We regularly trace those symptoms back to a handful of leak points, and the hatch is usually on the list alongside pot lights, plumbing stacks and bathroom fan housings. If you want the bigger picture on how attic insulation and ventilation work together to keep the roof deck dry, sealing the hatch is a good place to start, because it is the one leak you can see from inside the house.
Types of Attic Access and How Each One Leaks
Not every attic hatch is the same, and the fix depends on what you have. Most homes in the GTA have one of four setups.
| Access type | Where the air gets through | Typical fix | Difficulty |
|---|---|---|---|
| Lift-off ceiling panel (lid sits on a wood stop) | Perimeter gap between lid and stop, gap between trim and drywall | Weatherstrip the stop, caulk the trim, add rigid foam to the lid, add latches | Low |
| Hinged panel in a frame | Hinge side gap, uneven closing, warped panel | Replace or shim the frame, add compressible gasket, insulate the panel | Low to moderate |
| Pull-down folding ladder | Large perimeter gap around the door panel, thin door, gaps between the frame and rough opening | Seal the frame to the framing, add gasket, install an insulated cover box or tent on the attic side | Moderate |
| Knee wall or gable wall access door | Door perimeter, uninsulated door slab, gaps at the frame | Weatherstrip like an exterior door, insulate the door slab, add a latch | Low to moderate |
| Hatch inside a closet with shelving below | Same as a lift-off panel, often worse because it is rarely disturbed and never checked | Same as a lift-off panel, plus clearing insulation from the stop edges | Low, but awkward access |
Weatherstripping the Hatch: Doing It So It Actually Seals
Weatherstripping is the heart of any attic hatch job. Done right, it turns a leaky panel into something that behaves more like a closed exterior door. Done wrong, it either does nothing or stops the lid from sitting flat.
Pick the right material
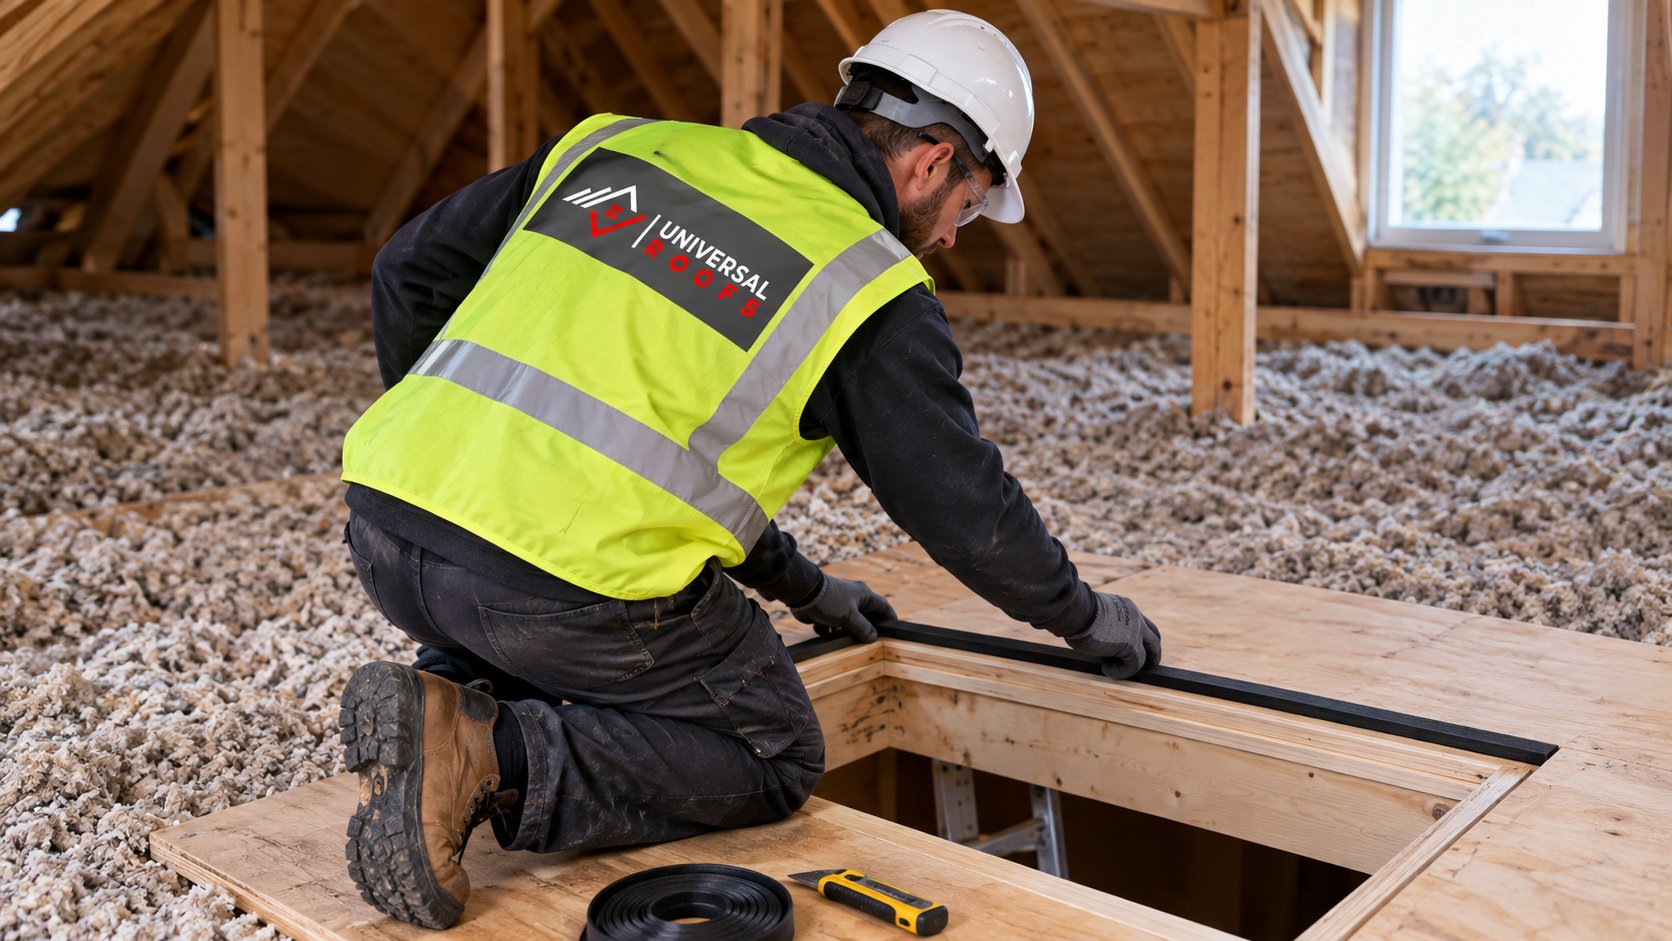
For a lift-off panel, the most common choice is a closed-cell foam tape or a rubber or silicone compression gasket applied to the top face of the wood stop, so the lid presses down onto it. Closed-cell foam is inexpensive and easy to install. Better quality rubber gaskets (often sold as D or P profile) keep their shape longer and recover after being compressed, which matters because the lid gets lifted and replaced over the years.
Avoid open-cell foam that looks like a sponge. It lets air pass straight through once it is compressed and dusty. Also avoid felt strips, which compress permanently and do very little.
Prepare the stop
Adhesive-backed weatherstrip only sticks to clean, dry wood. We scrape off loose paint, vacuum the dust and wipe the stop down. If the stop is split or badly warped, it is often faster to replace it with fresh straight lumber, fastened securely to the framing so it does not flex when someone rests a knee on it.
Watch the thickness
The gasket needs to be thick enough to fill the gap but not so thick that the lid rocks or sits proud of the trim. A good test is to lay the lid down after installing the strip and look along the edge from below. You want even contact all the way around with the lid sitting level. If one corner rides high, the stop is out of plane and needs shimming or replacing.
Seal the trim, too
People often miss this. The casing around the hatch is nailed to the drywall, and there is usually a gap behind it where the drywall was cut around the framing. Air can bypass your new weatherstripping entirely by travelling behind the trim. A bead of paintable acrylic latex caulk where the trim meets the ceiling, and another where the drywall edge meets the framing on the attic side, closes that path.
Building an Insulated Cover for the Attic Hatch
Once air leakage is handled, the next job is to bring the lid up to something closer to the insulation level around it. That is where attic hatch insulation comes in. The goal is not perfection, since the lid will always be the thinnest part of the floor, but a lid with several inches of rigid foam is a big improvement over bare plywood.
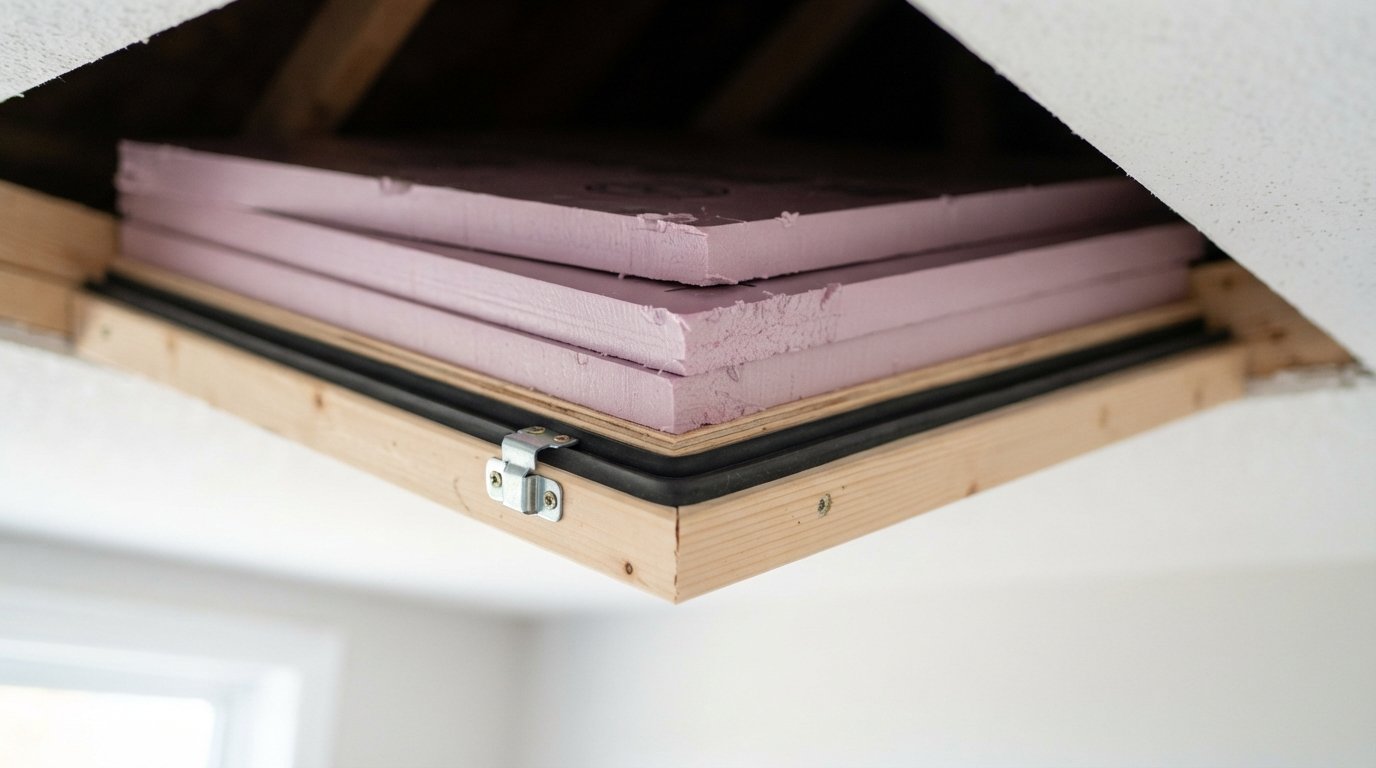
Rigid foam on the lid
The usual approach is to glue layers of rigid foam board to the attic side of the lid. Common options are expanded polystyrene (EPS), extruded polystyrene (XPS) and foil-faced polyisocyanurate. Per inch, EPS is the lowest of the three, XPS sits in the middle and polyiso is the highest when it is warm, though polyiso loses some of its performance in very cold conditions. For a hatch lid, any of them works; the difference is mostly how thick you can go before the stack gets heavy or awkward.
A few practical rules we follow:
- Use a foam-compatible adhesive. Some solvent-based construction adhesives dissolve polystyrene.
- Cut each layer slightly smaller than the lid so it clears the framing of the opening when you lift the lid out and set it aside.
- Stagger or step the layers if the opening is tight, so the lid can still be tilted through the hole.
- Keep the total weight manageable. A lid that is too heavy tends to get dropped or left off.
- Foam plastic generally should not be left exposed on the living-space side. Keep it on the attic side and check the product literature for any covering it requires.
Build a dam around the opening
If your attic has loose-fill insulation, it will slowly spill into the opening every time the lid is moved. A simple dam, made from strips of plywood or rigid foam fastened around the opening and standing a little higher than the insulation level, keeps the fill where it belongs. It also gives the insulated lid a solid edge to sit against. We see many attics where the insulation around the hatch has been pushed back into a ring over the years, which leaves a bare, cold band right where the air leaks were already worst.
Latches and Compression: The Detail Most Hatches Are Missing
This is the part that separates a hatch that seals from one that only looks sealed. Weatherstripping only works when it is squeezed. A lid resting on a gasket under its own weight barely compresses it, especially if the lid is light plywood and the gasket is fairly firm. In the heating season, the pressure difference pushes up from below, and the lid can lift just enough to open a crack along one edge.
The fix is a pair of latches that pull the lid down onto the gasket. Options include:
- Hook and eye: simple and cheap, but hard to adjust for tension.
- Cam or draw latches: these pull the lid down firmly and can be adjusted as the gasket settles. Our usual choice for lift-off panels.
- Turn buttons on the stop: a small rotating block that holds the lid down. Fine for lighter gaskets.
- Weighted lids: some people simply add more foam or a board for weight. It helps, but a latch is more reliable.
For safety, any latch on a lift-off panel must be releasable from the room side, so the hatch can always be opened from the living space and nobody is locked out of, or into, the attic. Choose hardware that is reachable from below, tucked near the frame, on lift-off panels, hinged panels and ladder doors alike.
A good test after installation: close the hatch on a windy day and run the back of your hand or a thin strip of tissue around the perimeter. You should not feel movement. If one side still leaks, check whether the lid is flexing between latches. A longer lid sometimes needs a third latch or a stiffer lid.
Pull-Down Ladders: The Hardest Hatch to Seal
Folding attic ladders are convenient, and many homeowners install them to make storage easier. From an energy point of view, though, they are among the worst openings in the ceiling. The door panel is usually thin, the opening is larger than a standard hatch, and the gaps around the frame are often generous because the ladder needs clearance to swing down.
Here is how we approach a ladder:
- Seal the frame to the framing. The ladder frame sits in a rough opening, and there is almost always a gap between the two. We fill it with backer rod and sealant or low-expansion foam on the attic side.
- Add a gasket to the door panel. Many ladders ship with little or no weatherstripping. A compression gasket around the inside of the frame lets the door close against it.
- Add tension. Ladder springs are designed to hold the door up, not to compress a gasket. A latch or two on the room side helps, as long as it does not interfere with the ladder hardware.
- Cover it from above. Because the door itself cannot carry much insulation without fouling the folded ladder, the best solution is usually an insulated box or zippered tent that sits over the whole ladder on the attic side. You open it from inside the attic after climbing up.
If a ladder is old, loose or damaged, replacing it with a model that has a built-in insulated door and gasket is sometimes simpler than trying to upgrade it. That decision depends on how often you use the attic. If you only go up once a year, a plain hatch with a well-built foam lid is honestly the better performer.
When to Seal and Insulate the Hatch
Early autumn is the right window. The attic is comfortable to work in, and sealing now means you get the benefit through the whole heating season. It is also the easiest time to have someone check soffit baffles, bathroom fan ducts and other penetrations while the hatch is open.
Homeowners working with our Halton Region roofing, eavestroughs and attic work team often ask whether the hatch alone is worth a service call. On its own it is a small job. As part of a broader air sealing and insulation visit, it makes a lot of sense, and it is the piece people notice most because they can see and feel the difference below.
Costs, Options and What Is Worth Doing
Hatch work is relatively inexpensive compared with most attic jobs. The table below gives broad estimates for common scopes. These are typical ranges only; your actual price depends on the house, how easy the attic is to reach, the size of the opening and what else is being done during the same visit.
| Scope of work | What it usually includes | Typical range (estimate, CAD) |
|---|---|---|
| Weatherstrip and latch a lift-off hatch | Clean or replace stop, compression gasket, two latches, caulk trim | Often falls around $150 to $400 |
| Full attic hatch insulation upgrade | Weatherstripping and latches plus a multi-layer rigid foam lid and an insulation dam | Often falls around $300 to $700 |
| Seal and cover an existing pull-down ladder | Frame sealing, gasket, latch, insulated box or tent on the attic side | Often falls around $400 to $900 |
| Replace a pull-down ladder with an insulated unit | Remove old ladder, fit new unit, seal frame, trim and gasket | Often falls around $800 to $1,800 |
| Hatch work as part of a whole-attic air sealing and top-up | Hatch plus sealing of other penetrations and added insulation | Priced by the whole attic; the hatch adds a modest amount |
If you are budgeting, the order of value is fairly clear: air sealing first, compression latches second, lid insulation third, and ladder replacement only if the ladder itself is failing or you use it constantly.
Common Mistakes We See on Attic Hatches
Most failed attic hatch upgrades fail for predictable reasons. Knowing them helps you judge a job, whether you had it done or you are checking a previous owner’s work.
| What we find | Why it is a problem | How to correct it |
|---|---|---|
| Batt insulation stapled loosely to the lid | Batts sag, fall off and leave gaps; they do nothing for air leakage | Replace with glued rigid foam and add weatherstripping |
| Weatherstrip on the lid edge instead of the stop | It scrapes and tears every time the lid slides in and out | Move the gasket to the top face of the stop |
| Foam lid cut to the full size of the opening | Lid cannot tilt out, so people pry and damage it or leave it off | Trim the foam layers smaller or step them |
| No latches | Gasket is not compressed and the lid lifts under pressure | Add adjustable cam or draw latches |
| Insulation pushed away from the opening | Bare ring of ceiling around the hatch loses heat | Build a dam and restore insulation depth |
| Gap behind the trim left open | Air bypasses the new gasket entirely | Caulk the trim and seal the drywall edge from above |
One more mistake: sealing the hatch perfectly while a bathroom fan still dumps humid air into the attic. If the attic has a moisture source, fix that too.
What to Ask a Contractor About Hatch Work
A good contractor should be able to explain exactly what they will do and why. Useful questions:
- What kind of weatherstrip will you use, and where will it go?
- Will you add latches, and what type?
- How thick will the foam on the lid be, and will the lid still fit through the opening?
- Will you seal behind the trim and around the frame from the attic side?
- Will you restore the insulation around the opening and add a dam?
- While you are up there, will you note any moisture, ventilation or bathroom fan problems?
If the answer to most of these is vague, the job will probably be a strip of foam tape and nothing else. That is better than nothing, but it leaves most of the benefit on the table.
Frequently Asked Questions
Is sealing the attic hatch really worth it?
What is the best weatherstripping for a lift-off hatch?
How thick should the insulation on the lid be?
Can a pull-down attic ladder be made energy efficient?
Why is there dirt around the edge of my hatch?
When is the best time to do this work?
Book Your Attic Hatch Sealing Before the Heating Season
A drafty hatch is a small problem with an easy fix, and it is one of the few energy upgrades you can feel from the hallway the same day. Universal Roofs can seal and insulate your hatch or ladder, check the insulation and ventilation around it, and let you know if anything else in the attic needs attention before the cold months. Call us today at (416) 732-2421 or request a free estimate.
Serving homeowners across Halton Region and the wider GTA with roofing, eavestroughs and attic work.