
Some of the worst wall rot we open up has nothing to do with a failed roof. It sits in one small spot: where the bottom edge of a lower roof meets a wall that keeps going past it. Without a kick out flashing at that corner, every rain sends a stream of water off the end of the step flashing, down the face of the wall and, too often, behind the siding, brick or stucco. By the time a stain shows up inside, the sheathing and framing behind that corner may have been wet for years.
This guide explains what the part is, where your house needs one, how to recognize the damage a missing one causes, and how a retrofit is actually done, including on brick and stucco walls where the job is fussier.
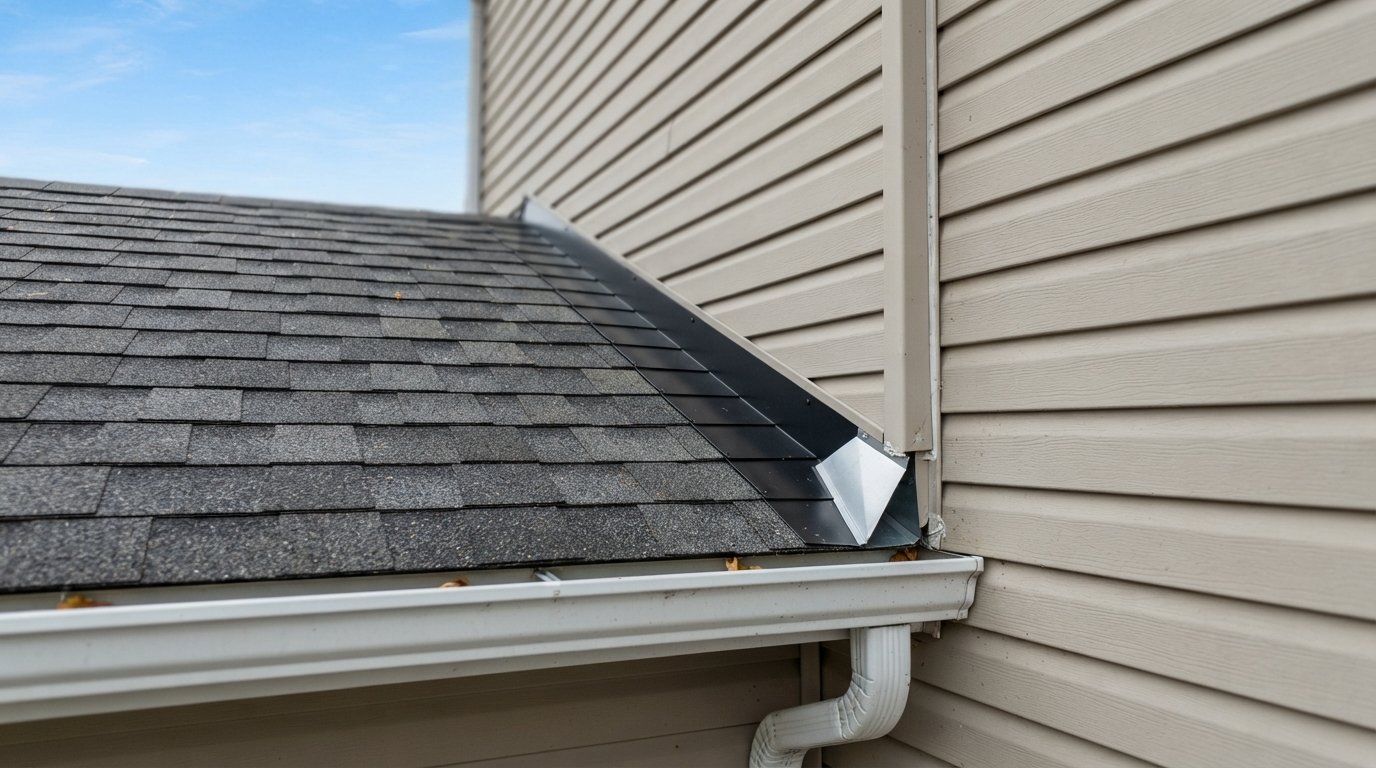
What Kick Out Flashing Does
Where a sloped roof runs up against a vertical wall, roofers weave step flashing into each course of shingles. Each piece has one leg under the shingle and one leg up the wall, tucked behind the cladding or its water-resistive barrier. Water running down the roof along the wall is kept on the shingles by those steps.
The trouble starts at the bottom. When the roof ends at an eave but the wall continues down past it, the last piece of step flashing simply stops. All the water the step flashing has been guiding down the wall pours off that last piece and runs straight down the wall surface. If there is a trough, its end cap usually stops a little short of the wall, so the water misses it.
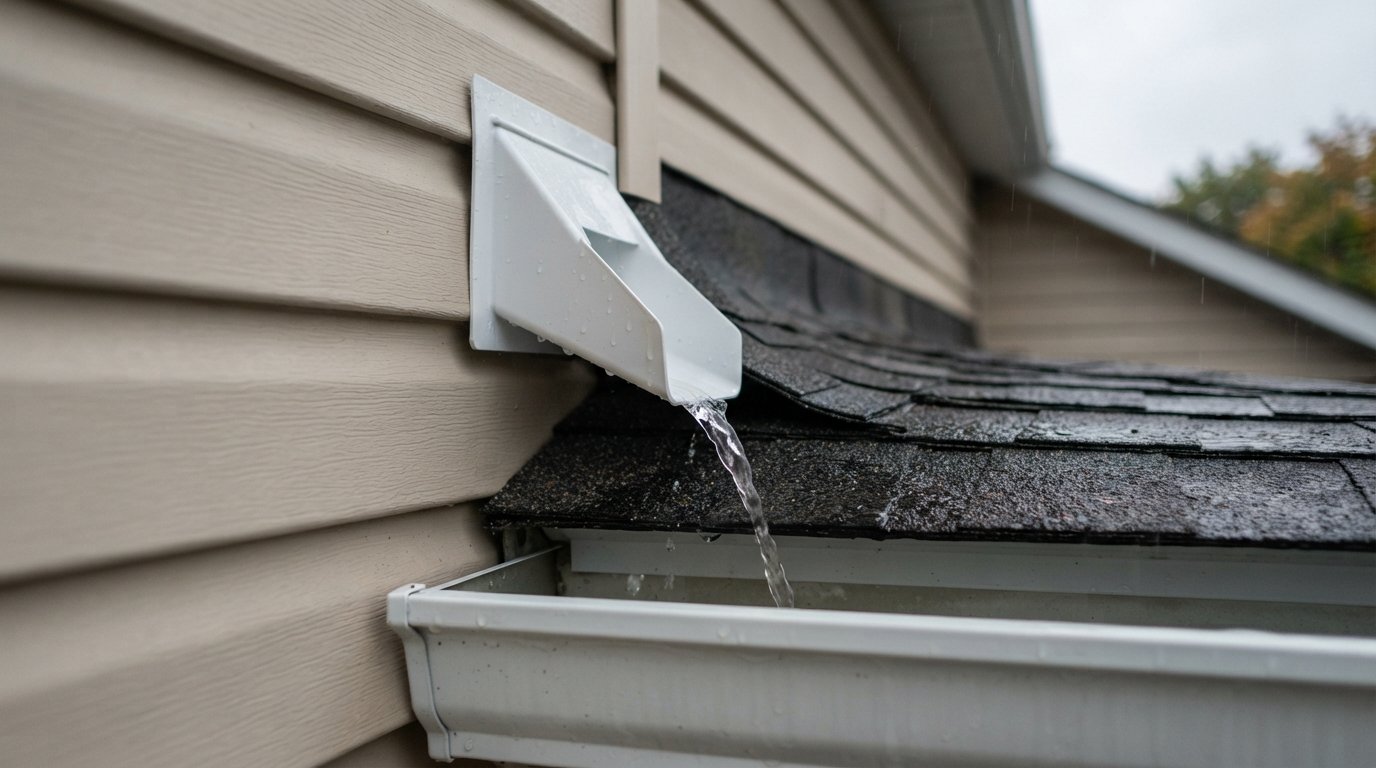
A kick out flashing, sometimes called a diverter flashing, is a formed piece of metal or moulded material that sits at the base of the step flashing run. It has a flange that lies under the cladding and a sloped fin that projects out from the wall and turns the water sideways, away from the wall and into the eavestrough. It is small, cheap relative to the damage it prevents, and one of the most frequently missing details on houses built before it became common practice.
Where Your House Needs One
The condition is easy to spot once you know it. Walk around and look for any spot where a roof edge stops against a wall that continues lower than the eave. Common examples on GTA homes:
- Attached garage roofs that butt into the side of a two-storey wall.
- Porch and veranda roofs that run into the front wall beside a door.
- Additions and sunrooms where a newer roof meets older walls.
- Dormers whose cheek walls extend past the lower roof edge.
- Split-level houses, where one roof line ends beside another level’s wall.
- Bay window roofs tied into a taller wall.
If a wall meets the roof only at a rake or the roof ends in a valley, a kick-out is not the relevant part. The specific condition is a roof-to-wall intersection where the eave stops and the wall carries on.
How Water Gets Behind The Wall
Understanding the path helps explain why damage often appears far from where the water enters.
- Rain runs down the step flashing and leaves the last piece at the eave.
- With no kick out flashing, it flows down the wall face below the roof line.
- On siding, the water finds the lap joints and the gap at the corner trim, and gravity plus wind drive it behind the cladding.
- On stucco or other face-sealed finishes, it enters through the joint where the finish meets the roof edge, and has no easy way out.
- On brick, water soaks the mortar and can reach the air space and the sheathing behind if the flashing detail is poor.
- Behind the cladding, water sits against the sheathing and framing, often below the level of the window or door beside it, and wicks down and sideways.
Because the wall cavity drains and dries slowly, a single missing piece of flashing can cause rot that extends well below and beside the corner. That is why a small exterior stain or a swollen trim board can turn out to be the visible tip of a larger repair.
Signs Of Damage From A Missing Kick-Out
Early autumn rain is a good time to look. Check each roof-to-wall corner from the ground and, where safe, from inside.
| Where to look | What you might see | What it can mean |
|---|---|---|
| Wall below the roof corner | Dark streaks, algae or dirt tracks running down | Water leaving the step flashing and running down the wall |
| Siding at the corner | Swollen, buckled or loose boards, peeling paint | Water behind the cladding |
| Stucco near the roof edge | Cracks, staining, soft or hollow-sounding areas | Water trapped behind the finish |
| Brick below the corner | White efflorescence, spalling faces, damp mortar | Repeated saturation of the masonry |
| Window or door beside the corner | Rotting sill or trim, stains on interior drywall | Water tracking down inside the wall |
| Garage or basement interior below | Musty smell, stains at the base of the wall | Long-term wetting of framing or sill plate |
Inside, look at walls directly below the exterior corner. Drywall stains, bubbling paint or soft baseboards on the garage side of a shared wall are common clues. If you see any of these, the priority is to stop the water first and then find out how far the damage goes. That investigation is part of our roof repair and roof-to-wall leak work.
What A Good Kick Out Flashing Looks Like
Not all kick-outs perform equally. When you or an installer are choosing one, look for:
- A watertight body. One-piece moulded or seamless formed units, or metal pieces with properly soldered or sealed seams, avoid the leak that a cut-and-folded piece can develop at its own corner.
- Enough projection. The diverter fin needs to stick out far enough from the wall to throw water past the trough’s end cap and into the trough, not back against the wall.
- A generous wall flange. The flange behind the cladding must be tall enough to lap properly with the water-resistive barrier and step flashing above.
- Compatible material. Aluminum or pre-painted steel with aluminum troughs, copper with copper. Mixing metals in a wet spot invites corrosion.
- A trough that meets it. The eavestrough should run close to the wall so the kick-out discharges straight into it. An end cap that stops a foot short makes the kick-out far less useful.
The main types you will come across compare like this:
| Type of kick out flashing | Strengths | Watch for |
|---|---|---|
| One-piece moulded unit | No seams to leak, consistent shape, quick to fit | Colour options may be limited; must suit the cladding thickness |
| Pre-formed seamless metal | Durable, can be colour matched to trim | Needs correct flange height for the wall barrier |
| Site-bent metal from coil | Can be shaped for odd angles and thick claddings | Folded corners must be sealed or soldered or they leak |
| Soldered copper | Very long lasting, suits copper troughs and heritage work | Keep it away from aluminum troughs to avoid corrosion |
Whatever type is used, the material matters less than how it is lapped into the wall. A premium kick out flashing installed on top of the wall barrier will still let water in, while a plain metal one lapped correctly will do its job for decades.
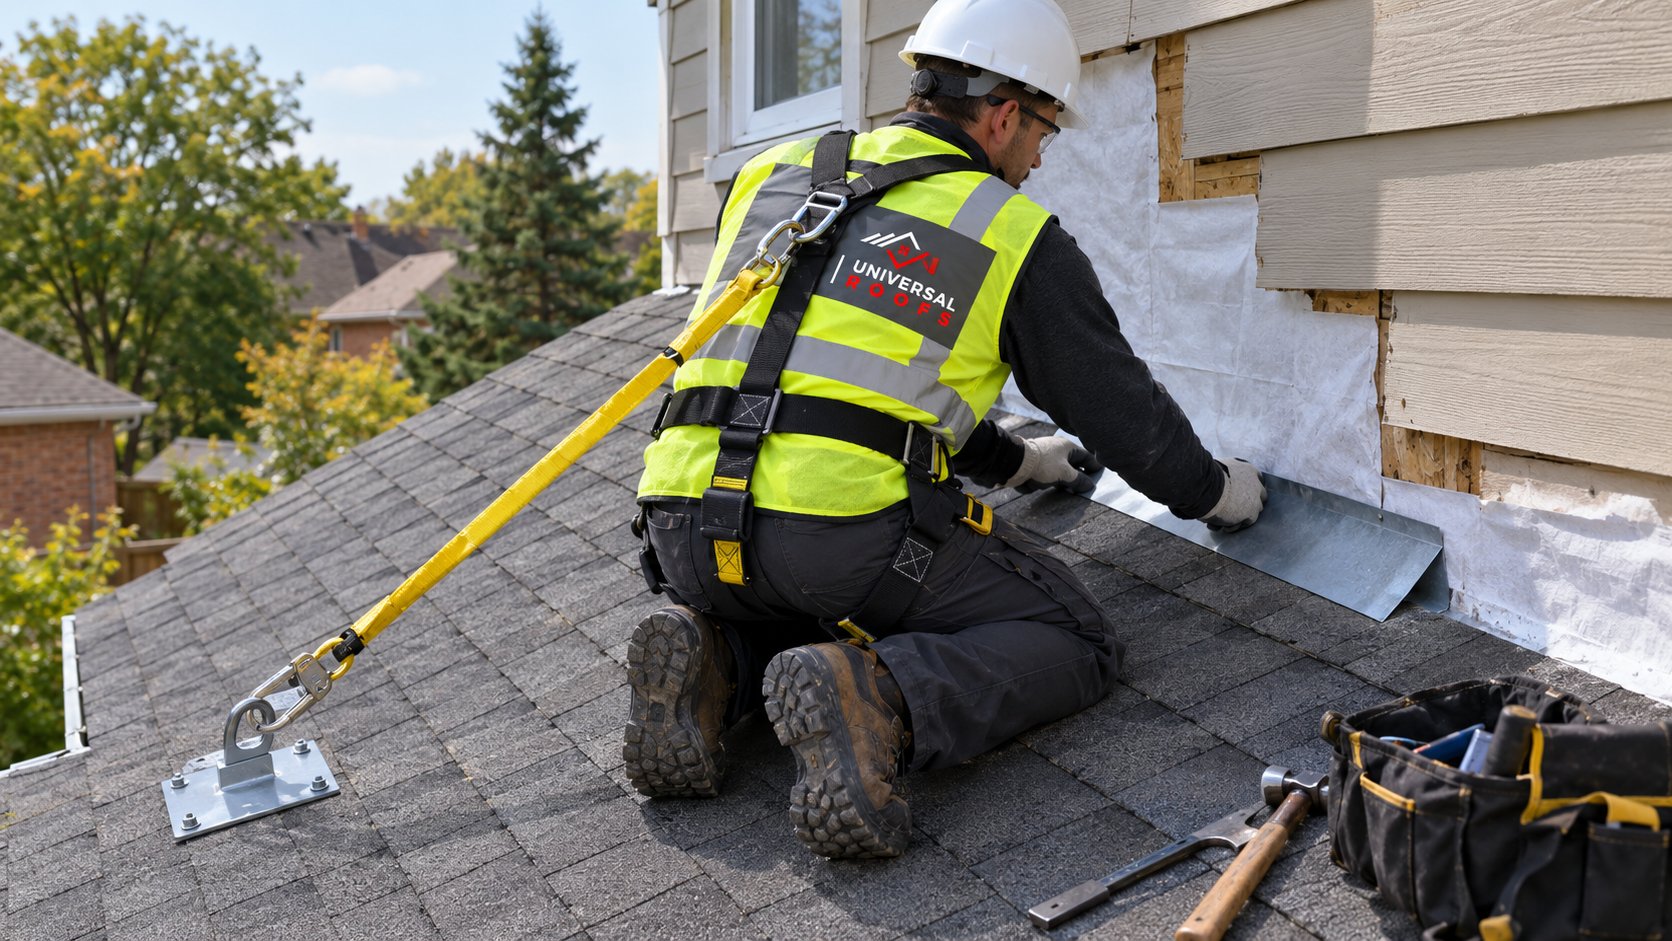
How A Retrofit Kick Out Flashing Is Installed
Adding kick out flashing to an existing house is not a matter of screwing a piece of metal onto the wall. To work, it has to be lapped correctly with the layers already there. The steps below describe a typical siding retrofit.
| Step | What the crew does | Purpose |
|---|---|---|
| 1. Open the corner | Remove the siding courses and trim around the roof-to-wall junction | Exposes the step flashing and wall barrier |
| 2. Assess the sheathing | Probe and inspect the sheathing and framing behind | Finds hidden rot before it is covered again |
| 3. Repair as needed | Replace wet or soft sheathing, dry the area | Sound substrate for the new flashing |
| 4. Adjust the bottom step flashing | Lift shingles at the eave and fit the kick-out as the lowest piece | Kick-out takes over where step flashing ends |
| 5. Lap with the wall barrier | Tuck the flange under the barrier above, tape or seal edges | Water on the barrier flows onto, not behind, the flashing |
| 6. Reinstall cladding | Replace siding and trim with a small clearance above the roof | Keeps cladding ends out of standing water |
| 7. Align the trough | Extend or adjust the eavestrough and end cap to meet the diverter | Diverted water lands in the trough |
The critical principle is shingle-style lapping: every layer higher on the wall must overlap the layer below it, so water always flows outward. A kick-out tucked on top of the wall barrier, or step flashing that lies over the kick-out flange instead of into it, just moves the leak a few inches.
Brick walls
On brick, the step flashing is usually covered by a counter-flashing let into a mortar joint. Retrofitting a kick-out means adjusting that counter-flashing and fitting a diverter that sits tight to the brick face at the bottom. Mortar joints that were cut for the counter-flashing need to be properly sealed or repointed. Brick corners are more labour-intensive than siding, and the details must be handled carefully to avoid trapping water in the masonry.
Stucco walls
Stucco is the least forgiving, because it cannot be removed and replaced like siding. The crew cuts back a section around the corner, installs the kick-out lapped correctly with the barrier, then the stucco is patched. If there is already hidden damage, the opening may need to grow. Stucco corners are also where investigation tends to find the most extensive rot, so expect the scope to be confirmed only once the wall is open.
Cost And Scope: What Drives The Price
A retrofit on a siding wall with sound sheathing is usually a small, contained job. Costs rise with wall type, height and hidden damage. As a broad estimate that varies by house, access and scope, a straightforward siding retrofit often falls in the range of a few hundred dollars per corner, while brick or stucco corners and any sheathing or framing repair can take it considerably higher. A site visit, and sometimes opening the wall, is the only way to price it.
Two things keep the cost of kick out flashing work down. First, catching it early, before sheathing rots. Second, doing it at the right time: if you are replacing the roof or the siding anyway, adding kick out flashing costs very little extra because the corner is already open.
Building Rules And Current Practice
Kick out flashing is widely treated as standard good practice at roof-to-wall intersections, and cladding and roofing manufacturers commonly show it in their installation details. Requirements for flashing at these junctions can change with code updates, and interpretations differ, so if you are building or permitting an addition, confirm current requirements with your municipality’s building department and follow the cladding and roofing manufacturers’ instructions for your specific products.
For homeowners, the practical takeaway is simpler: if your house has a roof edge that dies into a continuing wall and there is no diverter at the bottom, it is worth adding one whether or not a rule required it when the house was built. Our Toronto roofing, eavestroughs and attic work team checks these corners as a routine part of roof and eavestrough inspections.
How To Check Your Own Corners This Autumn
You do not need to climb onto the roof. From the ground or an upstairs window:
- Locate every roof-to-wall eave corner using the list earlier in this article.
- Look for a kick out flashing at the bottom of the step flashing. A properly installed one is a visible fin angled away from the wall.
- Watch in rain. Water should jump off the diverter into the trough, not sheet down the wall.
- Look at the wall below for streaking, swelling, cracks or efflorescence.
- Check inside at the same location for stains, soft drywall or musty smells.
Note what you see, take a photo in the rain if you can, and share it with the contractor. It makes the assessment faster and more accurate.
Frequently Asked Questions
What is the purpose of a kick-out at the roof edge?
Can a kick-out be added without replacing the roof?
How do I know if water has already damaged the wall?
Is caulking the corner a good substitute?
Why is stucco more at risk?
When is the best time to install one?
Book A Kick Out Flashing Inspection
A missing kick-out is a small detail with an expensive consequence, and the fix is straightforward when it is done in the right order. Universal Roofs inspects roof-to-wall corners, opens and repairs damaged areas, and installs properly lapped diverters that send water into the trough where it belongs.
Call us today at (416) 732-2421 or request a free estimate.
Serving homeowners in Toronto and across the wider GTA.