
A summer storm rolls through the GTA, the wind gusts hit 90 km/h, and by morning your driveway is littered with shingle fragments you don’t remember buying. If that sounds familiar, you are not alone — wind damage is one of the most common reasons Toronto homeowners call a roofer, and it is also one of the most misunderstood. Some damage is obvious from the ground. Much of it is not, and delaying repairs is exactly how a $400 fix turns into a $9,000 replacement.
This guide walks through the expert tips for repairing residential roof wind damage that our crews use every week across the Greater Toronto Area, from the first walk-around inspection to the final shingle nail. Whether you are dealing with a handful of lifted shingles after last night’s gusts or a more serious blow-off that has exposed the underlayment, you will find practical, homeowner-friendly guidance here — plus a clear sense of when the job is safe to inspect yourself and when it is time to call a professional.
Toronto’s roofs face a particular combination of stresses: strong lake-effect wind corridors, freeze-thaw cycles that weaken shingle adhesive seals over winter, and increasingly frequent summer thunderstorm cells that arrive with little warning. Understanding how wind actually damages a roof — and how to repair it properly rather than just patching the surface — is the difference between a roof that lasts its full 25-year lifespan and one that fails again at the next windstorm.
How Wind Actually Damages a Residential Roof
Wind damage rarely happens the way people picture it. Homeowners often imagine a hurricane-style event that rips shingles clean off, but in the GTA the more common failure mode is quieter and more gradual. Wind gets under the leading edge of a shingle tab, especially one where the factory seal has weakened from age or heat cycling, and it flexes the shingle up and down thousands of times during a single storm. Each flex stresses the nails and the sealant strip a little more, until either the shingle tears, the nail pulls through the mat, or the seal breaks completely and the tab lifts permanently.
This is why wind damage often looks worse a few days after a storm than it did the morning after. A shingle that “survived” the storm with a broken seal may still be sitting flush, but the next moderate breeze will catch that loose edge and finish the job. That is also why an inspection immediately following any wind event — even one that did not feel severe — is one of the most valuable habits a homeowner can build. Our roof repair teams see this pattern constantly: minor damage that was ignored for a season, only to reappear as active leaking after the next round of storms.
Roof geometry matters too. Corners and rake edges experience the highest uplift pressure because wind accelerates as it wraps around a building. Ridge caps and hip lines are next, followed by the field of the roof. If you are doing a visual check from the ground, start with the corners and edges facing the prevailing wind direction — usually west or northwest in most of the GTA — since that is where damage shows up first and worst.
Signs of Wind Damage You Can Spot From the Ground
You do not need to climb a ladder to get useful information. Binoculars and a walk around the perimeter of the house will tell you most of what you need to know before deciding whether to call in a professional.
- Lifted or curled tabs — shingles that no longer lie flat against the roof deck, especially along edges and ridges.
- Missing shingles — dark rectangular patches where the shingle mat and granules are gone entirely, exposing the underlayment or deck.
- Granule loss in gutters — a heavier-than-usual accumulation of gritty granules in your eavestroughs or at downspout outlets after a storm.
- Creased shingles — a shingle that has been folded back and re-settled will often show a visible crease line, which is a structural failure even if the shingle appears to be in place.
- Debris on the lawn or driveway — shingle fragments, flashing pieces, or granules blown clear of the roof are an obvious red flag.
- Exposed nail heads — nails that are no longer covered by the shingle above them, which is a near-guaranteed future leak point.
Inside the house, check your attic for daylight coming through the roof deck, damp insulation, or new water stains on the underside of the sheathing. A flashlight sweep along the ridge and any roof penetrations — vents, chimneys, skylights — takes ten minutes and can catch a leak before it reaches your ceiling drywall. If your home has skylights, it is worth checking those seals specifically, since wind-driven rain finds its way through a compromised skylight flashing far faster than through shingles alone; our skylights page covers what healthy flashing should look like.
| Visible Sign | Likely Cause | Urgency Level | Recommended Action |
|---|---|---|---|
| Lifted or curled tab edges | Broken factory seal from wind flex | Moderate | Re-seal or replace within 1-2 weeks |
| Missing shingle(s) | Complete blow-off during high gusts | High | Tarp same day, replace within 48 hours |
| Granules in gutters/downspouts | Surface wear accelerated by wind abrasion | Low-Moderate | Monitor; plan inspection this season |
| Creased or folded shingles | Shingle blown back then re-settled | High | Replace immediately, do not leave in place |
| Exposed or raised nail heads | Nail backed out or shingle shifted | Moderate-High | Re-nail and seal within 1 week |
| Attic daylight or water stains | Full penetration through deck | Emergency | Tarp and call a professional same day |
First Response: What to Do in the First 24 to 48 Hours
How you respond in the first two days after a wind event has a bigger impact on your final repair cost than almost anything else. Water does not wait for a contractor’s schedule, and every hour that a gap in your roofing system stays open is another hour that moisture can work its way into decking, insulation, and drywall.
Start with photo documentation. Walk the perimeter of the house and photograph every area of visible damage, along with wide shots that establish context for your insurance adjuster. Date-stamped photos, or a quick video walkthrough, make the claims process faster and reduce back-and-forth with the insurer later.
Next, address any active leaking. If water is coming through the ceiling, place a container to catch it and, if the bulge in the drywall is growing, puncture it carefully with a screwdriver to relieve pressure in a controlled spot rather than letting it collapse on its own. This sounds counterintuitive, but a small, controlled hole is far easier to repair than a ceiling section that gives way under the weight of trapped water.
If shingles are missing or a section of the roof deck is exposed, a temporary tarp is the single best thing a homeowner can do before a professional arrives — but only if it can be done safely from a stable ladder without walking on a wet or damaged roof surface. If you are not confident doing that yourself, do not attempt it; a fall risk is never worth saving a service call. This is precisely the scenario our roof repair crews are set up to respond to quickly, with proper fall protection and the right materials on the truck.
DIY-Safe Repairs vs. When to Call a Professional
Not every wind-damaged roof needs a full crew. Some repairs are genuinely within reach for a comfortable, careful homeowner with the right tools — and knowing the difference protects both your wallet and your safety.
A single lifted shingle tab with an otherwise intact mat can often be re-sealed with roofing cement applied under the tab and pressed down firmly, provided the shingle itself is not cracked or brittle. This is a five-minute job if you can safely access the spot from a ladder without stepping onto the roof slope. Similarly, a handful of exposed nail heads can be dabbed with roofing sealant as a stop-gap measure.
Everything beyond that generally belongs to a professional crew, for reasons that go beyond convenience:
- Steep or high roofs — anything over roughly a 6:12 pitch, or any second-storey roof, requires harness and rope fall protection that most homeowners do not own or know how to rig correctly.
- Multiple missing shingles — this usually means the surrounding courses were also stressed and may fail soon even if they look intact.
- Underlayment or deck exposure — once the felt or synthetic underlayment is torn, the repair needs to integrate properly with the surrounding shingle courses or it will leak at the seams.
- Flashing damage — flashing around chimneys, valleys, and skylights requires precise metal work and correct layering with the shingles; a poor flashing repair is one of the most common causes of repeat leaks.
- Insurance claims — a licensed contractor’s assessment and documentation carries far more weight with an adjuster than a homeowner’s own photos and description.
If in doubt, the safest and most cost-effective choice is a professional inspection before you climb up at all. Many “small” wind repairs turn out to have a second layer of damage that is invisible from the ground, and catching that early is what keeps a repair from becoming a full roof replacement.
Step-by-Step: How Professionals Repair Wind-Damaged Shingles
Understanding the actual repair sequence helps homeowners evaluate whether a contractor is doing the job properly, or just patching the surface and hoping it holds.
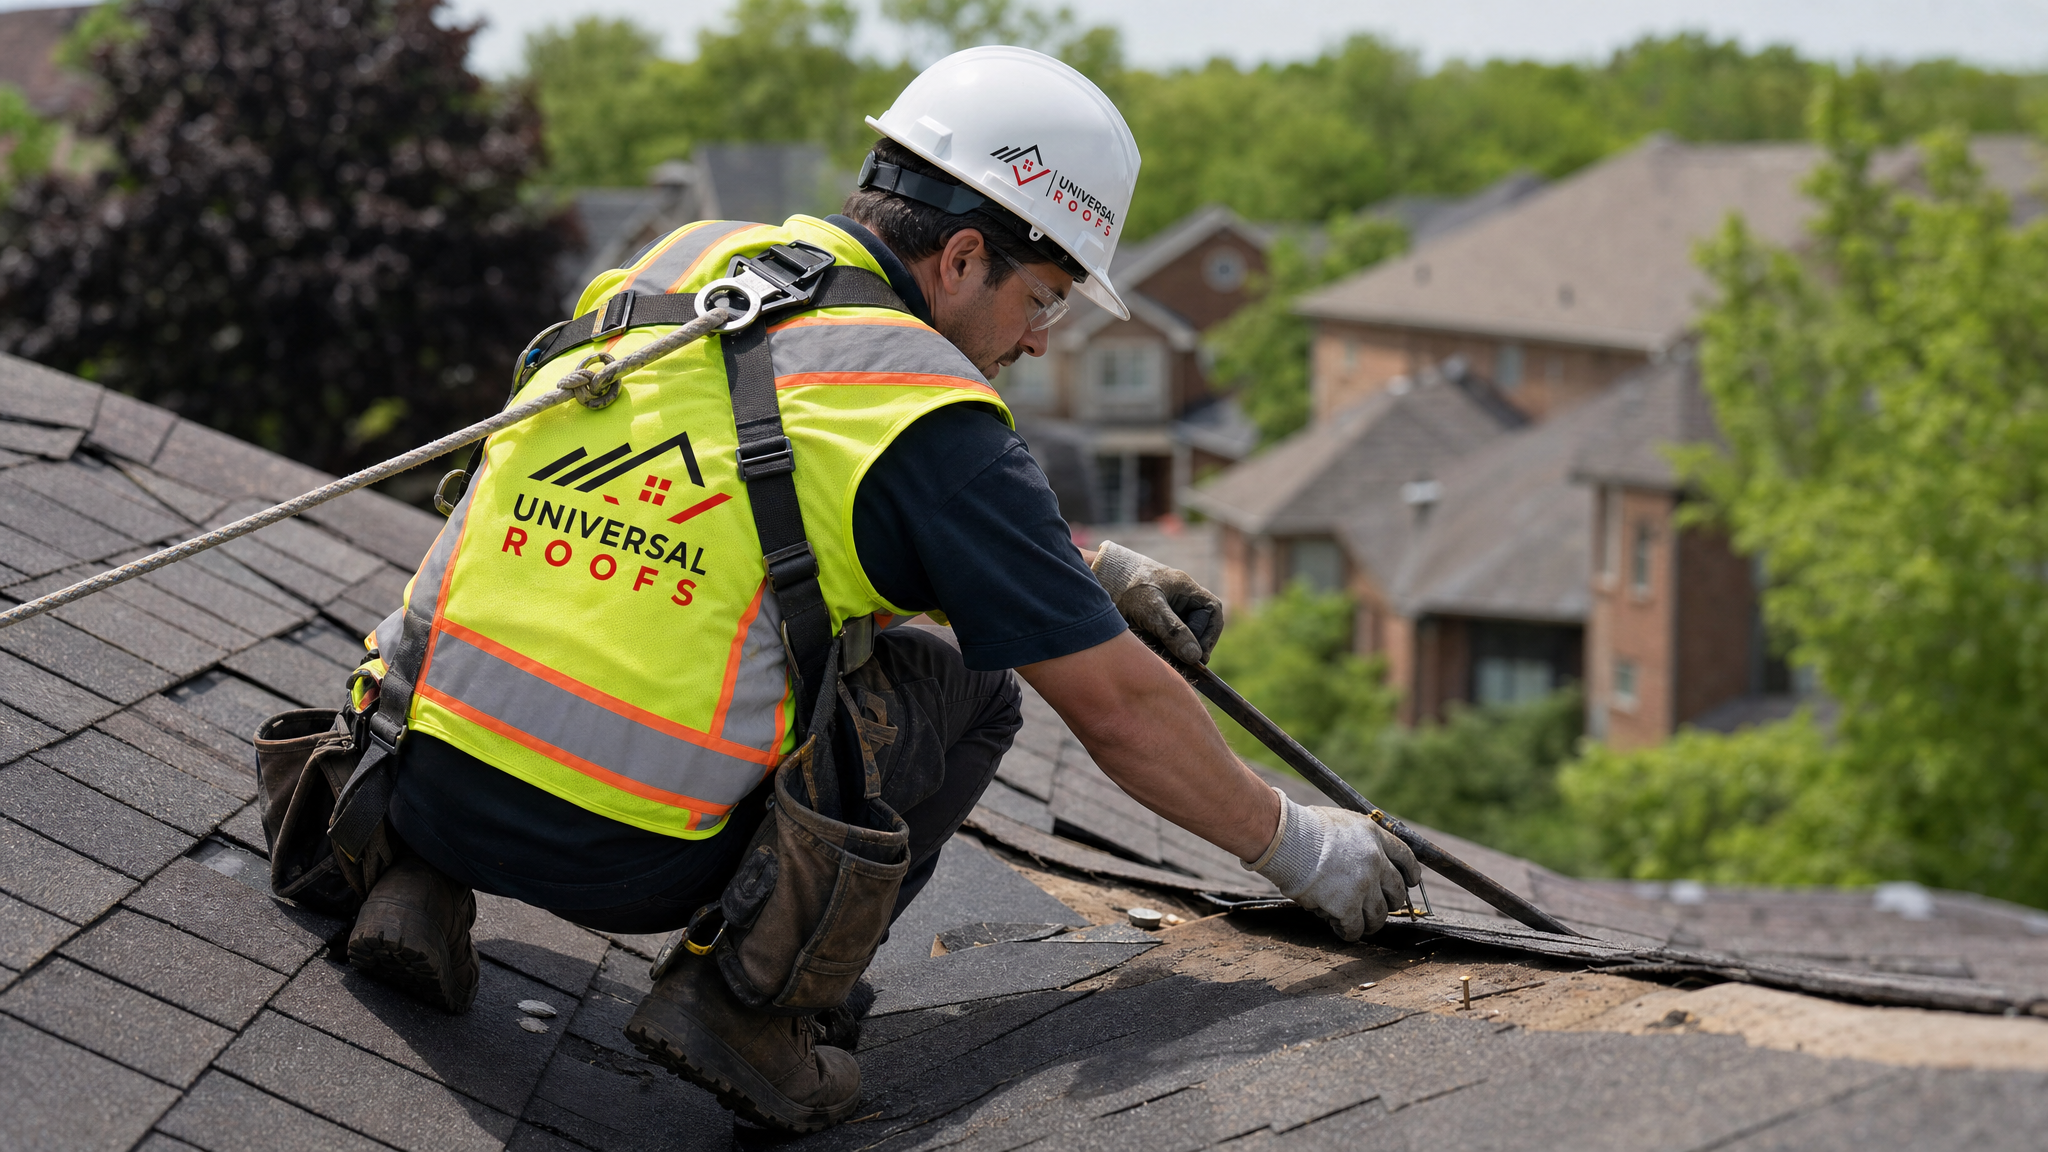
The process starts with a full-roof inspection, not just a look at the obviously damaged section. Wind rarely damages just one spot; a proper assessment checks every ridge, valley, and edge, because a section that looks fine today may already have a broken seal that fails at the next storm. From there, damaged shingles are carefully removed, working from the top down so the courses above are not disturbed. The nails are pulled, not just cut, since a nail head left under a new shingle will telegraph through and eventually puncture it.
Once the area is exposed, the underlayment is checked for tears or saturation. Any compromised underlayment is cut back to sound material and replaced with a properly lapped patch — this step is frequently skipped by less careful repairs and is the single biggest cause of a repair failing again within a year. New shingles are then woven into the existing courses, matched for colour and profile as closely as possible, and fastened with the correct nail pattern: four to six nails per shingle depending on the wind zone, placed in the manufacturer’s designated nailing strip rather than higher up where they will not hold.
Finally, every replaced shingle gets hand-sealed with roofing cement at the tabs, since factory-applied adhesive strips only activate fully under sustained heat and won’t bond properly outside of warm summer conditions — which is one reason repairs done in cooler months need this extra manual step. The whole area is then checked again after 24 hours of curing where practical, to confirm the seal has taken.
| Repair Method | Best For | Typical Timeline | Approximate Cost Range (CAD) |
|---|---|---|---|
| Spot re-sealing (cement under tabs) | 1-3 lifted shingles, seal intact otherwise | Same day | $150 – $350 |
| Shingle replacement (matched courses) | Missing or torn shingles, isolated area | 1 day | $400 – $1,200 |
| Underlayment + shingle repair | Torn felt/synthetic underlayment exposed | 1-2 days | $800 – $2,500 |
| Flashing repair (valley, chimney, skylight) | Wind-lifted or separated flashing | 1 day | $500 – $1,800 |
| Full section re-roof | Widespread damage across one roof plane | 2-3 days | $3,500 – $8,000 |
| Full roof replacement | Damage across most of the roof, or aged shingles beyond repair | 3-5 days | $9,000 – $18,000+ |
These figures are general GTA ranges and vary with roof pitch, material, accessibility, and the extent of decking replacement needed underneath. A detailed, written quote after an in-person inspection is always the reliable number to work from.
Materials That Matter: Shingles, Sealants, and Fasteners
Not all repair materials perform equally in wind. If you are choosing shingles for a repair, or discussing options with a contractor, a few specifications are worth understanding.
Wind ratings. Asphalt shingles are rated by wind resistance class, typically expressed as the maximum sustained wind speed the shingle is warrantied against when installed with the correct nailing pattern. Standard three-tab shingles are usually rated to handle winds up to about 96 km/h, while architectural (laminated) shingles rated for high-wind installation can handle 195 km/h or more when properly fastened. Given the frequency of severe summer thunderstorms and derecho-style wind events the GTA has seen in recent years, upgrading to a high-wind-rated architectural shingle during a repair or partial re-roof is a reasonable, cost-effective decision.
Sealant quality. Roofing cement varies significantly in flexibility and UV resistance. A cheap, brittle sealant will crack within a season or two of Toronto’s temperature swings, while a quality polymer-modified roofing cement stays flexible through freeze-thaw cycles and maintains its bond far longer.
Fasteners. Nails should always be corrosion-resistant (hot-dipped galvanized or equivalent) and long enough to fully penetrate the roof deck — typically at least 19mm (3/4 inch) into solid wood sheathing. Under-driven or over-driven nails are one of the most common causes of a shingle failing again in the very next wind event, since either mistake compromises the shingle’s holding strength.
| Material | Wind Resistance Rating | Typical Lifespan (GTA Climate) | Notes |
|---|---|---|---|
| Standard 3-tab asphalt shingle | Up to ~96 km/h | 15-20 years | Budget-friendly, lower wind tolerance |
| Architectural/laminated shingle | Up to ~195 km/h (high-wind installation) | 25-30 years | Best balance of cost and durability |
| Premium designer shingle | Up to ~210 km/h | 30-40 years | Higher upfront cost, longest lifespan |
| Standing seam metal panel | Exceeds 200 km/h | 40-60 years | Best for high-exposure sites, higher cost |
Flashing, Valleys, and Skylights: The Overlooked Wind-Damage Zones
Homeowners tend to focus on shingles because they are visible, but flashing failures are responsible for a disproportionate share of wind-related leaks. Flashing is the metal (or occasionally rubber) material that seals transitions — where the roof meets a chimney, where two roof planes meet in a valley, or where a skylight penetrates the deck. Wind uplift can peel back the edge of a flashing piece just enough to let wind-driven rain underneath, and because the damage is often tucked into a valley or against a vertical wall, it goes unnoticed until a stain appears on an interior ceiling.
Chimney flashing deserves particular attention after a wind event, since the counter-flashing (the piece embedded in the chimney’s mortar joints) can separate from age even when the step flashing beneath it is fine. Valley flashing should be checked for any lifted edges or debris that could be channeling water sideways instead of down and off the roof. And if your home has a skylight, its flashing kit is worth a specific look — a skylight replacement or reseal is a much smaller job than repairing water damage to the drywall and framing around it after a wind-driven leak goes unnoticed for a season.
Attic ventilation also plays an underappreciated role here. Poor ventilation traps heat and moisture, which accelerates shingle aging and makes seals more brittle and prone to wind failure in the first place. If your roof seems to suffer repeat wind damage in the same spots year after year, it is worth having your attic ventilation assessed alongside the shingle repair — the two are more connected than most homeowners realize.
Flat Roofs and Wind Damage: A Different Set of Rules
Everything above focuses on sloped, shingled roofs, which cover the large majority of GTA homes. But garages, additions, and some bungalow sections use flat or low-slope roofing, and wind affects these systems differently. Instead of lifting individual shingle tabs, wind on a flat roof works at the membrane’s edges and seams, especially at parapet walls and roof-edge metal. A membrane that has come loose at a seam will balloon and flap in strong gusts, which accelerates the tear and can eventually pull the membrane free entirely.
If you have a flat roofing section on your property, the post-storm checklist is a little different: look for bubbling or ballooning in the membrane, lifted edge metal or fascia trim, and any pooling water that suggests the drainage slope has been disrupted. Flat roof repairs generally require heat-welding or adhesive resealing specific to the membrane type (EPDM, TPO, or modified bitumen), so this is rarely a DIY-appropriate repair even for otherwise handy homeowners.
Insurance Claims: Documenting Wind Damage the Right Way
Most home insurance policies in Ontario cover wind damage, but the claims process goes far more smoothly when the documentation is thorough and timely. Adjusters are looking for clear evidence that the damage was storm-caused rather than the result of ordinary wear and deferred maintenance, so the quality of your documentation directly affects how quickly and fully a claim is approved.
| Documentation Step | What to Capture | When to Do It | Why It Matters |
|---|---|---|---|
| Weather record | Date, time, and reported wind speeds for the storm | Same day as the storm | Establishes the storm as the cause |
| Ground-level photos | Wide shots of all four roof elevations | Within 24 hours | Shows extent and context of damage |
| Close-up photos | Each damaged shingle, flashing point, or debris item | Within 24 hours | Provides adjuster with specific evidence |
| Interior photos | Any ceiling stains, attic leaks, or water intrusion | As soon as noticed | Links exterior damage to interior consequences |
| Professional inspection report | Written assessment from a licensed contractor | Within a few days | Carries more weight than homeowner photos alone |
Keep receipts for any emergency measures you take, such as tarps or temporary materials, since these costs are typically reimbursable under a wind damage claim. And resist the urge to have full repairs completed before the adjuster has seen the damage in person or reviewed your contractor’s report — insurers generally want the chance to inspect (or review clear documentation of) the damage before repair work proceeds, especially for larger claims.
Preventing Repeat Wind Damage
Once a repair is complete, a few maintenance habits meaningfully reduce the odds of the same problem recurring at the next windstorm.
- Schedule seasonal inspections, ideally in spring and fall, to catch shingles with weakening seals before a storm tests them.
- Trim overhanging branches that can whip against the roof surface in high winds and abrade shingle granules.
- Clear gutters regularly so wind-driven rain has a clear path off the roof rather than backing up under the shingle edge.
- Check attic ventilation annually, since balanced intake and exhaust airflow keeps shingles cooler and their sealant more flexible and wind-resistant.
- Address minor damage promptly rather than waiting for the “next storm” to finish the job — a single lifted tab today is a missing shingle and a leak after the next windstorm.
Homeowners across Toronto, Peel Region, York Region, Halton Region, and Durham Region all deal with the same underlying wind exposure patterns, though local microclimates near the lakeshore or on more exposed properties can see somewhat higher gust speeds. A contractor familiar with your specific municipality’s typical wind patterns and building code requirements will generally recommend the right shingle wind rating and nailing pattern for your address.
Choosing the Right Contractor for a Wind Damage Repair
Not every roofer who advertises storm repair is equally qualified to do it well. A few questions separate a reliable contractor from one who will leave you with a repeat problem:
- Do they inspect the whole roof, or only the section you pointed out?
- Do they check and, if needed, replace underlayment — not just swap shingles?
- Are their technicians using proper fall protection (harness and rope) on steep or high roofs?
- Will they provide written documentation suitable for an insurance claim?
- Do they carry liability insurance and offer a workmanship warranty on the repair?
Reading recent reviews from homeowners in your area is one of the fastest ways to gauge whether a company follows through on these standards consistently, rather than just on their best days. It is also worth reviewing a company’s FAQ page and learning more about their history and licensing before committing to a repair, especially one that may be significant enough to involve an insurance claim.
What are the best expert tips for repairing residential roof wind damage without making it worse?
How much does it typically cost to repair wind damage on a residential roof in Toronto?
Can I repair wind-damaged shingles myself, or should I always call a professional?
How do I know if wind damage is severe enough to need a full roof replacement instead of a repair?
Will my home insurance cover wind damage repair costs?
How can I prevent repeat wind damage after a roof repair is completed?
Need Help With Expert Tips for Repairing?
Following these expert tips for repairing residential roof wind damage will help you make smart, safe decisions after any storm — but a hands-on inspection from an experienced crew is still the most reliable way to catch damage before it becomes a leak. Universal Roofs has been repairing wind-damaged roofs across the GTA since 2005, and our technicians know exactly what to look for after every kind of storm this region sees.
Call us today at (416) 732-2421 or request a free inspection to get started.
Universal Roofs proudly serves Toronto, Mississauga, Brampton, Vaughan, Markham, Oakville and the GTA since 2005.