
A leaking roof around the chimney is one of the most common — and most misdiagnosed — water problems in GTA homes. Homeowners often assume the chimney itself is cracked or that the roofing shingles nearby have failed, when in reality the culprit is almost always the flashing: the thin metal barrier installed where the chimney meets the roof deck. When flashing fails, water finds every seam, nail hole, and gap in the assembly and works its way into the attic, the ceiling drywall, and eventually the framing.
At Universal Roofs, we’ve repaired thousands of chimney flashing failures across Toronto and the surrounding GTA since 2005, and the pattern is remarkably consistent: freeze-thaw cycles loosen fasteners, ice damming pries seams apart, and sealant that looked fine in September is cracked and useless by April. This guide walks through exactly how professional roofers diagnose and fix leaking roofs at the chimney, the flashing repair techniques that actually last in our climate, and when a patch is enough versus when the whole flashing system needs to be replaced.
Whether you’re dealing with an active leak right now or you noticed a water stain on the ceiling near your fireplace and want to understand what’s involved before calling a contractor, this article covers the full picture — materials, techniques, costs, and the questions most GTA homeowners ask.
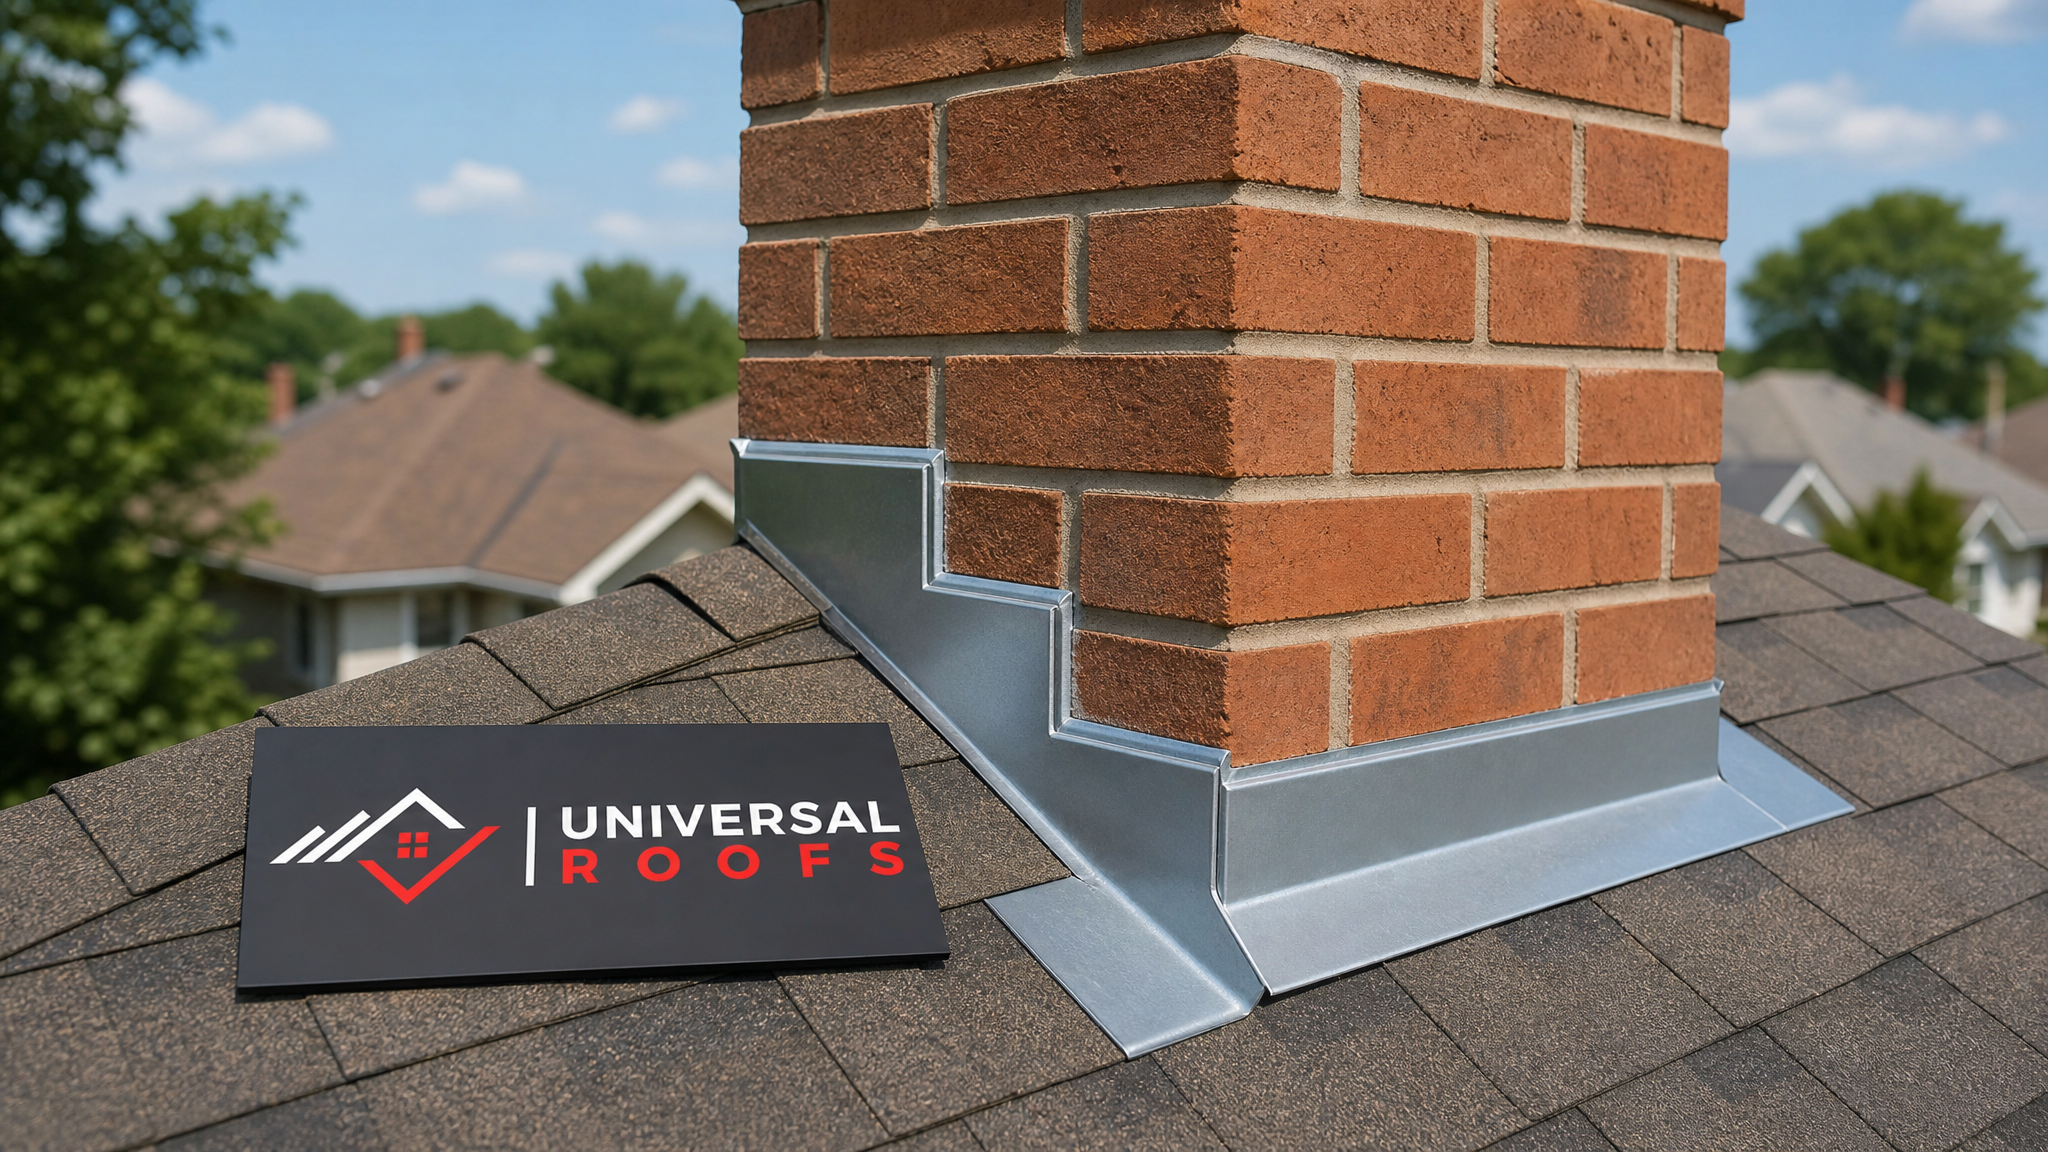
Why Chimney Flashing Fails in the GTA Climate
Chimney flashing takes more abuse than almost any other part of a roof. It sits at a hard transition point — masonry meeting shingles, two different materials expanding and contracting at different rates — and it has to shed water in every direction: down the roof slope, around the sides of the chimney, and away from the back where debris and snow pile up.
In Toronto and across the GTA, several local conditions accelerate flashing failure:
- Freeze-thaw cycling. Water that gets under a flashing seam in November can freeze, expand, and pry the metal or sealant apart before a January thaw lets more water in behind it. Repeat that forty or fifty times over a winter and even a well-installed flashing job degrades.
- Ice damming. When heat escapes from an under-insulated attic, snow melts on the upper roof and refreezes at the eaves and around chimney bases, forming ice dams that back water up under the flashing. This is one of the top reasons we get emergency calls in February and March.
- UV and thermal cycling on sealant. Caulking and roofing cement break down faster under direct summer sun than most homeowners expect — typically within 3 to 5 years, sometimes less on south-facing slopes.
- Masonry movement. Older Toronto chimneys, especially on homes built before the 1980s, shift slightly over decades. That movement opens hairline gaps between the counter-flashing and the brick that widen year over year.
- Improper original installation. A surprising number of leaks trace back to flashing that was face-nailed through shingles and caulked over instead of properly stepped and tucked into the masonry — a shortcut that fails within a few seasons.
Understanding which of these is driving your leak matters because it determines whether a targeted repair will hold or whether you’re looking at a full roof repair around the chimney area.
How to Diagnose a Chimney Flashing Leak
Before any repair technique makes sense, the leak has to be traced to its actual entry point — which is often several feet away from where the water stain appears on the ceiling, since water travels along rafters and sheathing before it drips down.
| Symptom | Likely Cause | Where to Check | Urgency |
|---|---|---|---|
| Water stain on ceiling near fireplace | Step flashing or counter-flashing gap | Attic sheathing directly above the stain | Moderate — schedule within weeks |
| Drip only during heavy rain, not snow melt | Sealant failure at counter-flashing reglet | Top edge of flashing where it meets brick | Moderate |
| Leak appears only after a thaw | Ice dam backing water under flashing | Lower step flashing courses and eaves | High — can cause rapid drywall damage |
| Rust streaks on brick below flashing | Corroded galvanized flashing nearing failure | Full flashing assembly, all sides | High — replace before next winter |
| Musty attic smell, no visible drip | Slow chronic leak saturating insulation | Insulation and sheathing around chimney chase | High — hidden mould risk |
| Daylight visible around chimney from attic | Missing or displaced flashing section | Full perimeter inspection from attic and roof | Urgent |
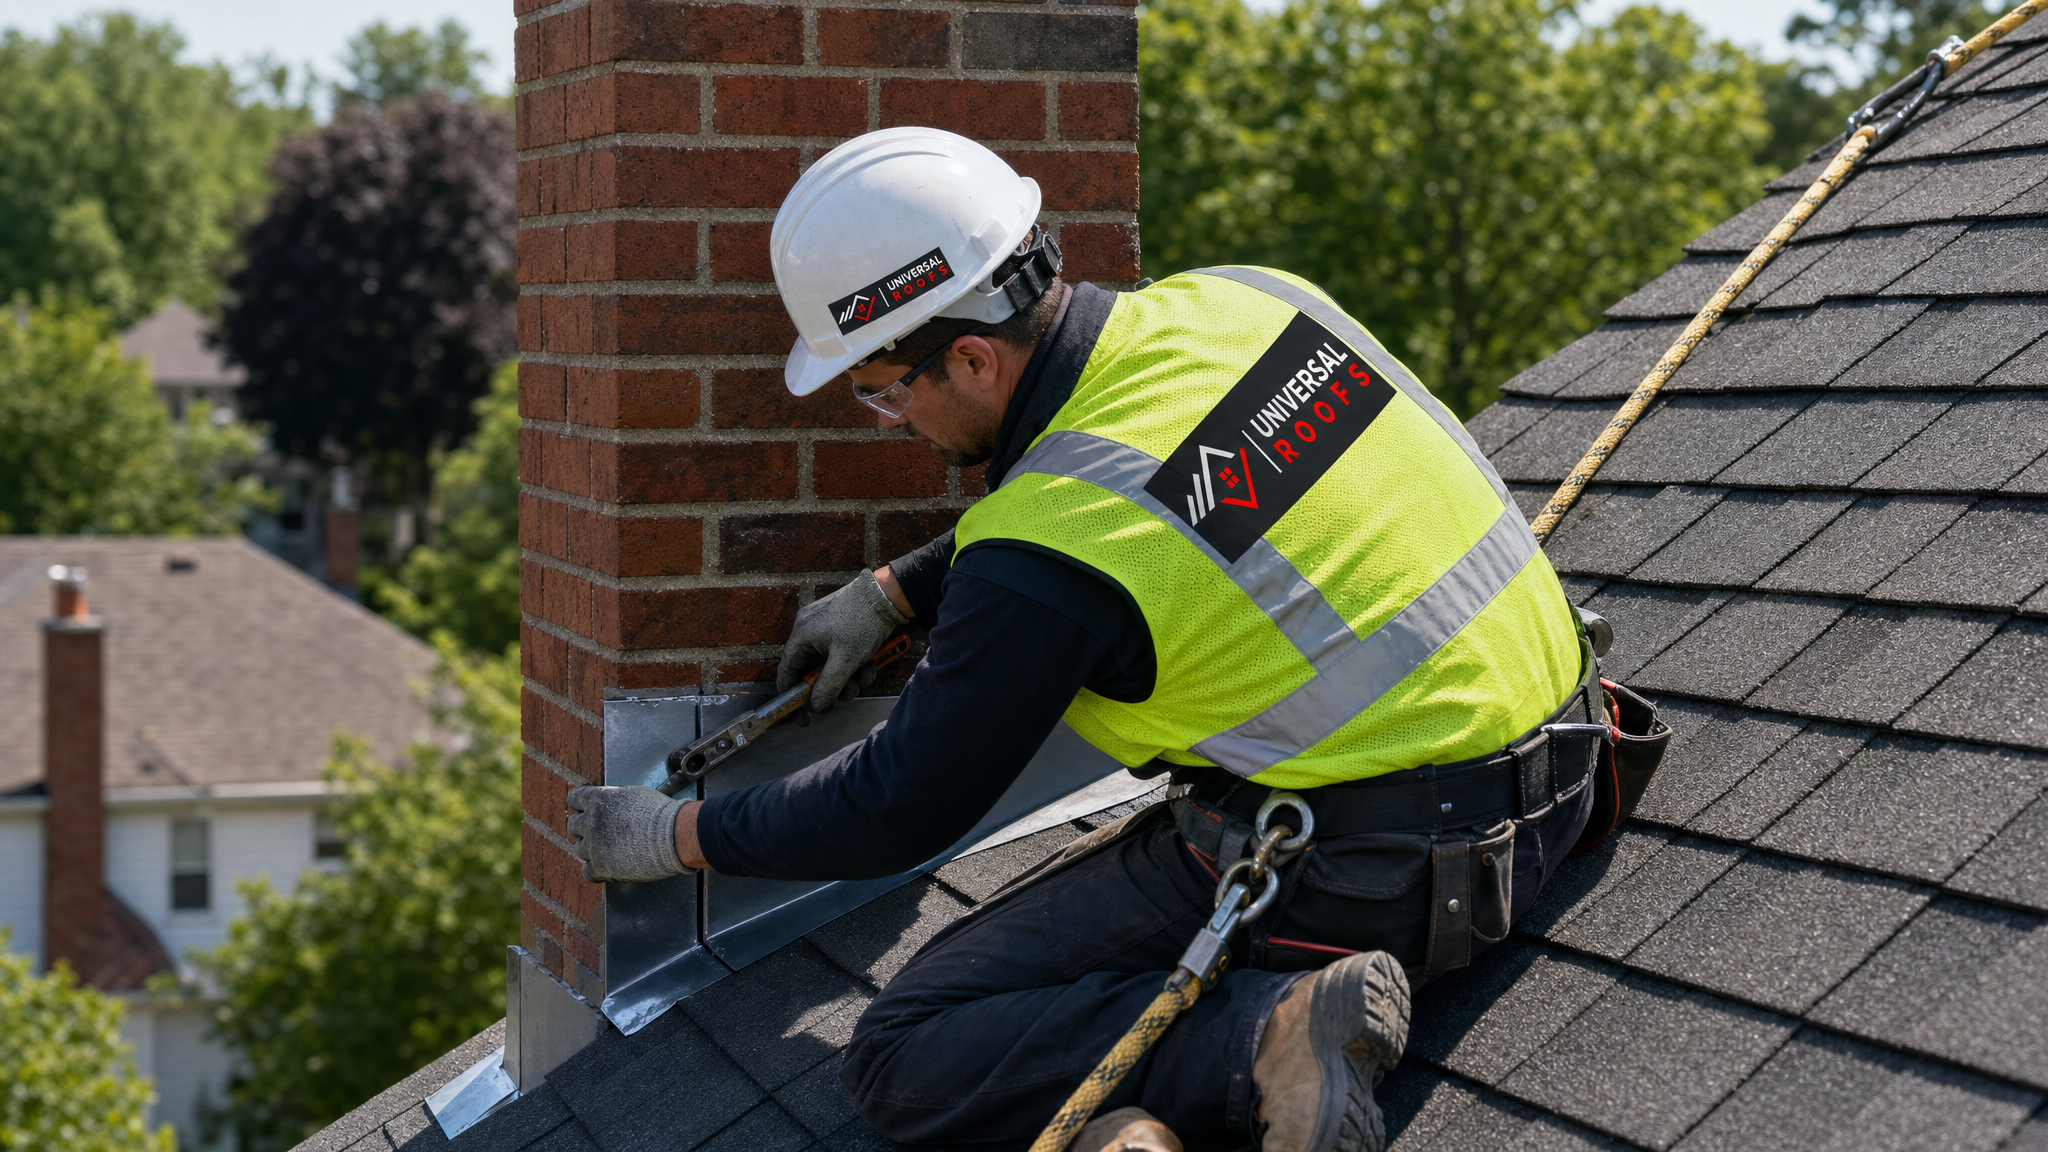
A proper diagnosis involves three steps. First, an interior attic inspection with a flashlight, looking for staining, mould, or daylight at the chimney chase. Second, an exterior roof inspection checking every flashing component — base flashing, step flashing, and counter-flashing — for gaps, rust, and lifted edges. Third, a water test in dry weather, where a hose is run slowly over specific sections of flashing while someone watches from inside the attic, isolating exactly which seam is admitting water.
Skipping the diagnosis and simply caulking whatever looks suspicious is the single most common reason homeowners end up calling a roofer twice for the “same” leak. If the underlying gap is a half metre away from where the caulk went, the leak returns with the next rain.
The Anatomy of Proper Chimney Flashing
A correctly built chimney flashing system is not one piece of metal — it’s an interlocking assembly of several components, each doing a specific job:
- Base flashing (apron flashing): A single piece at the front (downslope side) of the chimney, bent to run up the chimney face and out over the shingles below it.
- Step flashing: Individual L-shaped pieces, one per shingle course, running up both sides of the chimney. Each piece overlaps the one below it, creating a shingled, water-shedding pattern along the sides.
- Back flashing (saddle or cricket): On chimneys wider than about 60 centimetres, a small peaked structure called a cricket (or saddle) is built behind the chimney to divide water flow around it instead of letting it pool and dam against the back wall.
- Counter-flashing: A separate piece of metal set into a cut reglet (groove) in the mortar joint or under a course of brick, overlapping down over the step and base flashing to keep water from ever getting behind the metal in the first place.
The counter-flashing and step flashing relationship is where most leaks originate, because it’s the only junction that relies partly on sealant rather than pure overlap geometry. Understanding this layered system is essential before deciding on a repair technique, since a fix that only addresses the visible surface layer without checking what’s underneath rarely lasts.
Chimney Flashing Repair Techniques That Actually Work
There is a real difference between a quick patch and a durable flashing repair. Below are the techniques we use most often, ranked roughly from smallest intervention to full replacement.
1. Resealing Existing Flashing Joints
When the metal itself is still sound — no rust-through, no cracks, no missing sections — but the sealant at the counter-flashing reglet has dried out and cracked, resealing is often sufficient. This involves removing all old caulk and roofing cement completely (not caulking over it), cleaning the mortar joint and metal surface, and applying a high-quality polyurethane or butyl-based roofing sealant rated for masonry-to-metal joints. Standard silicone caulk is a poor choice here — it doesn’t bond well to masonry long-term and tends to peel within a season or two in our climate.
2. Re-cutting and Re-setting Counter-Flashing
If the counter-flashing has pulled loose from its reglet (a very common failure after 10-15 years), the fix is to re-cut the mortar groove slightly deeper, bend a new counter-flashing lip to fit, tuck it into the fresh reglet, and point the joint with fresh mortar or masonry sealant. This is more involved than simple resealing but far less invasive than tearing out the whole assembly.
3. Replacing Individual Step Flashing Pieces
Corroded or bent step flashing pieces can typically be replaced one at a time without disturbing the surrounding shingles, provided the roofer works carefully to lift the shingle courses above each piece. This targeted approach preserves shingles that still have useful life left, which matters on a roof that isn’t due for full replacement yet.
4. Installing or Rebuilding a Cricket
Wide chimneys without a cricket are a recurring leak source because water and debris pool against the uphill side. Building or rebuilding a properly sloped cricket, flashed with its own step and counter-flashing, permanently redirects water and eliminates the pooling that causes chronic leaks in that location.
5. Full Flashing Replacement
When the metal shows rust-through, when multiple components have failed simultaneously, or when the surrounding shingles are also near end of life, a full tear-out and reflash is the right call. This is done alongside new step flashing, new base flashing (and cricket if needed), and new counter-flashing set into a fresh reglet — typically paired with replacing the shingle courses immediately adjacent to the chimney.
| Repair Technique | Typical Cost (CAD) | Expected Lifespan | Best For |
|---|---|---|---|
| Resealing existing joints | $250 – $500 | 2 – 5 years | Sound metal, failed sealant only |
| Re-cut and reset counter-flashing | $500 – $1,200 | 10 – 15 years | Loose counter-flashing, sound step flashing |
| Replace individual step flashing sections | $400 – $900 | 15 – 20 years | Localized corrosion or bent pieces |
| Install or rebuild a cricket | $700 – $1,800 | 20+ years | Wide chimneys (over 60 cm) without one |
| Full flashing replacement | $1,200 – $3,000 | 20 – 30 years | Rust-through, multiple failures, older roofs |
Prices vary with chimney size, roof pitch, accessibility, and the flashing material chosen. These figures reflect typical GTA market rates in 2026 and are meant as a planning guide rather than a quote — every chimney is different, which is why we recommend an on-site assessment through our contact page before budgeting a specific number.
Flashing Materials Compared
Not all flashing metal performs the same way over a GTA winter. The material choice affects both cost and how long the repair will last before it needs attention again.
| Material | Corrosion Resistance | Relative Cost | Notes for GTA Climate |
|---|---|---|---|
| Galvanized steel | Moderate (10-20 years before rust risk) | Lowest | Common on older builds; watch for rust streaks on brick as an early warning sign |
| Aluminum | Good, but reacts with mortar over time | Low-moderate | Avoid direct contact with wet mortar without a protective coating |
| Copper | Excellent (50+ years) | Highest | Ages to a natural patina; ideal for older or heritage-style Toronto homes |
| Painted or coated steel | Good if coating stays intact | Moderate | Cost-effective middle ground; matches most asphalt shingle colours |
For most GTA homes, painted steel or aluminum strikes the right balance of cost and durability for a 20-30 year roofing cycle. Copper is worth the premium on homes where the chimney is a visible architectural feature or where the roof itself is expected to last much longer, since copper flashing will outlive several generations of asphalt shingles.
DIY Repair vs. Calling a Professional
A small number of chimney flashing issues are within reach of a confident, safety-conscious homeowner — mainly resealing a visibly cracked joint on a low-slope, easily accessible roof. However, several factors push most chimney flashing work firmly into professional territory:
- Height and fall risk. Chimneys are almost always at or near the roof peak, the steepest and least forgiving section of the roof.
- Correct diagnosis. As covered above, the visible leak point is often not the actual entry point, and misdiagnosing it wastes money and delays the real fix.
- Masonry work. Re-cutting a reglet and repointing mortar requires masonry skills most homeowners don’t have, and doing it poorly can create new leak paths.
- Warranty implications. DIY flashing work can void a roofing manufacturer’s warranty on the surrounding shingles if it’s not installed to spec.
- Insurance and liability. Working at height without proper fall protection is genuinely dangerous — this is not a place to cut corners.
If your inspection turns up anything beyond a small, easily reached, low-slope joint, it’s worth having a professional look — an incorrect patch can trap moisture against the sheathing and cause hidden rot that costs far more to fix later than the original leak would have.
Chimney Leaks and Attic Health
Chimney flashing leaks rarely stay contained to the roof. Once water gets past the flashing, it runs down the inside of the chimney chase or along rafters into the attic space, where it can saturate insulation, promote mould growth on sheathing, and — if left long enough — rot the framing around the chimney opening.
This is why a thorough chimney flashing repair should always include a look at attic ventilation and insulation, not just the exterior metal. Poor attic ventilation contributes directly to the ice damming that causes many flashing leaks in the first place, so addressing both together produces a more durable fix. If you haven’t had your attic inspected in several years, it’s worth a look through our attic services page to understand what proper ventilation and insulation should look like for a home your size.
Homes with skylights near the chimney face a similar layered-flashing challenge, and the same water-tracing logic applies — if you’re dealing with a leak near a skylight rather than a chimney, our skylight and skylight replacement pages cover that specific repair path.
Seasonal Timing for Chimney Flashing Repairs
Summer is genuinely the best window for chimney flashing work in the GTA. Dry, warm weather (typically 15-30°C through July and August) allows sealants and mortar to cure properly, and there’s no risk of the repair being interrupted by rain or early frost. Booking an inspection now, in July, also means any repair is fully cured and tested well before the first freeze-thaw cycles return in late autumn — rather than rushing a fix in November when temperatures are already borderline for proper sealant adhesion.
If you noticed a leak during spring melt this year and have been putting off the repair, summer is the ideal time to actually get it resolved rather than waiting until the next thaw reveals the same problem again.
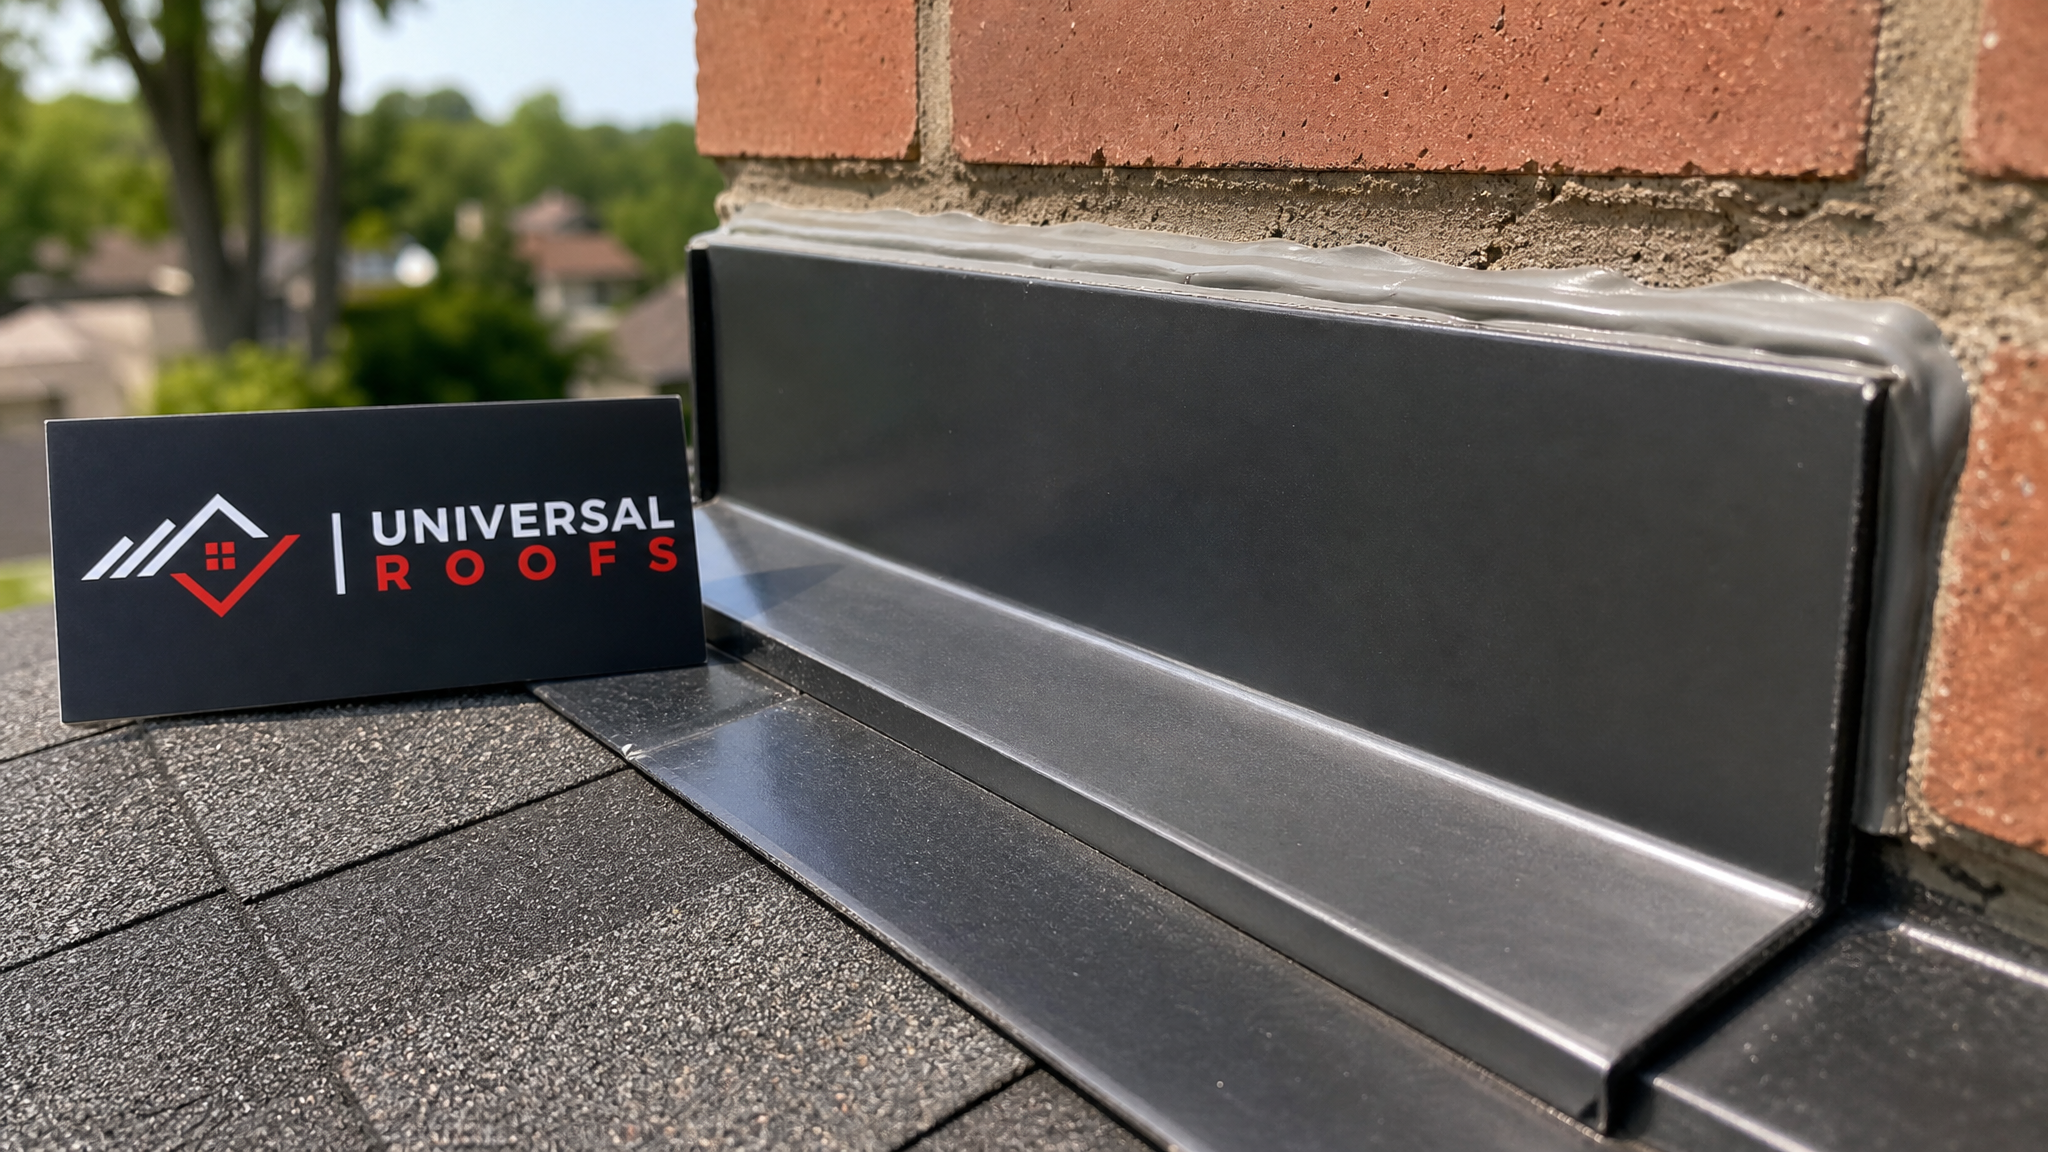
Preventing Future Chimney Flashing Leaks
Once a flashing repair is complete, a few habits extend its lifespan considerably:
- Annual inspection. A quick visual check each spring and fall catches lifted seams or cracked sealant before they become active leaks.
- Keep the chimney area clear of debris. Leaves and pine needles trap moisture against flashing and accelerate corrosion.
- Address ice dams promptly. If you see icicles forming heavily near the chimney base each winter, that’s a sign of heat loss and inadequate ventilation worth investigating.
- Don’t ignore small stains. A faint ceiling stain that “dried up” is often just a leak that paused with the season — it typically returns.
- Track the age of your flashing. If your roof and flashing are both original and older than 15-20 years, proactive replacement during a planned roof replacement is often more cost-effective than repeated patch repairs.
For homeowners across Toronto, Peel Region, York Region, Halton Region, and Durham Region, chimney flashing failure is one of the most consistent service calls we receive year-round, and prevention is always cheaper than remediation once water has reached the attic.
What to Expect When You Book a Repair
A properly run chimney flashing repair follows a predictable sequence: an on-site inspection of both the roof exterior and attic interior, a clear explanation of what’s failing and why, a written scope covering exactly which components will be repaired or replaced, the repair itself (typically completed in a single day for most homes), and a final check confirming the fix with a visual or water test where appropriate.
You can see examples of how past customers describe this process on our reviews page, and general questions about scheduling, warranties, and service areas are answered on our FAQ page. For homeowners who want to understand who they’re hiring before booking anything, our about page covers our history serving the GTA since 2005.
What are the most common signs I need chimney flashing repair for a leaking roof?
Can I fix a leaking chimney flashing myself, or do I need a professional?
How much does fixing a leaking roof chimney flashing repair typically cost in the GTA?
Why does my chimney flashing keep leaking even after it was sealed?
What is the best material for chimney flashing repair in a cold climate like Toronto?
Is summer a good time to schedule chimney flashing repair?
Need Help With Fixing Leaking Roofs Chimney?
A leaking roof around the chimney rarely fixes itself, and every season it’s left unaddressed increases the risk of attic damage, mould, and costly interior repairs. Universal Roofs has diagnosed and repaired chimney flashing failures across the GTA for two decades, using techniques built for our specific freeze-thaw climate rather than generic patches that fail within a year.
Call us today at (416) 732-2421 or request a free inspection to get started.
Universal Roofs proudly serves Toronto, Mississauga, Brampton, Vaughan, Markham, Oakville and the GTA since 2005.