
If you have noticed dark streaks, greenish patches, or fuzzy black growth spreading across your clay or concrete tile roof, you are not alone. Moss and algae are among the most common cosmetic and structural complaints we hear from homeowners across the GTA, especially on north-facing slopes that stay shaded and damp for much of the year. What starts as an eyesore can, left unchecked, trap moisture against the tile surface, accelerate freeze-thaw damage, and shorten the lifespan of an otherwise durable roofing system.
Tile roofs are prized for their longevity, often lasting 50 years or more, but that longevity depends on keeping the tile surface clean and the underlying structure dry. Moss holds water like a sponge, algae feeds on the limestone filler in some tiles, and both can work their way into hairline cracks and grout lines. In a climate like Toronto’s, where summer humidity gives way to freeze-thaw cycles every winter, that trapped moisture becomes a serious problem rather than a purely aesthetic one.
This guide walks through why moss and algae take hold on tile roofs in the first place, the safest and most effective removal methods, the prevention strategies that actually work long-term, and when it makes sense to call in a professional rather than tackle it yourself. Whether you are dealing with your first patch of green growth this summer or trying to stop a recurring problem for good, this article covers what you need to know.
Why Moss and Algae Take Hold on Tile Roofs
Moss and algae are not the same organism, and understanding the difference matters when choosing a treatment. Algae, most commonly the species Gloeocapsa magma, appears as dark grey or black streaking and feeds on the calcium carbonate found in some concrete tiles and aggregate shingles. It thrives in humid, shaded conditions and spreads through airborne spores carried by wind and birds. Moss, by contrast, is a small flowerless plant that roots itself in grout lines, tile overlaps, and any debris that has accumulated in low spots on the roof. It needs organic material and consistent moisture to establish itself, which is why it is almost always found on the shaded, north- or east-facing slopes of a roof.
Several conditions make a tile roof more susceptible to moss and algae growth. Overhanging tree branches create shade and drop leaves, twigs, and seeds that collect in valleys and along tile edges. Poor attic ventilation can cause condensation to form on the underside of the roof deck, which migrates outward and keeps tiles damp longer than they should be. Clogged gutters back water up under the lowest course of tiles, and a roof pitch that is too shallow slows natural runoff, giving spores more time to settle and germinate.
Toronto’s climate compounds these issues. Spring and autumn bring extended damp periods with limited direct sun, summer humidity keeps moisture levels high even on clear days, and winter snow cover can sit on a roof for weeks, keeping tiles saturated well into the thaw. This is why so many GTA homeowners see the heaviest moss and algae growth on the same slopes year after year, and why a proper attic ventilation check is often part of a lasting fix rather than just scrubbing the surface.
Signs Your Tile Roof Has a Moss or Algae Problem
Catching growth early makes removal easier and less risky for the tiles underneath. Look for these warning signs during a visual inspection from the ground, ideally with binoculars, or from a safe vantage point such as an upstairs window:
- Dark grey, black, or greenish streaks running down from the ridge or ends of tiles, usually starting near vents or chimneys
- Raised, cushion-like green or brown growth clustered in grout lines, valleys, or tile overlaps
- Granule or aggregate loss on concrete tiles, visible as lighter patches where the surface coating has worn away
- Persistent damp patches that do not dry out even after several sunny days
- Small plants, lichen, or moss cushions visible along the eaves or in shaded valleys
- Water stains or a musty smell in the attic, which can indicate moisture is being trapped beneath affected tiles
If you notice several of these signs at once, especially combined with any sagging, cracked, or displaced tiles, it is worth scheduling a full roof repair assessment rather than treating the growth in isolation. Moss can mask underlying tile damage, and pressure washing over a cracked or loose tile can make a small problem much worse.
Removal Methods Compared
There is no single correct way to remove moss and algae from a tile roof, and the right method depends on the severity of growth, the tile material, and your comfort working at height. The table below compares the most common approaches used across the GTA.
| Method | Best For | Tile Safety | Typical Cost (GTA) | Effectiveness |
|---|---|---|---|---|
| Manual brushing and hand removal | Light growth, isolated patches | Very safe when done gently | DIY: $0-$50 in tools | Good for surface growth, does not kill spores |
| Soft washing with biocide solution | Moderate to heavy growth across full slopes | Safe for all tile types | $450-$900 per average roof | Excellent, kills spores at the root |
| Low-pressure rinse after chemical treatment | Removing dead residue after biocide application | Safe below 800 PSI | Included in most soft wash packages | Very good, restores appearance |
| High-pressure washing | Not recommended for tile roofs | High risk of cracking or dislodging tiles | $300-$600 (not advised) | Removes growth but risks costly damage |
| Zinc or copper strip installation | Long-term prevention on all tile types | Safe, no chemical contact needed | $200-$450 installed | Excellent for prevention, slower for existing growth |
The industry consensus, and our own approach on every tile roof we service, is that soft washing with a properly diluted biocide solution is the safest and most effective option. Soft washing uses low water pressure, typically under 500 PSI, combined with a cleaning solution that breaks down organic growth at the cellular level rather than blasting it off mechanically. This matters enormously on tile roofs because clay and concrete tiles can crack, chip, or dislodge under the force of a standard pressure washer, and a single cracked tile can lead to a leak that costs far more to fix than the original moss problem.
Step-by-Step: How Professional Soft Washing Works
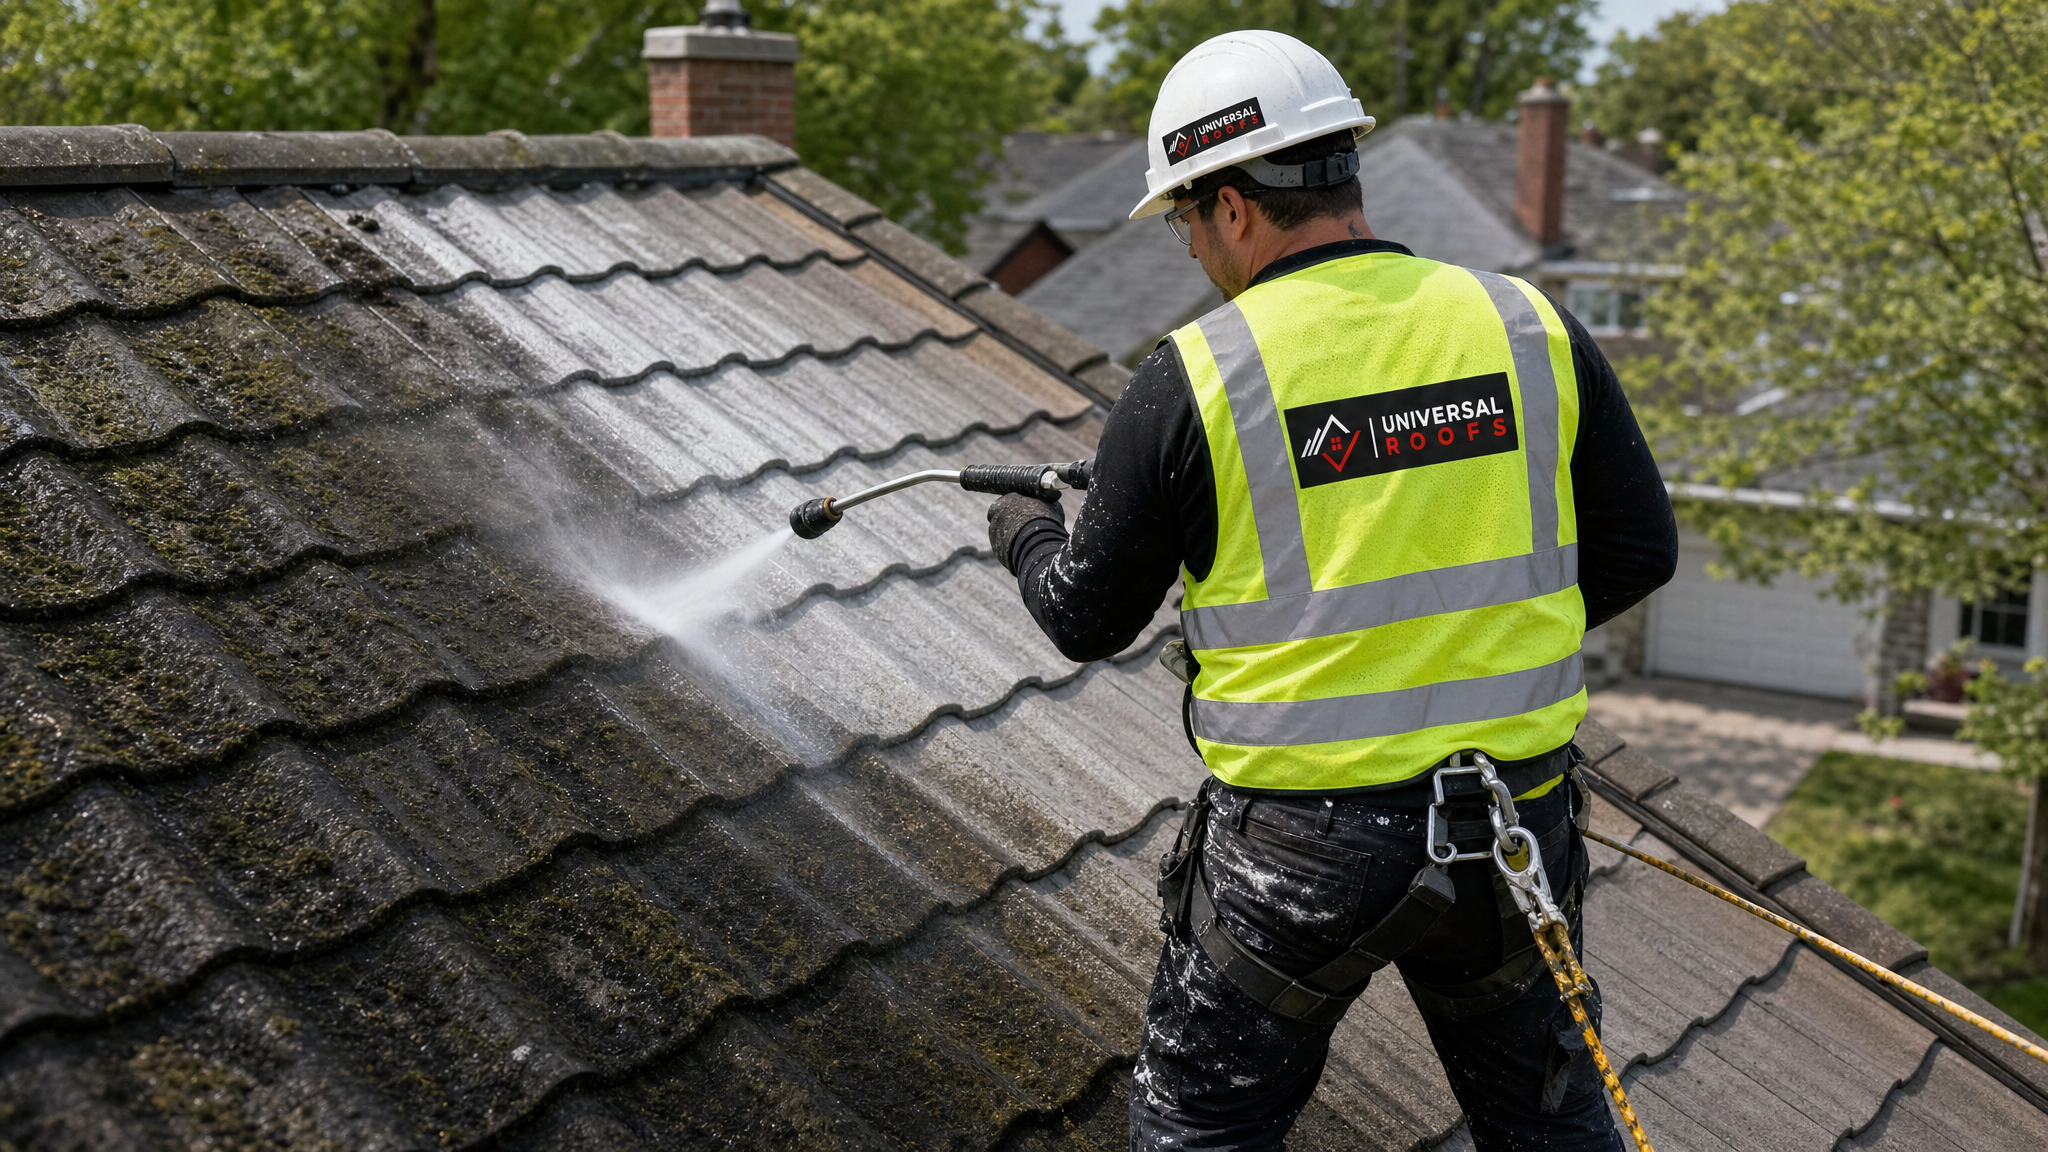
Understanding the process helps homeowners know what to expect and why it takes the time it does. A proper soft wash treatment on a tile roof generally follows these stages:
- Inspection first. Before any water or chemical touches the roof, a technician walks the accessible sections and checks for cracked, chipped, or loose tiles that need to be addressed first. Treating over damaged tiles can force water underneath them.
- Landscaping protection. Plants, gardens, and any exterior fixtures near the downspouts are pre-wetted and covered or rinsed afterward, since biocide runoff can affect sensitive vegetation if not managed properly.
- Application of cleaning solution. A sodium hypochlorite-based or eco-friendly biocide blend is applied at low pressure, allowed to dwell on the surface for 15 to 25 minutes so it can penetrate moss roots and algae colonies.
- Manual agitation where needed. Stubborn moss cushions in valleys or grout lines are gently loosened by hand or soft brush rather than scraped, which protects the tile glaze or coating.
- Low-pressure rinse. Once the dwell time has passed, the roof is rinsed at low pressure to remove dead organic material and chemical residue.
- Gutter and downspout flush. Debris that washes down is cleared from gutters so it does not create a new blockage that invites regrowth at the eaves.
- Optional preventive treatment. A follow-up application of a longer-lasting algaecide or the installation of zinc strips can be added at this stage to extend the clean period.
Most tile roofs in the 1,500 to 2,500 square foot range take between three and six hours to complete properly, depending on pitch, accessibility, and the severity of growth. Steeper roofs or those with multiple valleys and dormers take longer because more time is spent on careful hand work rather than broad spraying.
Prevention: Stopping Regrowth Before It Starts
Removing existing moss and algae only solves half the problem. Without addressing the underlying conditions that allowed growth in the first place, most tile roofs will see new spores take hold within one to three years, sometimes faster on persistently shaded slopes. The following prevention strategies address the root causes rather than just the symptoms.
| Prevention Strategy | What It Addresses | Estimated Lifespan of Benefit | Approximate Cost |
|---|---|---|---|
| Zinc or copper ridge strips | Ongoing spore germination via metal ion runoff | 10-15 years | $200-$450 |
| Tree trimming and canopy management | Shade and debris accumulation | 2-3 years before regrowth needed | $150-$500 depending on scope |
| Gutter cleaning (twice yearly) | Water backup under eave tiles | 6 months between services | $100-$250 per visit |
| Improved attic ventilation | Underside condensation and prolonged dampness | Life of the roof once corrected | $500-$1,800 depending on system |
| Annual preventive biocide spray | New spore colonization before it takes hold | 12-18 months | $250-$450 |
Zinc and copper strips deserve special mention because they are one of the most cost-effective long-term solutions available. Installed just below the ridge cap, these metal strips release trace amounts of zinc or copper oxide with every rainfall, and the mineral runoff travels down the tile surface, creating an environment that is inhospitable to moss and algae spores. They will not remove existing heavy growth on their own, but paired with an initial soft wash, they meaningfully extend the time before a roof needs cleaning again.
Trimming back overhanging branches so that at least 3 metres of clearance exists above the roofline reduces both shade and the volume of organic debris landing on the tiles. Combined with a twice-yearly gutter cleaning schedule, in late spring and again in late autumn, this cuts off the two biggest contributors to moss establishment: shade and standing debris.
Attic Ventilation and Hidden Moisture
One of the most overlooked contributors to recurring algae and moss problems is inadequate attic ventilation. When warm, moist air from inside the home becomes trapped in the attic rather than exhausting properly, it condenses against the underside of the roof deck. Over time, this raises the moisture content of the tiles from below, keeping the surface damp even during dry weather and creating ideal conditions for algae to establish on the topside as well.
Signs that ventilation may be contributing to your moss or algae problem include visible frost or condensation on the attic underside during winter inspections, a persistently musty smell in the attic space, ice damming along the eaves in winter, and moss or algae growth that seems to reappear quickly in the same spots even after professional cleaning. If any of these apply to your home, it is worth having your attic ventilation evaluated as part of the overall roof health assessment, since no amount of surface cleaning will permanently fix a moisture problem that originates from below.
Special Considerations for Clay vs. Concrete Tile
Not all tile roofs respond to cleaning and prevention methods the same way, and knowing which material you have changes the recommended approach.
| Tile Type | Common Growth Pattern | Recommended Cleaning Method | Special Notes |
|---|---|---|---|
| Clay tile | Algae streaking on glazed surfaces, moss in overlaps | Soft wash with pH-neutral biocide | Glaze can be scratched by stiff brushes; avoid abrasive tools |
| Unglazed clay tile | Moss rooting directly into porous surface | Soft wash with longer dwell time | More porous, absorbs moisture faster, needs more frequent maintenance |
| Concrete tile | Heavy black algae streaking (Gloeocapsa magma) | Soft wash plus zinc strip installation | Calcium content actively feeds algae; most prone to staining |
| Coated concrete tile | Surface algae without deep staining | Low-pressure rinse with mild biocide | Protective coating resists staining but wears down over 10-15 years |
Concrete tiles, which make up a large share of the tile roofs installed across Mississauga, Brampton, and Vaughan over the past two decades, are particularly prone to the dark algae streaking many homeowners describe as their roof “looking dirty” even after rain. This is because the calcium carbonate used as filler in many concrete tile products is a direct food source for Gloeocapsa magma. Clay tiles, especially glazed varieties, tend to resist algae staining better but are more susceptible to moss taking root in the overlap seams between courses.
DIY vs. Professional Removal: What’s Actually Safe
Many homeowners understandably want to try removing moss or algae themselves before calling a contractor, and light, isolated growth can sometimes be managed safely from the ground with a soft brush on an extension pole and a garden-hose-diluted cleaning solution. However, there are real limits to what should be attempted without professional equipment and training.
Walking directly on a tile roof is one of the most common ways homeowners accidentally damage their own tiles. Clay and concrete tiles are designed to shed water, not bear concentrated foot traffic, and stepping in the wrong spot can crack a tile that then requires a full roof repair visit to replace. Renting a pressure washer and using it at consumer-grade pressure settings is another common mistake. Even settings that seem moderate can force water up under tile overlaps, damage the fragile surface glaze, or strip protective coatings meant to last 15 years or more.
Working at height on a sloped, often slippery, tile surface also carries genuine fall risk, particularly on roofs with a pitch steeper than 6:12 or with algae growth that has already made the surface slick. Professional crews use proper fall protection harnesses, roof anchors, and ladder stabilization equipment specifically because tile roofs are among the more hazardous surfaces to work on safely.
If your roof shows heavy growth across multiple slopes, any sign of tile damage, or is steeper than a typical walkable pitch, professional soft washing is the safer and, in most cases, more cost-effective route once you account for the risk of a cracked tile or a fall injury.
Timing Your Moss and Algae Treatment
Late spring through late summer, roughly May through September, is the ideal window for moss and algae removal in the GTA. Temperatures are warm enough for cleaning solutions to work effectively and for the roof to dry fully afterward, and this timing also gets ahead of the autumn leaf drop and winter snow load that would otherwise trap new moisture against the tiles. Scheduling a summer cleaning, like now in July, means your roof enters the winter freeze-thaw season with a clean, dry surface rather than one already holding moisture in moss cushions or algae mats.
Treating in late autumn or winter is generally not recommended, since cold temperatures slow or stop the effectiveness of most biocide solutions, and a wet roof heading into a hard freeze increases the risk of ice damage. If you notice growth in the colder months, it is reasonable to schedule an assessment and plan the treatment for the next warm stretch rather than attempting a full clean mid-winter.
When Moss and Algae Signal a Bigger Roofing Issue
In some cases, persistent or rapidly returning moss and algae growth is a symptom of an aging roofing system rather than a standalone maintenance issue. Tile roofs nearing the end of their service life often show more porous, weathered surfaces that hold moisture more readily, along with cracked underlayment that allows water to seep beneath tiles and feed growth from underneath. If a cleaning and prevention program is not holding for more than a year at a time, or if you are also seeing missing, cracked, or shifting tiles, it may be time for a broader inspection to determine whether a full roof replacement makes more sense than continued spot maintenance.
This is also a good moment to check adjacent roofing components. Skylights surrounded by heavy moss growth can develop flashing leaks that go unnoticed until interior damage appears, so it is worth having skylights inspected as part of the same visit, and older units nearing 15-20 years old may be better served by a skylight replacement rather than continued patching. Flat sections of a roofline, such as over a garage or addition, are also worth reviewing separately, since flat roofing systems handle moisture and drainage very differently than sloped tile and can develop their own algae or ponding issues.
Maintenance Schedule to Keep Your Tile Roof Clean
A simple, consistent maintenance rhythm prevents most moss and algae problems from becoming serious. Based on what we see across thousands of tile roof inspections in the GTA, the following schedule keeps growth from taking hold:
- Twice yearly (spring and autumn): Clean gutters and downspouts, and do a visual check from the ground for early streaking or growth
- Every 2-3 years: Professional soft wash treatment, timed for late spring or summer
- Every 10-15 years: Reapply or replace zinc and copper prevention strips as their mineral output diminishes
- Annually: Trim back tree branches to maintain clearance above the roofline
- Every 3-5 years: Full roof inspection to check for tile damage, flashing wear, and attic ventilation performance
Homeowners across our service areas in Toronto, Peel Region, York Region, Halton Region, and Durham Region see the best long-term results when cleaning and prevention are treated as a routine part of home maintenance rather than a one-time fix after the growth has already become visible from the street.
What is the best method for eliminating moss and algae on tile roofs?
Can I use a pressure washer to remove moss and algae from my tile roof?
How often does a tile roof need moss and algae treatment?
Do zinc strips really work for preventing algae on tile roofs?
Is moss on a tile roof actually causing damage, or just cosmetic?
When is the best time of year to clean moss and algae off a tile roof in Toronto?
Need Help With Eliminating Moss and Algae?
A clean, well-maintained tile roof protects your home for decades, and Universal Roofs has been helping GTA homeowners keep their roofs in top condition since 2005. Our crews use safe, tile-appropriate soft washing methods and long-term prevention strategies so you are not fighting the same moss and algae problem year after year.
Call us today at (416) 732-2421 or request a free inspection to get started.
Universal Roofs proudly serves Toronto, Mississauga, Brampton, Vaughan, Markham, Oakville and the GTA since 2005.