
If your attic feels like a sauna in July or your shingles seem to be aging faster than they should, poor airflow is very likely the culprit. Finding practical ways to enhance roof ventilation is one of the highest-value, lowest-cost projects a Toronto-area homeowner can tackle, and summer is actually the best time to notice the warning signs and get it fixed before the humid months finish doing their damage.
A roof that “breathes” properly moves hot, moist air out of the attic and pulls cooler, drier air in continuously. When that exchange stalls, heat builds up under the shingles, moisture condenses on the underside of the roof deck, and your air conditioner works overtime trying to compensate. Over a few seasons, that combination quietly shortens shingle life, warps roof decking, and can even feed mould growth in the attic space.
At Universal Roofs, we’ve inspected thousands of GTA attics since 2005, and ventilation problems show up in a huge share of them — often on roofs that are otherwise in decent shape. This guide walks through exactly how attic airflow is supposed to work, the specific upgrades that make the biggest difference, what they typically cost, and how to tell when a simple fix will do versus when it’s time to call in a professional.
Why Roof Ventilation Matters More Than Most Homeowners Realize
Every attic needs a continuous flow of outside air moving through it, entering low near the eaves and exiting high near the ridge. This isn’t just about comfort on a hot afternoon — it protects the physical structure of your home in ways that aren’t always obvious from the ground.
In summer, an attic without adequate airflow can reach temperatures well above 60°C on a sunny day. That heat radiates downward into living spaces, forcing your air conditioning to run longer and harder, and it also bakes the underside of your shingles, accelerating the breakdown of the asphalt and granules that protect your roof. Manufacturers are explicit about this: most shingle warranties require minimum ventilation levels, and insufficient airflow is a common reason claims get denied.
In winter, the same lack of airflow creates a different but equally damaging problem. Warm, moist household air rises into the attic, and if it can’t escape, it condenses on the cold underside of the roof deck. That moisture soaks into wood sheathing and insulation, promotes mould and rot, and contributes to ice damming along the eaves — a problem that causes real damage during Toronto’s freeze-thaw cycles every winter. Good ventilation isn’t a seasonal fix; it’s a year-round system that has to work in both directions.
Beyond structural concerns, ventilation directly affects your energy bills. Studies from building science researchers consistently show that a balanced attic ventilation system can reduce cooling costs by keeping attic temperatures closer to outdoor ambient temperature, easing the load on your HVAC system during the hottest stretches of July and August.
Signs Your Roof Ventilation Needs Improvement
Most homeowners don’t think about attic airflow until something goes wrong. Here are the practical warning signs worth checking for, especially during a summer heat wave when problems tend to be most obvious.
- Upper floors feel noticeably hotter than the rest of the house, even with air conditioning running
- Visible moisture, water stains, or dark discolouration on the attic’s roof sheathing
- A musty odour when you open the attic hatch or access panel
- Shingles that are cupping, curling, or losing granules faster than expected for their age
- Frost or condensation on the underside of the roof deck during cold snaps
- Ice damming along the eaves in winter, even with a well-insulated attic floor
- Noticeably higher summer cooling bills compared to similar homes in your neighbourhood
If two or more of these sound familiar, it’s worth having a professional evaluate your attic’s airflow before scheduling any other roof work. Ventilation problems are frequently discovered during unrelated jobs like a roof repair or a full roof replacement, since technicians are already up in the attic and can see the evidence firsthand.
Understanding the Intake and Exhaust Balance
Effective attic ventilation always depends on two components working together: intake vents that draw cooler air in near the bottom of the roof, and exhaust vents that let hot, moist air escape near the top. Neither one works well without the other, and an imbalance between them is the single most common mistake we see on GTA homes.
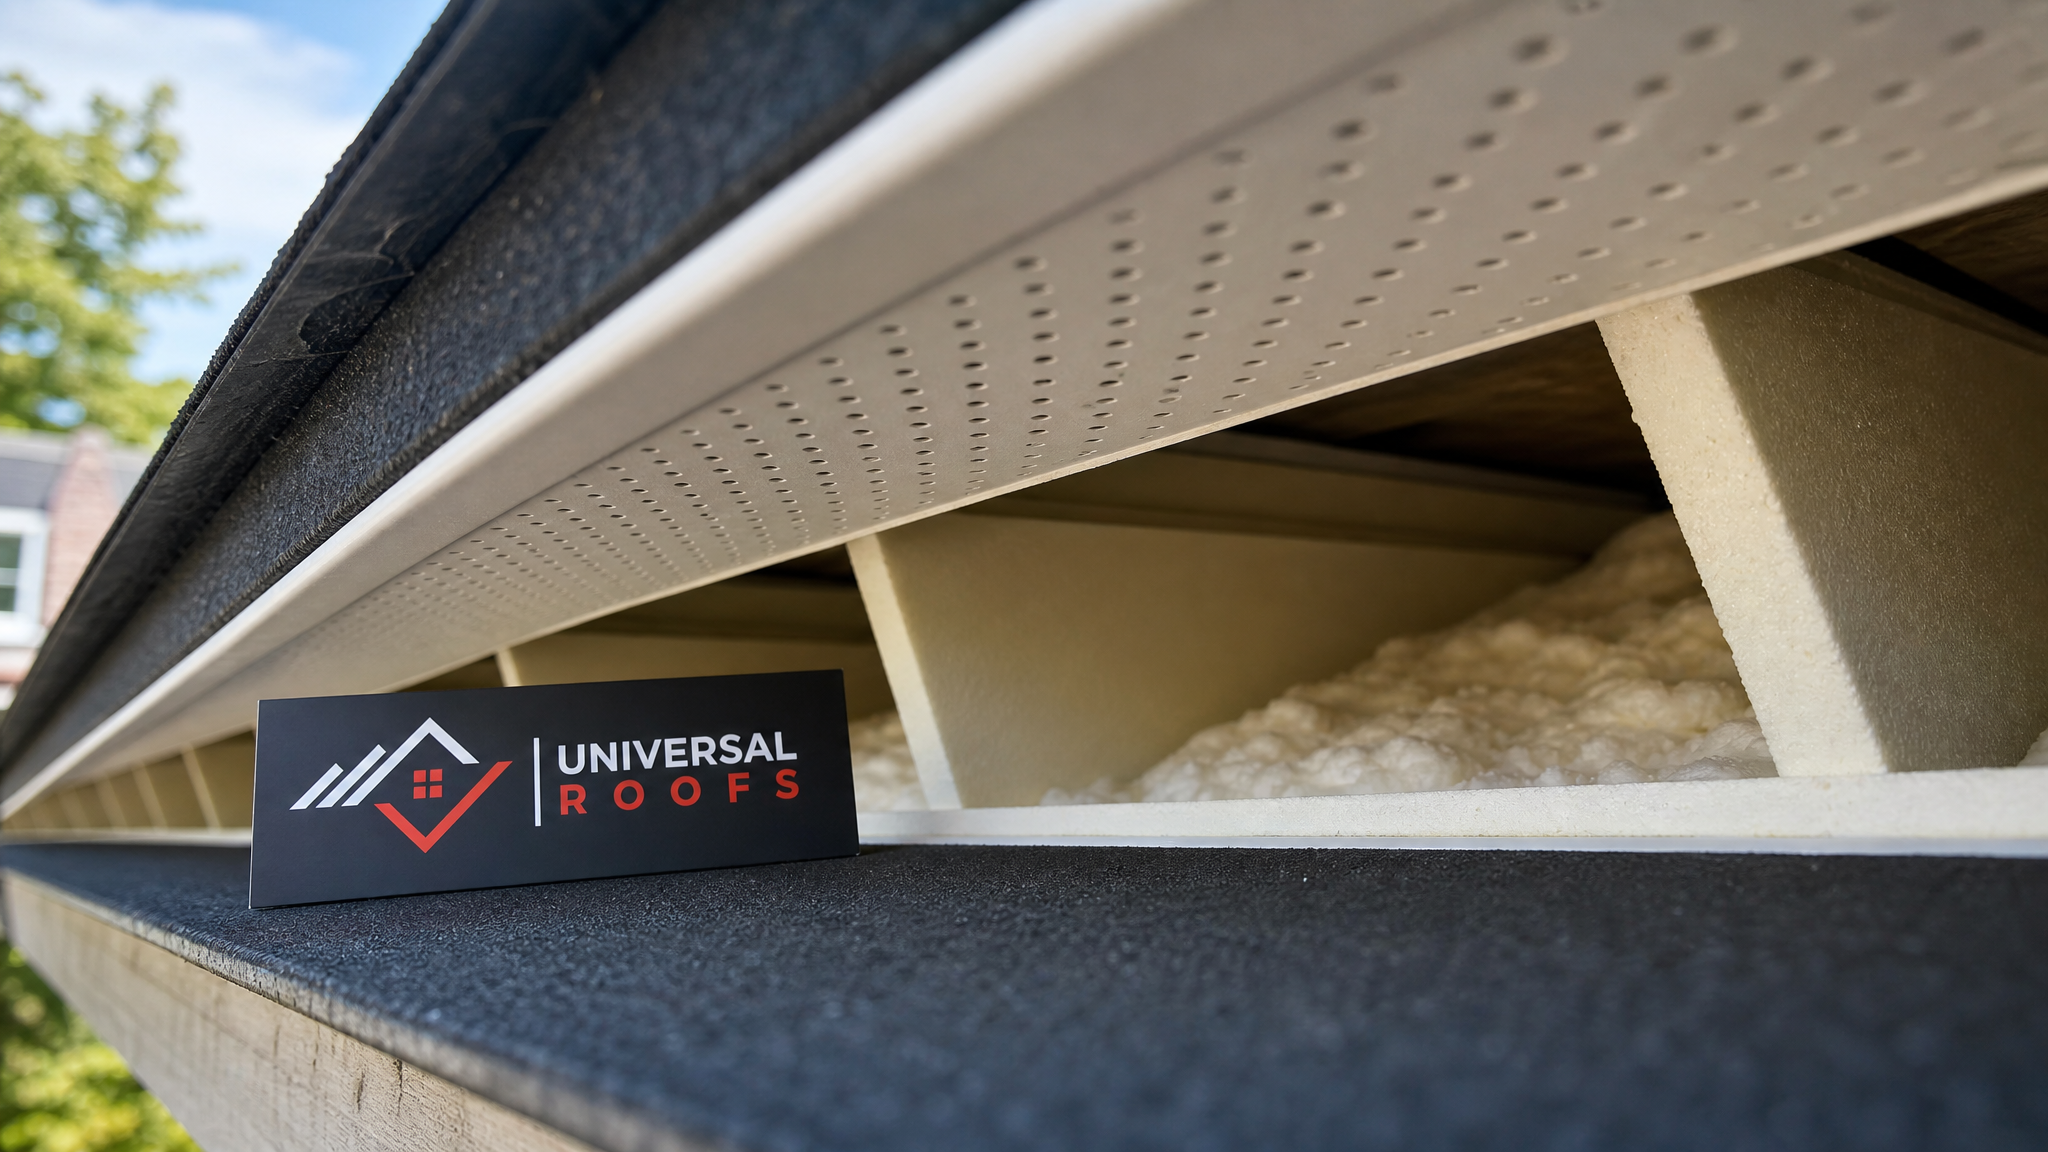
Intake typically comes from soffit vents installed along the underside of the roof’s overhangs. Exhaust usually comes from a combination of ridge vents, roof-mounted vents, or gable vents positioned near the peak. Air naturally rises as it heats up, so as hot air escapes through the exhaust vents, it draws fresh air in through the intake vents in a continuous cycle — as long as nothing is blocking the path.
The general rule of thumb used across the roofing industry is 1 square foot of net free ventilation area for every 300 square feet of attic floor space, split roughly evenly between intake and exhaust. That ratio assumes a properly installed vapour barrier on the attic floor; without one, the requirement often doubles. A home in Mississauga or Markham with a 1,500 square foot attic footprint, for example, would typically need around 5 square feet of total net free vent area — roughly 2.5 square feet of intake and 2.5 square feet of exhaust.
| Attic Floor Area | Recommended Total NFA (1:300 ratio) | Intake Needed | Exhaust Needed |
|---|---|---|---|
| 1,000 sq ft | 3.33 sq ft | 1.67 sq ft | 1.67 sq ft |
| 1,500 sq ft | 5.0 sq ft | 2.5 sq ft | 2.5 sq ft |
| 2,000 sq ft | 6.67 sq ft | 3.33 sq ft | 3.33 sq ft |
| 2,500 sq ft | 8.33 sq ft | 4.17 sq ft | 4.17 sq ft |
| 3,000 sq ft | 10.0 sq ft | 5.0 sq ft | 5.0 sq ft |
NFA stands for “net free area” — the actual open space air can pass through, which is always smaller than a vent’s overall dimensions once you account for louvres and mesh screening. A qualified contractor calculates this precisely for your specific attic rather than relying on rough guesses, since undersized systems are one of the most frequent ventilation mistakes on older homes across Toronto, Peel Region, and York Region.
The Most Effective Ways to Enhance Roof Ventilation
With the intake-exhaust principle in mind, here are the specific upgrades that make the biggest practical difference on GTA homes, roughly ordered from simplest to most involved.
1. Clear and Unblock Existing Soffit Vents
Before spending money on new hardware, check whether your current soffit vents are actually doing their job. Insulation is often pushed up against the eaves during attic upgrades, blocking airflow at the exact point it’s supposed to enter. Installing baffles (also called rafter vents) between the roof deck and the insulation keeps a clear channel open, restoring intake without touching the exterior of the house at all. This is frequently the cheapest and fastest ventilation fix available.
2. Upgrade to a Continuous Ridge Vent
If your roof currently relies on a handful of individual roof vents (sometimes called “turtle vents” or “box vents”), switching to a continuous ridge vent along the entire peak usually provides far more consistent, evenly distributed exhaust. Ridge vents run the full length of the roof’s peak, so hot air escapes along the whole ridge line rather than pooling in sections between scattered individual vents.
3. Add or Enlarge Soffit Vents
Homes built before soffit ventilation became standard, or homes with narrow overhangs, often simply don’t have enough intake area. Installing additional continuous soffit vent strips or upgrading to a higher-NFA perforated soffit panel increases intake capacity to properly match whatever exhaust capacity already exists on the roof.
4. Install a Solar-Powered or Electric Attic Fan
For attics with unusually high heat loads — think south-facing roofs with dark shingles, or homes with finished attic spaces — a powered attic fan can supplement passive ventilation. Solar-powered units have become popular in the GTA because they run automatically on sunny days without adding to your electricity bill, activating exactly when the attic needs the extra airflow most.
5. Balance Gable Vents With Ridge and Soffit Systems
Older homes often have gable end vents installed alongside soffit and ridge vents. Left unmanaged, gable vents can actually short-circuit a ridge vent system, pulling air in through the gable and out the ridge without ever properly circulating air across the attic floor. A qualified technician can determine whether gable vents should be sealed, screened down, or left as-is based on your specific attic layout.
6. Address Bathroom and Kitchen Exhaust Fans
It’s surprisingly common to find bathroom or kitchen exhaust fans venting directly into the attic instead of outside through the roof or a wall. This dumps large amounts of warm, moist air straight into the attic space every time someone showers or cooks, overwhelming even a well-designed ventilation system. Rerouting these fans to vent outdoors is one of the most important — and most overlooked — moisture-control fixes available.
Comparing Ventilation Upgrade Options
Every home is different, and the right combination of upgrades depends on your attic’s current setup, roof shape, and how it’s being used. The table below compares the most common options homeowners across Toronto, Oakville, and Vaughan consider.
| Ventilation Upgrade | Type | Typical Cost Range (CAD) | Best For |
|---|---|---|---|
| Soffit vent cleaning/baffle install | Intake | $300 – $800 | Blocked existing vents, minor airflow issues |
| Additional soffit vent panels | Intake | $500 – $1,500 | Homes with insufficient intake capacity |
| Continuous ridge vent | Exhaust | $800 – $2,200 | Roofs with scattered box vents or no ridge vent |
| Solar-powered attic fan | Exhaust (active) | $600 – $1,400 per unit | South-facing roofs, high heat-load attics |
| Electric attic fan with thermostat | Exhaust (active) | $450 – $1,000 per unit | Homes without strong solar exposure |
| Gable vent rebalancing/sealing | Exhaust adjustment | $200 – $600 | Older homes with mixed vent types |
| Bathroom fan re-routing to exterior | Moisture control | $350 – $900 | Fans currently venting into the attic |
These figures reflect typical residential pricing across the GTA and can shift based on roof pitch, attic accessibility, and whether the work is bundled with other roofing services. Combining ventilation upgrades with a scheduled roof repair often reduces total labour costs, since scaffolding and roof access are already accounted for.
Ventilation Considerations for Flat Roofs and Skylights
Sloped residential roofs aren’t the only roof type that needs airflow management. Flat roofs, common on additions, garages, and some commercial buildings across the GTA, use a different ventilation approach entirely — often relying on mechanical ventilation, vapour barriers, and insulation strategies rather than a ridge-and-soffit system. If your property includes a flat roofing section, it’s worth having it assessed separately, since applying sloped-roof ventilation logic to a flat roof deck can lead to trapped moisture rather than solving it.
Skylights add another layer of complexity. A poorly flashed or poorly insulated skylight well can create a localized cold spot that promotes condensation, even when the rest of the attic ventilates properly. If you’re noticing moisture specifically around a skylight, it’s worth having both the skylights installation and the surrounding insulation checked together, and in some cases a skylight replacement with better-insulated framing resolves what looked like a ventilation problem but was actually a localized thermal bridge.
Common Ventilation Mistakes to Avoid
A handful of mistakes account for the vast majority of ventilation problems we find during inspections. Avoiding these will save both money and future headaches.
| Mistake | Why It’s a Problem | Better Approach |
|---|---|---|
| Blocking soffit vents with insulation | Cuts off intake airflow entirely, even if exhaust vents are working fine | Install rafter baffles to keep a clear air channel at the eaves |
| Mixing ridge vents with gable or box vents improperly | Can short-circuit airflow, pulling air from the nearest opening instead of across the whole attic | Have a contractor evaluate the full system before adding new vent types |
| Oversizing exhaust without matching intake | Creates negative pressure that can pull conditioned air from living spaces into the attic | Keep intake and exhaust balanced at roughly a 1:1 ratio |
| Venting bathroom fans into the attic | Floods the attic with warm, moist air that overwhelms passive ventilation | Reroute exhaust ducting through the roof or a sidewall to the exterior |
| Ignoring attic floor air sealing | Warm household air continues leaking upward regardless of roof vent upgrades | Air seal penetrations (pot lights, plumbing stacks, wiring) before adding ventilation |
DIY Fixes vs. When to Call a Professional
Some ventilation improvements are genuinely manageable for a comfortable, careful homeowner. Others require roof access, precise cutting into the roof deck, or an understanding of how airflow moves through your specific attic — and getting those wrong can create new problems rather than solving old ones.
Reasonable DIY tasks include clearing insulation away from existing soffit vents from inside the attic, installing simple foam rafter baffles, and checking whether bathroom fans are ducted to the exterior. These don’t require roof access and carry low risk if done carefully.
Tasks better left to a professional include cutting a continuous ridge vent slot into roof sheathing, calculating and balancing net free area across a whole roof system, installing powered attic fans that require electrical wiring, and diagnosing whether gable vents are helping or hurting your specific setup. These jobs involve working at height, cutting into structural roof components, and judgment calls that come from having assessed hundreds of similar attics.
If you’re ever unsure which category a fix falls into, it’s worth having a technician take a look before starting. A quick professional assessment is inexpensive compared to the cost of correcting a ventilation system that was modified incorrectly. You can read about the kinds of results other GTA homeowners have seen on our reviews page, or browse common questions on our FAQ page before booking an assessment.
Seasonal Timing for Ventilation Upgrades in the GTA
Summer is an ideal time to address ventilation issues for a simple reason: the problems are at their most obvious. Attic heat buildup, cooling bill spikes, and shingle heat damage all show up most clearly during warm months, making it easier for a technician to diagnose exactly where airflow is failing.
It’s also practical from a scheduling standpoint. Roofing contractors across Toronto and the surrounding regions tend to be less booked with emergency winter leak repairs during the summer, which means ventilation upgrades can often be scheduled and completed before the fall, well ahead of the freeze-thaw cycles that make ice damming and attic condensation worse each winter. Addressing ventilation now, rather than waiting for the first cold snap, gives any new system a full season to prove itself before it’s tested by winter conditions.
That said, ventilation assessments and most upgrades can be performed nearly any time of year as long as the roof surface itself is safe to access. If you’re already having other roof work done in the fall or spring, it’s worth asking your contractor to check attic airflow at the same time.
How Universal Roofs Approaches Ventilation Assessments
Every ventilation assessment we perform starts with a full attic inspection — checking insulation depth and placement, existing vent types and condition, evidence of past moisture problems, and how bathroom or kitchen exhaust is currently ducted. From there, we calculate the net free area your specific attic actually needs and compare it against what’s currently installed, rather than assuming a one-size-fits-all fix.
Because ventilation problems are so often discovered alongside other roofing needs, we frequently find and fix them during scheduled maintenance, a roof repair visit, or a full roof replacement. If your attic includes finished space, a attic conversion, or complex rooflines with multiple valleys and dormers, we factor that complexity into the ventilation plan rather than applying a standard ridge-and-soffit calculation that might not fit your home.
Our technicians serve homeowners across Toronto, Peel Region, York Region, Halton Region, and Durham Region, and every assessment includes a clear explanation of what’s happening in your attic, what it’s costing you in comfort and energy bills, and what practical steps will actually fix it — not just a list of products to buy.
If you’d like to learn more about how we work or see examples of past projects, our about page has additional background on our team and history serving the GTA since 2005.
Maintaining Your Ventilation System Long-Term
Once your ventilation system is properly balanced, a small amount of ongoing maintenance keeps it working correctly for years. Check soffit vents from inside the attic once or twice a year to confirm insulation hasn’t shifted or been pushed against them during other attic work. Clear leaves, debris, and pest nests away from exterior soffit and ridge vent openings, particularly after autumn leaf-fall. If you have a powered attic fan, test that it’s activating properly at the start of each summer season.
It’s also worth having your attic ventilation re-evaluated any time you add insulation, finish part of the attic for living space, install a new skylight, or complete a full re-roof, since each of these changes can shift the balance between intake and exhaust that your system was originally designed around.
What are the most effective ways to enhance roof ventilation on an older home?
How much does it cost to improve roof ventilation in the GTA?
Can I improve attic ventilation myself, or do I need a professional?
How do I know if my roof has enough ventilation?
Does better roof ventilation actually lower cooling costs in summer?
What is the best time of year to upgrade roof ventilation in Toronto?
Need Help With Easy Ways to Enhance?
Whether your attic is running hot in the summer heat or showing early signs of moisture damage, Universal Roofs can assess your current ventilation setup and recommend exactly what your home needs — nothing more, nothing less.
Call us today at (416) 732-2421 or request a free inspection to get started.
Universal Roofs proudly serves Toronto, Mississauga, Brampton, Vaughan, Markham, Oakville and the GTA since 2005.