
A roof leak never waits for business hours. It shows up as a dark stain spreading across the ceiling during a July thunderstorm, a steady drip landing on the kitchen counter, or shingles peeling back after a wind gust off Lake Ontario. When it happens, the first ten minutes matter more than most homeowners realize — what you do before a roofer arrives can be the difference between a simple patch and a five-figure interior repair bill.
This guide walks through exactly how to respond when a roof emergency hits: how to assess the damage safely, what temporary measures actually work (and which ones make things worse), how fast a professional crew should respond, and what happens during a proper emergency repair visit. We wrote this from decades of GTA callouts — the kind of calls that come in at 11 p.m. during a summer downpour or the morning after an ice storm.
If you’re dealing with an active leak right now, skip to the quick-response checklist below. If you want the full picture — what causes emergencies, how contractors triage them, and how to prevent the next one — keep reading.
What Actually Counts as a Roof Emergency
Not every roofing problem needs a same-day callout, and knowing the difference saves homeowners money and stress. A true roof emergency is any situation where water is actively entering the building envelope, or where structural integrity is compromised to the point of imminent failure. In our two decades serving Toronto and the surrounding GTA, the calls that qualify as genuine emergencies fall into a fairly predictable set of categories.
Active interior water intrusion — visible dripping, a bulging or sagging ceiling patch, or water tracking down an interior wall — is always an emergency. So is any large hole or missing section of roofing material exposed after a storm, since it leaves the attic and insulation open to whatever weather follows. Falling or partially detached shingles, torn flashing around a chimney or skylight, and a tree limb resting on the roof deck all warrant urgent attention, even if no water has entered yet.
On the other hand, a single curled shingle noticed during a routine gutter cleaning, minor granule loss in the driveway, or a small hairline crack in old flashing sealant are legitimate concerns worth booking a standard inspection for — but they are not emergencies. Distinguishing between the two matters because emergency response is triaged differently than scheduled work, and understanding which category you’re in helps you communicate clearly with whoever you call.
The First 15 Minutes: Immediate Homeowner Actions
Before any contractor arrives, there are safe, sensible steps a homeowner can take to limit damage. None of these involve climbing onto a wet or storm-damaged roof — that step is for trained crews wearing proper fall protection, full stop.
Start indoors. If water is coming through the ceiling, place a bucket or large container directly under the drip and move any furniture, electronics, or valuables out from beneath the affected area. If the ceiling is visibly bulging with trapped water, it is often safer to puncture a small controlled hole at the lowest point of the bulge with a screwdriver, directing the water into a bucket — this prevents an uncontrolled ceiling collapse that can happen with no warning once drywall becomes saturated. Photograph everything as you go: the ceiling stain, the bucket catching water, any visible exterior damage from the ground. These photos matter enormously for insurance claims later.
Next, if it is safe to do so from the ground or a window, take exterior photos of the roof area in question. Do not go up a ladder in wind, rain, or darkness. If you can see obvious storm debris such as branches, torn shingles on the lawn, or a section of flashing that has blown loose, note the location relative to visible landmarks (a dormer, a chimney, a specific window) so you can describe it accurately over the phone.
Finally, shut off power to any electrical fixtures or outlets directly beneath the leak if you can do so safely at the breaker panel. Water and electricity are a dangerous combination, and this single step prevents a shock or fire hazard while you wait for help.
| Situation | Homeowner Action | Wait For a Professional? | Priority Level |
|---|---|---|---|
| Active ceiling drip | Bucket underneath, move belongings, photograph | Yes, for roof access | Emergency — same day |
| Bulging, water-filled ceiling | Controlled puncture at low point into bucket | Yes | Emergency — same day |
| Missing shingles after storm | Photograph from ground, note location | Yes, for tarping and repair | Urgent — within 24 hours |
| Tree limb resting on roof | Keep people and pets away from the area | Yes, before any limb removal | Emergency — same day |
| Single curled or lifted shingle, no leak | Note location, monitor for changes | Standard inspection is fine | Routine — within 1-2 weeks |
| Minor granule loss in gutters | Note during regular maintenance | Standard inspection | Routine — seasonal check |
Calling for Emergency Roof Repair: What to Say and What to Expect
When you call a roof repair emergency line, the person on the phone is trying to gather enough information to send the right crew with the right materials on the first trip — nothing slows a repair down more than a truck arriving without the correct underlayment or flashing size for the job. Be ready to describe the age of your roof if you know it, the type of roofing material (asphalt shingle, flat membrane, metal), roughly where the leak or damage is located relative to the house, and whether water is actively entering right now or was a past event.
A properly run emergency response follows a predictable sequence. Dispatch takes the call and triages severity — active water intrusion and structural hazards jump the queue ahead of cosmetic damage. A crew is assigned and given an estimated time of arrival, which for genuine emergencies in the Toronto core should be same-day and often within a few hours during daylight. On arrival, the crew performs a rapid visual and, where safe, a rooftop assessment, followed immediately by temporary weatherproofing — tarping, temporary flashing, or sealant — to stop the water ingress. A full repair or replacement quote is prepared once the immediate danger has been neutralized, and permanent repair work is scheduled, often for the same or next business day.
Response time targets vary by company and by how the emergency is defined, but the industry benchmark for a legitimate emergency roofing service in a dense urban market like the GTA is arrival within two to four hours for active leaks during business hours, and same-day for anything reported before early evening.
| Response Stage | Typical Timeframe | What Happens | Homeowner Involvement |
|---|---|---|---|
| Initial call / triage | Under 5 minutes | Dispatch gathers details, assigns priority | Describe the issue, location, roof type |
| Crew dispatch | 15-60 minutes | Nearest available crew assigned and routed | Confirm access to the property |
| On-site arrival | 2-4 hours (same day) | Visual inspection, safety assessment | Point out interior damage location |
| Temporary weatherproofing | 30-90 minutes on site | Tarp, temporary flashing, sealant applied | Approve emergency stabilization scope |
| Permanent repair | Same day to 2-3 days later | Full repair or replacement completed | Review and approve final quote |
Temporary Fixes That Work — and Ones That Don’t
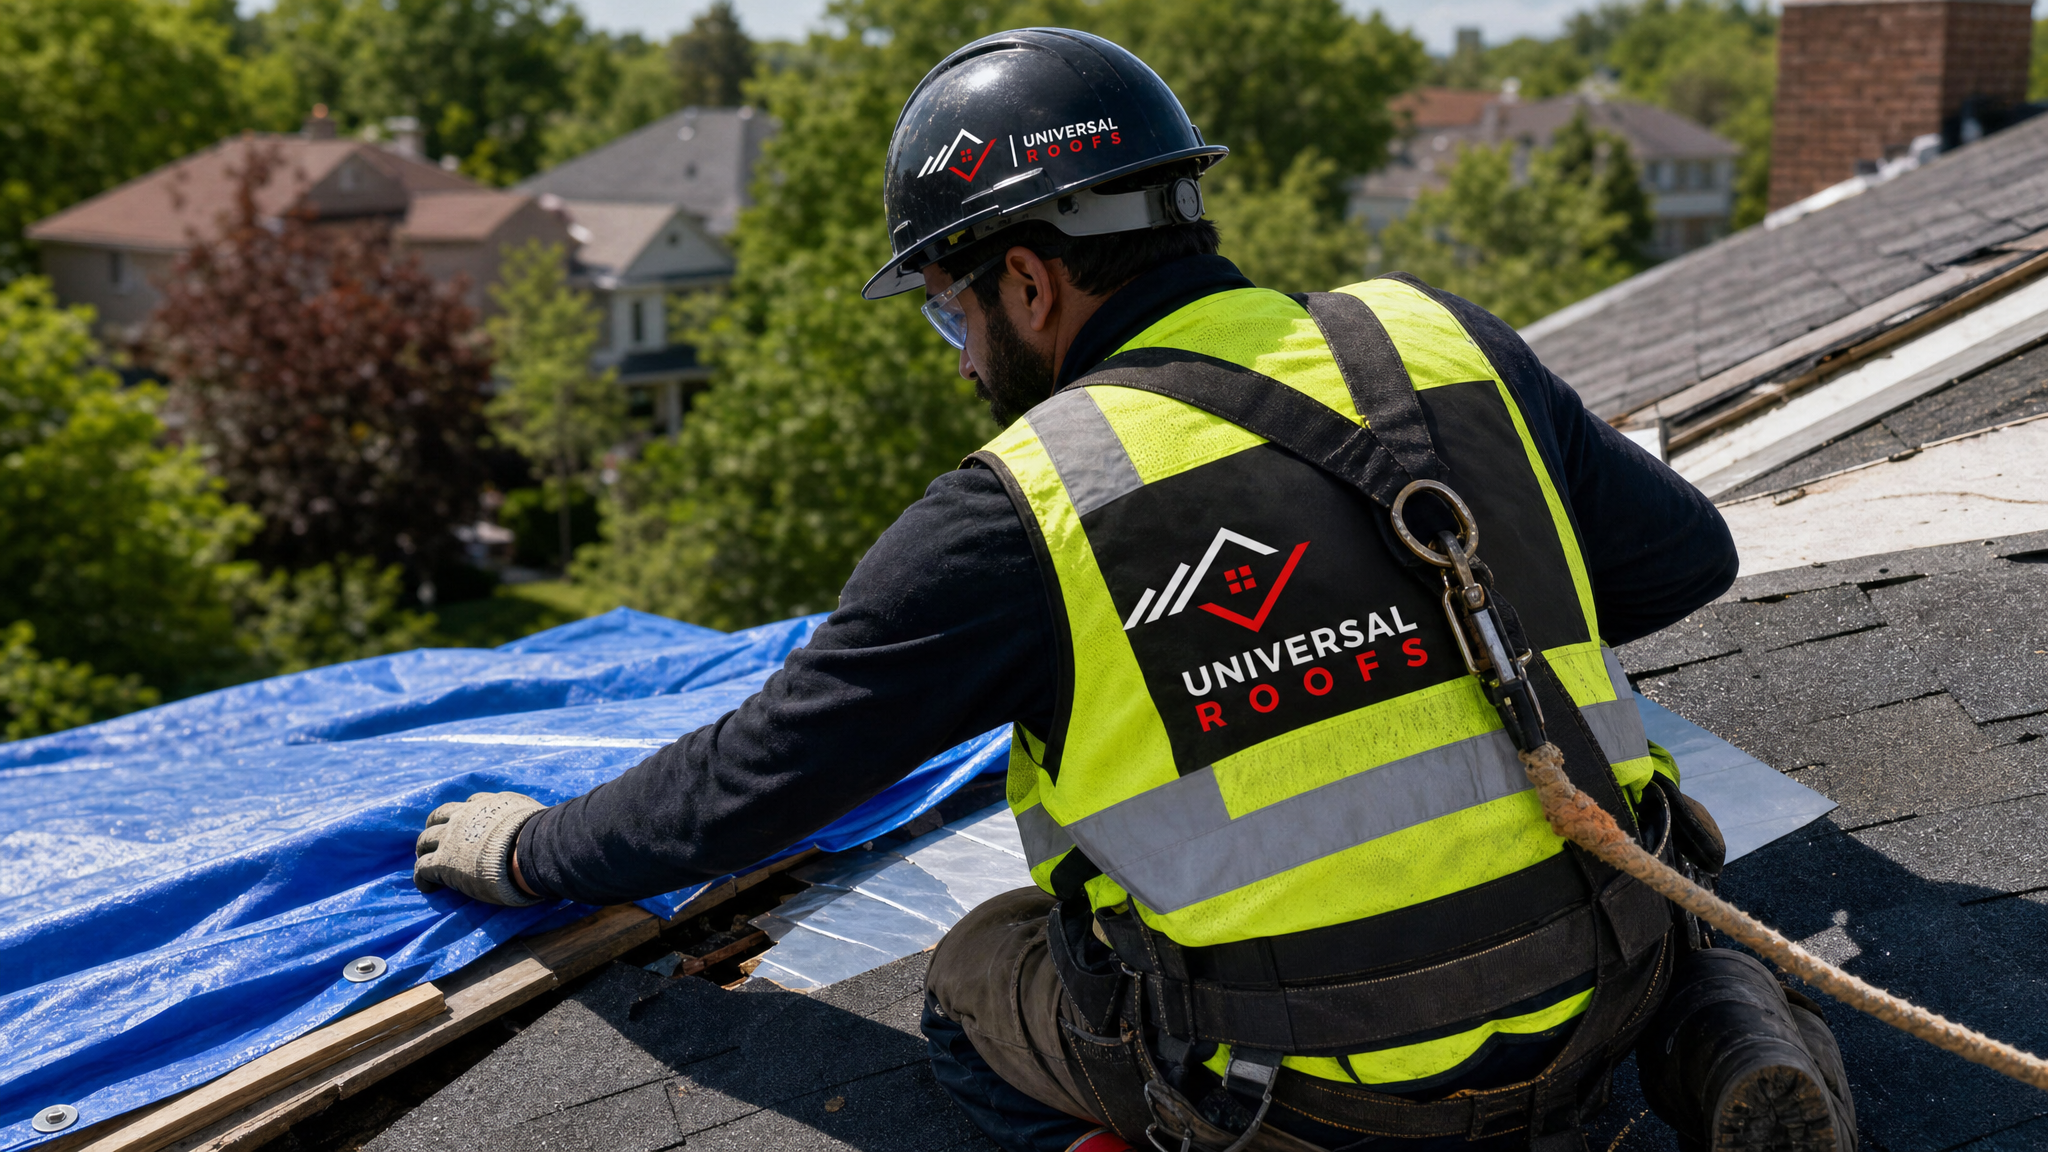
Homeowners often ask whether they should attempt a temporary fix themselves before a crew arrives, especially if the emergency happens overnight or during a long weekend. The honest answer is that most effective temporary weatherproofing requires roof access, which means it requires fall protection, proper footwear, and an understanding of how water actually moves under shingles and membranes — water rarely enters exactly where it appears on the ceiling, since it travels along rafters and sheathing before dripping through drywall.
That said, there are a few interventions that are genuinely safe and useful from ground level or attic access. Inside the attic, sliding a plastic sheet or tarp beneath an active drip point (found by following insulation staining upward toward the roof deck) can redirect water into a container rather than letting it soak insulation and framing further. From the ground, clearing debris away from downspouts and eavestroughs during a storm can reduce the volume of water pooling near vulnerable roof edges. If a window or skylight seal has failed, towels along the interior sill limit water spreading to flooring while you wait.
What does not work, and often makes things worse, is climbing onto a wet or storm-affected roof without training and gear, applying generic caulking or asphalt roofing cement over a shingle that needs to be properly lifted and re-secured (this frequently traps moisture underneath and accelerates rot), or using duct tape as a “temporary membrane” — it fails within hours in wet conditions and leaves adhesive residue that complicates the proper repair later. Tarping done incorrectly, without securing every edge and without protecting the tarp from wind lift, can also cause secondary damage when it whips loose in a storm.
| Method | Effectiveness | Risk Level | Recommended? |
|---|---|---|---|
| Attic-side plastic sheeting under drip | Good short-term water redirection | Low (no roof access needed) | Yes, while waiting for a crew |
| Professional tarp with secured edges | Excellent, industry standard | Low when done by trained crew | Yes, this is the standard emergency measure |
| Roofing cement smeared over shingle | Poor, often traps moisture | Medium — can worsen rot | No |
| Duct tape over leak point | Fails within hours when wet | Low risk, but ineffective | No |
| DIY climb onto wet/storm-damaged roof | N/A | High — fall hazard | No, always call a professional |
Common Causes of Emergency Roof Failures in the GTA
Understanding why emergencies happen helps homeowners recognize early warning signs before a full failure occurs. In Toronto and the wider GTA, our freeze-thaw climate is the single biggest driver of sudden roof failures. Water that gets beneath shingles in autumn can freeze in a January cold snap, expand, and force material apart — then a spring thaw or a summer downpour finds the new gap and the leak appears seemingly out of nowhere. Ice damming along the eaves in winter is a classic precursor to spring and early-summer leaks that homeowners often can’t connect back to the original cause.
Summer brings its own emergency triggers: severe thunderstorms with high wind gusts can lift shingle tabs or peel back sections of membrane roofing, especially on roofs already weakened by age or prior minor damage. Hail, though less frequent here than on the prairies, does occur in GTA summer storms and can bruise or crack shingles in ways that aren’t obvious until a leak develops weeks later. Falling branches during wind events are one of the most common single causes of sudden, dramatic roof breaches that require same-day tarping.
Age-related failure is the quieter cause behind many “sudden” emergencies. A roof nearing or past the end of its expected service life has less reserve capacity to handle a hard rain or wind event — what would have been a non-issue on a five-year-old roof becomes a full breach on a twenty-year-old one. This is why we always recommend a proactive roof replacement assessment once a roof is approaching the upper end of its rated lifespan, rather than waiting for an emergency to force the decision.
Flat and low-slope roofs, common on additions, garages, and some commercial-style GTA homes, fail differently than sloped shingle roofs — ponding water, membrane seam separation, and blocked drains are the usual suspects. If your property has a flat roofing section, it’s worth having it inspected separately, since flat roof emergencies often present as slow, hard-to-locate leaks rather than the obvious dramatic breach of a sloped roof.
Skylights and roof penetrations are another frequent emergency source. The flashing around a skylight, chimney, or vent stack is where two different roofing systems meet, and that seam is inherently more vulnerable than an unbroken field of shingles. If you notice staining specifically around a skylight, it’s often a flashing issue rather than a problem with the skylight unit itself, though in some cases skylight replacement is the more cost-effective long-term fix if the unit is older and the seals have degraded throughout.
What Happens During a Professional Emergency Repair Visit
Once a crew arrives, the process is methodical even when the situation feels chaotic to a homeowner watching water drip into a bucket. The technician’s first priority is safety — checking wind conditions, roof pitch, wet surfaces, and whether the deck itself is stable enough to walk. On steep or storm-compromised roofs, this often means rigging fall protection and anchor points before any work begins, which can take longer than homeowners expect but is non-negotiable.
The assessment phase identifies not just the visible entry point but the true source, which is frequently several feet upslope from where water appears inside. Crews check flashing at all penetrations, examine shingle or membrane condition around the affected area, and look for secondary damage to the underlying deck or sheathing that might not be visible from the interior yet. This is also when the crew evaluates whether the attic insulation has absorbed water and needs to be addressed — saturated insulation loses its R-value and can promote mould growth if left in place, which connects emergency roof repair to broader attic health.
Temporary stabilization comes next: a properly secured tarp, temporary flashing, or sealant application designed to hold until permanent repair materials and a full crew can be scheduled. This step alone often resolves 90% of a homeowner’s immediate stress, since it stops the active water intrusion even if the “real” repair happens a day or two later. Finally, the crew documents everything with photos for both the homeowner’s insurance file and for planning the permanent repair, and provides a clear, itemized quote before any further work proceeds.
Insurance, Documentation, and Cost Expectations
Emergency roof repairs frequently intersect with home insurance claims, particularly when the cause is a storm, wind event, or falling debris rather than gradual wear. Most Canadian home insurance policies cover sudden and accidental damage from windstorms, hail, or falling objects, but they typically exclude damage from long-term neglect or lack of maintenance — which is another reason documenting the timeline (when you first noticed the issue, what the weather was doing, and photos of both interior and exterior damage) matters so much.
A reputable roofing contractor will provide a detailed written estimate before starting permanent repairs, separate from any emergency stabilization charge, and should be willing to work directly with an insurance adjuster if needed, providing photos, measurements, and a scope of work that matches what the adjuster requires. Be cautious of anyone who pressures immediate payment in full before any inspection has taken place, or who won’t put a scope of work in writing — legitimate emergency response includes clear paperwork, not just a handshake and a tarp.
Costs for emergency response typically include a service call component (covering after-hours or expedited dispatch) plus the cost of temporary materials and labour, with the permanent repair quoted separately once the full scope is understood. Homeowners should expect emergency tarping and stabilization to run a few hundred dollars in most cases, with the full permanent repair varying enormously depending on the extent of damage — from a simple flashing fix to a full section re-roof if water has been infiltrating unnoticed for an extended period.
Preventing the Next Emergency
The best emergency response is the one you never need. A twice-yearly visual check — ideally in spring after winter freeze-thaw cycles and again in early autumn before the next round of storms — catches most developing problems while they’re still routine maintenance rather than emergencies. Look for lifted or missing shingles, granules accumulating in gutters and downspouts, staining on interior ceilings near exterior walls, and daylight visible through the attic where there shouldn’t be any.
Keeping gutters and downspouts clear reduces the water volume that can back up under roof edges during heavy summer storms, and trimming back tree limbs that overhang the roofline removes one of the most common causes of sudden storm damage. If your roof is approaching or past 15-20 years old (the typical range for asphalt shingles in our climate), a proactive professional inspection is worth scheduling well before you’re relying on it to survive the next major storm.
For homeowners across the region, we recommend a baseline inspection appropriate to your area’s typical weather exposure — whether that’s Toronto‘s dense urban wind corridors, the Peel Region‘s mix of older and newer housing stock, the York Region‘s more exposed suburban lots, the Halton Region‘s lakeside weather patterns, or the Durham Region‘s wider range of roof ages. Local exposure genuinely affects how often a roof needs checking, and a contractor familiar with your specific area will know what to look for first.
You can also read what past customers experienced during both routine and emergency work on our reviews page, and check our FAQ page for answers to more specific questions about warranty coverage, material options, and scheduling. To learn more about who we are and how long we’ve served the GTA, visit our about page.
Building Your Own Emergency Response Plan
Every homeowner benefits from having a simple plan in place before an emergency happens, rather than scrambling to figure it out during a storm. Keep the phone number of a trusted local roofer saved in your phone, not just bookmarked on a computer you might not have access to during a power outage. Know where your main electrical panel is and how to shut off power to a specific circuit safely. Keep a few heavy-duty tarps, a bucket, and a flashlight in an accessible location — not buried in the back of a garage — so you’re not searching for basic supplies while water is actively entering your home.
It also helps to know your roof’s basic facts ahead of time: approximate age, material type, and whether it has flat sections, skylights, or other penetrations, since this information speeds up triage enormously when you’re calling for help under stress. Homeowners who’ve had a professional inspection in the past year or two also have a head start, since a contractor with prior familiarity with your roof can often diagnose an emergency faster over the phone and arrive with the right materials already loaded.
Finally, resist the urge to treat every roof concern as equally urgent, and equally resist the urge to ignore genuine warning signs because a problem seems minor. The tables above are a useful reference, but when in doubt, a quick call to a professional roofer costs nothing and can prevent a small issue from becoming an expensive one.
What is the fastest way to get emergency roof repair quick response in Toronto?
Should I try to fix a roof leak myself before help arrives?
How much does emergency roof repair typically cost?
Will home insurance cover emergency roof repair?
What are the warning signs that a roof emergency is developing?
How quickly should a professional respond to an active roof leak?
Need Help With Emergency Roof Repair Quick?
Whether you’re facing an active leak right now or simply want a professional set of eyes on your roof before the next storm rolls through, Universal Roofs has the experience and local crews to respond quickly and get it done right the first time.
Call us today at (416) 732-2421 or request a free inspection to get started.
Universal Roofs proudly serves Toronto, Mississauga, Brampton, Vaughan, Markham, Oakville and the GTA since 2005.