
A summer thunderstorm rolls through the GTA, the wind gusts past 90 km/h, and before the rain even lets up you hear the crack of a branch or an entire tree coming down on your roof. It is one of the most stressful moments a homeowner can face, and what you do in the first few hours often determines whether you are looking at a straightforward repair or a much larger, more expensive rebuild. These essential tips for emergency roof repair after fallen trees are drawn from years of storm-response calls across Toronto, Mississauga, Vaughan, and the surrounding region, and they are designed to walk you through exactly what to do from the moment the tree lands to the day your roof is fully restored.
Fallen trees are one of the most common causes of sudden, severe roof damage in the GTA. Mature silver maples, ash trees weakened by the emerald ash borer, and old-growth oaks are common throughout older Toronto neighbourhoods, and many of them tower directly over rooflines. When wind, ice, or simple age brings one down, the damage can range from a few cracked shingles to a punctured deck, broken trusses, and exposed interior rooms. Knowing how to respond safely and in the correct order protects your family, your belongings, and your insurance claim.
In this guide we walk through the seven essential steps for emergency roof repair after fallen trees, along with the safety hazards to watch for, how professionals assess and tarp storm damage, what a typical repair timeline and cost range looks like, and how to work with your insurance company so the claims process goes smoothly. Whether the damage is a single broken branch through a soffit or a full tree trunk resting on your rafters, this is the roadmap to follow.
1. Confirm Everyone Is Safe Before You Look at the Roof
The very first of these essential tips for emergency roof repair after fallen trees has nothing to do with the roof itself. Before anyone steps outside or even looks up at the damage, account for every person and pet in the home. Move everyone away from the area directly under the fallen tree and away from any room where the ceiling is sagging, cracked, or dripping water. A compromised roof structure can continue to fail for hours after the initial impact, and a partial collapse is far more dangerous than the original strike.
If the tree has torn down power lines, treat every wire as live and stay at least 10 metres away, even if the line looks dead. Call Toronto Hydro or your local utility immediately, and do not attempt to move branches that are touching any wire. If you smell gas, hear hissing near a gas meter or line, or see sparking, evacuate the property and call 911 and your gas utility from a safe distance before doing anything else.
Once everyone is confirmed safe, check for structural warning signs from inside the home: new cracks in ceiling drywall, doors or windows that suddenly stick, visible daylight through the attic, or a spongy feel underfoot on the upper floor. Any of these mean you should stay out of that portion of the house and call a professional roofing contractor before re-entering.
2. Never Climb Onto a Storm-Damaged Roof Yourself
It is tempting to grab a ladder and assess the damage up close, but this is the single most common way homeowners get seriously hurt after a tree falls on their roof. A trunk or heavy limb can shift, roll, or continue to settle for hours or even days after impact, and a deck that looks intact from the ground may already be cracked or partially detached from the trusses underneath. Wet shingles, moss, and sawdust from the broken branches make footing extremely unpredictable, and a fall from a pitched roof is one of the leading causes of serious injury during storm cleanup season in Ontario.
Instead, do a visual inspection from the ground, from an upstairs window, or with binoculars. Take photos and video from multiple angles for your insurance file, but leave the physical inspection, tarping, and branch removal to a licenced roofing contractor and, where a large trunk section is involved, a certified arborist or tree removal crew. Professional crews carry fall-protection harnesses, safety ropes, and the training to know where a roof structure is still load-bearing and where it is not — something that is genuinely difficult to judge from the ground or from a quick look on a ladder.
If you run a Universal Roofs emergency call, our crews arrive with the equipment to assess both the visible surface damage and the underlying deck and truss condition before anyone sets foot on the roof plane itself.
3. Document the Damage Thoroughly Before Anything Is Moved
Once it’s safe, documentation becomes one of the most important of these essential tips for emergency roof repair after fallen trees — and one homeowners most often rush past in the panic of the moment. Insurance adjusters rely heavily on early photo and video evidence, and damage that gets covered by a tarp or partially cleared before it’s documented can slow down or reduce a claim payout.
Walk the perimeter of the house and take wide shots showing the tree in relation to the roof, then move closer for detailed shots of the point of impact, any punctures, broken shingles, bent flashing, or damaged gutters. Photograph the tree itself, including the root ball if it uprooted, since this can matter for determining whether the tree came from your property or a neighbour’s. Get timestamps on your photos (most phones do this automatically) and note the date and approximate time of the storm.
Inside the home, photograph any water stains, ceiling sagging, insulation that has fallen through, or damaged flooring and furniture beneath the impact point. If your attic is accessible and safe to view from the hatch without climbing further in, photograph the underside of the deck and any visible daylight or broken framing members.
| Documentation Item | Why It Matters | Best Method | Timing |
|---|---|---|---|
| Wide exterior shots of tree and roof | Shows scope and origin of damage for adjusters | Phone or camera, multiple angles | Immediately, before any cleanup |
| Close-up shots of punctures and broken shingles | Establishes extent of surface damage | Zoom or walk closer (ground level only) | Same day, in daylight |
| Interior water stains and ceiling sagging | Supports claims for interior damage and contents | Photo plus written notes on room and date first noticed | Within 24 hours |
| Video walkthrough narrating damage | Provides context adjusters can review remotely | Slow, steady video with verbal notes | Same day |
| Contractor’s written damage assessment | Professional documentation adjusters weigh heavily | Licenced roofer’s report and photos | Within 24-48 hours |
4. Get Emergency Tarping in Place Fast
Once the immediate hazards are addressed and the damage is documented, the priority shifts to keeping water out. Even a small puncture from a broken branch can let significant volumes of rain into the attic and living space within a single storm cycle, and secondary water damage — soaked insulation, mould growth, ruined drywall — often ends up costing more to repair than the original structural damage from the tree itself.
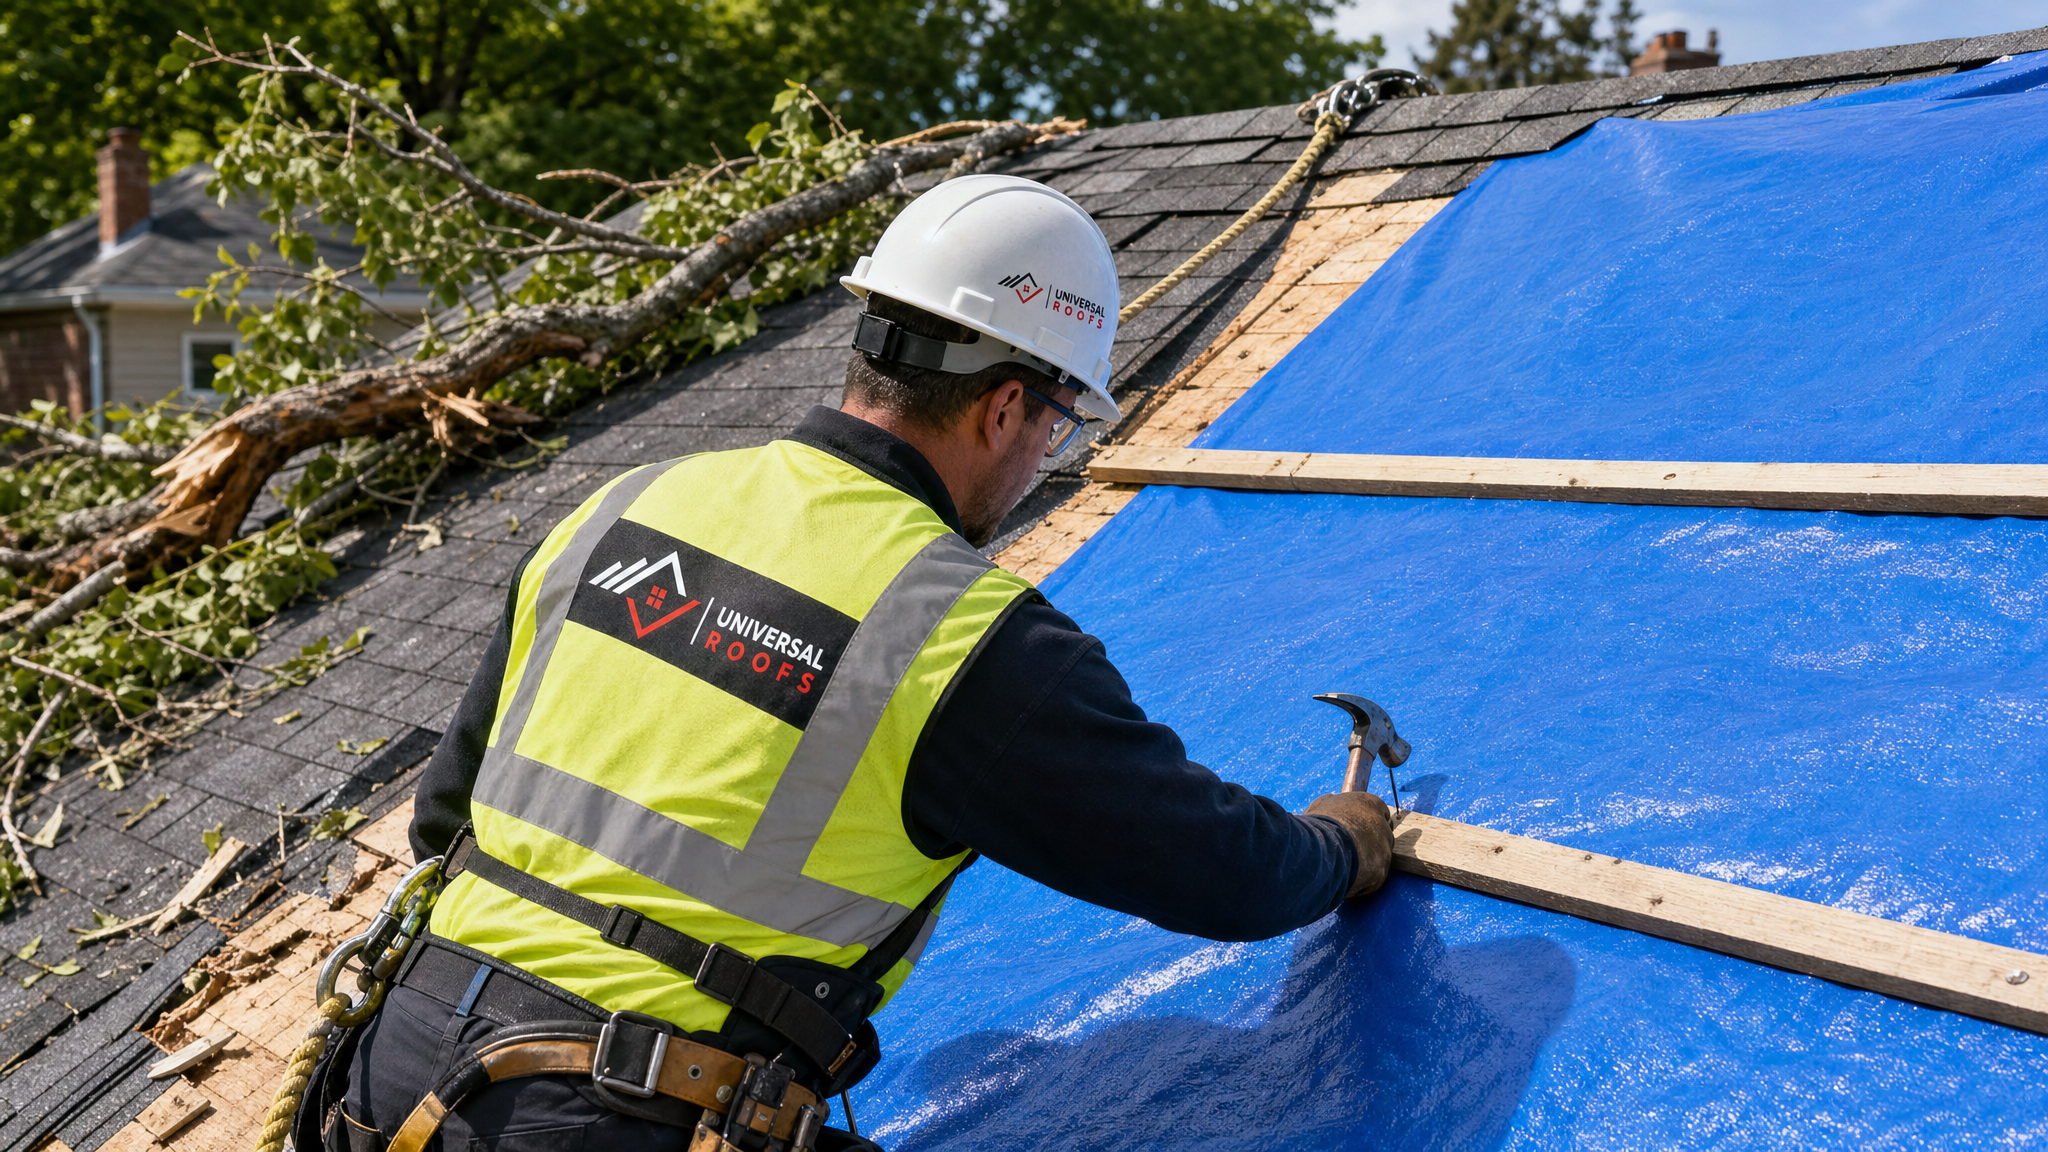
This is why professional emergency tarping is such a critical early step. A properly installed tarp is secured with wood strapping nailed into the roof deck (not just weighted down with bricks or sandbags, which can blow off or shift), extends well past the damaged area on all sides, and is sealed at the edges to shed water rather than trap it. Improperly installed tarps can actually make things worse by channelling water into gaps that weren’t previously exposed.
Most licenced roofing contractors in the GTA, including our own crews, offer 24-hour emergency tarping response specifically because the first few hours after a tree strike are the highest-risk window for water intrusion. If your damage involves a full roof repair down the line, a solid emergency tarp buys the time needed to properly plan materials, permits if required, and scheduling without the home sitting exposed to the next rainfall.
5. Understand the Difference Between Surface Damage and Structural Damage
Not every tree strike is the same, and one of the most important essential tips for emergency roof repair after fallen trees is learning to recognize the difference between damage that affects only the shingles and flashing, and damage that has compromised the deck or the truss system underneath. This distinction drives both the repair scope and the cost, and it’s something only a qualified inspection can confirm with certainty.
Surface-level damage typically includes torn or missing shingles, dented or creased metal flashing, damaged gutters and downspouts, and minor granule loss from smaller branches scraping across the surface. This kind of damage is usually repairable within a day or two and doesn’t require touching the underlying structure.
Structural damage is a different matter entirely. This includes a punctured or cracked roof deck, broken or split rafters and trusses, a sagging ridge line, or any point where you can see daylight from inside the attic. Structural damage almost always requires a licenced contractor to open up the affected section, assess the framing, and rebuild it to code before any new shingles or membrane go back on. In more severe cases involving a full trunk impact, part of the roof may need a broader roof replacement rather than a patch repair, particularly if the existing shingles were already near the end of their service life before the storm.
| Damage Type | Typical Signs | Repair Approach | Estimated Timeline |
|---|---|---|---|
| Minor surface damage | Torn/missing shingles, scuffed granules, bent flashing | Shingle and flashing replacement in the affected section | 1-2 days |
| Moderate surface damage | Damaged gutters, soffit, fascia, and a wider shingle area | Section repair plus gutter and trim replacement | 2-4 days |
| Deck puncture, no truss damage | Visible hole through sheathing, localized soft spot | Deck section cut out and replaced, then reshingled | 3-5 days |
| Truss or rafter damage | Sagging ridge, cracked framing, visible daylight in attic | Structural rebuild by licenced contractor, engineer review if extensive | 1-3 weeks |
| Full trunk impact / large opening | Multi-metre hole, exposed interior, interior water damage | Structural rebuild plus full section or full roof replacement | 2-6 weeks |
6. Work Through the Insurance Claim the Right Way
Most homeowner insurance policies in Ontario cover sudden tree damage to a roof, but how smoothly the claim moves depends heavily on how it’s handled from day one. Call your insurer as soon as possible after the storm — many companies have a 24 or 48 hour preferred reporting window — and give them the documentation gathered in step three. Ask for your claim number, your adjuster’s contact information, and a clear explanation of your policy’s deductible and coverage limits for both structural repair and any interior contents damage.
One detail that surprises many homeowners: if the fallen tree came from a neighbour’s property, your own insurer still generally handles your roof repair claim first (since the damage is to your structure), and any dispute over whose tree it was and who is ultimately liable is typically resolved between the two insurance companies afterward, not something you need to negotiate directly with your neighbour.
Request or hire an independent roofing contractor to provide a written damage estimate separate from the insurance company’s own inspector. Adjusters are working on behalf of the insurer, and a second, contractor-side estimate protects you from being underpaid for the true scope of repair. A reputable local contractor who regularly works with GTA insurers can often help translate the adjuster’s scope of work into an accurate, code-compliant repair plan, and can flag any damage the initial inspection may have missed, such as compromised flashing around a nearby skylight or hidden moisture in the attic insulation.
Keep every receipt related to the incident, including any emergency tarping costs, temporary accommodation if the home was uninhabitable, and tree removal invoices, since many of these are reimbursable under a standard homeowner policy.
7. Choose the Right Contractor to Complete the Permanent Repair
The final and arguably most consequential of these essential tips for emergency roof repair after fallen trees is selecting a qualified, licenced, and insured contractor to carry out the permanent repair — not just whoever answers the phone first or shows up unsolicited at your door in the days after a major storm. Storm-chasing contractors who go door-to-door offering fast, cheap repairs are a well-documented problem across the GTA after major wind and ice events, and their work frequently fails to meet Ontario Building Code requirements or manufacturer warranty terms.
Before hiring anyone, verify they carry valid liability insurance and WSIB coverage, ask for local references or check their reviews, and get a written scope of work that matches or exceeds what your insurance adjuster approved. A contractor who has served the same neighbourhoods for years — through winters, ice storms, and summer wind events — will also understand how local freeze-thaw cycles and Toronto’s building permit requirements affect the repair, particularly for anything involving structural framing.
Universal Roofs has been repairing storm and tree damage across the GTA since 2005, and our crews are equipped to handle everything from a single cracked shingle course to a full structural rebuild after a major trunk impact. If you have questions about your specific situation, our FAQ page covers many of the most common concerns homeowners have during an emergency repair, and our about page has more on our history and licencing.
What a Typical Emergency-to-Permanent Repair Cost Looks Like in the GTA
Costs vary widely depending on the severity of the tree strike, the size of the affected area, and whether structural framing needs to be rebuilt. The table below gives a general sense of what GTA homeowners can expect to budget for each stage, though your insurance deductible may cover some or all of these costs depending on your policy.
| Service Stage | Typical Cost Range (CAD) | Usually Covered by Insurance? | Notes |
|---|---|---|---|
| Emergency tarping (same-day) | $400 – $1,200 | Yes, typically reimbursed | Cost depends on roof size, pitch, and access difficulty |
| Tree removal from roof | $500 – $2,500 | Often, depending on policy wording | Larger trunk sections and crane access increase cost |
| Shingle/flashing section repair | $800 – $3,000 | Yes, minus deductible | Depends on shingle type and area matched to existing roof |
| Deck replacement (localized) | $1,500 – $5,000 | Yes, minus deductible | Includes sheathing, underlayment, and reshingling |
| Structural truss/rafter rebuild | $4,000 – $15,000+ | Yes, with engineer report if required | May require permit and city inspection depending on scope |
Reducing Future Risk After the Repair Is Complete
Once the immediate emergency has been resolved and your roof has been properly repaired, it’s worth taking a few preventative steps so a future storm doesn’t catch you off guard again. Have an arborist assess any large trees near the house for disease, deadwood, or lean, particularly ash trees affected by the emerald ash borer, which has killed a significant number of mature trees across Toronto and the surrounding region over the past decade. Dead or dying trees are far more likely to fail in a wind event than healthy ones.
It’s also a good time to have your full roof inspected rather than just the damaged section, since a tree strike can sometimes reveal that other areas of the roof were already nearing the end of their service life. If you’re in an area prone to heavy wind, ask your contractor about impact-resistant shingle options, and make sure attic ventilation and insulation are in good condition so the repaired section performs the same as the rest of the roof through Toronto’s freeze-thaw winters.
Homeowners across Toronto, the Peel Region, York Region, Halton Region, and Durham Region can request a post-storm inspection as part of the same visit that addresses the tree damage itself, which is often the most efficient way to catch any secondary issues before the next major weather event.
When to Call a Professional Immediately vs. When You Can Wait
Not every branch that lands on a roof requires an emergency, middle-of-the-night callout, but some situations absolutely do. Understanding the difference helps you respond appropriately without either overreacting to minor debris or underreacting to a genuinely dangerous situation.
| Situation | Urgency Level | Recommended Action | Can It Wait Until Morning? |
|---|---|---|---|
| Small branch, no visible penetration or leak | Low | Photograph and schedule a standard inspection | Yes |
| Large limb resting on roof, minor shingle damage | Moderate | Call for same-day assessment, avoid roof access | Usually, if no active leak |
| Visible puncture with active water intrusion | High | Call for emergency tarping immediately | No |
| Full trunk impact with interior ceiling damage | Critical | Evacuate affected rooms, call emergency roofer and insurer | No |
| Tree resting on power lines near roof | Critical | Call utility company and 911 before anything else | No |
What are the most essential tips for emergency roof repair after fallen trees?
How quickly should a tarp be installed after a tree falls on the roof?
Will home insurance cover emergency roof repair after a fallen tree?
How do I know if fallen tree damage is structural or just cosmetic?
Can I remove the tree from my roof myself to save money?
How long does a full roof repair take after fallen tree damage?
Need Help With 7 Essential Tips for?
If a fallen tree has damaged your roof anywhere across the GTA, don’t wait for the next rainfall to find out how much water has already gotten in. Universal Roofs provides emergency tarping, structural assessment, and full repair or replacement for storm and tree damage, with crews trained to work safely at height and document everything your insurance claim will need.
Call us today at (416) 732-2421 or request a free inspection to get started.
Universal Roofs proudly serves Toronto, Mississauga, Brampton, Vaughan, Markham, Oakville and the GTA since 2005.