
A roof leak rarely announces itself where it actually starts. Water can travel along a rafter, wick sideways through insulation, or follow an electrical run for metres before it finally shows up as a brown stain on your ceiling. That gap between “where the water appears” and “where the water gets in” is exactly why the equipment for roof leak detection and repair matters so much. Using the wrong tool, or no tool at all, means a contractor is essentially guessing, and a wrong guess can mean a re-opened roof, a repeat service call, and another round of drywall repair for the homeowner.
For GTA homeowners, this is not an abstract concern. Toronto’s climate puts roofs through repeated freeze-thaw cycles every winter, heavy spring rain, summer thunderstorms with wind-driven rain, and the occasional ice storm. Each of these stresses a roof assembly differently, and each can produce a leak that looks identical from inside the attic but has a completely different root cause and repair. The right diagnostic equipment is what separates a permanent fix from a patch job that fails again in a year.
This guide walks through the actual tools and equipment for roof leak detection and repair that professional roofers rely on, how each one works, when DIY methods are appropriate versus when you need a professional, and what the whole process typically looks like from first inspection to final repair.
Why Roof Leaks Are So Hard to Trace
Before looking at the equipment itself, it helps to understand why leak detection is genuinely difficult. Roofs are assemblies of overlapping layers: shingles or membrane, underlayment, sheathing, sometimes rigid insulation, and then the attic space or cathedral ceiling below. Water entering at a damaged shingle or a failed flashing joint does not necessarily fall straight down. Gravity pulls it downward, but the path of least resistance is usually along a nail shank, down a rafter, across a piece of sheathing, or along a truss chord until it hits something that stops it, like insulation, a joist, or a low point in the deck.
This means the visible stain on a bedroom ceiling might be metres away from the actual point of entry on the roof surface. A homeowner who climbs a ladder and patches the shingle directly above the stain is often patching the wrong spot entirely, which is one of the most common reasons DIY leak repairs fail. Professional roof repair starts with proper diagnosis, not with guessing based on where the damage shows up indoors.
Toronto-area roofs add another layer of complexity. Ice damming, common on homes with inadequate attic ventilation, forces meltwater backward under shingles well above the eave line. Wind-driven rain during summer storms can push water sideways into vertical seams that never leak under normal rainfall. Flat and low-slope roofs, common on additions and garages across the GTA, develop leaks from membrane seams and ponding water that behave nothing like a sloped shingle roof. Each scenario calls for a slightly different diagnostic approach, which is why professional roofers carry a full kit of equipment rather than relying on a single method.
Visual Inspection Tools: Where Every Diagnosis Starts
Every proper leak investigation begins with a careful visual inspection, both from the ground and up close on the roof surface. The equipment here is simpler than people expect, but using it correctly takes experience.
- Binoculars or a zoom-capable camera for an initial ground-level survey, spotting obvious issues like missing shingles, damaged flashing, or debris buildup without immediately climbing.
- Ladders rated for the height and roof pitch, along with proper fall-protection equipment, since a safe inspection is the first requirement, not an afterthought.
- Flashlights and headlamps for attic inspections, where most of the real diagnostic work on a sloped roof actually happens. Water stains, mould, rot, and daylight gaps around penetrations are usually easiest to spot from inside the attic.
- Drone cameras, increasingly used by roofing companies for large, steep, or hard-to-access roofs, giving a full overhead view of shingle condition, flashing, and valleys without the time and risk of a full roof walk.
- A basic probe or awl to check for soft, spongy decking around suspected leak areas, which indicates the plywood or OSB sheathing has already absorbed water and may need replacement, not just a surface patch.
Visual inspection alone catches many leaks, particularly obvious ones like cracked pipe boots, lifted shingle tabs, or separated flashing at a chimney. But plenty of leaks show no visible surface damage at all, which is where the next category of equipment becomes essential.
Moisture Meters and Thermal Imaging: Finding Hidden Water
This is where the real diagnostic equipment for roof leak detection and repair comes into play. Two tools dominate this category on professional job sites.
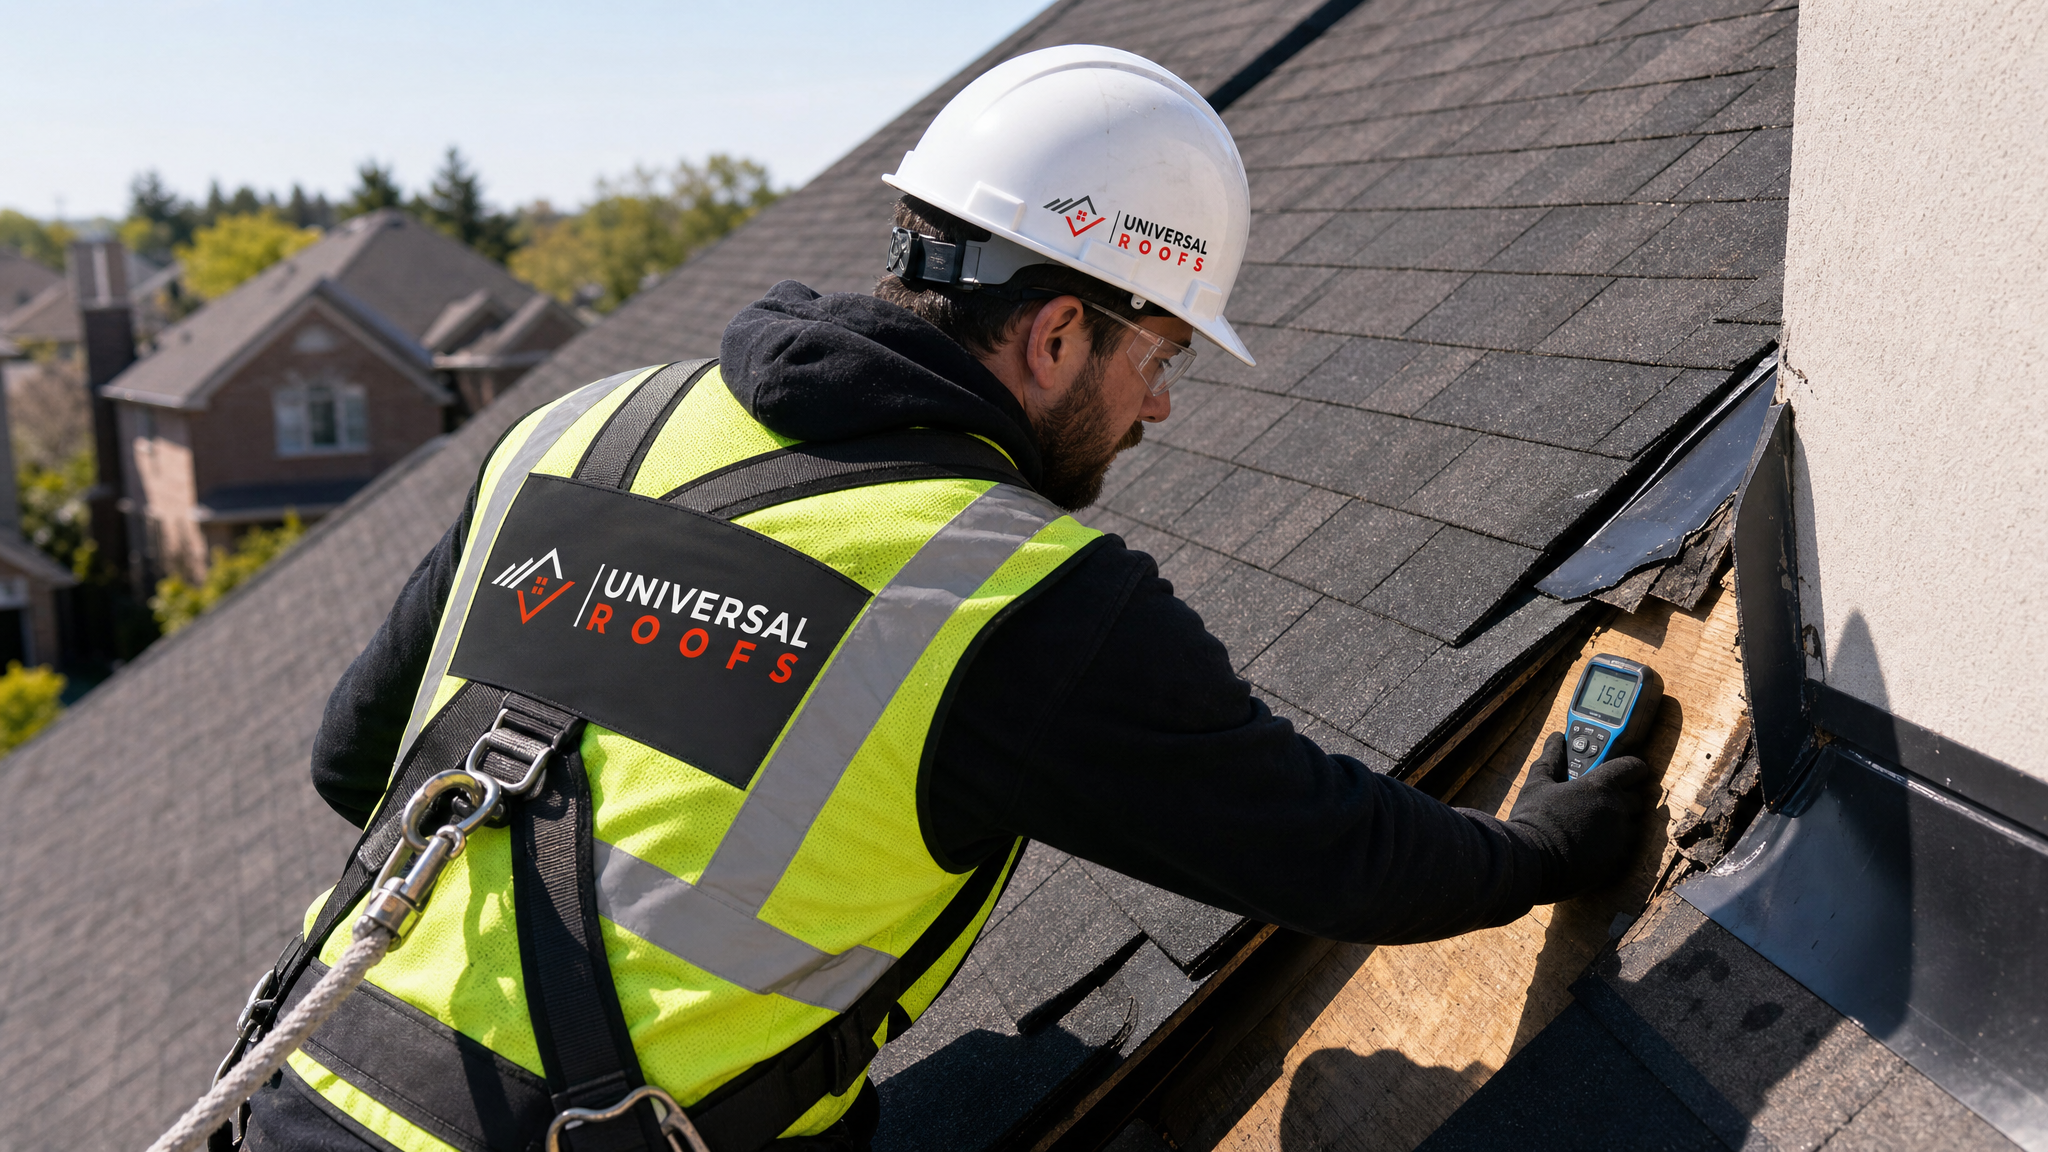
Moisture Meters
A moisture meter measures the moisture content inside wood, insulation, or drywall, either by direct contact with two pins pressed into the material (pin-type) or by reading through the surface using an electromagnetic sensor (pinless). Roofers use these to map out how far water has actually spread through the sheathing and framing, which is critical for two reasons: it shows the true extent of the damage, and it often reveals a moisture gradient that points back toward the entry point, since readings are typically highest closest to where water first entered.
Infrared (Thermal Imaging) Cameras
Infrared cameras detect temperature differences across a surface. Wet insulation and wet wood conduct and hold heat differently than dry material, so a thermal camera pointed at a ceiling or roof deck can reveal a distinct thermal signature where moisture is present, even when the surface looks completely dry and undamaged. This is especially useful for flat and low-slope roofs, where membrane leaks can travel a long way between the entry point and where moisture finally saturates the insulation below.
Thermal imaging works best under specific conditions: a meaningful temperature differential between the roof surface and the surrounding air, typically checked early morning or evening rather than in full midday sun, and a dry exterior surface at the time of scanning (rain within the past day or so can mask results). Professional crews understand these limitations, which is part of why DIY infrared scans with a consumer-grade camera often produce misleading results.
| Detection Method | What It Finds | Best Used On | Typical Cost Range |
|---|---|---|---|
| Visual inspection (ground + roof) | Obvious surface damage, missing shingles, cracked flashing | All roof types | Often included in service call |
| Attic inspection with flashlight | Stains, mould, daylight gaps, rotted decking | Sloped roofs with accessible attics | Often included in service call |
| Moisture meter | Extent and concentration of trapped water in wood/insulation | Sheathing, framing, drywall | $150–$350 as part of a diagnostic visit |
| Infrared thermal camera | Hidden moisture beneath membranes, insulation, or decking | Flat/low-slope roofs, large commercial roofs | $250–$600 as part of a diagnostic visit |
| Controlled water test (hose test) | Confirms a suspected entry point by reproducing the leak | Any roof type with an intermittent leak | $150–$400, sometimes bundled with repair |
| Electronic leak detection (flat roofs) | Pinpoints membrane breaches using low-voltage current | EPDM, TPO, and other flat roof membranes | $300–$700 depending on roof size |
Controlled Water Testing: Reproducing the Leak on Purpose
When visual inspection and moisture readings narrow the search but don’t pinpoint an exact source, roofers turn to a controlled water test, often called a hose test. This involves systematically wetting sections of the roof with a garden hose, working from the bottom of a suspected area upward in stages, while a second person watches inside the attic or interior space for signs of the leak reappearing. Each section is tested for several minutes before moving to the next, since it can take time for water to travel and show up indoors.
This method is slow and requires two people communicating clearly (often by phone or radio), but it is one of the most reliable ways to confirm exactly where a leak originates, particularly around complex areas like chimney flashing, valleys, skylight curbs, or dormer walls. It is also one of the few methods that can reliably reproduce an intermittent leak, one that only appears under specific wind and rain conditions, on demand.
For flat and low-slope roofs, professionals often use electronic leak detection instead. This method involves flooding the roof surface with a shallow layer of water and running a low-voltage current across the membrane; because most flat roof membranes are non-conductive, any point where the current passes through indicates a breach. This is far more precise than a hose test on a membrane roof and is standard practice for commercial and larger residential flat roofing systems.
Repair Equipment: From Sealants to Full Section Replacement
Once the source is confirmed, the equipment shifts from detection to repair. What gets used depends heavily on what caused the leak and how extensive the damage is.
| Repair Type | Equipment/Materials Used | When It’s Appropriate |
|---|---|---|
| Flashing repair or replacement | Sheet metal, tin snips, roofing nails, sealant gun, butyl tape | Chimneys, valleys, walls, skylight curbs with separated or corroded flashing |
| Shingle replacement | Pry bar, roofing nail gun, matching shingles, roofing cement | Cracked, curled, or missing shingles from wind or age |
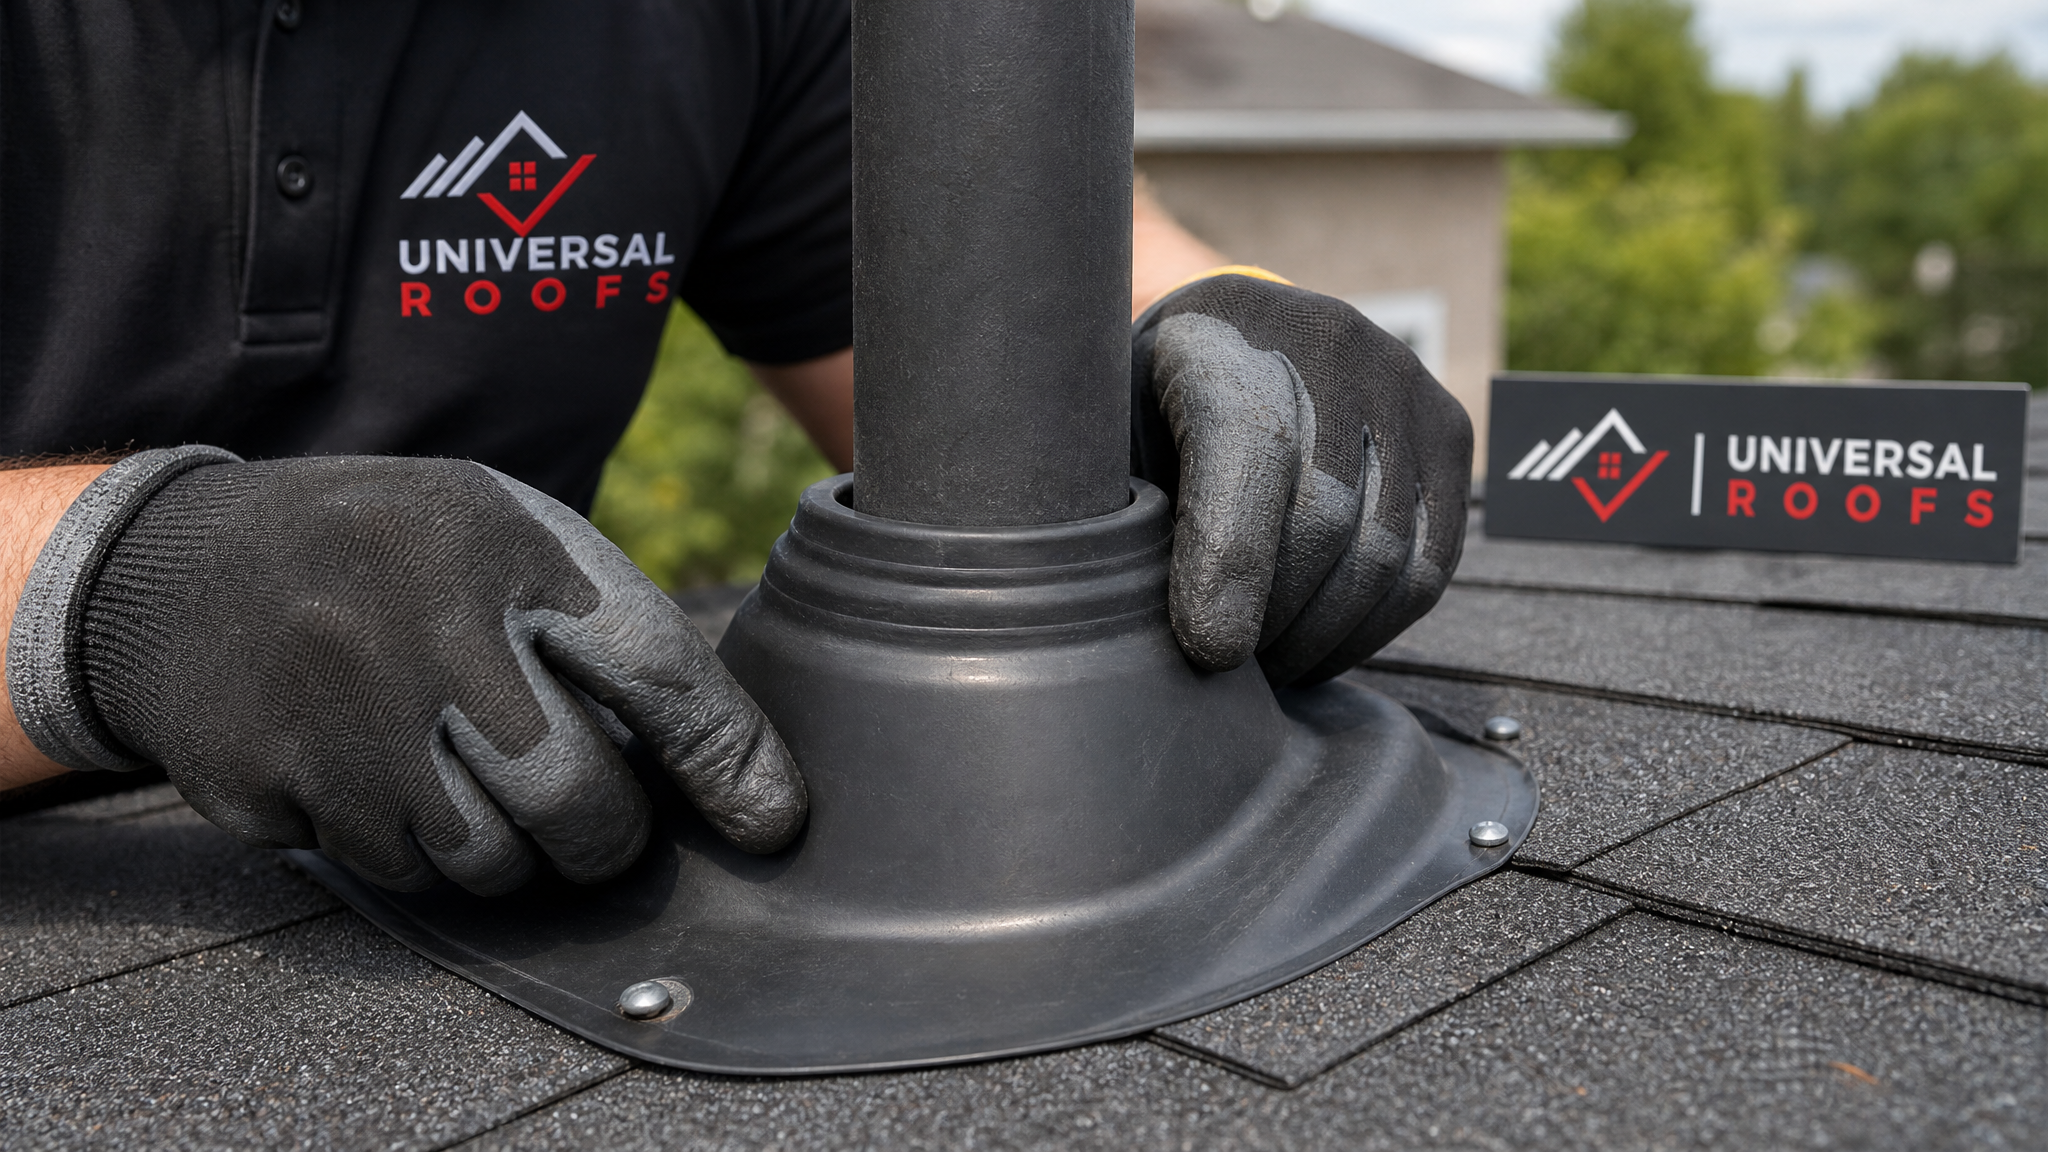
| Pipe boot / vent seal replacement | Utility knife, new boot assembly, sealant | Cracked rubber collars around plumbing and exhaust vents, a very common leak source |
| Sheathing/decking repair | Circular saw, replacement OSB/plywood, construction adhesive, framing nails | Soft or delaminated decking found during moisture testing |
| Membrane patching (flat roofs) | Heat welder or adhesive, patch material matched to membrane type, seam roller | Localized seam failures or punctures on EPDM/TPO roofs |
| Full section tear-off and reinstall | Full roofing crew tools, underlayment, matching shingles or membrane | Widespread damage beyond what spot repair can address |
Sealants and roofing cement have their place, but they are frequently misused by DIYers as a universal fix. A tube of roofing sealant over a cracked pipe boot might buy a season, but it is not a substitute for replacing the boot itself. Professional crews use sealant to finish and weatherproof a proper mechanical repair, not to hide a problem that needs actual material replacement.
DIY Detection vs. Calling a Professional
Homeowners can reasonably handle some early-stage detection work themselves, but there is a clear line where professional equipment and experience become necessary.
Reasonable DIY steps include a visual check of the attic with a flashlight after a rainstorm, looking for fresh water stains, and a ground-level binocular scan for obviously missing or damaged shingles. Beyond that, most homeowners run into real limits. Moisture meters and thermal cameras require calibration and interpretation experience to avoid false readings from condensation, sun exposure, or normal seasonal humidity. Walking a roof safely requires the right harness, anchor points, and roof-specific footwear that most households simply don’t own. And a hose test done incorrectly, testing the wrong section or not waiting long enough, can produce a false negative that leads a homeowner to believe a problem is fixed when it isn’t.
There’s also a cost-of-error issue. A missed or misdiagnosed leak keeps causing damage every time it rains, and that damage compounds. Wet insulation loses R-value and can promote mould growth. Saturated sheathing weakens over time and eventually needs full replacement instead of a patch. What starts as a $300 diagnostic and repair can become a multi-thousand-dollar sheathing and insulation job if the actual source goes unaddressed for a season or two.
If you’re seeing recurring stains, a leak that only shows up in certain wind conditions, or any sign of water near a skylight or chimney, it’s worth having it looked at properly rather than repeatedly patching from the inside. Our skylights and attic pages cover two of the most common leak-prone areas in more detail if you want to understand what’s typically involved.
The Step-by-Step Professional Process
Understanding how these tools fit together into an actual service call helps set expectations for what a proper leak diagnosis and repair should look like.
- Initial consultation and history. The technician asks when the leak first appeared, whether it correlates with wind direction, rain intensity, or recent ice buildup, and whether any recent roof work, HVAC installation, or storm damage preceded it.
- Ground and attic visual inspection. A walk of the exterior and a look through the attic with a flashlight, checking insulation, sheathing, and framing for staining or softness.
- Moisture mapping. Using a moisture meter (and thermal camera where appropriate) to trace the extent of water intrusion and narrow down the likely entry zone.
- Roof surface inspection. A careful walk of the roof itself, checking flashing, shingles, seams, and penetrations in the narrowed-down area.
- Controlled water test if needed. Used when the source still isn’t obvious, systematically wetting sections while watching for the leak to reappear indoors.
- Repair execution. Once confirmed, the appropriate repair, flashing replacement, shingle replacement, membrane patch, or decking repair, is carried out with matching materials.
- Post-repair verification. A final check, sometimes including a second water test, to confirm the leak is genuinely resolved before the crew leaves.
This process is the same in principle whether the work is being done through roof repair on an existing roof, as part of a broader roof replacement project, or as targeted skylight replacement around a leaking curb. The equipment might shift slightly depending on the roof type, but the diagnostic discipline stays the same.
Preventing Leaks Before They Start
The best use of leak detection equipment is often preventive rather than reactive. A yearly or twice-yearly inspection, ideally in spring after the freeze-thaw season and again in fall before winter, catches small issues like lifting shingle tabs, cracked pipe boots, and early flashing separation before they become active leaks.
A few maintenance habits go a long way for GTA homeowners:
- Keep gutters and downspouts clear so water isn’t backing up under the eave edge, a major contributor to ice damming in winter.
- Check attic ventilation. Poor airflow contributes to both ice damming and condensation, which can mimic a leak even when the roof surface is intact.
- Inspect flashing around chimneys, skylights, and vent stacks annually, since these penetrations are the single most common leak source on sloped roofs.
- Trim overhanging branches that can abrade shingles or drop debris into valleys.
- Address minor issues immediately rather than waiting, since a small flashing gap that costs a few hundred dollars to fix now can lead to a multi-thousand-dollar sheathing repair later.
Homeowners in the wider region, from the Peel Region to York Region, Halton Region, and Durham Region, deal with essentially the same freeze-thaw and storm patterns as the Toronto core, so the same inspection schedule and equipment apply regardless of exact location.
What This Means for Your Roof
The equipment for roof leak detection and repair, moisture meters, thermal cameras, controlled water testing, and electronic leak detection for flat roofs, exists because guessing simply doesn’t work reliably on a roof assembly. Water hides, travels, and shows up somewhere other than where it entered, and every one of these tools exists to solve that specific problem. A homeowner with a flashlight can catch the obvious issues, but confirming an intermittent or hidden leak, and repairing it correctly the first time, generally requires the combination of proper diagnostic equipment and the experience to interpret what it’s showing you.
Read what past clients have said about their experience on our reviews page, or check our FAQ page for answers to more common roofing questions. You can also learn more about our team and how we approach every inspection.
| Equipment | Typical Cost to Buy | Professional Rental/Day | Best For |
|---|---|---|---|
| Moisture meter (pin-type) | $80 – $250 | $25 – $40 | Spot-checking suspected wet decking |
| Infrared thermal camera | $400 – $3,000+ | $75 – $150 | Mapping hidden moisture across a roof plane |
| Electronic leak detection (ELD) rig | $5,000+ (pro-grade) | $150 – $300 | Locating pinhole leaks in membrane roofs |
| Smoke pencil / smoke test kit | $40 – $120 | $20 – $35 | Finding air/water paths around penetrations |
| Borescope inspection camera | $60 – $400 | $20 – $40 | Viewing inside wall cavities and soffits |
What equipment for roof leak detection and repair do professionals actually use first?
Can a moisture meter really find a hidden roof leak?
Is a thermal imaging camera worth it for finding a roof leak?
Why did a contractor recommend a hose test instead of just patching the visible damage?
What’s the difference between DIY leak detection and professional equipment for roof leak detection and repair?
How often should I have my roof inspected to catch leaks early?
Need Help With Top Equipment for Effective?
If you’re dealing with a stubborn or hidden roof leak, don’t rely on guesswork. The team at Universal Roofs uses proper diagnostic equipment, moisture meters, thermal imaging, and controlled water testing, to find the actual source before any repair begins.
Call us today at (416) 732-2421 or request a free inspection to get started.
Universal Roofs proudly serves Toronto, Mississauga, Brampton, Vaughan, Markham, Oakville and the GTA since 2005.