
A properly sealed metal roof can last 40 to 70 years, but a poorly sealed one can start leaking within a decade. In the Greater Toronto Area, where roofs endure freeze-thaw cycles, ice damming, high winds off the lake, and summer heat that can push metal surface temperatures past 60°C, sealing is not a cosmetic finishing step. It is the single factor that determines whether fasteners stay tight, seams stay watertight, and the substrate underneath stays dry for decades.
Homeowners often assume metal roofing is maintenance-free because the panels themselves are durable. In reality, the panels rarely fail first — the sealant does. Butyl tape dries out, sealant beads shrink and crack, fastener washers compress and lose their grip, and seams that were watertight in year one start weeping by year twelve. Understanding how sealing actually works, and where it fails, is what separates a roof that lasts a lifetime from one that needs surprise repairs every few summers.
This guide walks through nine essential, field-tested tips for sealing metal roofs correctly, whether you are maintaining an existing standing seam or corrugated metal roof, or planning a new installation. We cover material selection, application technique, seasonal timing, and the specific failure points that Toronto-area roofs face.
1. Choose the Right Sealant Chemistry for Metal
Not every sealant on a hardware store shelf is rated for metal roofing, and using the wrong chemistry is the number one reason seals fail early. Metal expands and contracts far more than asphalt shingles or wood as temperatures swing — and in Toronto, that swing can be 60°C or more between a January cold snap and a July heat wave. A sealant that cannot flex with that movement will crack, and once it cracks, water finds its way in.
The three chemistries that consistently perform well on metal roofs are:
- Polyurethane sealants — excellent adhesion to metal, strong UV resistance, and good flexibility. Best for seams, panel overlaps, and general perimeter sealing.
- Butyl rubber sealant/tape — the industry standard for fastener heads and lap seams because it stays permanently tacky and self-heals around small punctures. It does not cure hard, so it keeps flexing with the metal for years.
- Silicone sealants — the most UV- and weather-stable option, ideal for flashing details and skylight curbs, though it can be harder to paint over and costs more per tube.
Avoid acrylic latex caulk entirely on metal roofing. It shrinks, hardens, and cracks within one or two Toronto winters — it simply cannot handle the thermal cycling. If a previous contractor used latex caulk anywhere on your roof, treat that as a priority spot to strip and reseal with a proper roofing-grade product.
2. Prep the Surface Before You Seal Anything
Sealant only bonds as well as the surface beneath it. Rushing this step is the second most common cause of premature failure, right behind using the wrong product. Before applying any sealant:
- Remove all existing sealant residue, rust flakes, and chalking paint with a wire brush or grinding wheel.
- Degrease the area with isopropyl alcohol or a dedicated metal-prep solvent — oils from manufacturing or handling prevent proper adhesion.
- Treat any exposed rust spots with a rust-converting primer before sealing over them, or the corrosion will continue underneath the seal.
- Confirm the surface is completely dry. Even a light morning dew trapped under fresh sealant will compromise the bond and can cause bubbling.
On older panels with chalky or oxidized paint finishes, a light abrasion pass is essential — sealant applied directly over chalking paint often peels away within a season because it is only bonding to loose paint powder, not the metal itself.
3. Time the Job Around Toronto’s Climate
Sealant cure times are temperature- and humidity-dependent, and the GTA’s climate makes certain windows far better than others. Most polyurethane and silicone products need a substrate temperature between 5°C and 32°C to cure properly, which rules out mid-winter work entirely and makes peak summer afternoons risky too, since metal surface temperatures can exceed the manufacturer’s application ceiling even when the air temperature feels reasonable.
Late spring and early autumn are the sweet spots for most sealing projects in this region. Humidity is moderate, surface temperatures stay in the ideal range for most of the day, and there is enough dry weather ahead to let the sealant cure fully before the next rain. Since it is currently mid-summer, early morning is the best working window — the metal has cooled overnight and the day’s UV load has not yet peaked, giving the sealant a full cure window before the surface heats up again.
| Season | Suitability for Sealing | Key Consideration | Recommended Time of Day |
|---|---|---|---|
| Spring (April–May) | Excellent | Moderate humidity, stable temperatures | Mid-morning to early afternoon |
| Summer (June–August) | Good, with care | Panel surfaces can overheat by midday | Early morning before 10 a.m. |
| Autumn (September–October) | Excellent | Cooling surfaces, lower humidity | Late morning to mid-afternoon |
| Winter (November–March) | Not recommended | Sealants will not cure below 5°C | Avoid entirely; use temporary patches only |
4. Seal Fasteners and Penetrations First
If you only have time or budget to address one category of failure point, make it the fasteners. Exposed-fastener metal roofing systems rely on rubber or neoprene washers under every screw head, and these washers are consumable parts — they harden, crack, and shrink under UV exposure long before the panels themselves show any wear. A roof with hundreds of fasteners is only as watertight as its weakest washer.
Priority sealing points, in order of failure frequency, are:
- Fastener heads — re-torque any that have backed out, and add a small dab of butyl sealant over any washer showing cracking or compression.
- Pipe boots and vent penetrations — rubber boots degrade faster than the metal around them and are a top source of attic leaks.
- Ridge caps and hip flashing — these see the most wind uplift and thermal movement of any roof component.
- Valleys where two roof planes meet — water volume concentrates here, so any gap becomes a leak fast.
- Skylight curbs and chimney flashing — dissimilar materials meeting metal panels need continuous, flexible sealant beads, not rigid caulk.
If your roof includes a skylight, it is worth having the flashing and curb seal inspected alongside the roof itself — our skylight installation team frequently finds that skylight curb leaks get misdiagnosed as roof leaks because the water travels along the deck before it shows up as a stain.
5. Apply Sealant Using the Right Technique, Not Just the Right Product
Even premium sealant fails if it is applied incorrectly. The most common technique mistakes we see on GTA roofs are applying too thin a bead, tooling the sealant so aggressively that it loses thickness, and failing to achieve a “wet seal” where the sealant bonds to both surfaces rather than just bridging a gap.
Follow these application principles:
- Apply sealant in a continuous bead — never in dabs or short segments with gaps between them.
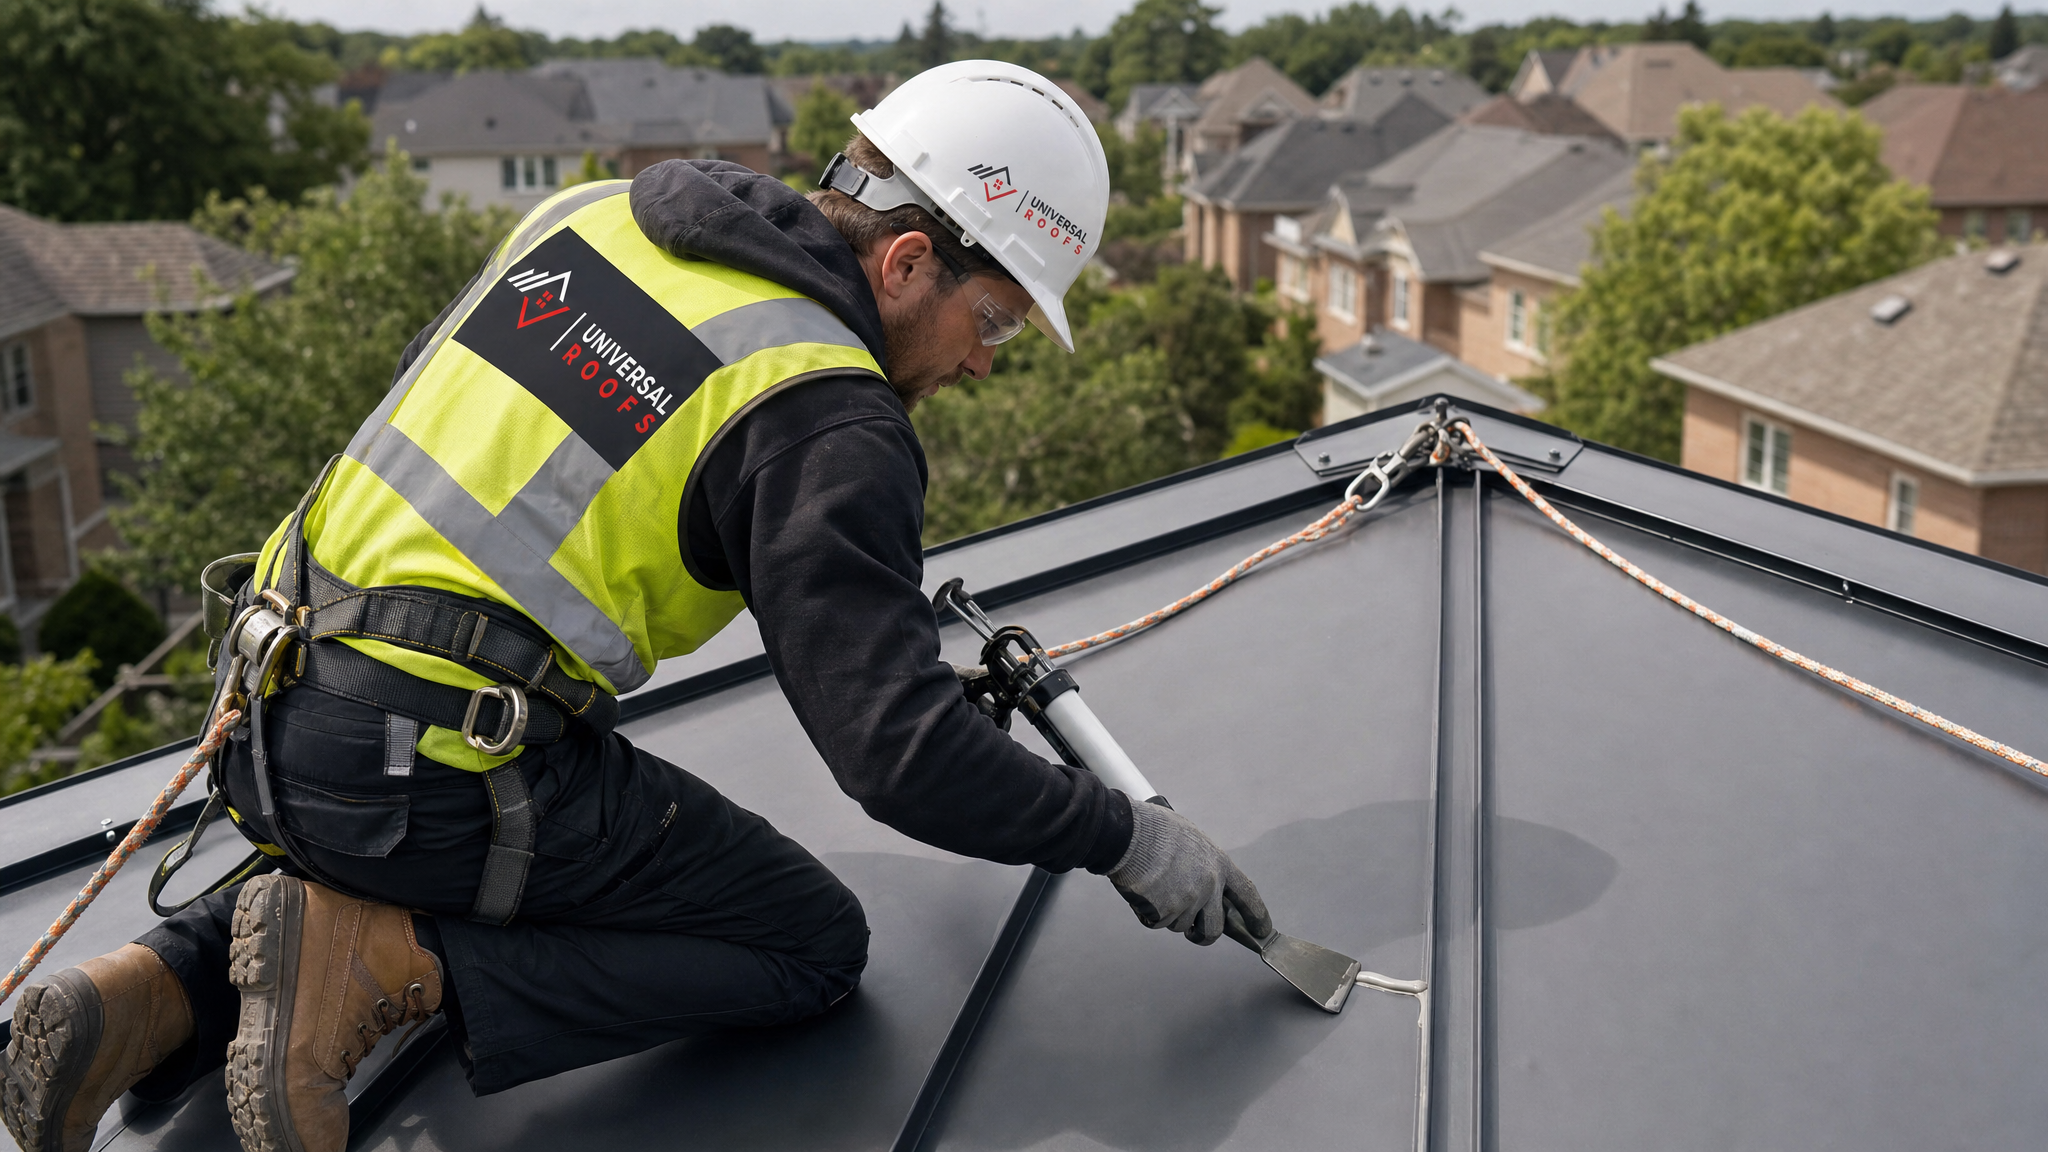
- Tool the bead lightly with a putty knife or dedicated tool to ensure full contact with both surfaces, without smearing it too thin.
- Overlap laps by at least 100–150 millimetres and apply sealant to the full overlap area, not just the edge.
- For fastener heads, use enough sealant to fully encapsulate the screw head and washer — a thin smear is cosmetic, not functional.
- Never seal over standing water or a wet surface; trapped moisture under cured sealant causes blistering and eventual bond failure.
On larger commercial or steep-slope jobs, this is genuinely a two-person task — one person applying, one tooling immediately behind, so the sealant does not begin skinning over before it is properly seated.
6. Address Seam and Panel Overlap Sealing Separately From Field Sealing
Standing seam and corrugated metal roofs have two distinct sealing zones that require different approaches: the flat field of the panel, and the seams or overlaps where panels join. Many DIY sealing attempts treat the whole roof the same way, which leads to over-sealing flat areas that did not need it while under-sealing the seams that actually carry the water load.
| Roof Zone | Sealant Type | Application Method | Inspection Frequency |
|---|---|---|---|
| Standing seam joints | Butyl tape (concealed) or polyurethane | Continuous bead inside the fold before crimping | Annually |
| Panel end laps | Butyl tape | Full-width strip under the overlap | Annually |
| Exposed fasteners | Butyl or polyurethane dab | Encapsulate washer and screw head | Every 6–12 months |
| Ridge and hip caps | Polyurethane or silicone | Continuous bead under cap flange | Annually |
| Skylight and chimney flashing | Silicone | Continuous bead, tooled into a cove profile | Twice yearly |
Notice that concealed seam sealant, like butyl tape inside a standing seam fold, is applied during installation and is not something a homeowner can retrofit without disassembling the seam. This is why getting the seam sealing right the first time during a roof replacement matters so much — it is far cheaper to do it correctly at installation than to chase leaks in a finished seam years later.
7. Know When Sealing Is Enough and When You Need Repair or Replacement
Sealing is a maintenance and prevention tool, not a cure-all. A roof with widespread rust-through, panels that have separated from fastener stress, or a deck underneath that has already absorbed water damage needs repair or replacement, not another round of caulk. Applying sealant to a roof past this point is a temporary patch that can actually mask a bigger problem while it continues to worsen underneath.
Signs that you have moved past a sealing-only fix include:
- Visible rust perforation (light passing through pinholes from inside the attic)
- Panels that flex or oil-can excessively when walked on
- Multiple failed seams across different areas of the roof, rather than isolated spots
- Soft or spongy roof decking felt through the panels
- Recurring leaks in the same location despite repeated sealant applications
If you are seeing any of these signs, it is worth having a technician assess whether targeted roof repair can still solve the problem, or whether the panels and underlayment have reached the end of their service life. We also recommend checking the attic from the inside during any leak investigation, since staining patterns on the underside of the deck often reveal exactly where water is entering, which can be several metres away from where it shows up on the ceiling below.
8. Match Sealant Colour and Finish to Avoid a Patchwork Look
This tip is easy to overlook but matters both for curb appeal and for long-term performance. Many premium sealants are available in colours matched to standard metal roofing finishes — charcoal, forest green, barn red, galvanized silver — and using a colour-matched product means the repair blends in rather than leaving obvious white or grey streaks across a coloured roof.
Beyond appearance, mismatched sealant can also signal to future buyers or inspectors that a roof has had multiple ad-hoc repairs, which can affect resale value and insurance assessments. A neatly sealed roof with colour-matched beads at seams and fasteners looks intentional and professionally maintained, while a roof covered in visible white caulk blobs raises questions about what else might have been rushed.
If your roof’s finish has faded or chalked over the years, ask your contractor for a sealant that closely matches the current weathered colour rather than the original factory colour, since an exact match to a faded panel will look more uniform than a bright, “too-new” patch.
9. Build a Recurring Inspection and Resealing Schedule
Sealant is a wear item, not a one-time installation. Even the best polyurethane or silicone products have a realistic service life of 10 to 20 years before they need attention, and fastener washers typically need dabs of fresh sealant every 5 to 10 years depending on sun exposure. Waiting until a leak appears means water has already been finding its way in for a while, often causing hidden damage to insulation or decking before the first stain shows up on a ceiling.
A practical inspection rhythm for GTA homeowners:
| Inspection Task | Recommended Frequency | Best Season | Who Should Do It |
|---|---|---|---|
| Visual check for cracked or missing sealant | Twice yearly | Spring and autumn | Homeowner (ground/binoculars) or technician |
| Fastener torque and washer condition check | Annually | Spring | Licensed roofing technician |
| Full seam and flashing sealant renewal | Every 8–12 years | Late spring or early autumn | Licensed roofing technician |
| Post-storm inspection | After major wind/hail events | As needed | Licensed roofing technician |
| Attic interior check for water staining | Twice yearly | Spring and autumn | Homeowner or technician |
Keeping a simple log of when each section was last resealed — even just photos with dates — makes it far easier to catch a failing seam before it becomes an interior leak. Many of our clients across Toronto, Peel Region, York Region, and Halton Region schedule this alongside their eavestrough cleaning each spring and fall, since a technician is already on the roof for that visit.
Homeowners further out in Durham Region face similar freeze-thaw stress on seams and fasteners, and the same inspection cadence applies regardless of which part of the GTA your property is in.
What are the most essential tips for sealing metal roofs on an older home?
How often should a metal roof be resealed in the Toronto area?
Can I seal a metal roof myself, or do I need a professional?
What is the best time of year to seal a metal roof in the GTA?
Why does my resealed metal roof still leak in the same spot?
Does sealant colour matter when sealing a metal roof?
Need Help With 9 Essential Tips for?
Getting every seam, fastener, and flashing detail right on a metal roof takes both the right materials and years of hands-on experience reading how a specific roof is aging. Universal Roofs has been sealing, repairing, and replacing roofs across the GTA since 2005, and we know exactly which seams fail first on Toronto’s metal roofs and why.
Call us today at (416) 732-2421 or request a free inspection to get started.
Universal Roofs proudly serves Toronto, Mississauga, Brampton, Vaughan, Markham, Oakville and the GTA since 2005.