
Bathroom exhaust fans do their job well until the roof around them starts failing quietly. Most homeowners never think about the small metal collar where a vent pipe pokes through their shingles, but that single detail is one of the most common sources of hidden roof leaks in the GTA. When the flashing around a bathroom vent is installed incorrectly or wears out, water finds its way into the attic long before anyone notices a stain on the ceiling below.
This guide breaks down the essential roof flashing tips for bathroom vents that every Toronto homeowner should understand, whether you are dealing with a musty smell in the bathroom, planning a roof replacement, or just want to catch a problem before it becomes expensive. We will cover how vent flashing works, the materials that hold up best through our freeze-thaw winters, warning signs of failure, and when it makes sense to call in a professional rather than attempt a patch job yourself.
Getting this detail right matters more than most people realize. A bathroom vent penetration is a small hole in an otherwise continuous roof surface, and every seam around it is a potential entry point for water. Combined with the warm, moist air constantly pushed through the duct, a poorly flashed vent can lead to rot, mould, and ice damming faster than almost any other roof feature.
Why Bathroom Vent Flashing Fails More Often Than Other Roof Penetrations
Every roof penetration needs flashing, but bathroom exhaust vents fail at a noticeably higher rate than plumbing stacks or furnace vents. There are a few reasons for this. First, bathroom vent caps are usually low-profile plastic or metal housings with moving parts (the damper flap), which means there are more joints and materials that can degrade compared to a simple pipe boot. Second, the exhaust air itself is warm and saturated with moisture from showers and baths, so any small gap around the vent becomes an efficient path for condensation to collect in the attic, even without an active leak.
In the Greater Toronto Area, our climate adds another layer of stress. We get intense summer heat that bakes rubber gaskets and sealants, followed by a winter freeze-thaw cycle that expands and contracts every seam dozens of times per season. A flashing detail that would last twenty years in a milder climate can start failing in under ten here if it was not installed with the right materials and technique. This is exactly the kind of penetration our roof repair technicians are called out for most often during spring and fall inspections.
Because bathroom vents are usually installed after the main roofing job, sometimes by a different trade entirely (an HVAC contractor rather than a roofer), the flashing detail is often an afterthought. That is the root cause behind a large share of the leaks we diagnose: not bad shingles, but a poorly integrated vent penetration.
Tip 1: Use the Right Flashing Material and Boot Style for Your Roof
The first essential roof flashing tip for bathroom vents is choosing hardware that matches both your roofing material and the realistic lifespan you expect from the rest of the roof. Not all vent boots are created equal, and the cheapest option at the hardware store is rarely the right one for a Toronto roof that has to survive humid summers and icy winters.
There are three broad categories of vent flashing used on residential roofs today.
| Flashing Type | Best For | Typical Lifespan | GTA Climate Suitability |
|---|---|---|---|
| Rubber (EPDM) boot with metal base | Asphalt shingle roofs | 8-12 years | Moderate — rubber hardens and cracks under UV and freeze-thaw |
| Silicone boot with metal base | Asphalt shingle and metal roofs | 15-20+ years | Excellent — silicone resists UV degradation and stays flexible in cold |
| All-metal storm collar flashing | Metal roofs, low-slope sections | 25-30+ years | Excellent — no rubber or plastic to degrade, but requires precise fabrication |
| Plastic (PVC) boot | Budget installations only | 5-8 years | Poor — becomes brittle quickly in cold, cracks are common |
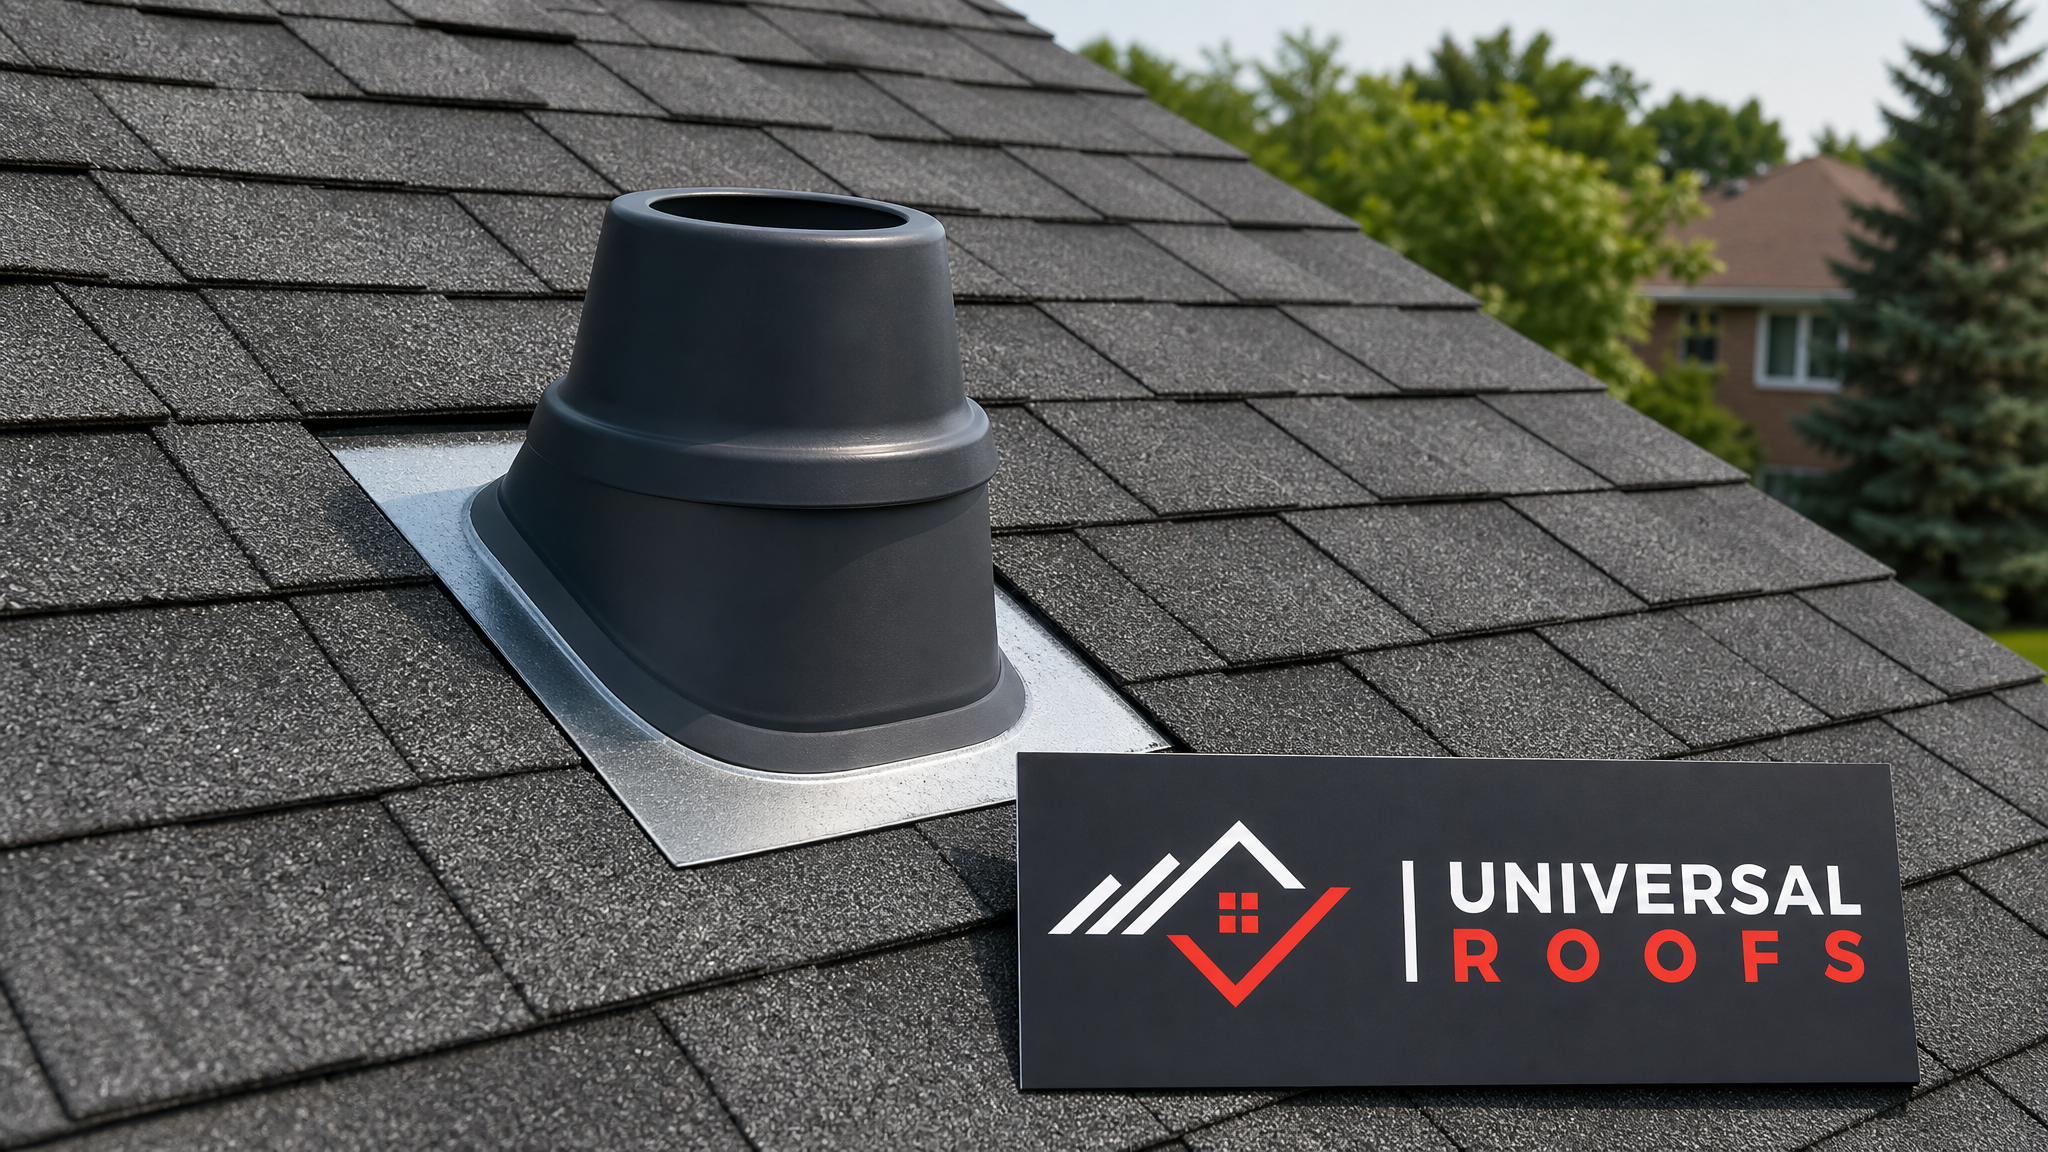
For most GTA homes with asphalt shingle roofs, a silicone boot over a galvanized steel or aluminum base is the standard we recommend. The metal base integrates properly into the shingle courses (more on that below), while the silicone collar seals tightly around the vent pipe and stays pliable through winter instead of hardening and splitting the way rubber does. If your roof is due for a full roof replacement, this is the moment to upgrade every vent boot on the house, not just patch the old ones.
Metal storm collar flashing is the premium option, typically reserved for metal roofing systems or low-slope sections where a soft boot alone will not shed water reliably. It costs more upfront and requires a contractor who can custom-fabricate or properly fit the collar, but it essentially never needs replacing on its own.
Tip 2: Get the Shingle Integration and Layering Sequence Correct
The second critical flashing tip has nothing to do with the vent boot itself and everything to do with how it is woven into the surrounding shingles. This is the step that separates a professional installation from a rushed one, and it is invisible once the job is finished, which is exactly why so many homeowners never know it was done wrong until water starts coming through.
Proper flashing integration follows a strict shingle-over-flashing-over-shingle layering sequence, working from the bottom of the roof slope upward:
| Step | Task | Why It Matters |
|---|---|---|
| 1 | Install shingle courses up to the vent location | Establishes the base layer that flashing must sit on top of, not underneath |
| 2 | Cut the shingle course opening slightly larger than the boot base | Prevents the boot from being forced or cracked during installation |
| 3 | Set the flashing base flat over the lower shingle course | Ensures water on the lower course drains onto the shingle, not under the flashing |
| 4 | Seal the top and side edges of the flashing base with roofing cement | Locks the flashing in place and blocks wind-driven rain from side infiltration |
| 5 | Install upper shingle courses over the top edge of the flashing | Directs all water downhill, over the flashing and onto the shingles below — never under it |
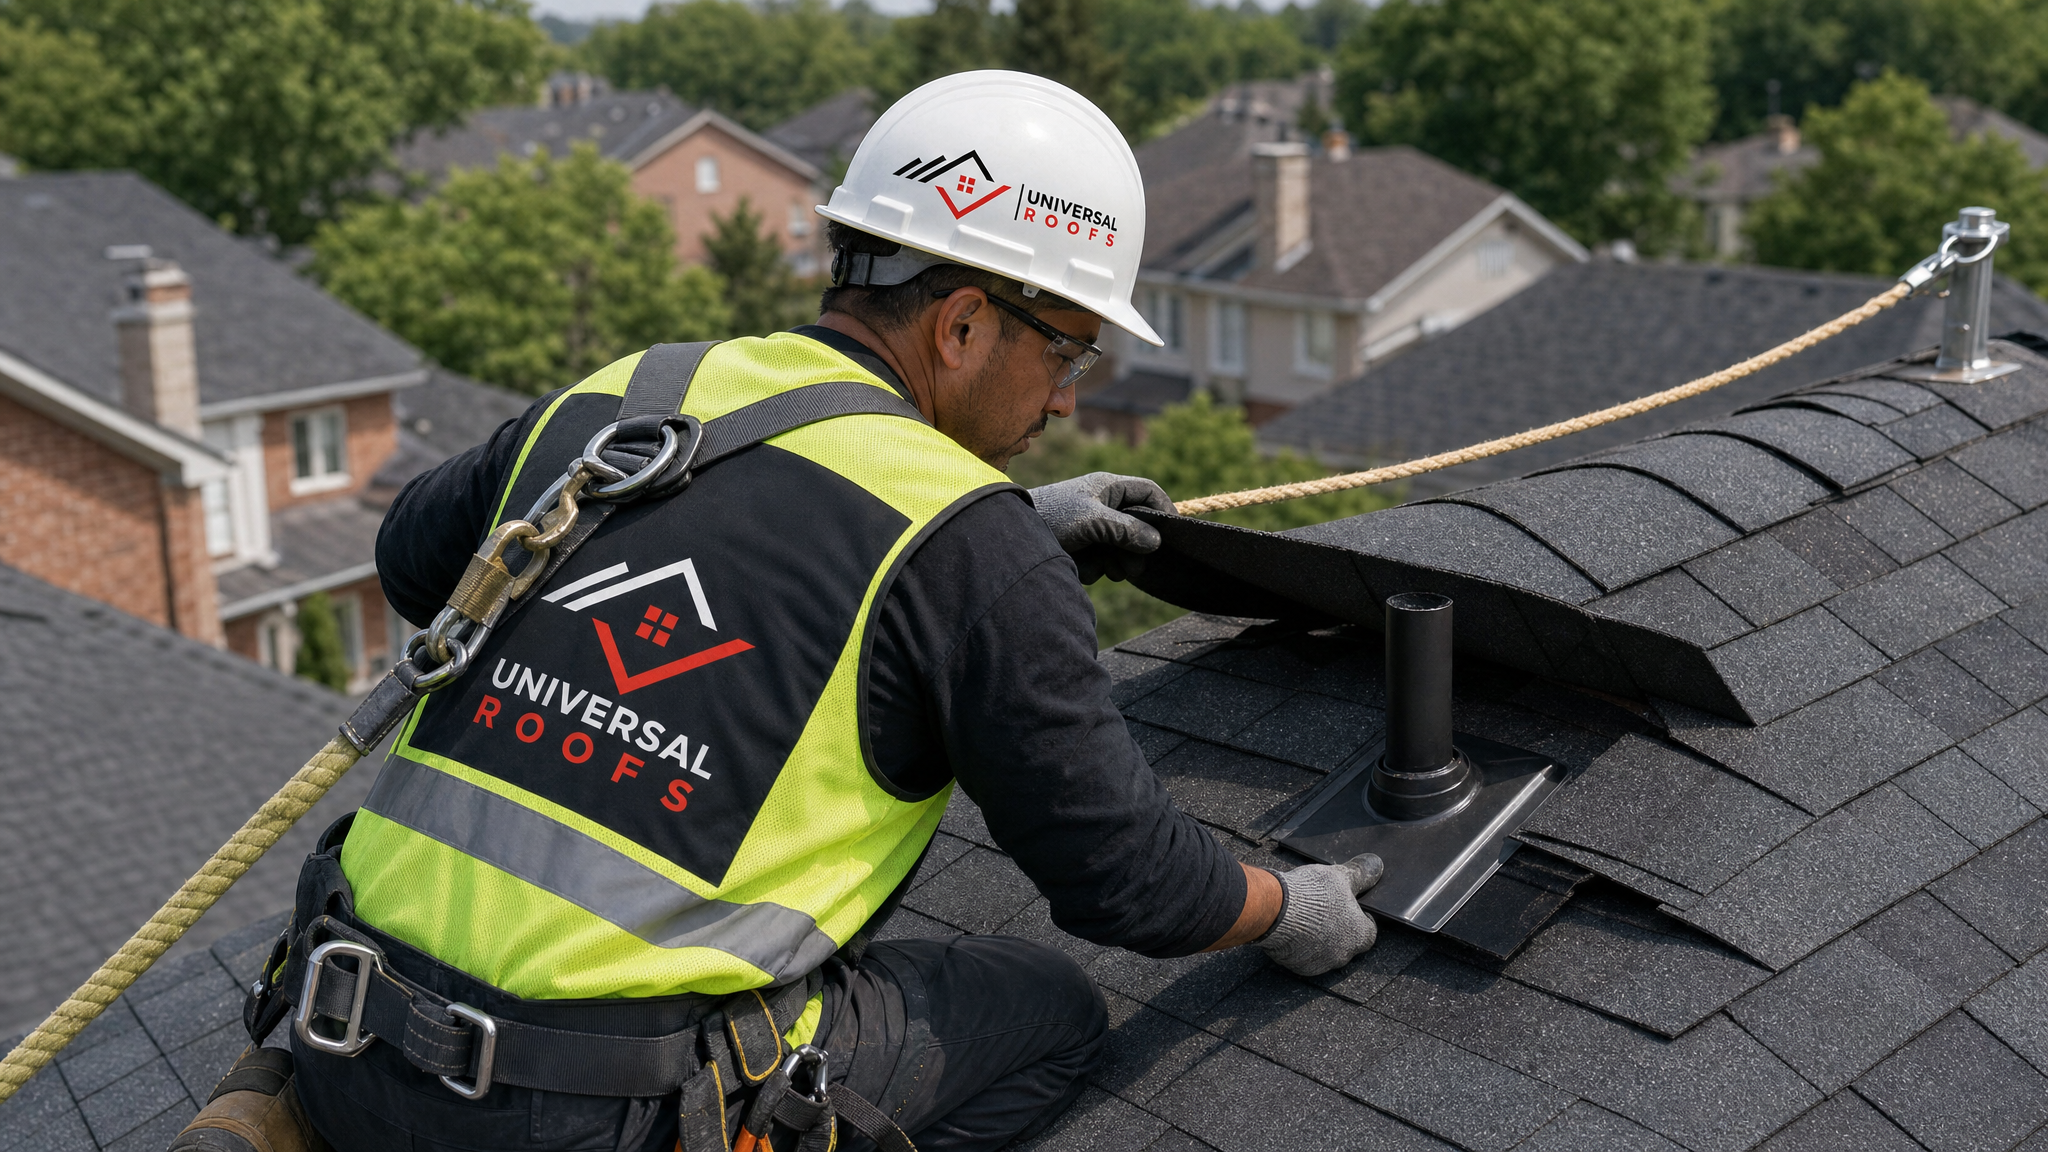
The single most common mistake we find during inspections is a flashing base installed on top of the upper shingle course instead of underneath it. This traps water against the top edge of the flashing every time it rains, and eventually that water works its way under the metal and into the roof deck. It is a subtle installation error that can go unnoticed for years, which is why we always recommend having a qualified roofer handle vent flashing rather than a general handyman or the HVAC installer who put the fan in.
Tip 3: Seal, Caulk, and Fasten With the Right Products (and Know Their Limits)
Even a well-integrated flashing boot needs the right sealants and fasteners to stay watertight over time. This is where a lot of DIY attempts and even some professional shortcuts go wrong: caulk and roofing cement are not interchangeable, and neither is a permanent substitute for proper mechanical integration.
A few rules to keep in mind:
- Use roofing-grade sealant (polyurethane or high-quality butyl-based products), never generic silicone bathroom caulk, which was not formulated for UV and temperature-cycling exposure.
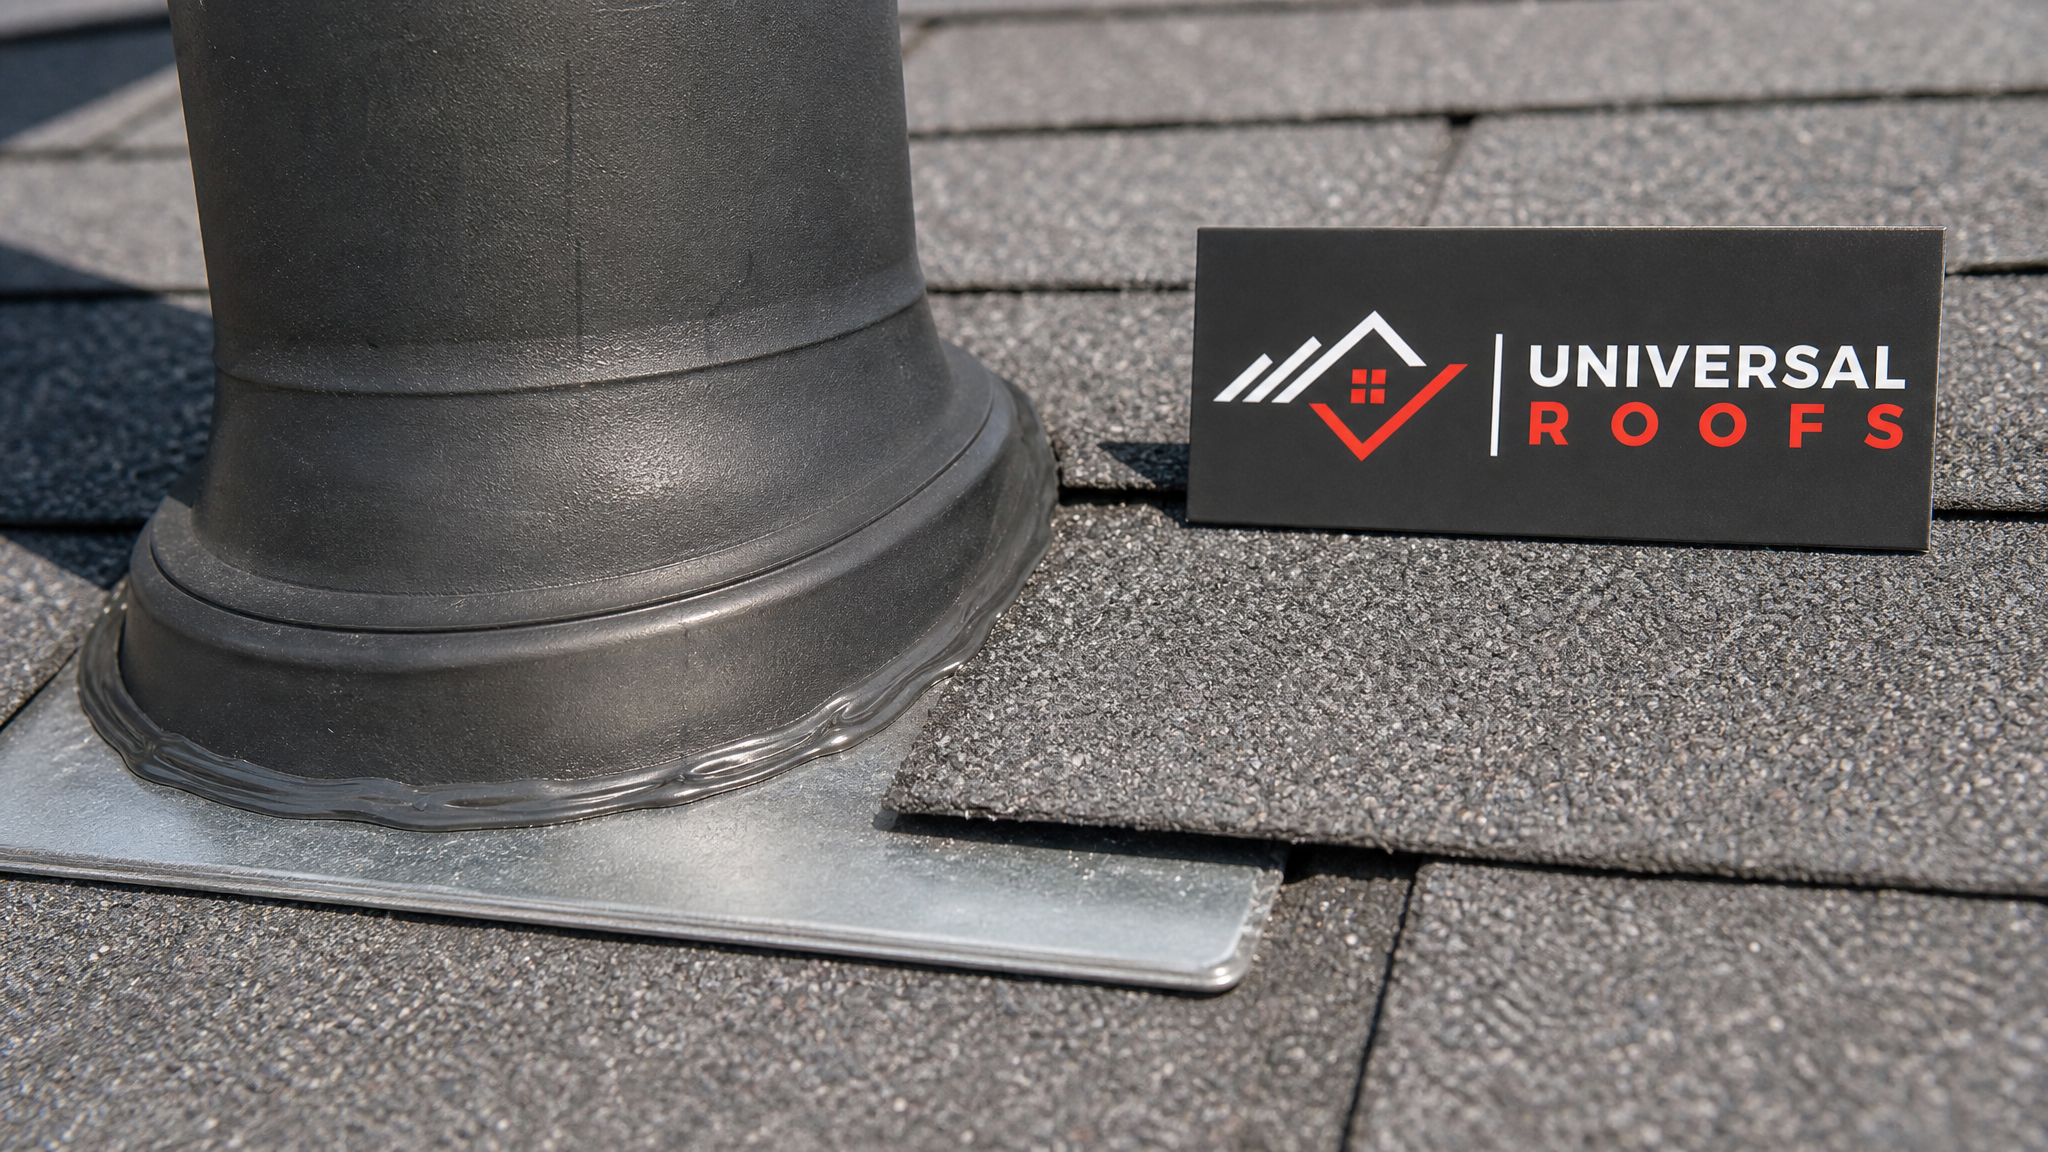
- Fasten the flashing base with corrosion-resistant roofing nails placed only through the flat portion of the flange, never through the boot collar itself or too close to the pipe.
- Reapply a bead of sealant around the base of the boot collar where it meets the vent pipe, since this is the first spot to crack from movement and thermal expansion.
- Never rely on sealant alone to compensate for a poorly cut or misaligned flashing base — caulk should reinforce a correct installation, not fix a bad one.
Homeowners sometimes try to solve a leaking vent by squeezing a tube of caulk around the visible edge of the flashing without lifting the shingles to see what is actually happening underneath. This can mask a small leak for a season or two, but it does nothing for water that is already getting under the flashing base. If you are noticing recurring leaks near a bathroom vent even after resealing, that is usually a sign the underlying shingle integration (Tip 2) was never done correctly and the whole detail needs to be redone, not just resealed.
| Symptom | Likely Cause | Recommended Fix |
|---|---|---|
| Leak reappears within one season of resealing | Flashing installed on top of upper shingles instead of underneath | Remove and reinstall flashing with correct layering |
| Cracked collar around vent pipe, no active leak yet | UV degradation of rubber or plastic boot material | Replace boot with silicone or metal collar version |
| Rust staining on flashing base | Uncoated or low-grade steel base corroding | Replace with galvanized steel or aluminum base |
| Musty smell in bathroom, no visible ceiling stain | Moisture entering attic space through poor flashing seal | Attic inspection to check for condensation or slow leak damage |
| Ice buildup around vent in winter | Warm exhaust air melting nearby snow, refreezing at flashing edge | Check duct insulation and flashing seal together |
Tip 4: Watch for the Warning Signs and Schedule Regular Inspections
The fourth essential tip is really about vigilance rather than installation technique: catching flashing failure early is what keeps a small repair from becoming a full deck replacement. Bathroom vent leaks are notoriously slow and quiet compared to a dramatic roof leak from storm damage, which means they often go undetected until there is visible damage to drywall, insulation, or roof sheathing.
Signs worth watching for, especially after a hard winter or a summer of intense UV exposure:
- A faint musty or mildew odour in the bathroom that lingers even with the fan running.
- Discoloration or a soft spot on the ceiling directly below or near the vent duct run.
- Visible daylight or gaps around the vent cap when viewed from the attic.
- Cracked, curled, or missing shingles in the immediate area around the vent.
- Granule loss or a chalky residue collecting near the flashing base, a sign the shingles nearby are aging faster due to trapped moisture.
Because bathroom vents are usually positioned on a rear or side slope that is not visible from the ground, most homeowners never actually see the flashing unless they get on a ladder or hire someone to look. We recommend a visual check of every roof penetration, including vent flashing, as part of an annual roof inspection, ideally in the spring after the freeze-thaw season and again in the fall before winter sets in. If your home also has a skylight or is due for a skylight replacement, those penetrations deserve the same attention, since the flashing principles are nearly identical.
If your attic ventilation system is also aging or undersized, that compounds the moisture problem at every vent penetration, bathroom exhausts included. Our attic ventilation assessments often turn up a direct connection between poor attic airflow and premature flashing failure, since trapped humid air accelerates corrosion and rot around every penetration on the roof.
What a Professional Bathroom Vent Flashing Repair Actually Involves
When our crews are called out for a bathroom vent flashing repair, the process is more thorough than simply caulking around the visible edge. A proper repair typically includes:
- Removing shingles in the surrounding courses to expose the full flashing base.
- Inspecting the roof deck underneath for rot, staining, or soft spots that indicate how long water has been getting in.
- Replacing the boot and metal base entirely, rather than patching cracked rubber or plastic.
- Re-integrating the new flashing with proper shingle-over-flashing layering, as outlined above.
- Sealing all edges with roofing-grade sealant and confirming the vent damper and duct connection are intact.
- Checking attic insulation and ductwork near the penetration for moisture damage that may need separate remediation.
This is also a natural point to evaluate the condition of the rest of the roof. A single failed vent flashing on an otherwise young roof is a simple, targeted repair. But if the same roof is fifteen-plus years old and showing granule loss, curling shingles, or multiple penetration issues, it may make more financial sense to fold the vent flashing fix into a broader roof replacement rather than repairing one detail at a time.
Cost Considerations for Bathroom Vent Flashing Repairs in the GTA
Pricing for a bathroom vent flashing repair depends on the extent of damage discovered once the shingles are pulled back, the flashing material chosen, and whether any deck or attic repair is needed alongside it. Here is a general range homeowners across Toronto, Mississauga, Brampton, Vaughan, Markham, and Oakville can expect, though every roof is different and a proper quote requires an on-site look.
| Scope of Work | Typical Price Range (CAD) | Timeline |
|---|---|---|
| Reseal existing flashing (no material replacement) | $150 – $300 | Same day |
| Replace vent boot and flashing base only | $300 – $650 | Half day to full day |
| Replace flashing plus repair minor deck rot | $650 – $1,400 | 1-2 days |
| Replace flashing plus significant deck and insulation repair | $1,400 – $3,000+ | 2-4 days |
Resealing alone should be treated as a stopgap rather than a permanent solution unless an inspection confirms the underlying flashing layering is sound. Homeowners who try to save money with repeated resealing on a poorly integrated flashing detail often end up paying for the full repair anyway, plus the cost of any deck rot that developed while the underlying issue went unaddressed.
Preventing Future Flashing Failures
Beyond correcting an existing problem, there are a few practical habits that extend the life of bathroom vent flashing on any GTA roof:
- Keep the bathroom fan and duct clean so moist air is vented efficiently rather than lingering in the attic near the flashing.
- Ensure the vent duct actually terminates through the roof (not just into the attic space), a surprisingly common builder shortcut that dumps humid air directly onto roof sheathing.
- Trim overhanging tree branches that drop debris and hold moisture against the flashing and surrounding shingles.
- Book a professional inspection every one to two years, particularly if your roof is past the ten-year mark.
- Address any attic ventilation imbalance, since poor airflow accelerates wear on every roof penetration, not just bathroom vents.
Homeowners throughout Toronto, the Peel Region, York Region, Halton Region, and Durham Region all deal with the same freeze-thaw stresses on their roofs, and bathroom vent flashing is one of the most predictable places for that stress to show up first. A small, proactive check now is far cheaper than a reactive repair after a leak has already reached the drywall.
When to Call a Professional Roofer
Flashing work looks simple from the ground, but it involves working safely at height, lifting and re-securing shingles without cracking them, and correctly reading how water moves across a roof slope. A misjudged repair can trap water in a new spot instead of solving the problem. If you notice any of the warning signs described above, or if your bathroom vent flashing has never been inspected since the roof was installed, it is worth having a professional take a look before the next heavy rain or freeze-thaw cycle.
You can read what other GTA homeowners have said about our flashing and roof repair work on our reviews page, or check our FAQ page for answers to common roofing questions. To learn more about our background and the team behind every inspection, visit our about page.
What are the most essential roof flashing tips for bathroom vents?
How often should bathroom vent flashing be replaced?
Can I reseal bathroom vent flashing myself instead of replacing it?
Why does bathroom vent flashing fail more often than other roof penetrations?
What does it cost to repair bathroom vent flashing in the GTA?
What are the warning signs of a failing bathroom vent flashing?
Need Help With 4 Essential Roof Flashing?
Bathroom vent flashing is a small detail with an outsized impact on your roof’s health, and getting it wrong can lead to hidden rot, mould, and costly repairs down the line. The team at Universal Roofs has been diagnosing and correcting these exact issues on GTA roofs since 2005, using the right materials and proper shingle integration every time.
Call us today at (416) 732-2421 or request a free inspection to get started.
Universal Roofs proudly serves Toronto, Mississauga, Brampton, Vaughan, Markham, Oakville and the GTA since 2005.